DX11, also known as DirectX 11, handles multimedia platforms on your Microsoft computer. This API runs exclusively on the Microsoft platform. Although DirectX 11 is a stable platform, many users encounter various issues, such as the DX10.0 feature level 11 is required for the engine to run error. However, these errors can be quickly fixed by following the appropriate troubleshooting methods. If you are facing this issue, this guide will help you fix the DX10.0 feature level 11 error with a few clicks. So, keep reading.
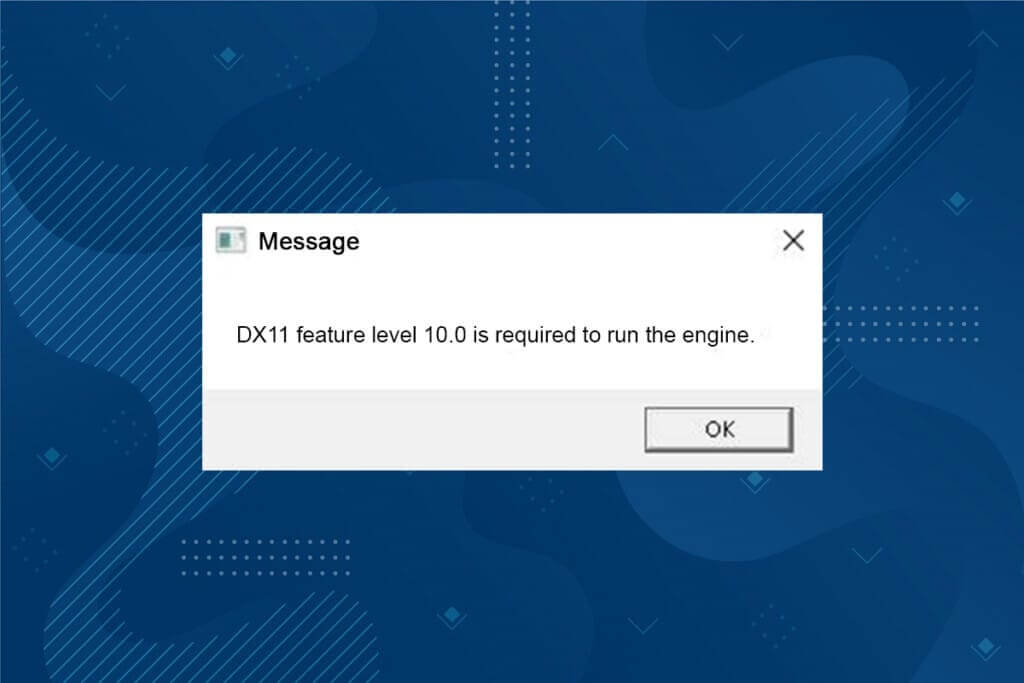
How to fix DX10.0 feature level 11 required for engine operation
DirectX is a set of application programming interfaces (APIs) that maintains all tasks and software related to games and multimedia services on the Microsoft platform. All DirectX software has hardware-accelerated support, which means it determines whether your gaming software meets the capabilities and parameters of your hardware to deliver optimal performance. Many DirectX APIs are essential components of your computer to ensure better video playback services. To put it simply, DirectX enhances the multimedia experience of games, graphics, sound, and network services.
What causes the error DX10.0 feature level 11 required for engine to run?
Below are some common causes of this error. Read them carefully and identify the root cause of your issue so you can follow the troubleshooting methods accordingly.
- If you have outdated drivers in your computer, DirectX will be incompatible with your graphics card, causing this error.
- If your computer doesn't have the Direct3D hardware feature level required by DirectX, you'll encounter this error. Consequently, you can't use any DirectX-related applications, which can cause this error.
- Your old operating system will be incompatible with DirectX, hence you will face the mentioned error.
- If too many graphic resources are running in the background, you will encounter this error.
Method 1: Restart your computer
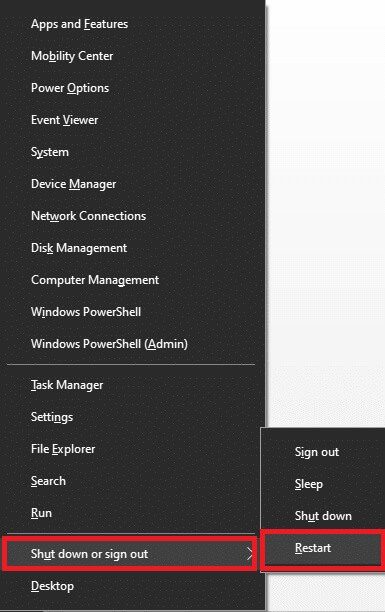
Before trying the remaining methods, it's recommended that you restart your system. In most cases, a simple restart will resolve the issue without any complicated planning. Therefore, try restarting your system using the steps below and see if you encounter the issue again. Alternatively, you can completely shut down your system using the power options and then restart it.
1. Go to Windows Power User Menu by pressing Windows + X keys At the same time.
2. Select Shutdown Or sign out.
3. Finally, tap Reboot.
Method 2: End background apps
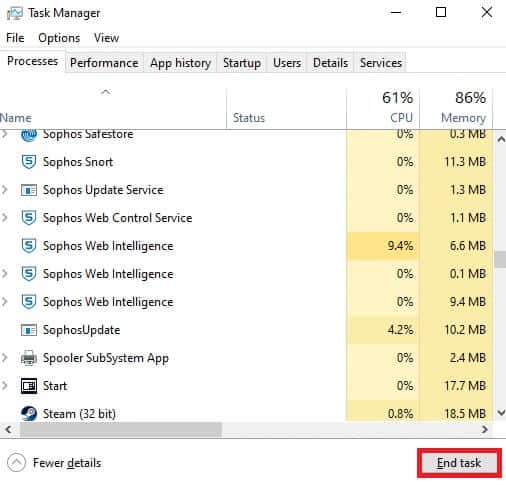
There may be too many applications running in the background. This will take up CPU and memory space, thus impacting system performance. Follow the steps below to fix the DX10.0 Feature Level 11 error.
1. Press Ctrl + Shift + Esc keys Together to open Task Management.
2. Now, find and identify the tasks that consume high CPU resources and are running unnecessarily in the background.
3. Finally, select finish the job As shown.
Method 3: Clean temporary files
You'll encounter this error code when your system contains corrupted system files or registry files. You can resolve this error by clearing the temporary files on your system. Then, follow the instructions to do the same.
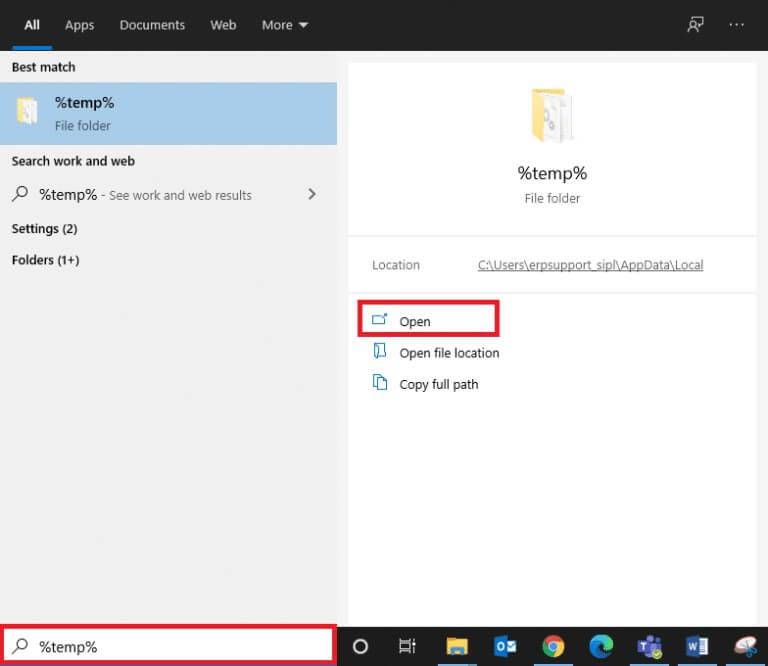
1. Go to start menu And type % Temp%.
2. Now, click on open To open temporary files.
3. Now, select All files and foldersRight click and select option. delete To remove all temporary files from the system.
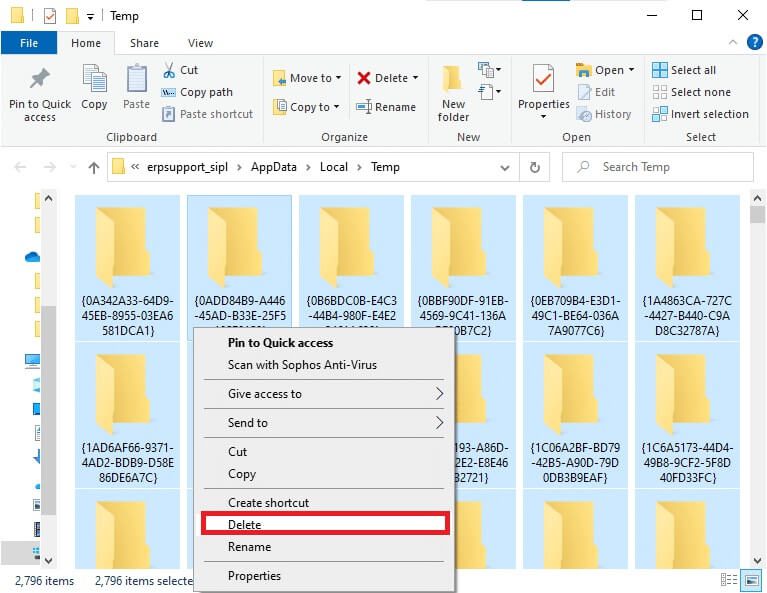
5. Finally, Redirect To the recycle bin and delete Files and folders Which I have now permanently deleted.
Method 4: Update or roll back the graphics driver
Option 1: Update your graphics drivers
If your system's current drivers are incompatible or outdated with the game files, you may encounter an error: DX10.0 feature level 11 is required to run the engine. Therefore, it's recommended that you update your hardware and drivers to prevent this issue.
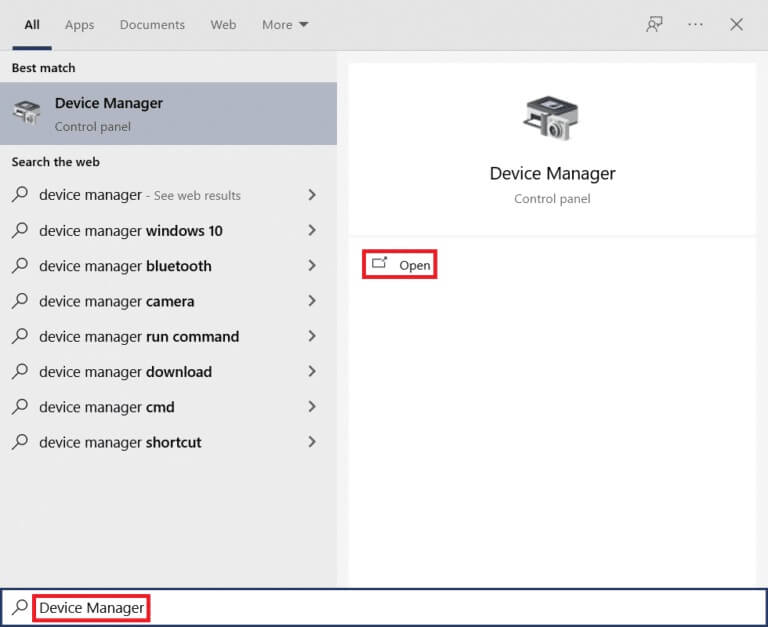
1. Write Device Manager In the list Windows 10 Search And open it.
2. Double-click on Display adapters On the main board to expand it.
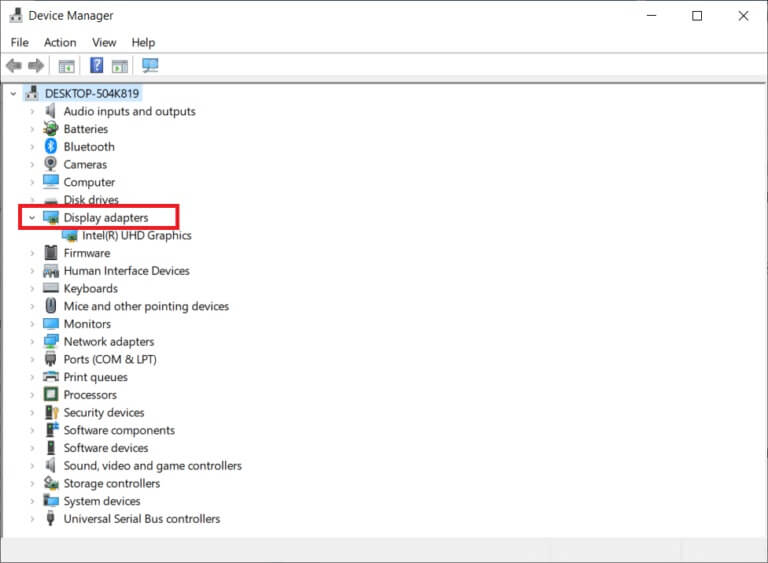
3. Now, right-click on Video card driver (say Intel(R) HD Graphics) And click Driver Update.
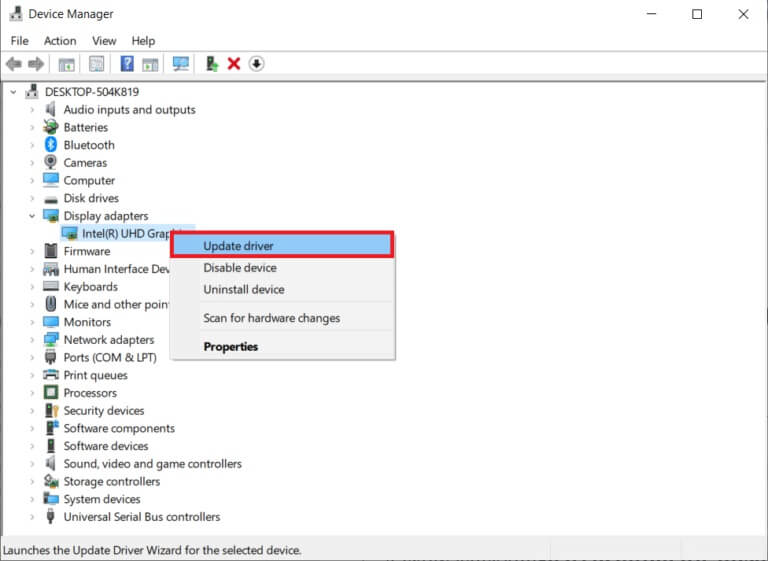
4. Now, click on "research" Automatically removes drivers.
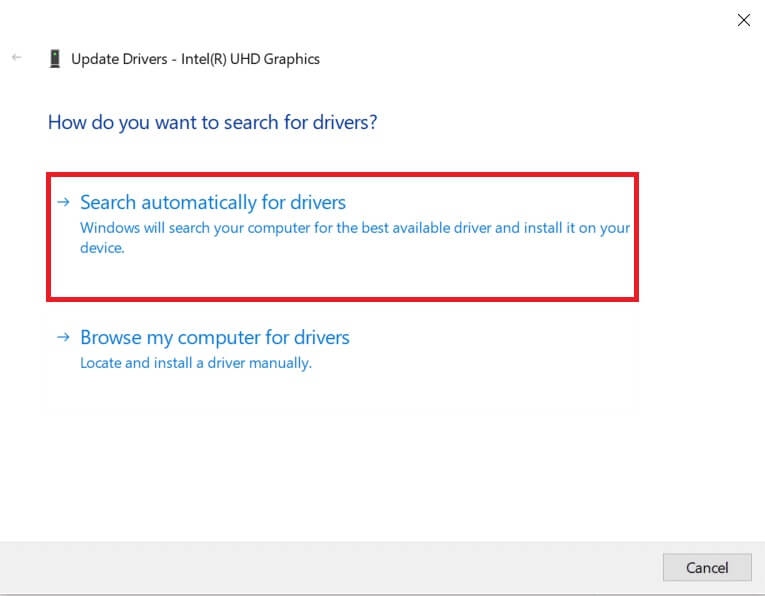
5A. If the driver is outdated, it will be automatically updated to the latest version. Latest version for him.
5b. If they are already in an updated stage, the screen displays the following message, The best drivers for your device are already installed..
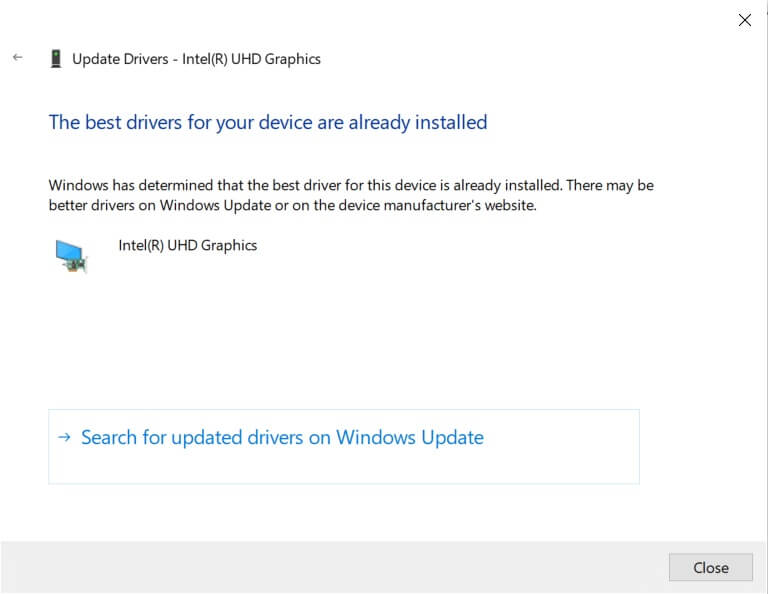
6. Click Close وReboot the computer.
Option 2: Restore drivers
If your system was working properly and started crashing after an update, rolling back the drivers may help. Rolling back the driver will delete the current driver installed on the system and replace it with the previous version. This process should eliminate any errors in the drivers and potentially resolve the issue.
1. Write Device Manager in Windows search bar Open it from the search results.
2. Double-click on Display adapters From the panel on the left, expand it.
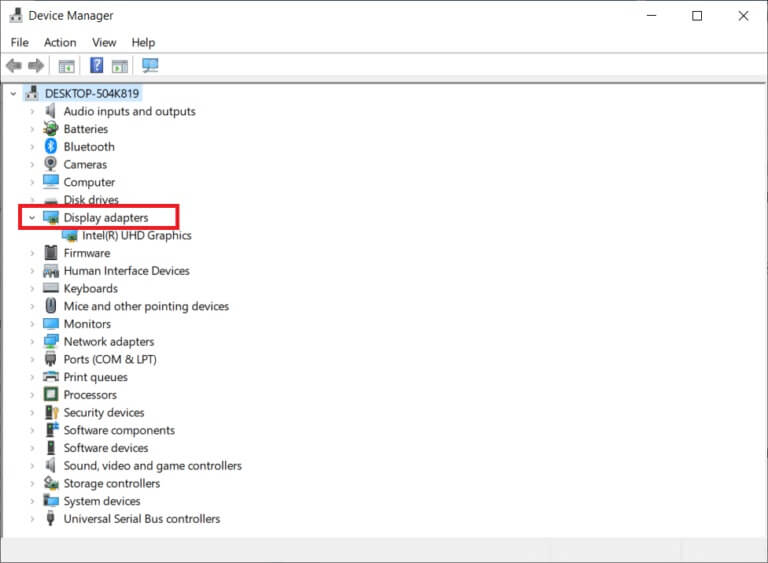
3. Right click on Graphics card driver And click "Characteristics" , as shown.
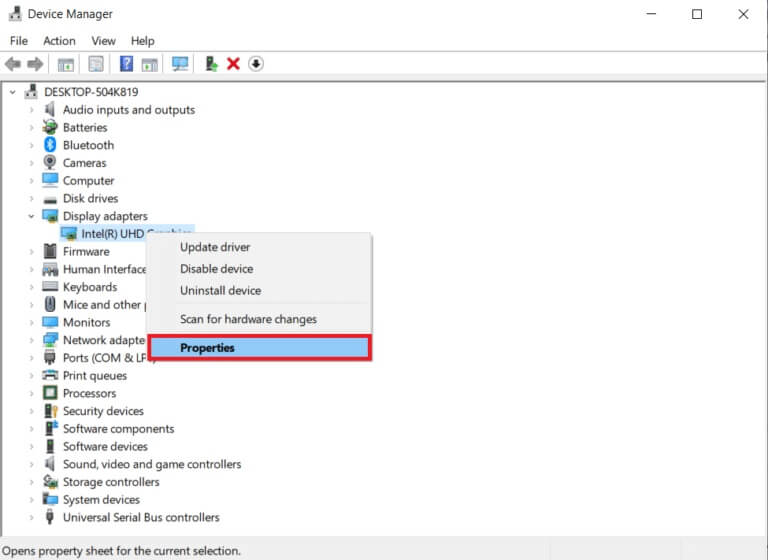
4. Switch to Driver tab and select Roll Back Driver , as shown.
Note: If the Roll Back Driver option is grayed out on your system, it indicates that your system does not have pre-installed driver files or that the original driver files are missing. In this case, try the alternative methods discussed in this article.
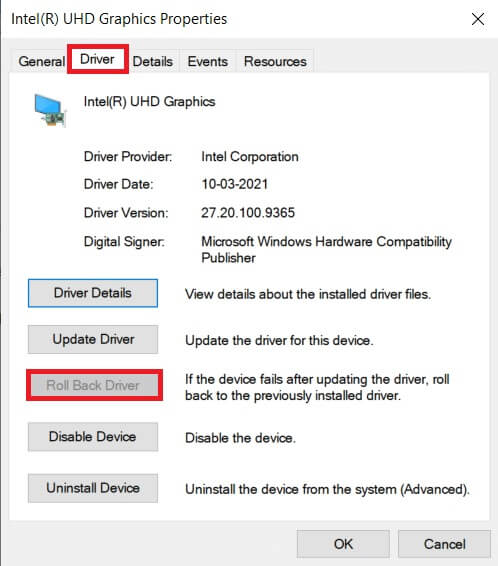
5. Click "OK".
6. Finally, tap "Yeah" in the confirmation message.
7. Restart your computer To make the rollback effective.
Method 5: Reinstall GPU drivers
If updating your drivers doesn't fix the issue, you can uninstall and reinstall your GPU drivers. Then follow the steps below to do so.
1. Turn on Device Manager And expand Display adapters As mentioned above.
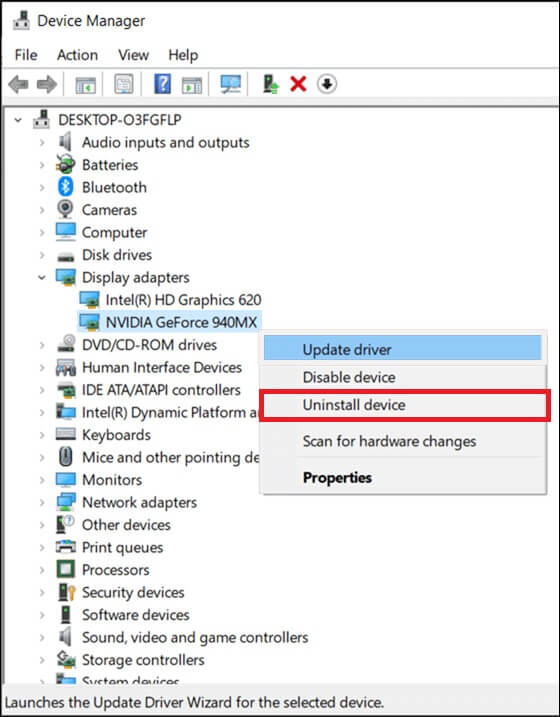
2. Now, right-click on Graphics driver (such as NVIDIA GeForce 940MX) and select Uninstall the device.
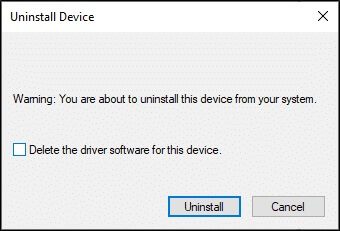
3. Now, a warning message will be displayed on the screen. Check the box. Delete the driver for this device Confirm the demand to click on uninstall.
4. Download Latest graphics drivers and installation on your device manually through the manufacturer's website. For example: AMD و NVIDIA و Intel.
5. Finally, restart your Windows PC.
Method 6: Update Windows
If you don't get any fixes by updating to a new patch, there's a small chance your system has errors. If you're using an older operating system, the files on your system may not be compatible with DirectX files leading to DX11 feature level 10.0, which is required for the engine to run. Follow the steps below.
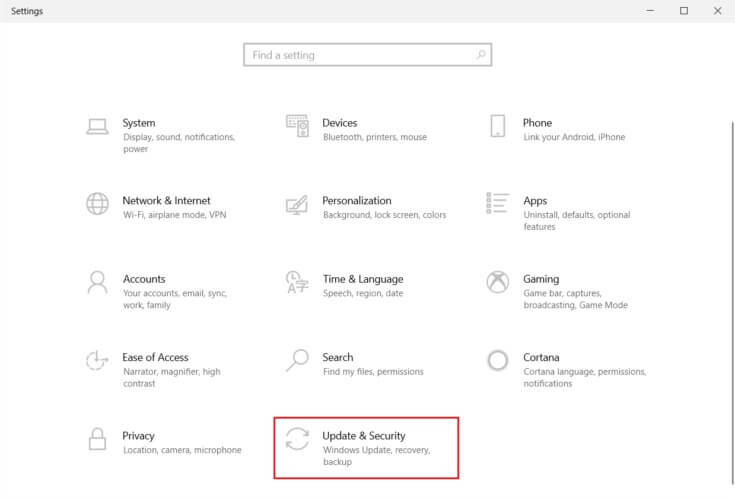
1. Press Windows key + I At the same time to run Settings.
2. Click on the box Update and security , as shown.
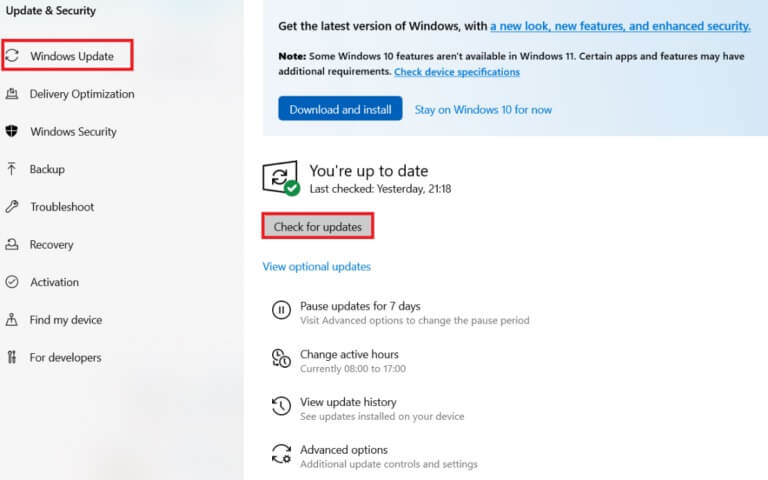
3. in Windows Update tab , Click Check for updates button.
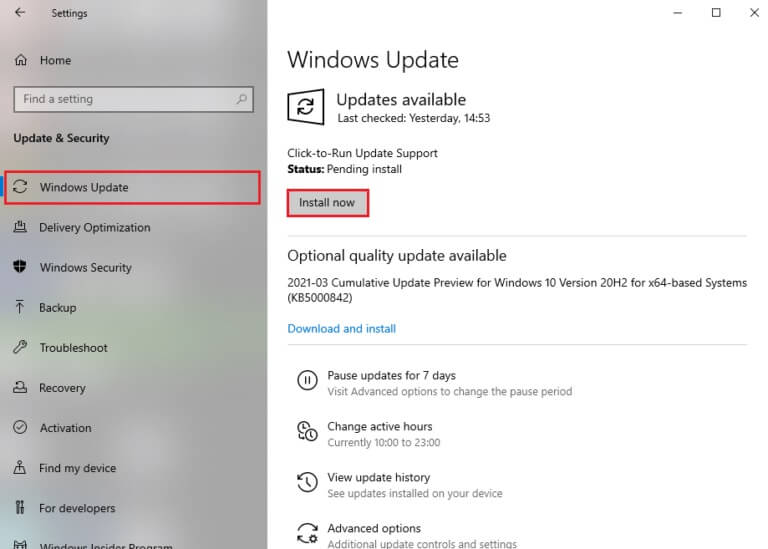
4 a. If available new update , Click INSTALL NOW Follow the instructions to update.
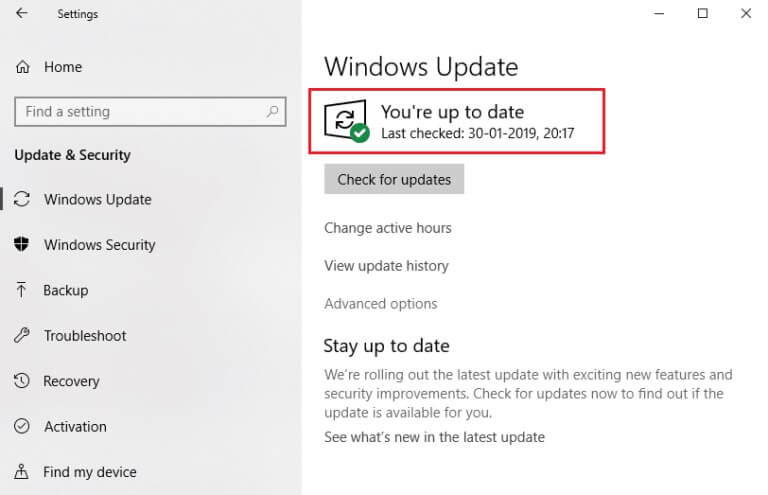
4b. Otherwise, if Windows is up to date, you will see Updated message.
Method 7: Update the game
Sometimes, you may be running the game on an older version. Check for game updates in the client. Steam Or page Epic Games Store And download it.
Method 8: Run with a dedicated GPU
Generally, a gaming PC comes with two messages: Onboard graphics card (Intel) and dedicated graphics card (NVIDIA and AMD). In this case, your computer will analyze the GPU resources to use and make a decision based on the application engine. If you're using a resource-intensive application, you'll need to switch to a dedicated graphics card instead of an integrated one to avoid this error.
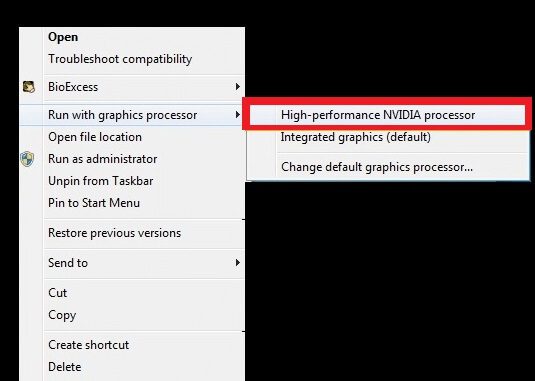
1. Right click on App shortcut , where you want to use a dedicated graphics card, and select Run using graphics processor option.
2A. If you are from NVIDIA users , click on High-performance NVIDIA processor from the dropdown menu.
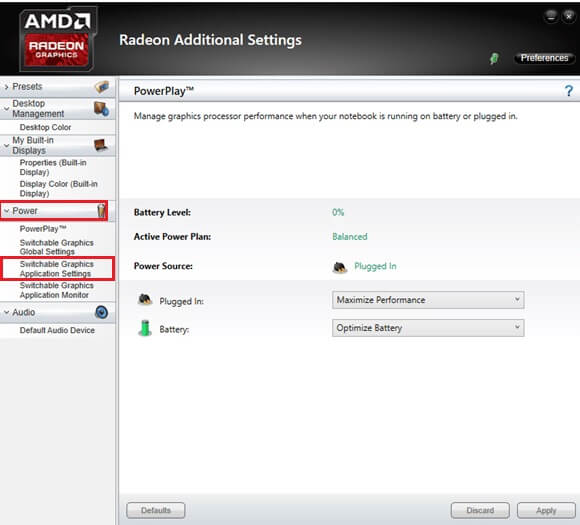
2b. If you are from AMD users , you cannot switch directly to a dedicated processor. Follow Instructions Below to add apps to the list.
3. Right-click on an empty area on the desktop andOpen AMD Catalyst Control Center.
4. Now, select the option Catalyst Control Center from the list.
5. In the left pane, click "Energy".
6. Finally, click on the option App graphics settings Convertible within energy and select GPU Your own.
Method 9: Repair DirectX
When your DirectX installation files are corrupted, you'll encounter a DX10.0 feature level 11 error. You can't uninstall DirectX easily. However, you can fix it to resolve the error by following the instructions below.
1. Visit Microsoft Download Center and download DirectX End-User Runtime Web Installer.

2. Now, follow the on-screen instructions to install. DirectX End-User Runtime Web Installer.
3. Again, go to Microsoft Download Center page to download DirectX End-User Runtimes (June 2010).
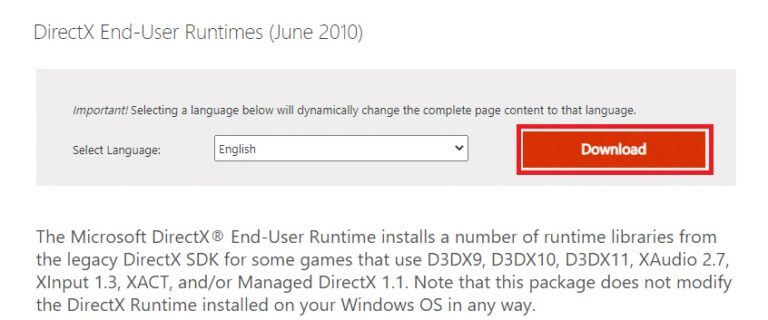
4. Now, install DirectX End-User Runtimes (June 2010) on your computer using Administrator rights.
Note: The Microsoft DirectX® End-User Runtime installs several runtime libraries from the legacy DirectX SDK for some games that use D3DX9, D3DX10, D3DX11, XAudio 2.7, XInput 1.3, XACT, and/or Managed DirectX 1.1. Note that this package does not modify the DirectX Runtime installed on your Windows operating system in any way.
5. Finally, Restart your computerThese utilities will replace and repair corrupted DirectX files and fix DX10.0 Feature Level 11 error.
Method 12: Install DirectX XNUMX on your system
DirectX 12 is an essential application for gaming on your Windows 10 system. It's how your computer communicates with users and tells them what to do. Therefore, to optimize Windows 10 for gaming, install DirectX 12 on your system. Follow the steps below to check if your system already has DirectX 12 and install it to fix the DX10.0 Feature Level 11 error.
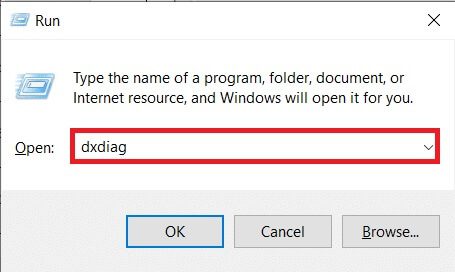
1. Press Windows + R keys To open the dialog box "employment".
2. Write dxDiag Then press Enter.
3. The following screen will be displayed when your system already has: DirectX 12 version.
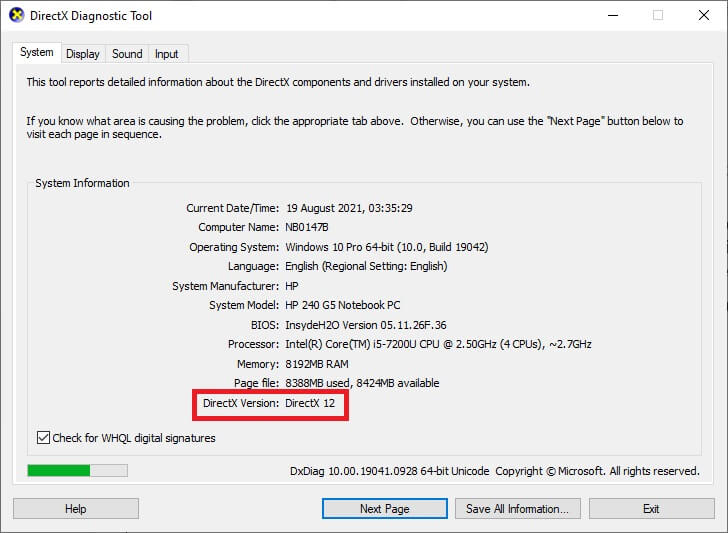
4. If you do not have DirectX 12 on your system, download and install it from Official Website By following the instructions on the screen.

We hope this guide was helpful and you were able to fix the DX10.0 feature level 11 required to run the engine error in Windows 10. Let us know which method worked best for you. Also, if you have any questions or suggestions regarding this article, feel free to leave them in the comments section.


