Prepare Google Chrome The most widely used browser in this technological world. This browser comes first to mind when you want to browse the internet. However, Google Chrome sometimes throws up some errors. Every time you browse your computer, you'll see a notification.Update Google ChromeBut while trying to update, you may encounter the problem of Google Chrome not updating. We offer you a useful guide that will fix the problem of not updating. Google ChromeSo, read on!

How to Fix Google Chrome Not Updating on Windows 10
While updating Google Chrome, you may encounter several mistakes During the update process, such as, An error occurred while checking for updates: Update check failed to start (Error code 3: 0x80040154).

You'll encounter the Chrome update issue if the Chrome updater can't find its update server to initiate the process. If you encounter the same error code while updating Google Chrome on Windows 10 and are looking for a solution, this article will help.
What are the problems with updating Chrome?
If you are facing this issue on your device, you may encounter several errors listed below.
- Update failed: The administrator has disabled updates.
- Update failed (Error: 7 or 12) An error occurred while checking for updates: Download failed
- Also update failed (error: 4 or 10) An error occurred while checking for updates: Update check failed to start
- Update failed (Error: 3 or 11) An error occurred while checking for updates: The update server is unavailable.
- This computer will no longer receive Chrome updates. Because Windows XP and Windows Vista are no longer supported.
Regardless of the errors and failed update messages, you can follow the troubleshooting methods discussed below to fix the Chrome not updating issue. However, before following these methods, you can try updating Chrome by following the steps in the section below.
How to update Google Chrome
If you encounter the Chrome update verification failed error, you can try manually installing the latest version. Here's how.
1. Turn on Google Chrome browser.
2. Click on three-dot icon To expand the list Settings.
3. Then select Instructions > About Google Chrome As shown below.


4. Allow Google Chrome Checking for updates. The screen will display a message. Check for updates , as shown.

5a. If updates are available, click the button. Update.
5b. If Chrome is already updated, it will display Google Chrome updated message.

If you are unable to update Google Chrome, we have compiled a list of ways to fix this issue due to an error while checking for updates: Update verification failed to start (Error code 3: 0x80040154)The methods are arranged in ascending order from basic to advanced to solve the same problem. If you want to get the fix faster and in just a few steps, follow the methods in the same order. Here we go!
Method 1: Restart your computer
Before trying the remaining methods, it is recommended that you restart your system. In most cases, restarting your device will fix the issue without any complicated planning. Therefore, try restarting your system by following the steps below and check if you encounter the issue again. Alternatively, you can completely shut down your system using the power options and then restart it.
1. Go to start menu.
2. Now, select energy symbol.
Note: In Windows 10, the power icon is located at the bottom. In Windows 8, the power icon is located at the top.
3. Several options will be displayed such as: Better sleep و Shut down و Restart (Restart)Here, click on Reboot.

Method 2: Restart Google Chrome
One of the easiest ways to fix Chrome not updating due to an error occurred while checking for updates is to restart Google Chrome. Restarting it will clear all temporary files, and there's a good chance it will resolve your issue.
1. Turn on Task management By pressing keys Ctrl + Shift + Esc At the same time.
2. In the tab Operations Find and select the Chrome process.
3. Then click the button finish the job As shown in the image below.

4. Now, Restart Google Chrome Check if you have fixed the problem.
Method 3: Clear browsing data files
All your browsing history files will be stored as temporary files in your browser. Over time, these files grow in size, and corrupted files can cause Chrome to not update. Try clearing your browsing data files and see if this fixes the issue.
1. Turn on Google Chrome.
2. Then click on Three dots icon > More tools > Clear browsing data… As shown below.

3. Check the following options.
- Cookies and other site data
- Cached images and files
4. Now, select the option All time For the time range.

5. Finally, tap Wipe data.
Method 4: Disable add-ons
When you have too many tabs on your system, your browser and computer will be very slow and may slow down Google Chrome's update, leading to this issue. In this case, your system will not function normally, resulting in the error code mentioned above. Now, you can try closing all unnecessary tabs and restarting your system.
If you close all tabs and still have the issue, try disabling all extensions.
Follow the instructions below to remove extensions from Google Chrome.
1. Turn on Chrome And type chrome://extensions in URL bar. Click on Enter key For a list of all installed add-ons.

2. DoShut down private switch In the appendix (Such as Grammarly for Chrome) to disable it.

3. DoBrowser update yours and see if the error appears again or not.
4. Repeat the above steps to disable. Additions One by one to check whether the error has been fixed or not.
Method 5: Turn off compatibility mode
Google Chrome does not work with older versions of Windows XP, Windows Vista, and Mac OS X 10.6, 10.7, and 10.8. You may have enabled compatibility mode in your browser. Chrome is supported on the following Windows versions:
- Windows 7
- Windows 8
- And Windows 8.1
- Windows 10 or later.
- Device with an Intel Pentium 4 or later processor capable of streaming SIMD 3 extensions.
If your computer meets the system requirements but an error occurs, this computer will not receive Google Chrome updates because Windows XP and Windows Vista are no longer supported during Chrome updates. To turn off compatibility mode, follow the steps below.
1. Right click on Google Chrome shortcut On the desktop and select Properties.

2. Go to the tab Compatibility.
3. Now, uncheck the box. Run this program in compatibility mode..

4. Finally, tap "Application" ثم "OK" to save the changes.
5. Now, restart your browser to see if the issue is resolved now.
Method 6: Perform Disk Cleanup
When your system has any corrupted files in Chrome or registry, you will face issues with Google Chrome not updating. You can do Disk Cleanup To fix this issue, follow the instructions to do the same.
Note: Data deleted by Disk Cleanup is not permanently deleted from your system and remains available on your hard drive. You can recover files whenever needed.
1. Turn on File Explorer By pressing the keys Windows + E Together and move to this computer.

2. Here, right-click on Drive (C :) Where it was installed Steam and select Properties As shown.

3. In the tab "general" , click the . button Disk Cleanup.

4. A prompt will appear and it will be calculated. Disk Cleanup The amount of space that can be freed up.

5. Check the box for all required items under Files to be deleted:Click on Clean system files.

6. Once the scan is complete, select the checkboxes again for all selected items and click "OK".

7. Finally, click the button. Delete Files in the confirmation message.

8. Restart your computer to clear additional space.
Method 7: Enable Google Update Services
If Google Update Services is disabled on your computer, you'll encounter the error "Google Chrome won't update." You can enable it manually by following the steps below.
1. Press the keys Windows + R At the same time to open Run . dialog.
2. Write services.msc And click OK.

3. Now, scroll down the list and double-click on Service. Google Update (gupdate).

4. Then set the startup type to automatic Or Automatic (Delayed Start).

5. Now, click on "Application" ثم "OK" to save the changes.
6. Again, scroll down to the list and double-click on Google Update Service (gupdatem).

7. Then set the startup type to Manual.

8. Now, click on Apply > OK to save the changes.
9. Finally, restart your computer and check if you have fixed the Google Chrome won't update issue.
Method 8: Modify the Windows Registry
Modifying registry values in the Windows Registry Editor may resolve error code 3:0x80040154. Here are some instructions for doing the same.
1. Launch the dialog box. "employment" And type regedit And press Enter key.

2. Click "Yeah" in control router In the user account.
3. Now, go to the next track in Registry Editor.
Computer\HKEY_LOCAL_MACHINE\SOFTWARE\Wow6432Node\Google\Update

4. Now, in the left pane, right-click on UpdateDefault and select an option Modification.
Note: If you can't find the default update string, try searching for the default update string.

5. Next, set the value data for Update on 1 and click the . button "OK".

Method 9: Turn off Windows Defender Firewall (not recommended)
Windows Defender may be blocking Chrome for security reasons. Therefore, you can turn off Windows Defender Firewall to fix the Google Chrome not updating issue.
Note: Disabling your firewall makes your system more vulnerable to malware or virus attacks. Therefore, if you choose to do so, be sure to enable it shortly after you've finished resolving the issue.
1. Press the . key Windows , And type Control Panel , and click to open.

2. Set View by> Category and select System and Security Settings.

3. Click Windows Defender Firewall.

4. Select an option Turn on Windows Defender Firewall or turn it off From the right side, as shown.

5. Here, select the option Turn off Windows Defender Firewall (not recommended) For every network setting available, i.e. public and private domain.

6. Finally, restart your computer.
Method 10: Run a malware scan
The Google Chrome update issue won't occur if malware is present on your computer. Follow the steps outlined to run a malware scan.
1. Press the keys Windows + I At the same time to run Settings.
2. Here, click Update and security settings As shown.

3. Go to Windows Security in the right pane.

4. Click Option Virus and threat protection in the right pane.

5. Click the button Quick Scan Search for Malicious software.

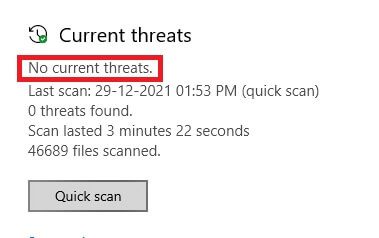
6A. Once the inspection is completed, you will be View all threats. Click Start the process within Current threats.

6b. If there is no threat on your device, the device will display a No Current Threats alert.

Method 11: Reset Chrome
Resetting Chrome will return the browser to its default settings, and there are more possibilities for fixing the issue discussed. Follow the steps below to reset Google Chrome and check if the issue is resolved.
1. Open Google Chrome and go to chrome://settings/reset
2. Click Option restore settings To Original default settings , as prominently shown.

3. Now, confirm your action by clicking the button. “Reset settings”.

Method 12: Reinstall Chrome
If none of the above methods help you fix the Google Chrome not updating issue, you can try reinstalling Google Chrome. Doing so will fix any issues related to the search engine, updates, or other related issues that are causing Chrome update problems.
Note: Back up all your favorites, saved passwords, and bookmarks, and sync your Google account with your Gmail. Uninstalling Google Chrome will delete all saved files.
1. Press the . key Windows , And type Applications and Features , and click to open.

2. Search for Chrome in Search field In this list.
3. Next, select Chrome and click the . button "uninstall" As shown in the picture.

4. Again, click on "uninstall" For confirmation.
5. Now, tap on Windows key , And type % localappdata% , and click open to move to AppData Local folder.

6. Open Google folder By double clicking on it.

7. Right click on Chrome folder and select an option delete As shown below.

8. Again, press the key. Windows , And type % Appdata%, and click open to move to AppData Roaming folder.

9. Again, go to Google folder Delete the Chrome folder as shown in steps 6-7.
10. Finally, restart your computer.
11. Next, download Latest version From Google Chrome As shown.

12. Turn on Setup file Follow the on-screen instructions to install Chrome.

We hope this guide was helpful and you were able to fix Chrome not updating on Windows 10. Let us know which method worked best for you. Also, if you have any questions or suggestions regarding this article, feel free to leave them in the comments section.