Microsoft has consistently enhanced the security of its Windows operating system by making incremental improvements to Windows Defender. It launched the SmartScreen feature with Windows 8 to protect users from installing potentially dangerous applications on their systems. SmartScreen checks if an application is on its list of unsafe applications and warns you of the risks. Microsoft has even integrated the feature into Microsoft Edge to protect you from falling victim to phishing scams. Here are the 7 best ways to fix the "Smartscreen can't be reached right now" error on Windows 11.
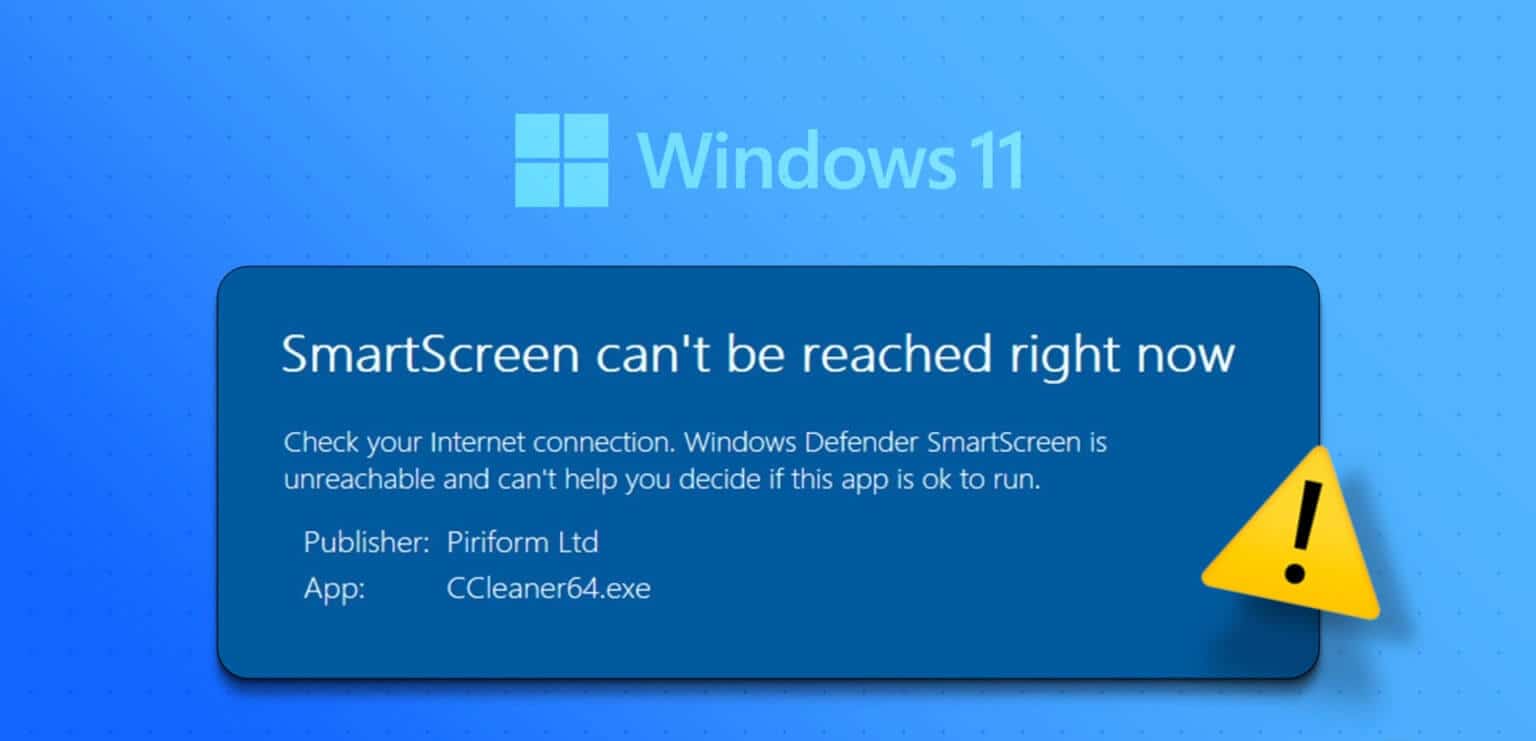
However, many users encounter the "SmartScreen can't be accessed at this time" error on their computers. In this post, we'll address this annoying issue with all possible fixes to get the feature working again.
1. Check your internet connection
SmartScreen relies on an internet connection to compare the app against the list of flagged apps. If your computer doesn't have an active internet connection, it won't be able to perform a scan.
So, check if your router is connected to your internet service provider and has an active connection. If not, reboot your router and see if internet connectivity is now available. After confirming your internet connection, retry installing the app.
2. Check the status of the Microsoft server.
SmartScreen is a cloud-based security service, and its servers may be down or under maintenance. You will encounter an error if you attempt to connect to the SmartScreen service during an outage.
Therefore, visit Microsoft's official social media channels for information about the outage and see if other users are experiencing the same issue. You can also visit third-party sites such as DownDetector Tracks server outages for major services. If other users are also experiencing issues with SmartScreen, please wait while Microsoft fixes the issue.
3. Disable proxy servers
Proxy servers help retrieve information from a web page or server on your behalf and deliver it to you. However, many users are experiencing an inaccessible SmartScreen sharing issue, and disabling the proxy server helped resolve the issue. Therefore, if you are using a proxy server on your system, disable it and try installing the application again. Here's how to do it:
Step 1: Click on Windows key + I Shortcut to run Settings app.
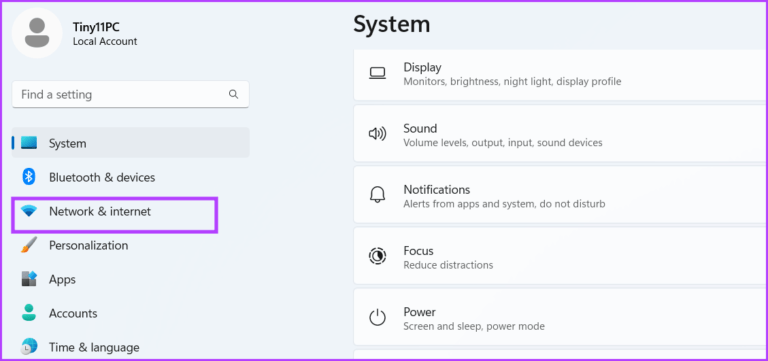
Step 2: Click Network and Internet option In the menu on the left side.
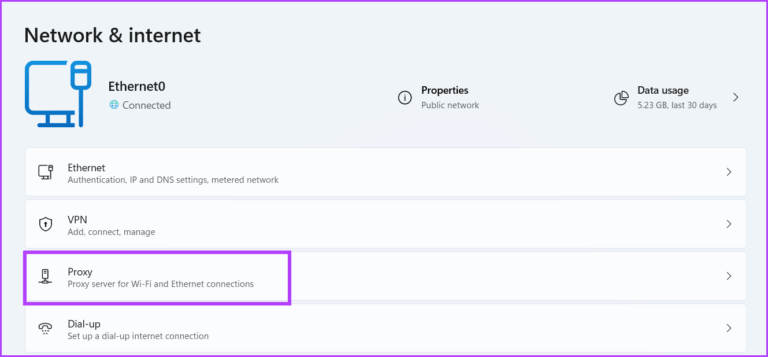
Step 3: Click Agent option.
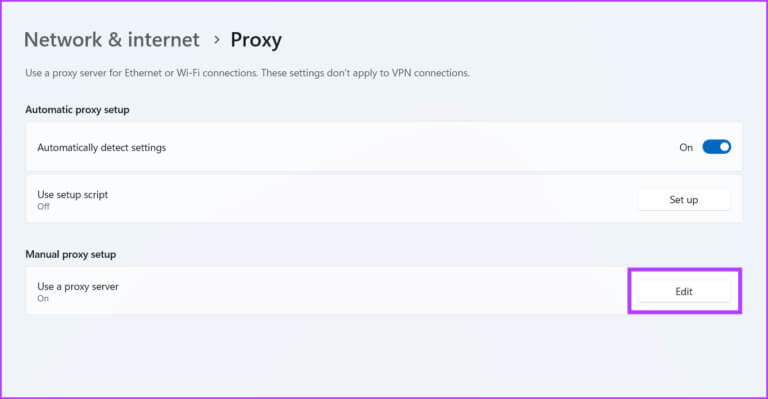
Step 4: Scroll down and select Manual Proxy Settings Section LocationClick the button. Release.
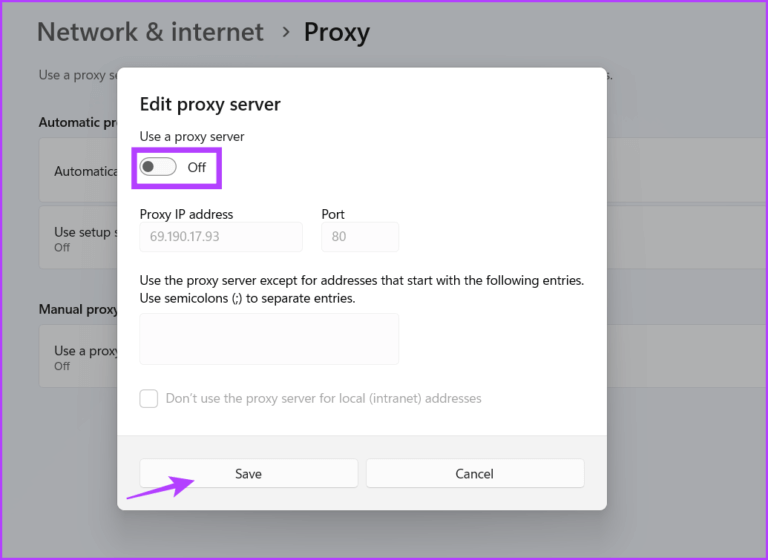
Step 5: In the Edit window proxy server Disable the toggle under the Use a proxy server option. Click the button "save" To close the window.
Reopen File Explorer and retry installing the app to check if SmartScreen is now working.
4. Restart the computer
You may also encounter the SmartSceen error due to a malfunctioning background service. If it isn't working properly, or the SmartScreen process encounters a similar issue, restart your computer. This will shut down the system and restart all necessary background services.
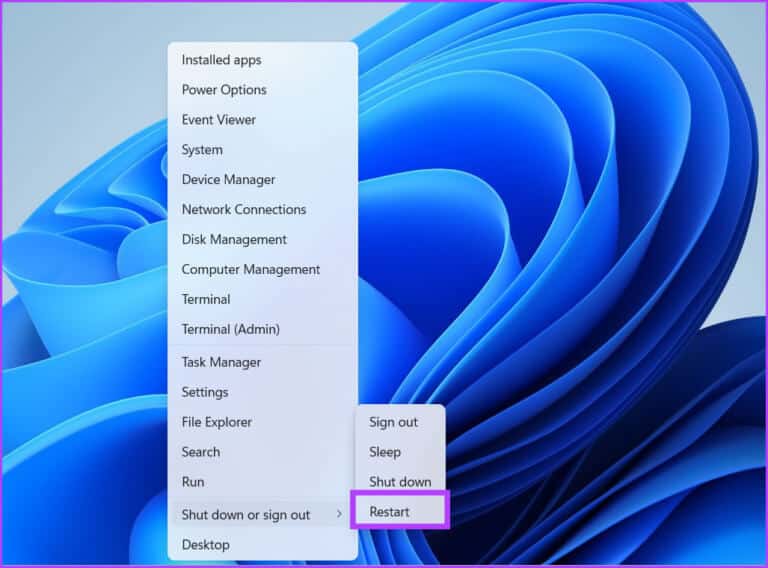
Right click on the button "Start" To open Power User menu. Hover over the Turn off or sign out option and click Restart optionWait for the system to restart and retry installing the application to check if it works. SmartScreen He works.
5. Clean boot performance
It's common for Windows services to conflict with third-party programs. Often, this can lead to errors while launching applications and accessing services. Therefore, you'll need to find the root cause of this issue by performing a clean boot. This will disable all third-party services at startup, while preserving all essential system services. Here's how:
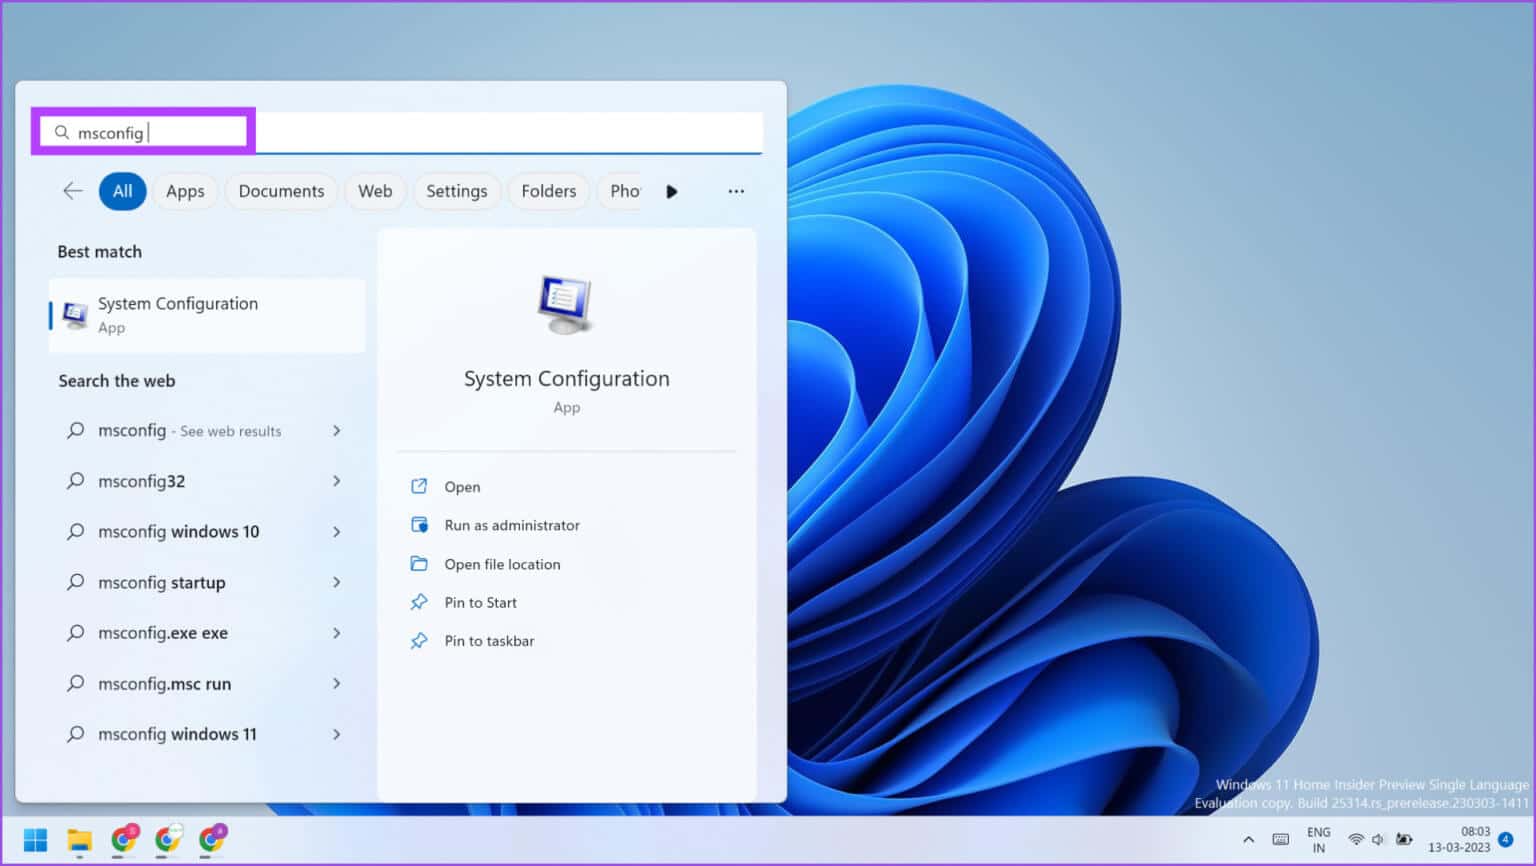
Step 1: Click on Windows key + S shortcut , And type msconfig , And press Enter To run system configuration.
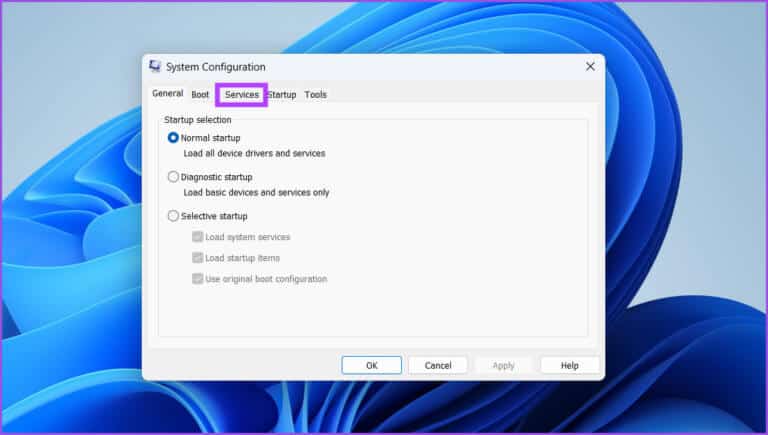
Step 2: Click Services tab.
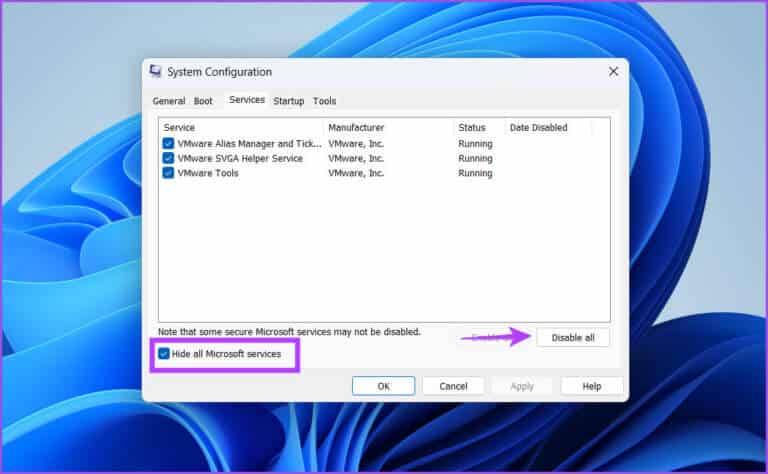
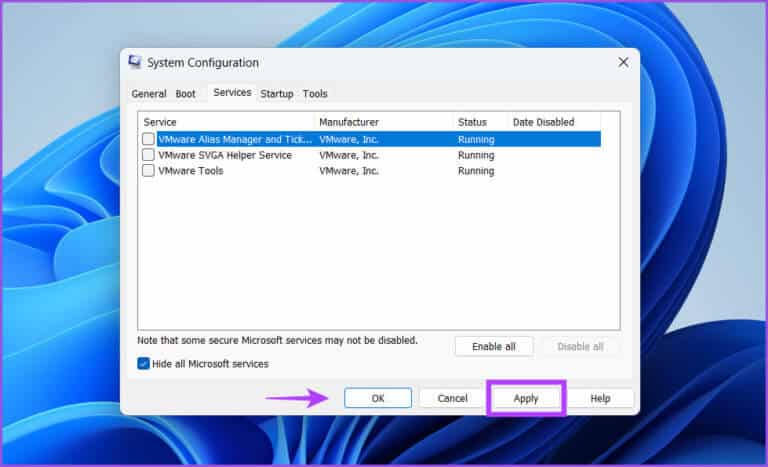
Step 3: Click the check box. “Hide all Microsoft services” and click the . button “Disable all”.
Step 4: Click the button "application". After that, click the button "OK".
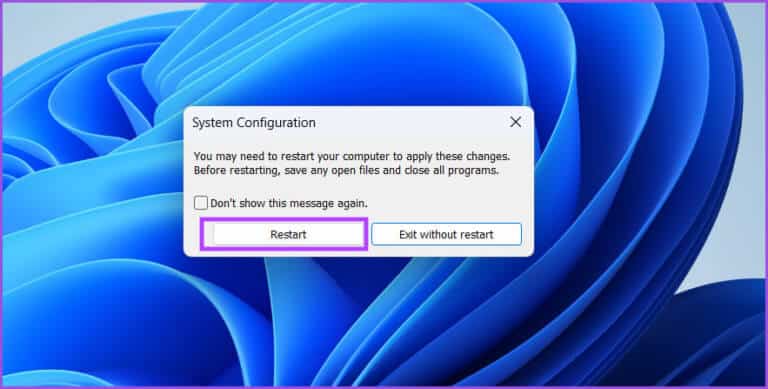
Step 5: You will see a pop-up window asking you to reboot your system. Click Restart now buttonWait for the system to boot to the desktop.
Next, run the app installation and check if you still see the SmartScreen error. If you don't experience any problems, a third-party service is the root cause. Reopen the System Configuration tool and reboot your system with some third-party services enabled. Repeat this cycle until you find the troublesome service.
6. Allow SMARTSCREEN through a firewall
If SmartScreen is blocked from Bypass Windows Defender Firewall Otherwise, it won't be able to connect to Microsoft servers and retrieve details. Therefore, you'll need to allow SmartScreen to communicate through Windows Defender Firewall. Here's how:
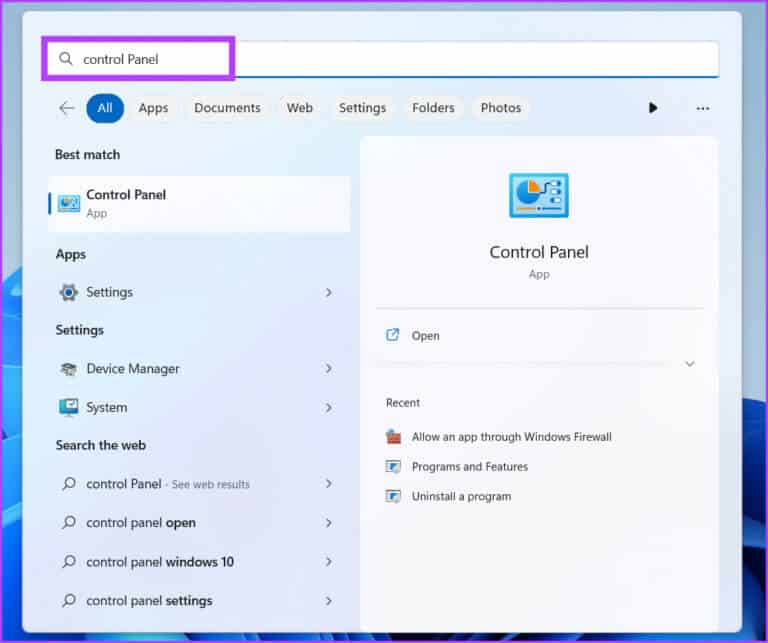
Step 1: Click on Windows key , And type Control Panel , And press Enter.
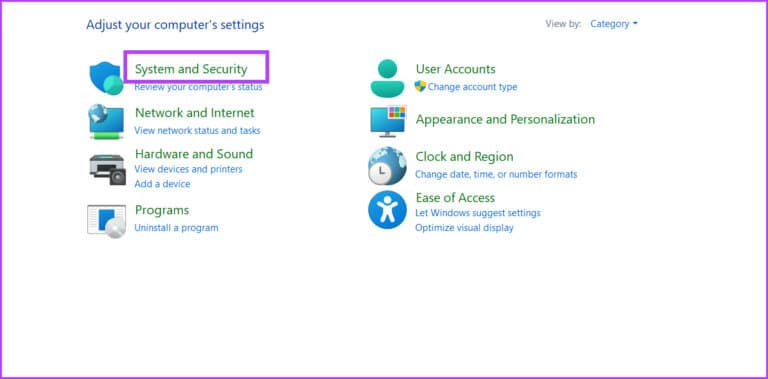
Step 2: in Control Panel window , click Option order and security.
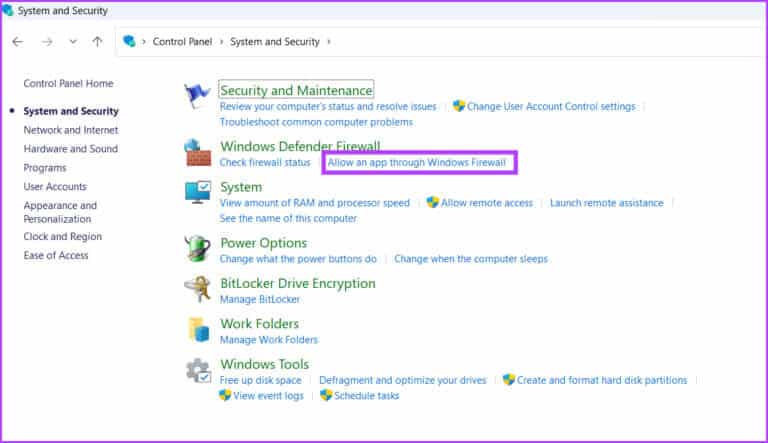
Step 3: Scroll down to Windows Defender Firewall section Click on the option “Allow an app through Windows Firewall.”
Step 4: click button Change settings. Look for “Windows Defender SmartScreen” In the list, click the check box to allow the service to connect to the Internet.
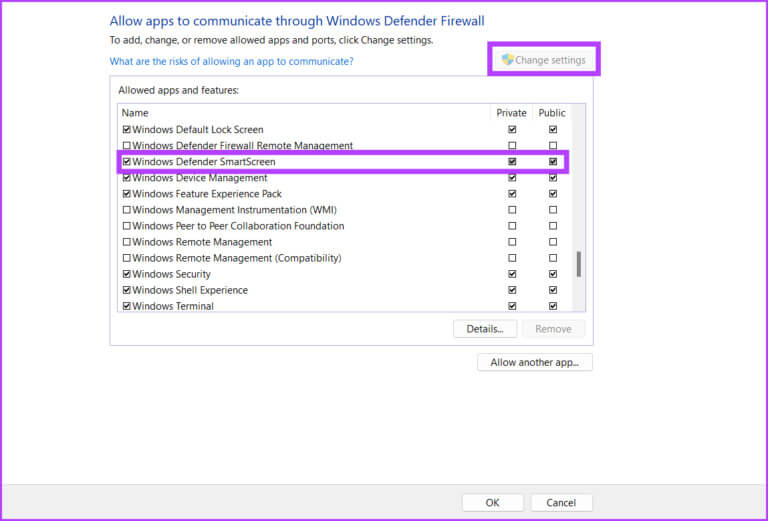
Step 5: Finally, click the button OK And closed Control Panel.
7. Create a new user account
An incorrectly configured user account can cause errors in SmartScreen. Therefore, you will need to: Create a new user account with administrator privileges To download and install apps, repeat the following steps:
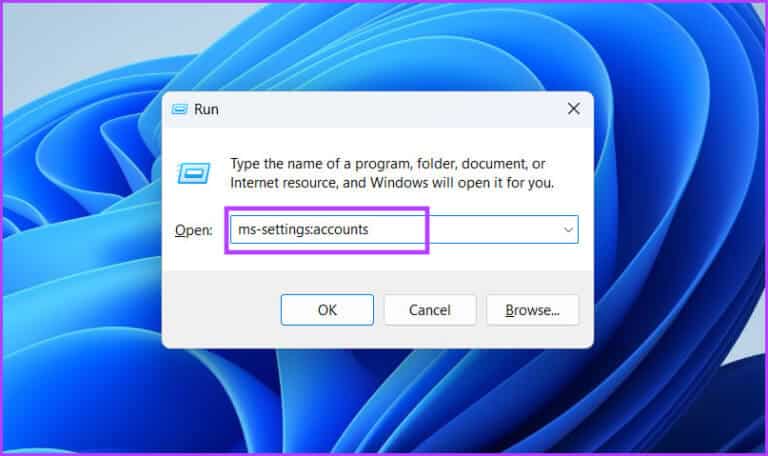
Step 1: Click on Windows key + R shortcut to open Run . dialog. Write ms settings: Accounts in the text box and press Enter.
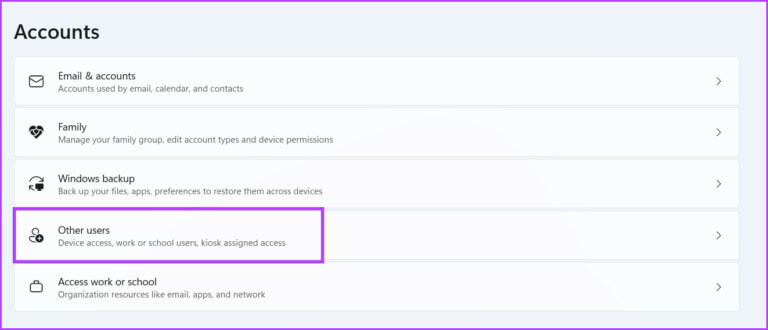
Step 2: Scroll down and tap an option Other users.
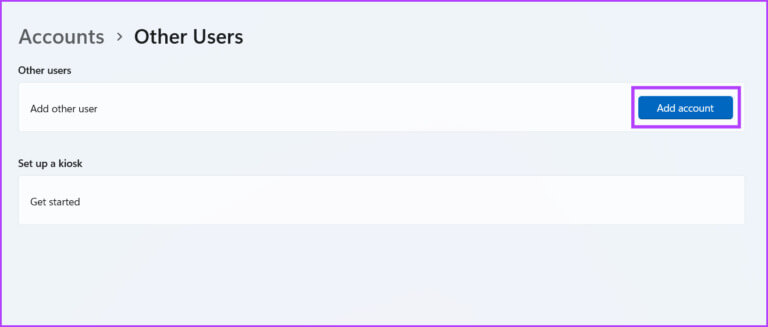
Step 3: Click on the button Add an account.
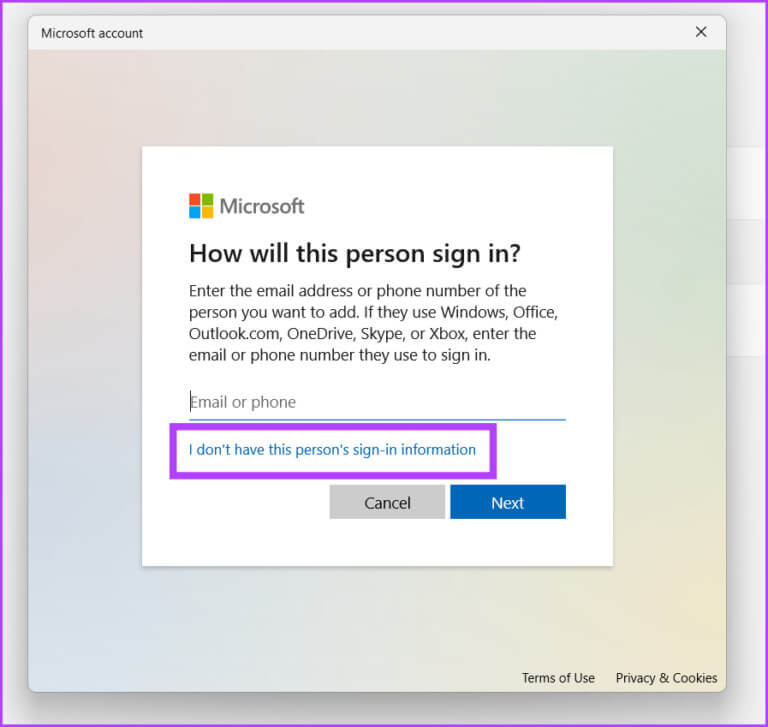
Step 4: Windows will ask you to create a Microsoft accountTo avoid adding an email or phone, click the option. “I don't have this person's login information.”
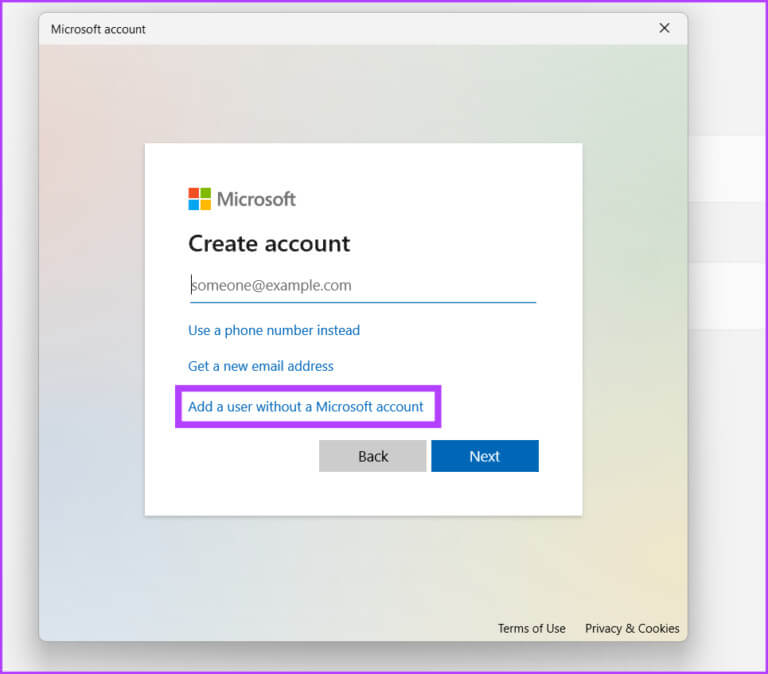
Step 5: After that, click on the option Add a user without a Microsoft account.
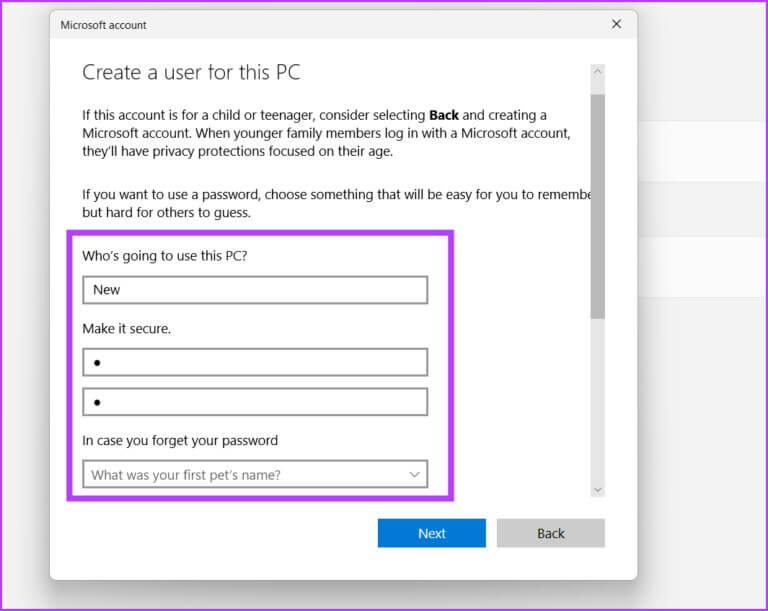
Step 6: Type username and password.Select Three security questions , enter your answers, and click the button. next one.
Step 7: Your new user account will appear in the Other users section. Click the button “Change account type.”
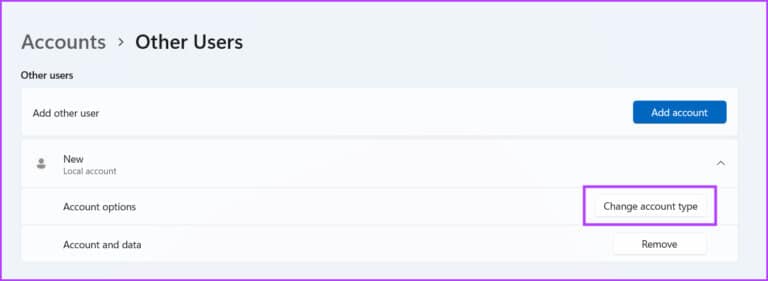
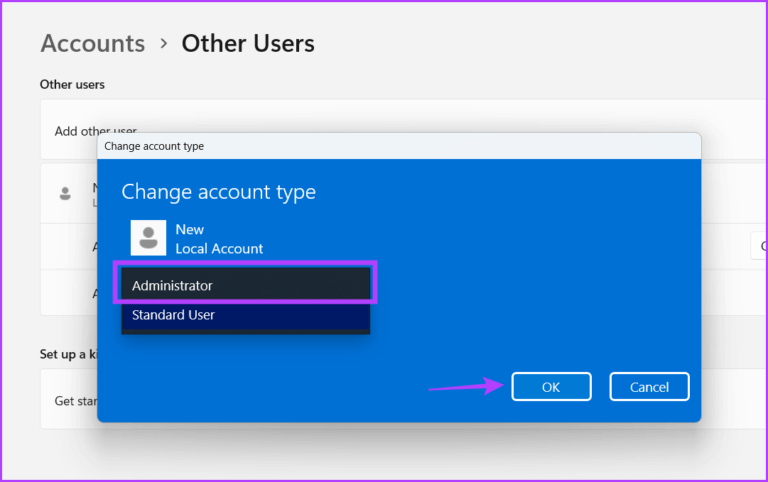
Step 8: Click icon Arrow and select Administrator option.Then click the button "OK". Your new user account will now have administrator privileges.
Step 9: Click on Windows key Right click on User account icon.Select account name The newly created account to switch to the new account.
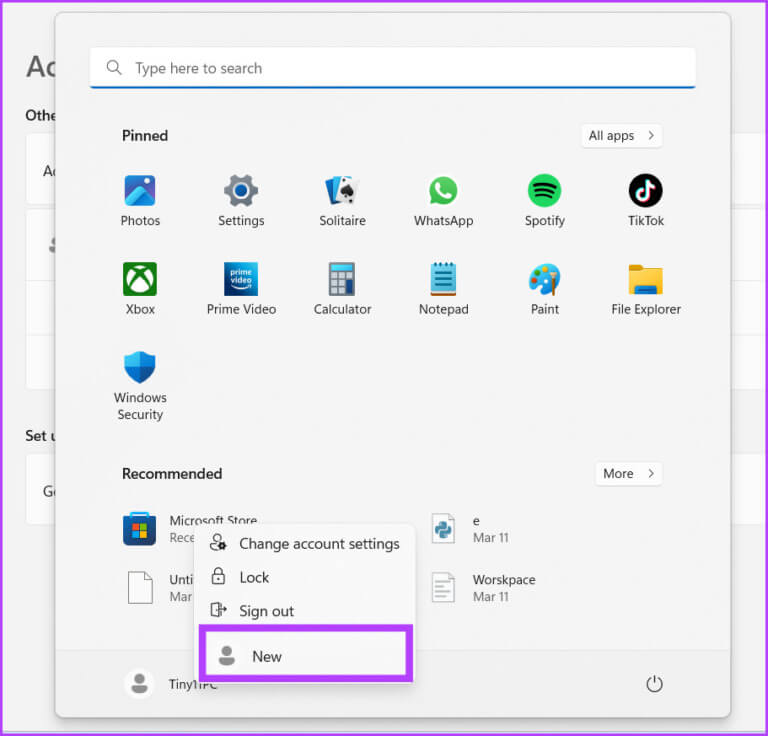
Step 10: Finally, log in with the new user account and try installing an app.
Check and install apps using SMARTSCREEN
Windows SmartScreen is an important security feature that warns you before installing suspicious apps on your system. If your system can't access it, try all of the methods above to prevent it.Fix the error Smartscreen can't be accessed at this time on Windows 11 andRestore the feature to working condition. Furthermore, never intentionally disable SmartScreen to avoid annoying pop-ups.


