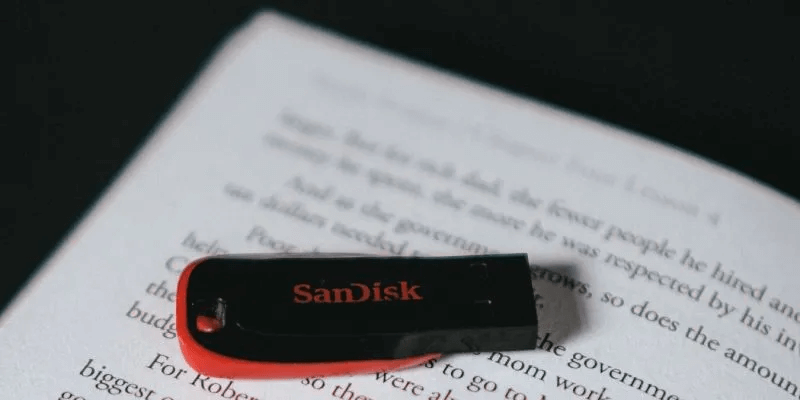
If you have a faulty or damaged USB drive, formatting it may be the best way to restore it to its original working condition. Even if your drive is healthy, you may still want to format it as a quick and easy way to erase its contents. This tutorial explains how to format a USB drive in Windows.
What file system should you use?
Before formatting a USB drive, you need to consider which file system you should use. File systems are ways of organizing data on a storage device (such as a hard drive or SD card). Support for different file systems varies depending on your operating system.
Windows 10 and 11 provide three file system options when formatting a USB drive: FAT32 NTFS and exFAT. Below is a breakdown of the pros and cons of each file system.
| Positives | Negatives | Best use for | |
|---|---|---|---|
| FAT32 | * Compatible with all major operating systems
* Less memory usage |
* Single files larger than 4GB cannot be processed, so you cannot copy a 5GB file in FAT32.
* Limited partition size (up to 32GB) |
* Removable storage devices such as USB flash drives
* Devices that need to be connected to a variety of operating systems |
| NTFS | * Partitions larger than 32GB can be created.
* Can read/write files larger than 4GB * Supports file encryption on the go |
*Limited cross-platform compatibility | * Internal hard drives * Windows system drivers |
| exFAT | * Provides unlimited file size and partition. | *You may need additional drivers for exFAT compatibility on Linux. | * External hard drives
* Flash drives if you want to work with files larger than 4 GB |
Next, let's take a look at some of the ways you can format a USB drive in Windows 10 and 11.
1. Format a USB drive from File Explorer
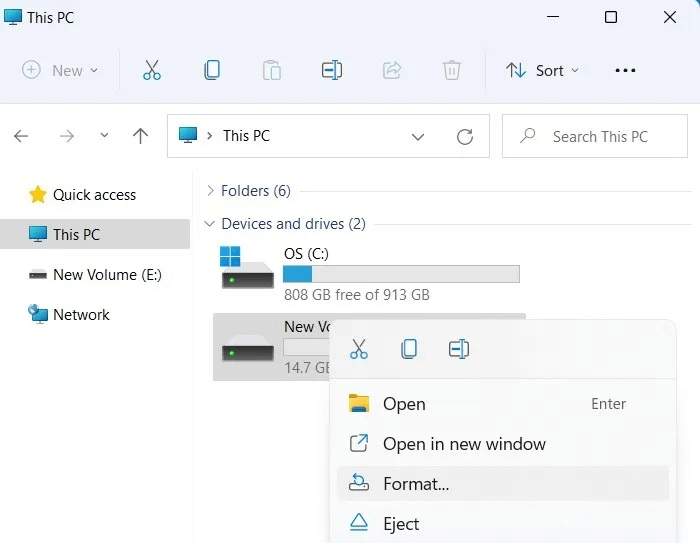
The most common way to format a storage device, and arguably the easiest way, is directly through The File Explorer utility included with WindowsThe process is the same for both internal and external storage devices.
To format a USB drive this way:
- Right-click on the drive in the File Explorer window and choose "Format" from the popup menu.
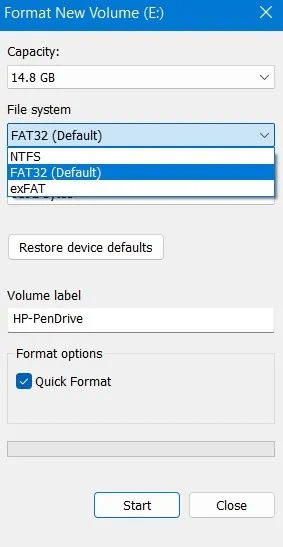
2. Choose the file system you decide to use on the device.
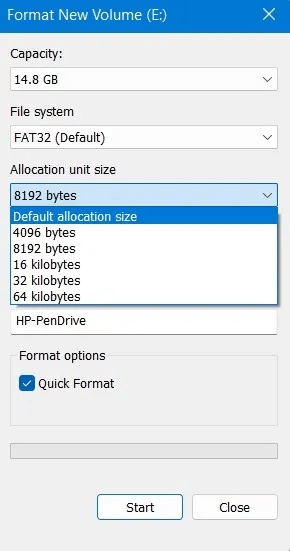
3. Select the allocation unit size you want to use. Higher values are better if you plan to store large files, as they give a slight performance boost and reduce fragmentation. However, they also waste some space. Keep in mind that most devices have Ideal allocation unit size Therefore, we suggest choosing the default value.
Note: Most storage media today are set to 4096 bytes.
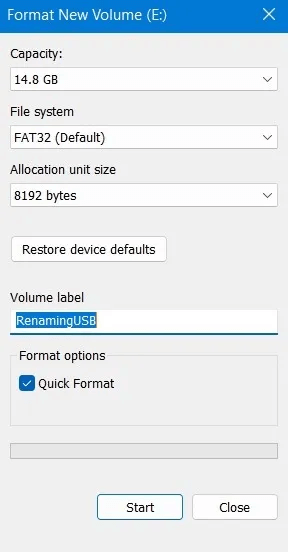
4. Enter a name for the USB drive in the field below. "Storage unit label".
5. Leave Quick setup Enabled if you do not keep sensitive data on the drive and if you are sure it is working properly. Quick setup The device is empty but does not actually erase its contents. It is the equivalent of flipping a switch. "not empty" To "empty". A full format takes longer, and in the case of large multi-terabyte external hard drives, it can take days. However, it overwrites the entire storage space, little by little, ensuring that there are no bad sectors and that everything is working properly.
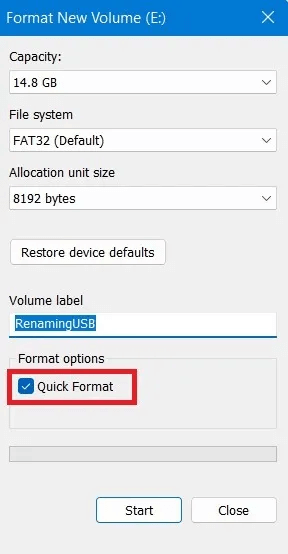
6. Click "Start" To format a USB drive.
2. Format the USB drive from Device Manager
If Windows, for some reason, doesn't assign a drive letter, or if its file system is corrupted, it may not appear in File Explorer. Fortunately, it's easy to format it from within the Disk Management app.
- Click on Win + X To access the Windows quick administrative menu.
- Choose Disk ManagementAlternatively, you can locate and launch the utility from the Start menu by pressing the Win key, then typing its name.
- Disk Management will present you with a list of all your storage devices and their partitions. If your drive is working properly, you'll see one or more partitions listed within it. You can format them individually. Alternatively, if you'd rather remove them and use all the space on your drive as a single contiguous block, click each one and choose “Remove storage unit” So that none of them remain.
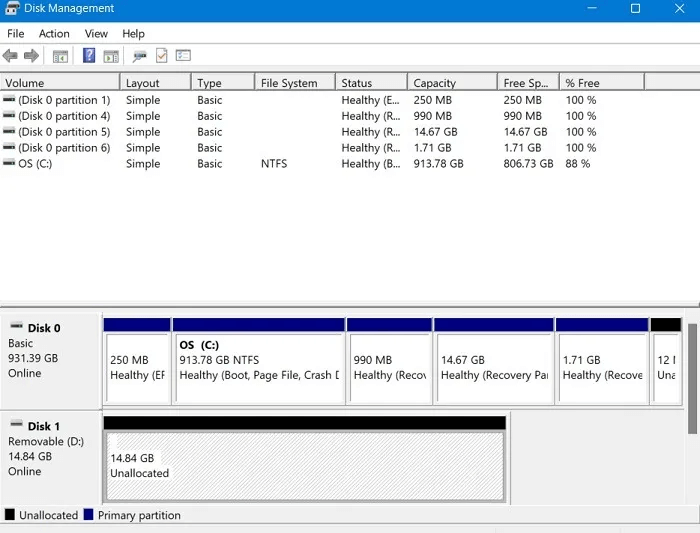
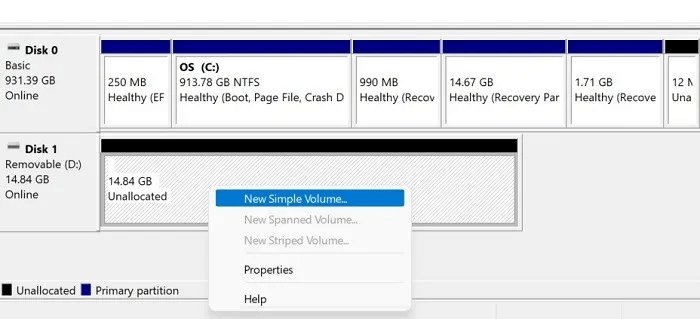
4. If the USB drive space appears to be unallocated, right-click on it and create a new partition. “Simple new storage unit.”
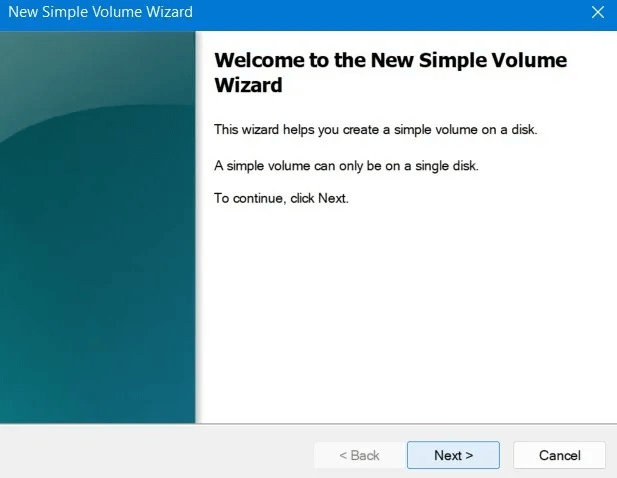
5. Follow New Simple Storage Wizard To create a partition and then format it.
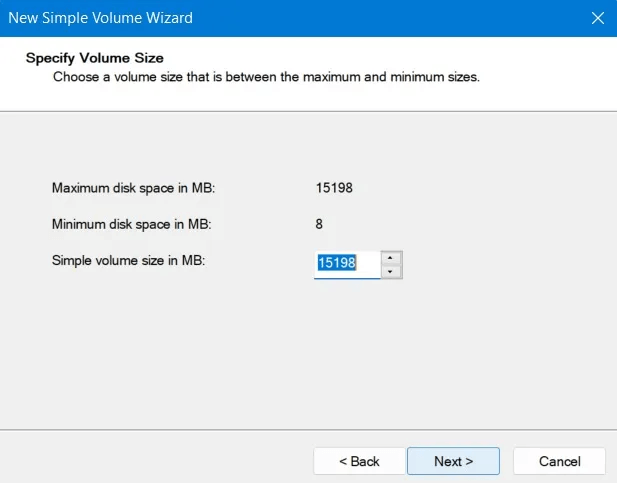
6. If you want to create more than one partition on your USB drive, you can enter a smaller volume size. This will free up space on the drive, allowing you to create more partitions later.
7. You'll have the option to assign a drive letter to the partition you create directly from this wizard. You can also assign it to an empty NTFS folder instead or skip assigning a drive letter altogether.
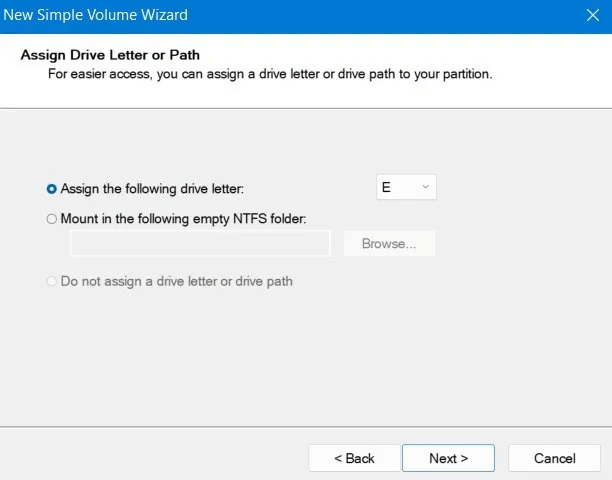
8. Similar to formatting from File Explorer, you will be able to choose the file system and allocation unit size, enter a volume label and select whether to choose a quick format or not.

9. Before the actual configuration, the wizard will provide a summary of your selections. Click "ending" To accept them and format the USB drive.
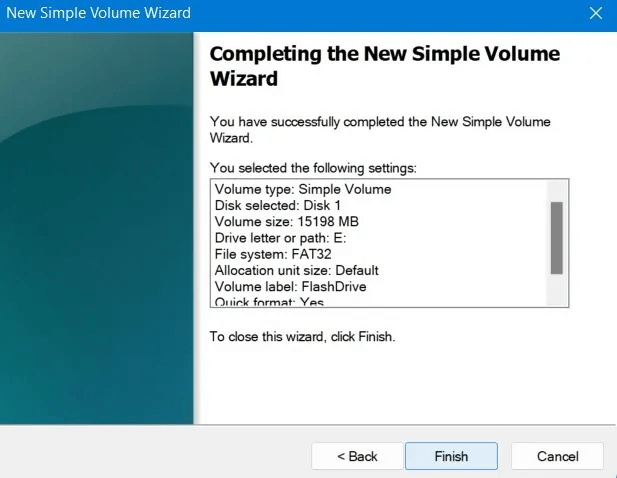
Format your drive
- New removable media drive The disc 1" Ready for its own formatting. It is no longer unallocated and displays a healthy primary partition.
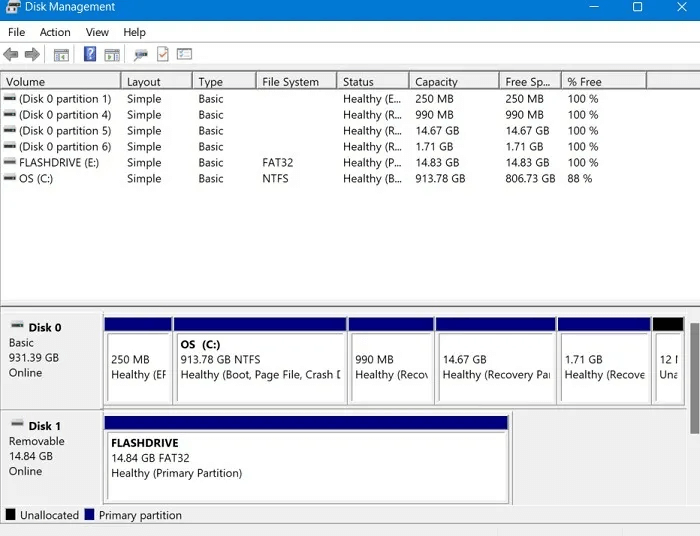
2. However, if your drive already has one or more partitions that you want to format without making any changes to them, the process is more straightforward. While in the Disk Management app, right-click on the partition you want to format and choose "Preparation" from the popup menu.
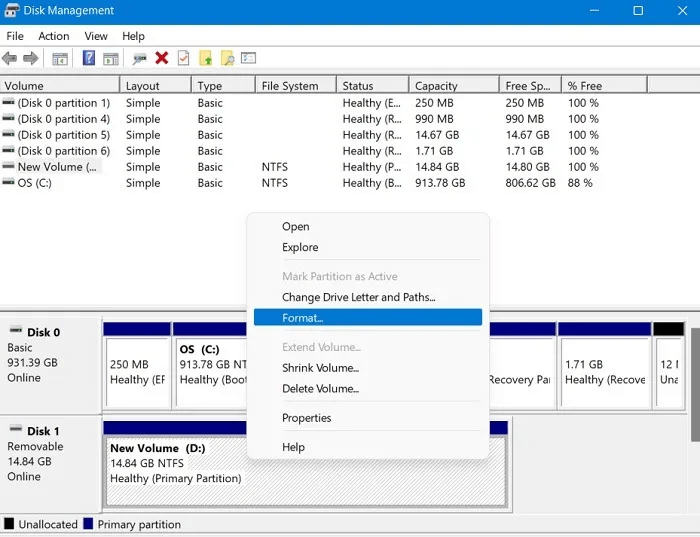
3. Enter a name for the partition in the Volume label field. As with the previous methods, choose the file system, allocation unit size, and whether you want to perform a quick format. Click "OK" To format a USB drive.
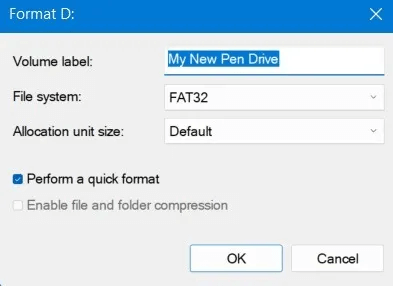
3. Format a USB drive from the command prompt
If you prefer the command line, you can format a USB drive using the diskpart command in PowerShell or the Command Prompt.
This tool is essentially the command line equivalent of the Disk Management application used in the previous section.
- Click on Win + X And choose Windows PowerShell (Admin). In the latest versions of Windows 10/11, the default option is Windows Terminal (Admin) , which combines PowerShell و Command Prompt In one window.
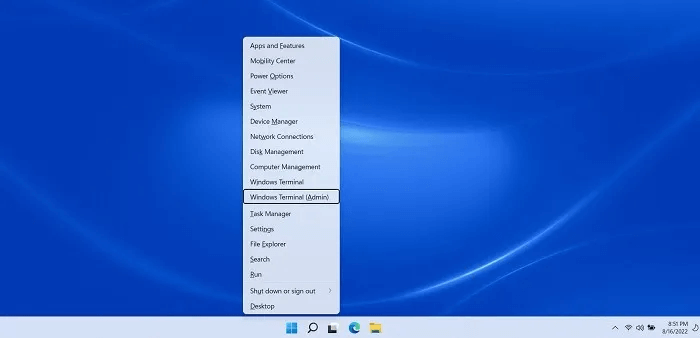
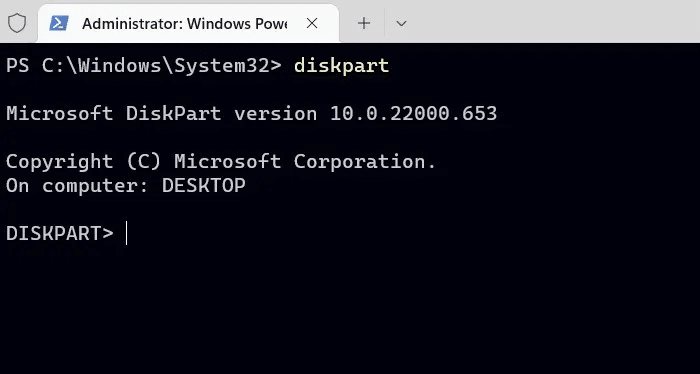
2. Write diskpart And press Enter.
3. Type the following command to view the active drives on your device:
list disk
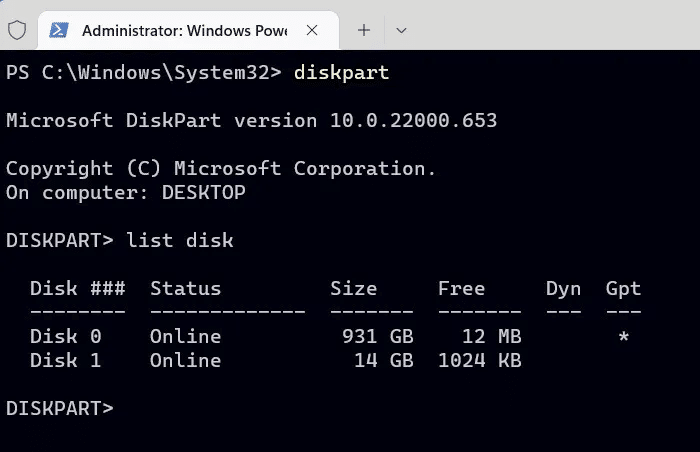
4. Use the command select To select your USB drive by quoting its disk number from the previous command. Replace disk 1 Below is the one that matches your USB drive.
select disk 1
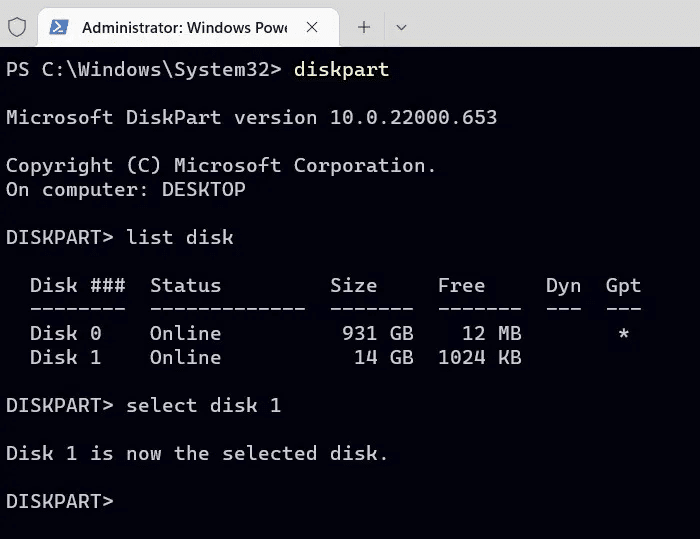
5. Remove the contents of the USB drive to start fresh with:
clean
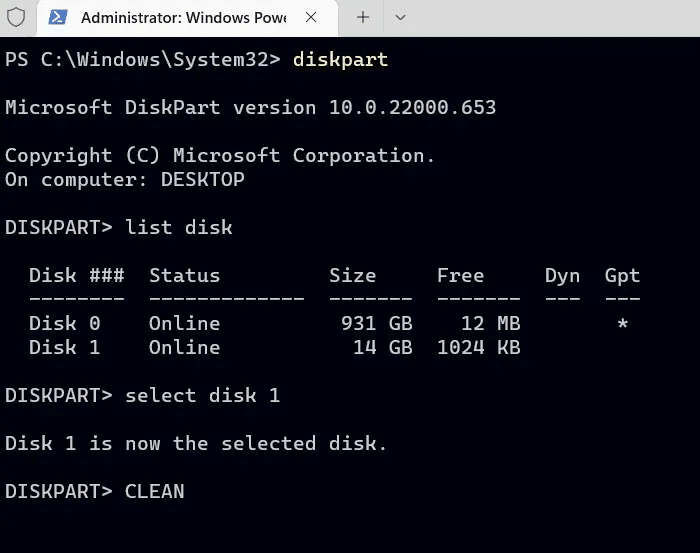
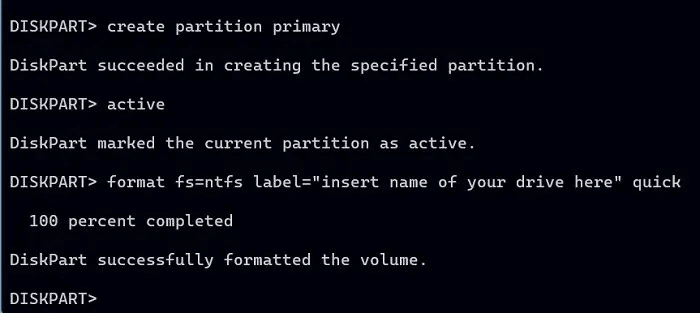
6. Create and activate a partition using the following commands:
create partition primary active
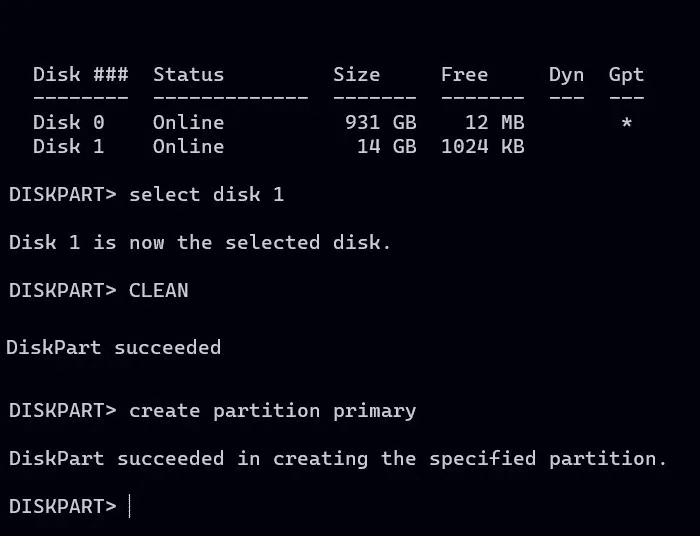
7. To perform a quick format on the partition you just created using the NTFS file system and label MTE Use:
format fs=ntfs label="MTE" quick
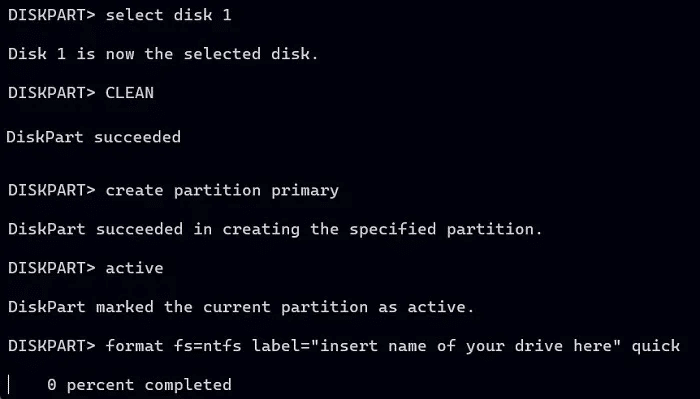
8. Wait a few seconds for the USB drive to complete formatting. The status will appear as “DiskPart has successfully formatted the volume.”
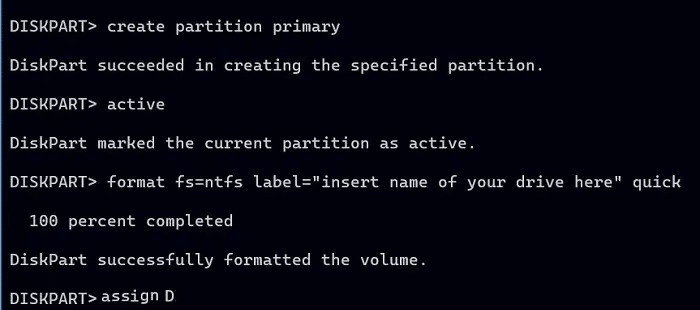
9. Assign a letter to your drive using:
assign "Drive Letter"
replace Drive Letter With the letter you want to use.
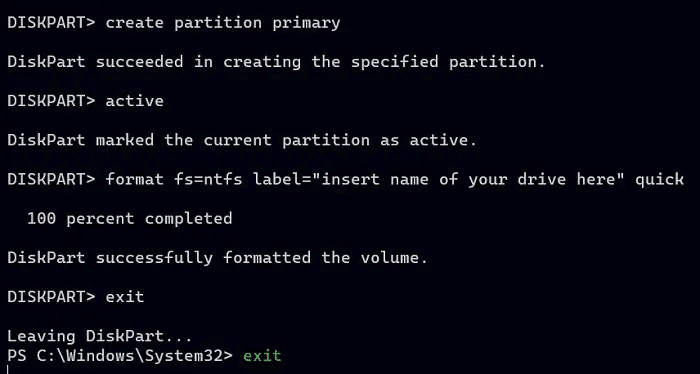
10. Once formatting is complete, exit DiskPart and the command prompt window using a simple exit command. This will prevent any unexpected errors on your USB drive.
4. Format a USB drive using modern PowerShell tools
A modern command-line warrior will likely prefer specialized PowerShell commands for the job at hand.
- turn on PowerShell With administrative privileges, type the following to view a list of connected storage devices:
Get Disk
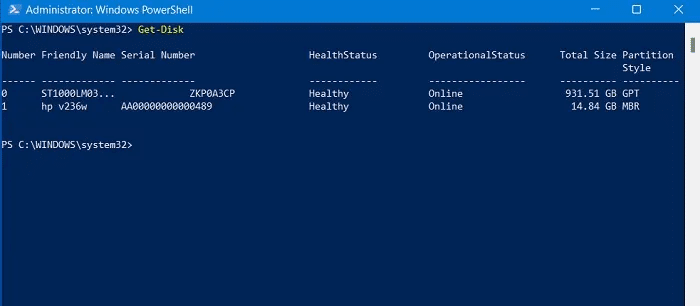
2. In our case, the USB flash drive is displayed as drive number 1. Replace this number with the number that matches your drive in the following command to erase its entire contents:
Clear-Disk -Number 1 -RemoveData
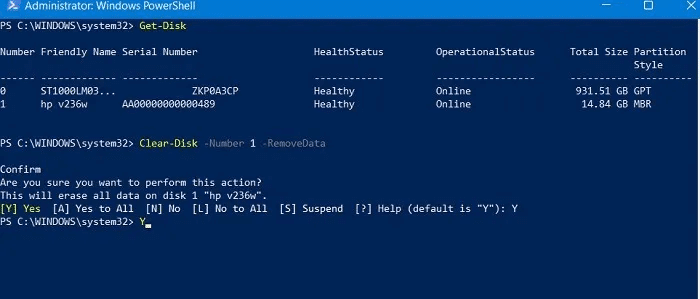
3. Answer yes (by typing “Y” and pressing Enter) when asked if you are sure you want to perform this action.
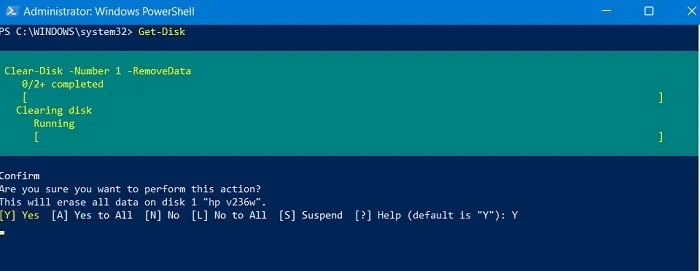
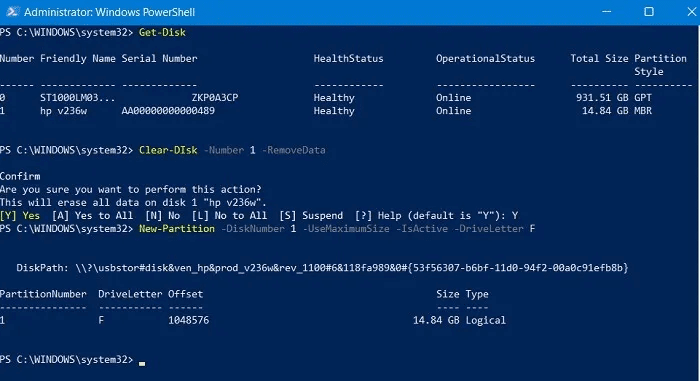
4. Proceed by creating a new partition, setting it as active, and assigning a drive letter to it:
New-Partition -DiskNumber 1 -UseMaximumSize -IsActive -DriveLetter F
Format your partition with the file system and label you choose using the Format-Volume command. A disk formatted to the letter F using the FAT32 file system and labeled FlashDrive might look like this: A disk formatted to the letter F using the FAT32 file system and labeled FlashDrive might look like this:
Format-Volume -DriveLetter F -FileSystem FAT32 -NewFileSystemLabel FlashDrive
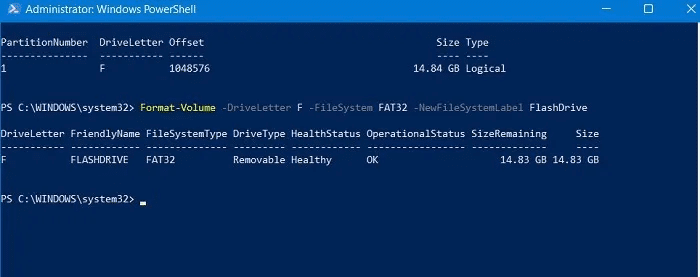
6. The formatted USB drive is ready to use and free of any errors or corruption that would have prevented you from using the drive.
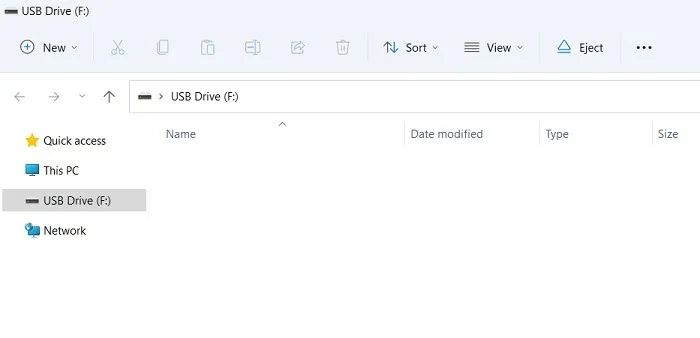
5. Format the USB drive the traditional way
As with many other things in life, when formatting a USB drive, sometimes the old-fashioned way is the easiest and best. This method has been around since early Windows operating systems and still works like a charm.
Note that this only works on existing partitions by erasing their contents, allowing you to choose a different file system and set a volume label. As with all other methods, you can also choose a full or quick format.
- To erase everything on the FAT32 formatted partition F, set the label FlashDrive Do a quick setup. The command will be:
format f: /FS:FAT32 /V:FlashDrive /Q
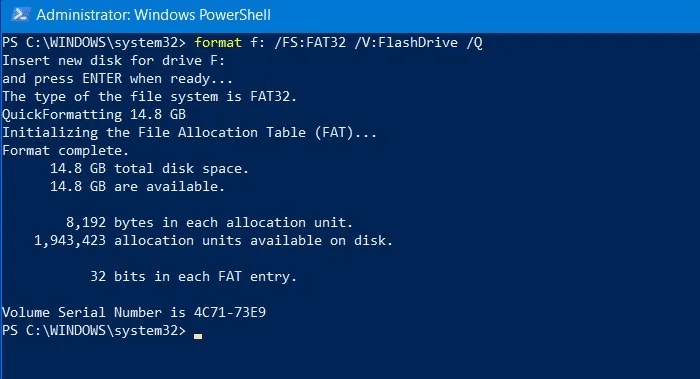
2. You will be asked to insert a new disk and press Enter. ignore part Insert disc , And press Enter , and enjoy your newly formatted drive.
6. Format USB drive with external software
While native Windows methods are sufficient for any hard drive/USB drive formatting issues, it may be worth considering third-party software if you're looking for additional functionality. We recommend EaseUS Partition Master for this reason. It's particularly useful in the following situations:
- When your USB turns into RAW format, it is completely out of bounds for any formatting procedure using Windows methods.
- USB displays an error message that reads: The disk is write-protected.
- Other errors accumulate on the pen drive because Windows is unable to complete the formatting process.
While EaseUS Partition Master is a shareware program, its USB formatting option is free to use. Follow these instructions to use it for formatting:
- Download and install EASEUS Partition MasterThis software has been tested to be free of malware.
2. Once the installation is complete, go to the main dashboard and select "start now" From a list Department Manager.
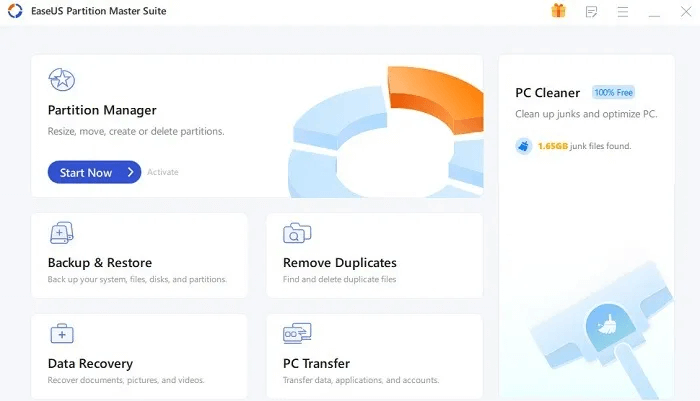
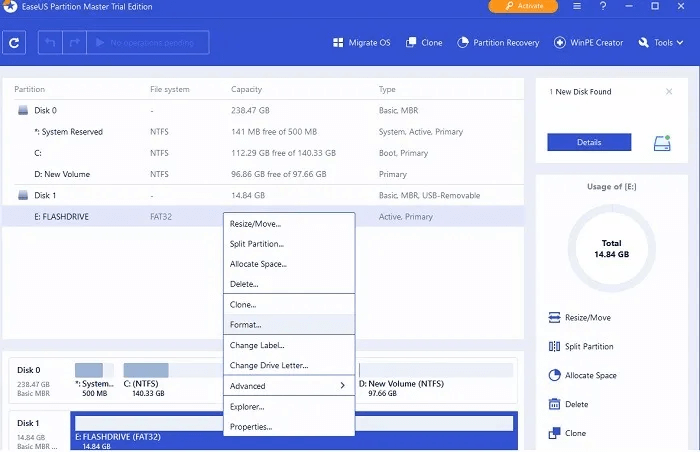
3. This tool has an appearance similar to the Windows Disk Management tool. Right-click on USB drive space and select "Preparation" From the given options.
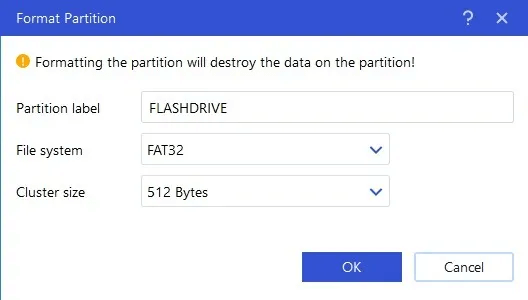
4. Enter a name for the formatted flash drive under "Department name". Choose file system And keep "block size" Default.
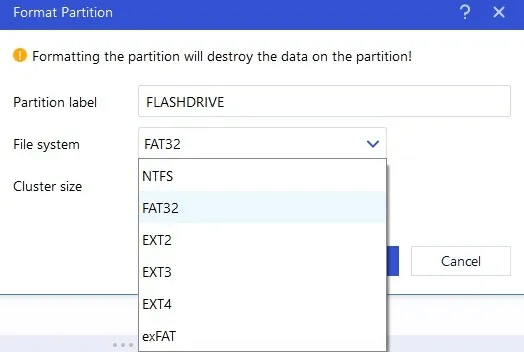
5. Unlike native Windows methods, this software allows you to create several other types of file systems on a USB drive, including EXT2, EXT3, and EXT4.
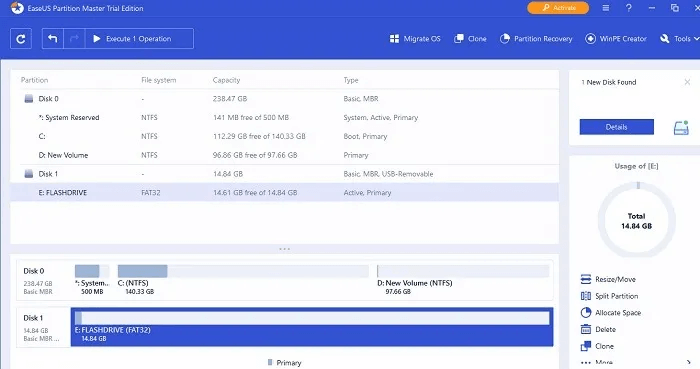
6. Click "OK" To complete the configuration.
Frequently Asked Questions
Q1. Will formatting a USB drive damage it?
answer. While replacing a flash drive will shorten its lifespan if done frequently, these drives are designed to withstand at least 10000 write cycles or more. Therefore, accidental formatting cannot damage them.
Q2. What format does a USB drive need to be in to hold music?
answer. If you intend to use a USB drive to manage your playlist, you'll need to store the playlist in a format the receiver understands. Generally, FAT32 and NTFS can be used on USB drives with any external playback devices.
Q3. How can I fix an unformatted USB drive?
answer. If your USB drive won't format itself, there could be many reasons, from bad sectors to a volume not showing up. To fix this, go to Disk Management and right-click to delete the volume. Then, reallocate the volume using the methods above or EaseUS Partition Master. For more ways to deal with unformatted and unusable USB drives, check out this helpful guide.


