Photo editing software lets you play with various photo effects on your computer. But not everyone needs complex photo editing software. For something as simple as creating Transparency effect for imagesYou can even use MS PowerPoint. Yes! We'll show you how to make your presentations fun.

We'll show you how to use PowerPoint to edit images and add a transparency effect without leaving them untouched. The transparency effect allows you to combine two images. This ensures that the foreground is always visible, clear, and sharp, including the background image.
With this effect, you can add trees to a field image, or use your imagination to create movie posters with a transparent effect. The possibilities are endless. In this guide, we'll show you how to create a transparency effect for images in MS PowerPoint. If this has piqued your interest, let's check out the guide itself.
Create a transparent effect in PowerPoint
To begin, you'll need to download two different images to your computer. One will be the background image, and the other will be the foreground image. It's this foreground image that we'll apply the transparency effect to using MS PowerPoint.
Step 1: Open MS PowerPoint and use a blank template to start the actions.
Step 2: From the top menu bar, click the Insert tab and select the Picture option to add an image to the template.

Step 3: After adding the image, you need to remove the background elements. This is done simply to keep the main shape of the image visible and remove unwanted parts of the image.
Again, from the top menu bar, click on the Format tab and choose the Remove Background option.

Step 4: After clicking the Remove Background option, you'll see that the added image turns pink. Now, MS PowerPoint will automatically remove the unwanted portion of the image. However, to be more precise, you can take advantage of the options to select the areas to keep and mark the areas to be removed under the BACKGROUND REMOVAL tab.
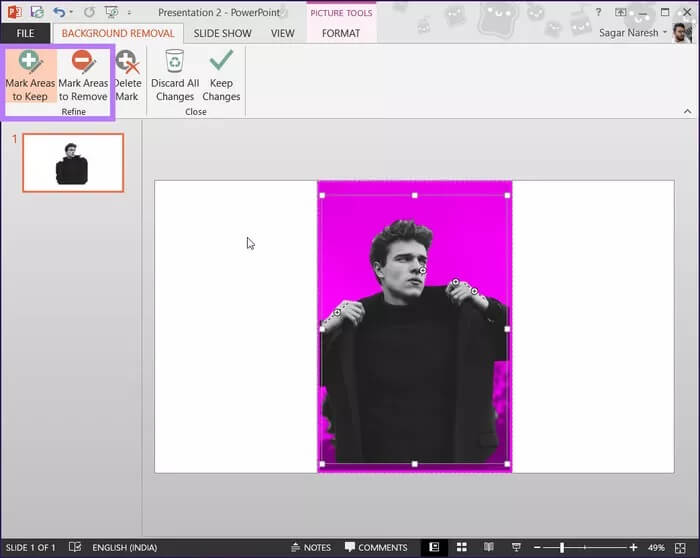
Step 5: Once you're satisfied with the result, click the “Keep Changes” button under the “Remove Background” tab.
Step 6: Now it's time to add the second image. But there's a trick. To adjust the transparency of the second image, you first need to add a shape.
To do this, from the top menu bar, select Insert and then Shapes.

Step 7: You can add any shape you want. In our case, we'll use a rectangle. Once you've selected the shape, draw it over the template. It will look like the image below.
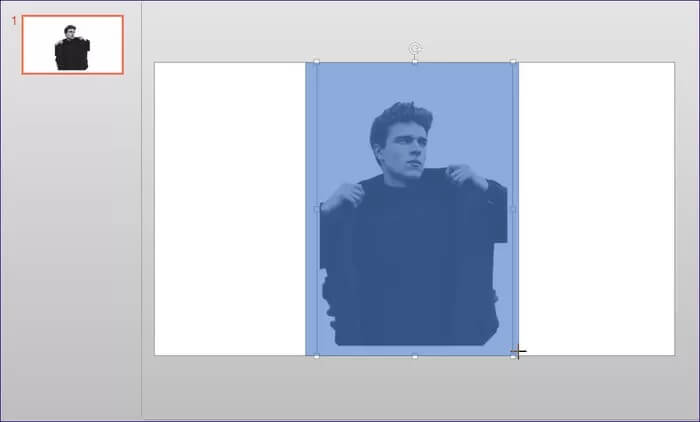
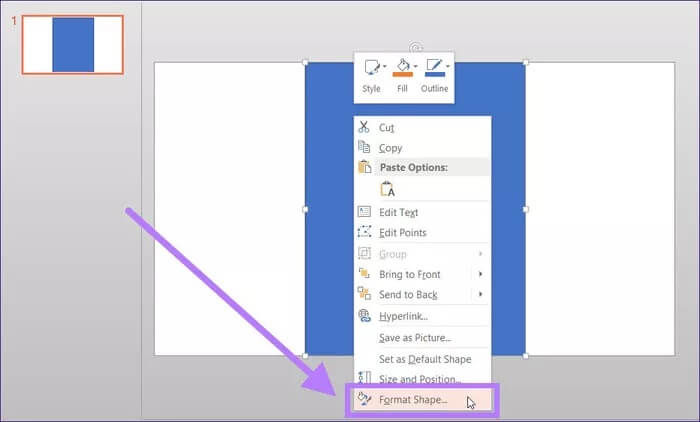
Step 8: Right-click on the added shape and select Format Shape from the list of options that appears.
Step 9: You'll see a new sidebar, "Format Shape," appear on the right side. Select the Picture or Texture fill option located within the Fill option under Shape Options.
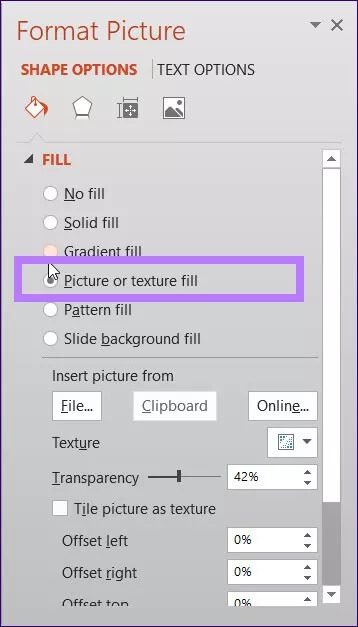
Step 10: You need to adjust the image transparency to your liking. You can also adjust the size of the foreground or background image to make it look more attractive.
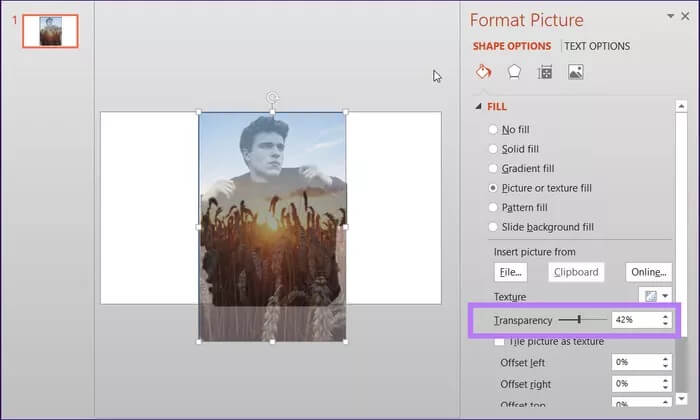
Step 11: Finally, click the “Apply to All” button at the bottom.
Create different artistic effects
That's it! You've just created a transparent image effect using MS PowerPoint. You can also modify the image by duplicating it and applying different effects to it. To create a more dramatic transparent effect, you can bring the background image to the foreground. For a more distinct background image, you can select the Bring Image Backward option.
You can do this by clicking on the Bring Forward or Bring Backward option from the Format option.

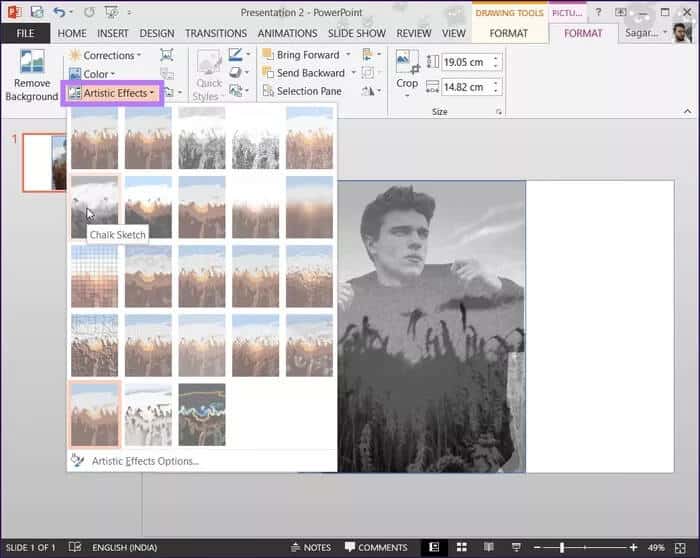
You can also add various artistic effects to your image by clicking on the Artistic Effects option within the Format option. A set of effects will appear. You can click on them to experiment and check out the real-time preview of the effects.
Transparency in presentations
With the steps above, you can easily create a transparency effect for images in PowerPoint. Although PowerPoint isn't ideally an image editing program, it's really interesting to know that you can create artistic effects using the tool. There are plenty of image effects you can experiment with to ensure your presentations look stunning and engaging.


