The Group Policy Editor can be used to: Windows To manage and modify group policy settings. However, the Management Console is not available for Windows 11 Home Edition , unlike previous versions. If you are considering upgrading to Windows pro Or Enterprise Just to access the Group Policy Editor, you don't have to do that. Today, we'll let you in on our little secret! Read below to learn how to enable the Group Policy Editor in Windows 11 Home Edition.
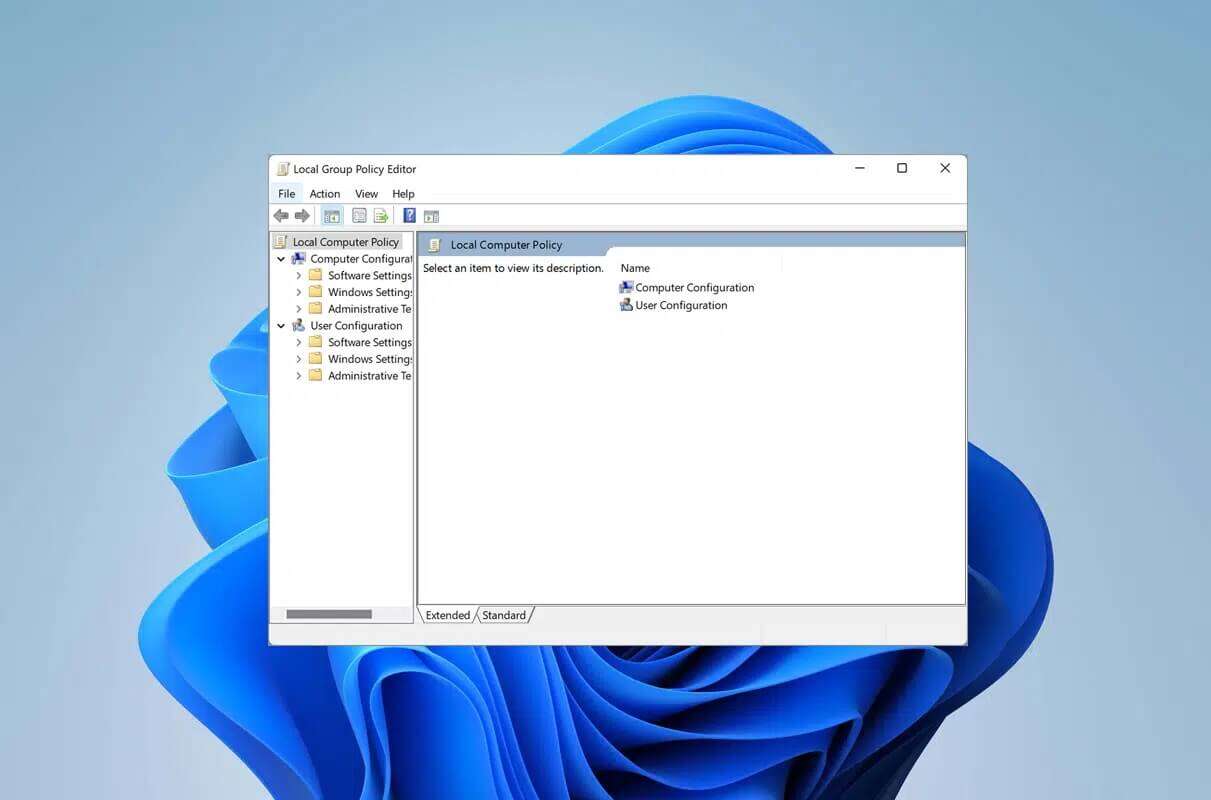
How to Enable Group Policy Editor on Windows 11 Home Edition
in Windows , can be used Group Policy Editor To manage and modify Group Policy settings. However, if you haven't heard of it, you probably don't need it. It's extremely useful, especially for network administrators.
- Users can use this software to configure access and restrictions to specific programs, applications, or websites.
- It can be used to form “Group approachOn both local and networked computers.
Verify that Group Policy Editor is installed.
Here are the steps to check whether your computer already has Group Policy Editor installed or not.
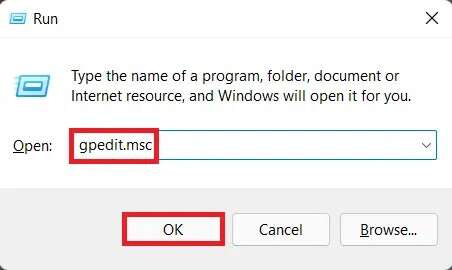
1. Press the keys Windows + R Together to open the dialog box "employment".
2. Write gpedit.msc And click "OK" To start the Group Policy Editor.
3. Pointing Next error If it is displayed, your system does not have Group Policy Editor installed.

How to enable Group Policy Editor
Here's how to enable Group Policy Editor on Windows 11 Home Edition:
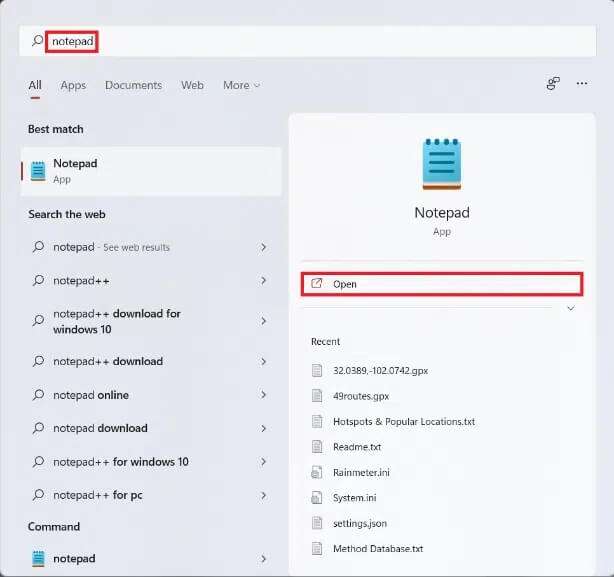
1. Click on the icon Search And type Notepad.
2. Then click "to open" , as shown.
3. Write The following script.
@echo off >nul 2>&1 "%SYSTEMROOT%\system32\cacls.exe" "%SYSTEMROOT%\system32\config\system" REM --> If error flag set, we do not have admin. if '%errorlevel%' NEQ '0' ( echo Requesting administrative privileges... goto UACPrompt ) else ( goto gotAdmin ) :UACPrompt echo Set UAC = CreateObject^("Shell.Application"^) > "%temp%\getadmin.vbs" echo UAC.ShellExecute "%~s0", "", "", "runas", 1 >> "%temp%\getadmin.vbs" "%temp%\getadmin.vbs" exit /B :gotAdmin if exist "%temp%\getadmin.vbs" ( del "%temp%\getadmin.vbs" ) pushd "%CD%" CD /D "%~dp0" pushd "%~dp0" dir /b %SystemRoot%\servicing\Packages\Microsoft-Windows-GroupPolicy-ClientExtensions-Package~3*.mum >List.txt dir /b %SystemRoot%\servicing\Packages\Microsoft-Windows-GroupPolicy-ClientTools-Package~3*.mum >>List.txt for /f %%i in ('findstr /i . List.txt 2^>nul') do dism /online /norestart /add-package:"%SystemRoot%\servicing\Packages\%%i" pause
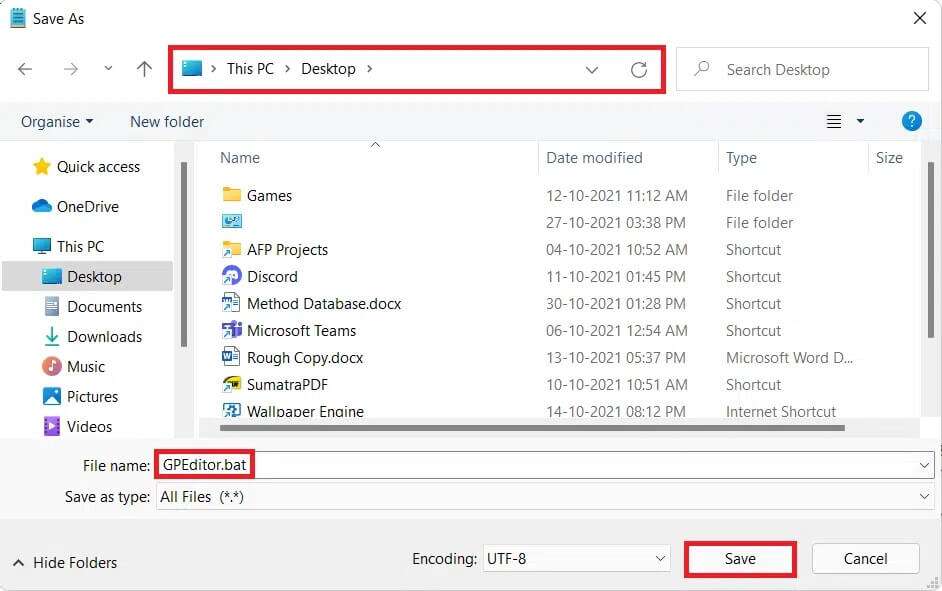
4. Next, tap File > Save From the menu bar at the top left corner of the screen.
5. Switch Storage location to the roof the desk In the address bar as shown.
6. In the File name: text field, type GPEditor Installer.bat Click Save as highlighted.
7. Now, close all windows. Active.
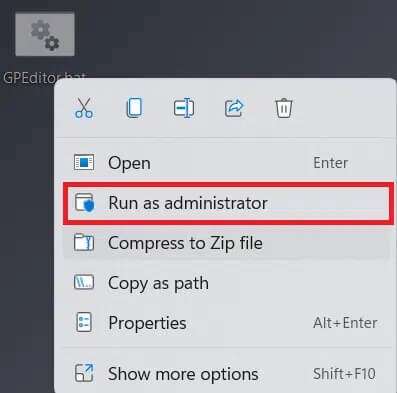
8. On the desktop, right-click GPEditor Installer.bat Select Run as administrator, as shown below.
9. Click "Yeah" In the User Account Control prompt.
10. Let the file run in a window. Command PromptOnce the process is complete, restart your computer. Windows 11.
Now, try to check the Group Policy Editor by following the instructions given at the beginning of this article.
We hope you found this article helpful on how to enable the Group Policy Editor. Please leave your suggestions and questions in the comments section below. Let us know what topics you'd like us to explore next.


