As a writer, I tend to be more productive. I often draw inspiration from other bloggers, YouTubers, and gamers using multi-monitor setups. So I set up a new desktop to accompany my old laptop. Since I was on a budget, I decided to install the Mouse Without Borders. To my surprise, it didn't work.

Mouse Without Borders is a free application available in Microsoft Garage that often offers trial apps and tools. This application allows you to use a single mouse and keyboard across multiple monitors and different systems. However, Mouse Without Borders was not performing as advertised.
Here are some possible solutions, including the one that ultimately worked for me. Mouse Without Borders works from Windows 7 to 10. It works seamlessly even if you have different versions of Windows installed on separate computers.
1. Check your release version.
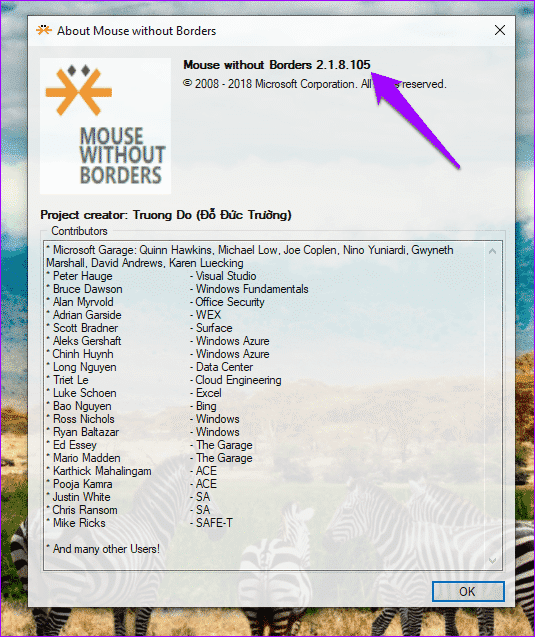
Are you using the same version of Mouse Without Borders on all your computers? To check, right-click the Mouse Without Borders icon in the system tray and select About.
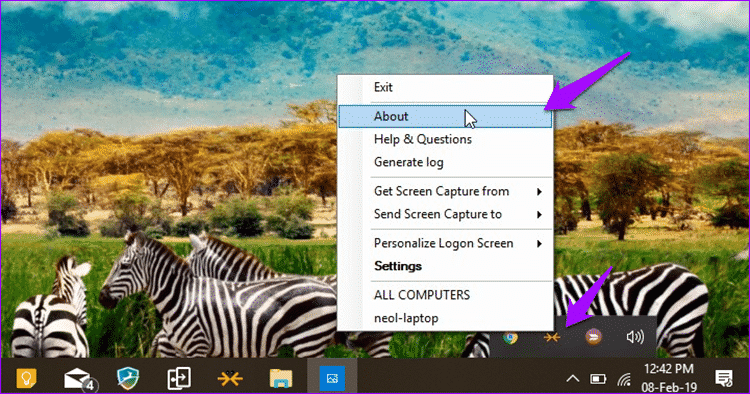
Do this on all machines and note the version number. If they're different, download the latest version using the link above and start the setup process again.
2. Same WI-FI network
All of your computers must be connected to the same Wi-Fi network for Mouse Without Borders to work. To check, click the Wi-Fi icon in the taskbar and check the name.
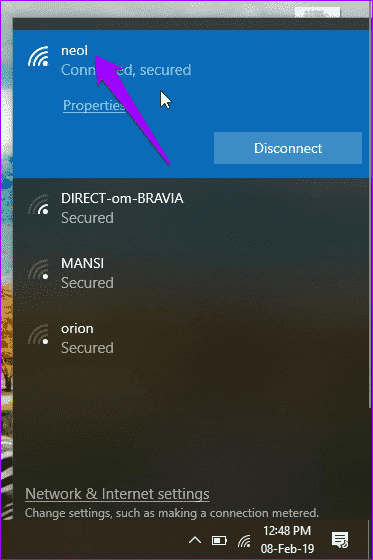


If so, move on to the next tip, if not, make sure you are connected to the same network as the other computer.
3. Compatibility mode
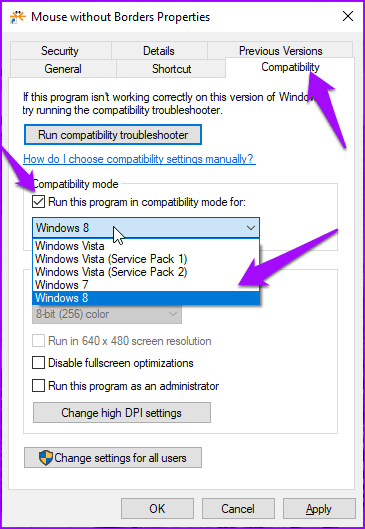
It's not necessary to install the same version of Windows on all your computers. You can have Windows 10 on one and Windows 7 on the other. In my case, Mouse Without Borders wasn't working even though Windows 10 was installed on both. Some users have found that changing the compatibility mode helped. To do this, right-click the Mouse Without Borders shortcut on your desktop and select Properties.
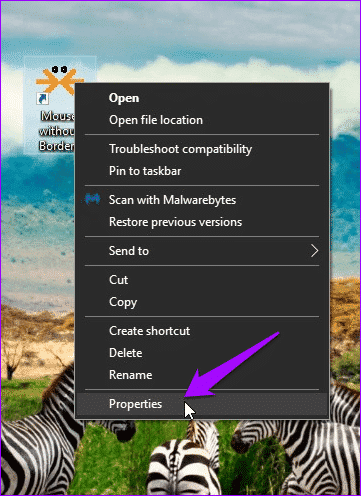
Under the Compatibility tab, use the drop-down menu to select a different version of Windows than the one you're running on both computers to see if this works. Click Apply and then OK to save the changes.
Select the same version of Windows on other computers as well and see if this works.
4. Run as administrator
Mouse Without Borders requires administrator rights to navigate between computers and access various settings. Perhaps it lacks the necessary permissions? Go back to "Properties" as you did in the previous section and open the "Compatibility" tab.
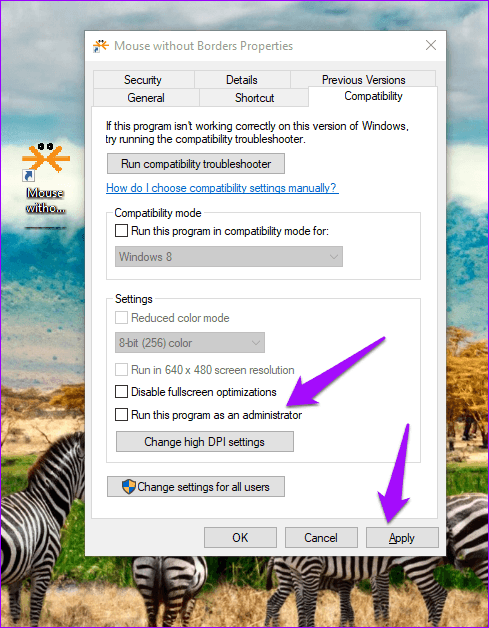
Select the Run this program as an administrator option and click Apply and OK to save the settings. Close Mouse Without Borders on all computers and restart it to check again.
5. Firewall settings
Firewalls are like a super-powered friend—they worry you too much and don't give you enough space. Some of our users reported that manually creating a Mouse Without Borders rule helped them. So follow these steps.
Step 1: Press the Windows key on your keyboard and search for “Administrative Tools” under “Control Panel.”
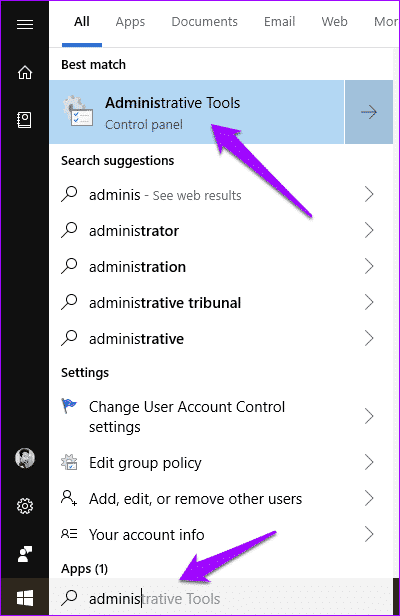
Step 2: Select Windows Defender Firewall with Advanced Security from the list.

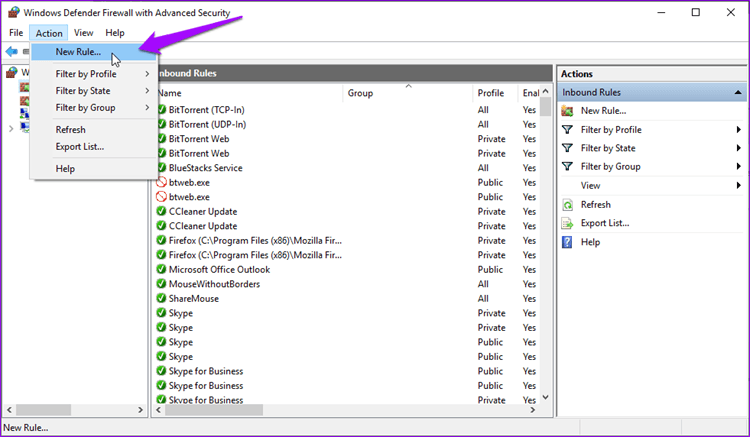
Step 3: Select the rules from the left pane.

Step 4: Under the Actions menu, select New Rule.
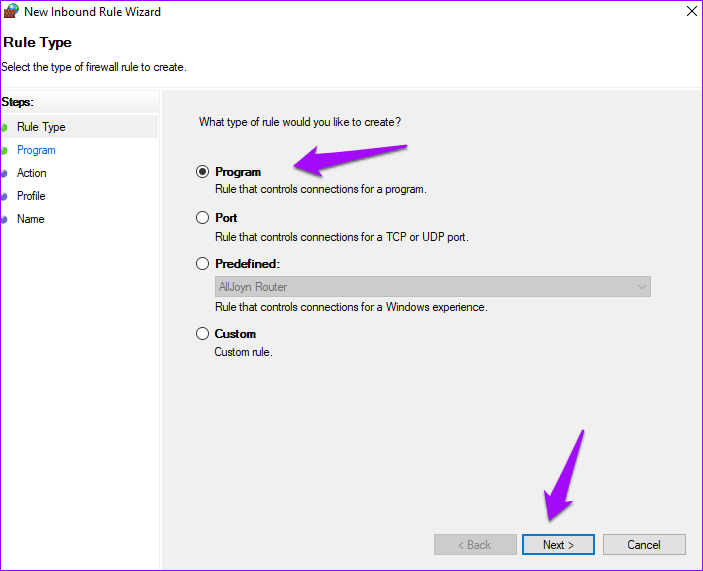
Step 5: Click “Program” and then click “Next”.
Step 6: Now, browse to the Mouse Without Borders installation folder and select the .exe file that launches the application. It's usually located on the C: drive under the Microsoft Garage folder.

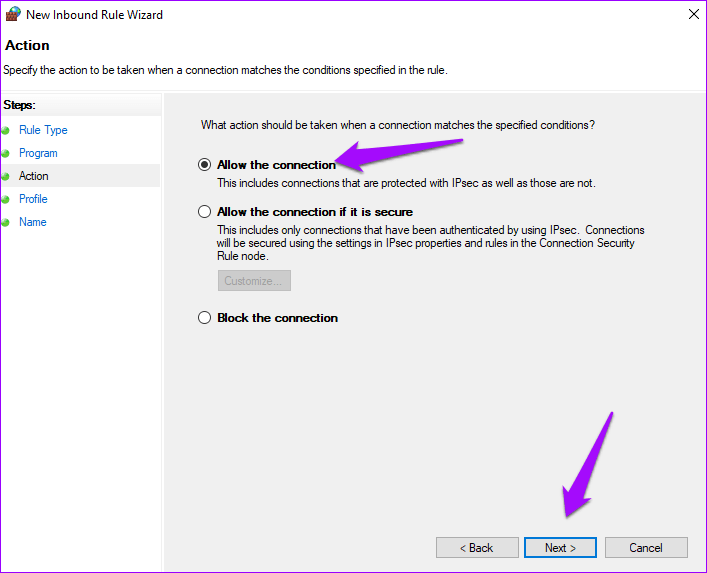
Step 7: Select Allow connection on the next screen and click Next.
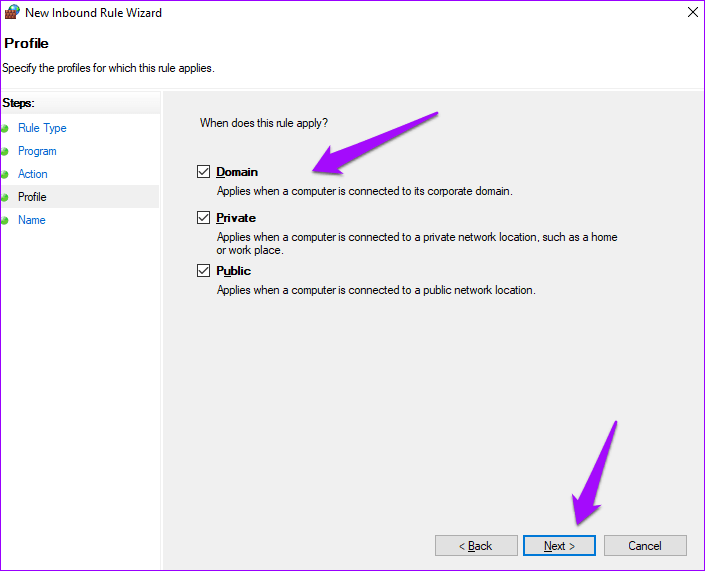
Step 8: Select all three options on the next screen when asked, "When does this rule apply?" and click Next.
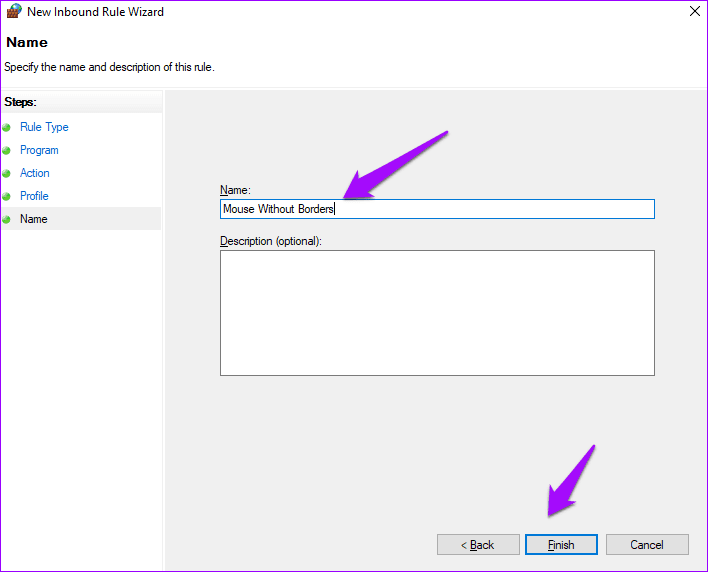
Step 9: Enter a name for your base. I suggest "Borderless Mouse" so you can find it later. Click "Finish."
Repeat the same steps on all computers you want to use Mouse Without Borders on and try again. Close the app and restart it to check if it works across computers.
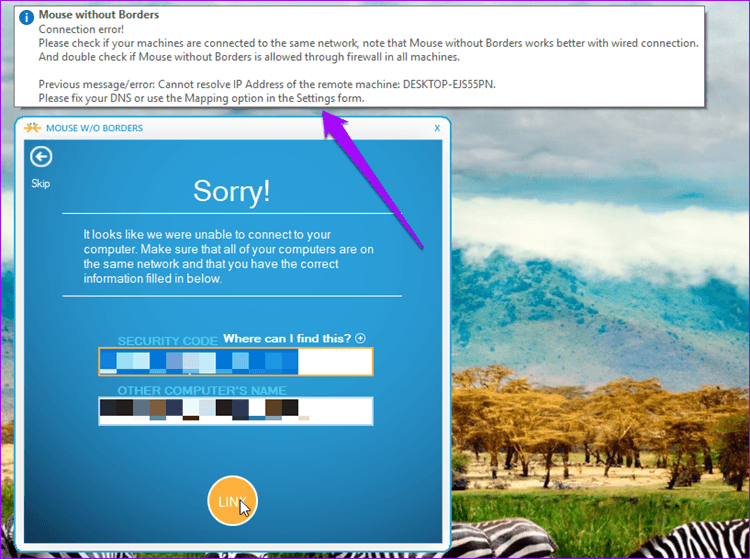
6. Enter the IP address manually.
Mouse Without Borders uses the Wi-Fi IP address to connect to other computers on the same network. Sometimes, the app can't detect the correct IP settings, which leads to this error.
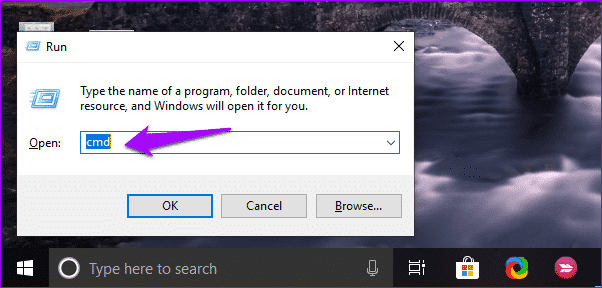
Launch the Run prompt by pressing Windows key + R on your keyboard and type cmd to open the command prompt.
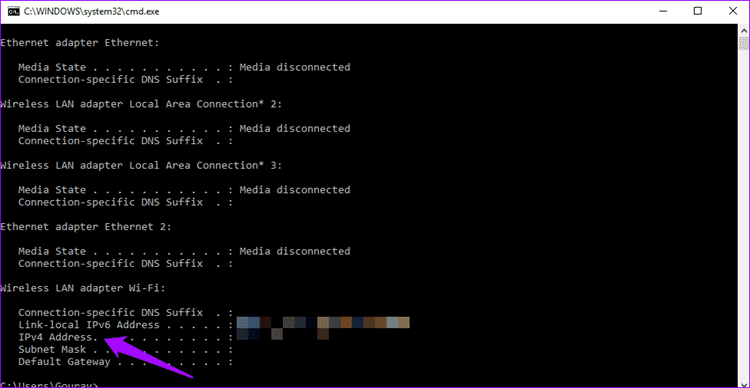
Do not use a browser to find your IP address. At a command prompt, type the command below and then press Enter.
ipconfig
Note the IPv4 address from the results. Repeat the steps for each computer.
Open the Mouse Without Borders application and click the IP Mappings tab. Enter each computer's name followed by its IP address on a new line.
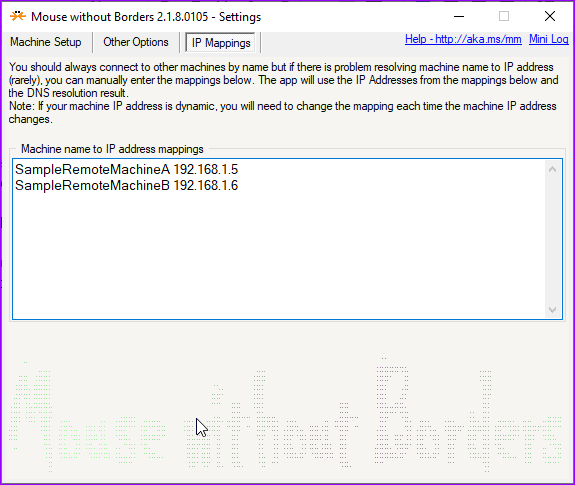
Note that you will need to enter the IPv4 address and computer name of the remote or slave computer on the master or host computer. Return to the Device Setup tab and click Apply to start the connection process again. If successful, you should see "Connected" written below the remote computer name.
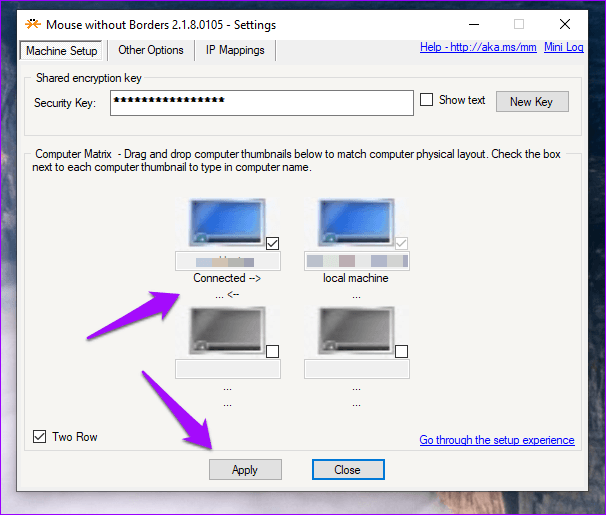
If Mouse Without Borders stops working again in the future, click the Apply button again to start a new connection. This is a known issue with the app.
7. Synergy
If all else fails and you find yourself pulling your hair out in frustration, you might want to consider a third-party tool like Synergy. It will cost you $29 for the basic version. Synergy does what Mouse Without Borders does, but it's also available for macOS and Linux. This gives you more freedom, especially if you're a programmer or other professional who works with different operating systems on a daily basis.

Like Mouse Without Borders, you can move files or use the clipboard to copy text and URLs. If you purchase the Pro version, it costs $39 and allows you to use an SSL connection.
Multi-screen magic
Mouse Without Borders is an excellent tool and usually works right out of the box with minimal setup. Just enter your password, and you're good to go. If you're having trouble connecting, try the solutions above to fix the Mouse Without Borders not connecting issue.


