The low disk space warning appears frequently in Windows 11, annoying many users and affecting their daily work experience. This article explains how to easily disable this warning while keeping your system stable and secure.
Quick tips
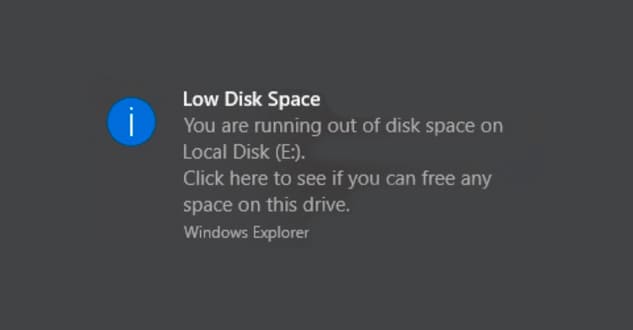
- The “Low Disk Space” warning is helpful, but it can become annoying after a while.
- To remove it, you can use the registry editor.
- For partitioned disks, you can remove their visibility via DiskPart.
- If you're looking for some extra space, you can start with temporary Windows files in Disk Cleanup.
Are you experiencing a problem with one of your drives running out of disk space? If so, you're probably aware of this thanks to the frequent Windows 11 warnings, but they can be a bit annoying after the fourth or fifth time. However, disabling these alerts is very simple. In this article, we'll show you how.
How to Disable Low Disk Space Warning on Windows 11
There are several ways to get rid of the "Low Disk Space" warning on your device. We've outlined the steps for each method below. Let's get started:
Disable via system registry
The system registry contains many important Windows settings, and changing anything without knowing the proper procedures can have serious consequences. However, this is also one of the best ways to disable annoying features. Don't worry, we'll walk you through the process:
Step 1. Open the Run window (Win + R) and type “regedit” before pressing (Ctrl + Shift + Enter) to run the process as administrator.
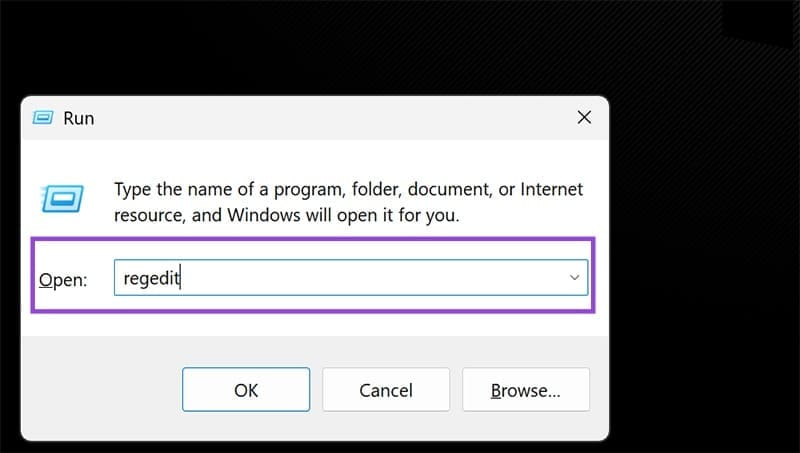
Step 2. In the Registry Editor window, navigate to the following path: “HKEY_CURRENT_USER\Software\Microsoft\Windows\CurrentVersion\Policies”. You can also copy and paste this path into the path bar.
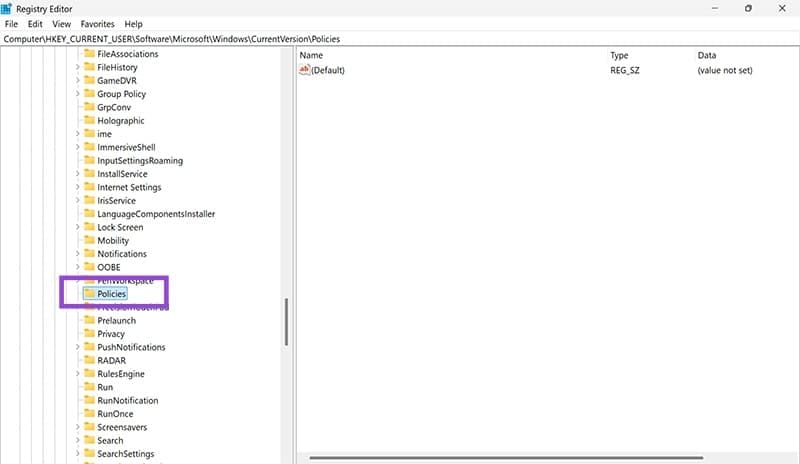

To step 3Right-click on the folder. “politics” In the sidebar, select “New key from the context menu.
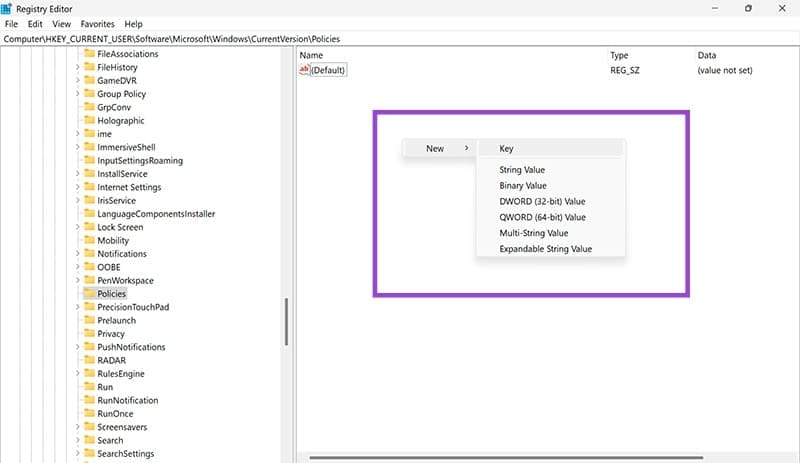
Step 4. Name the new key "Explorer" and press "Enter".
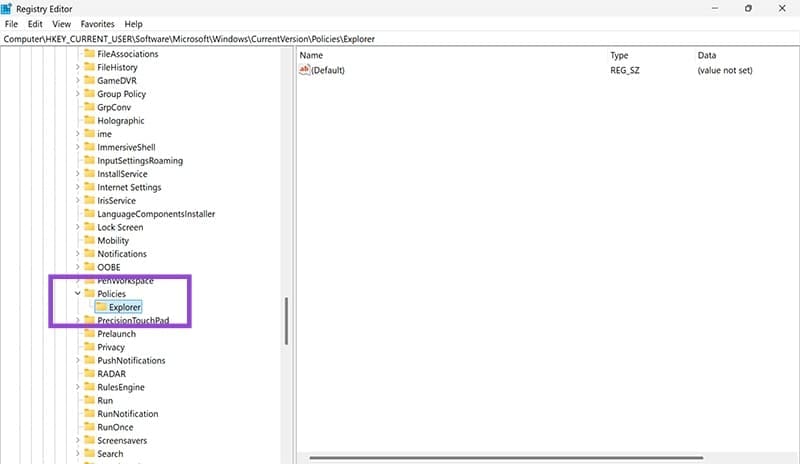
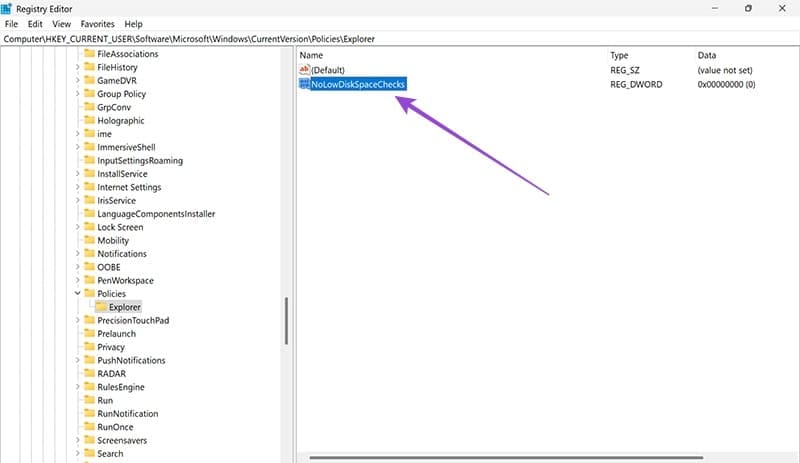
Step 5. Right-click the new Explorer key in the sidebar and choose New > DWORD (32-bit) Value from the context menu.
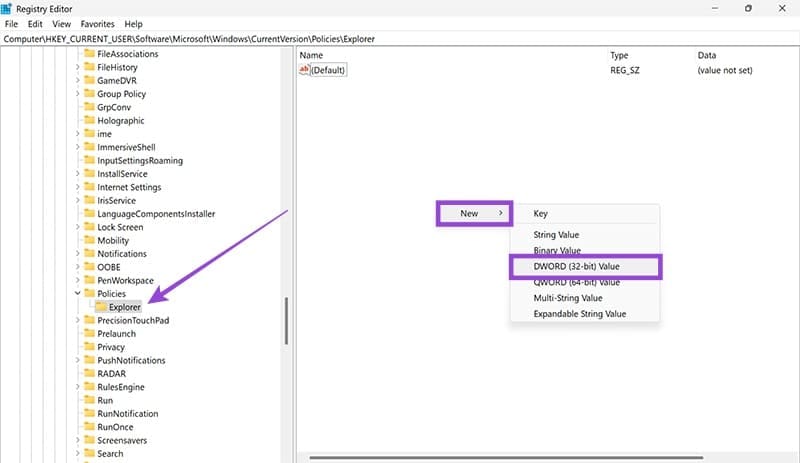
To step 6. In the main window, a new value will appear. Click it once and rename it. “NoLowDiskSpaceChecks” Then press “Enter”.
Step 7. Double-click the value and adjust. Value statements From “0” to “1”.
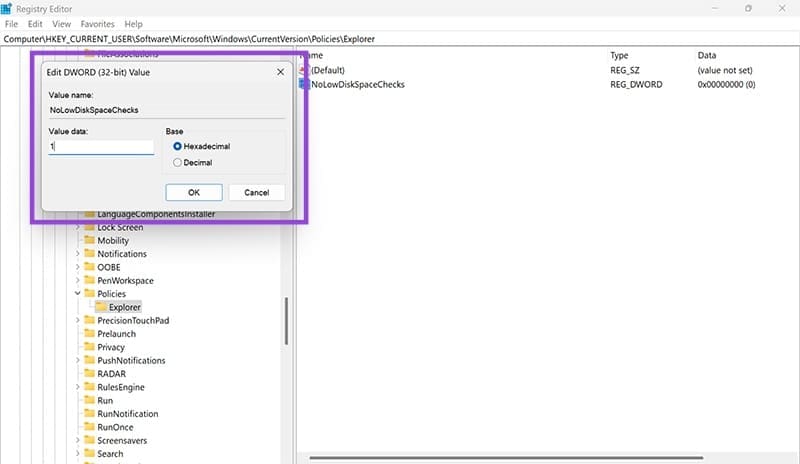
Step 8. Click on "OK".
To step 9. Restart your device, and you will not face any problem due to this message again.
Remove disk from list (partition only)
If you have a partitioned drive designated for storage or backup, and it suddenly becomes visible after a Windows update (like 24 hours ago), you can remove the "Low Disk Space" message and make the drive visible all at once. Here's how:
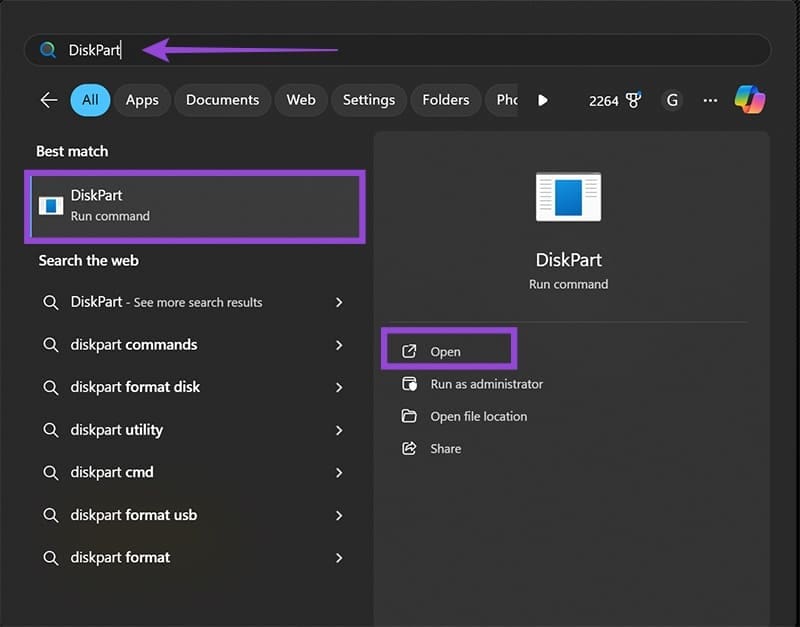
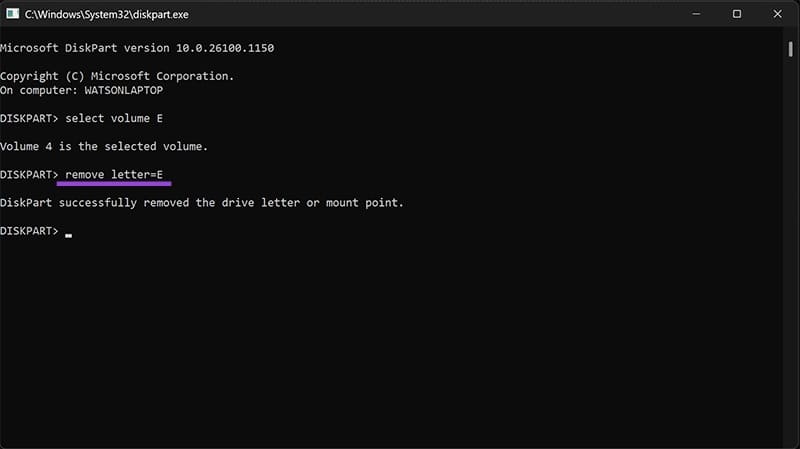
Step 1: Type DiskPart In the search bar and choose the option that appears.
Step 2. Select the visible section by typing “select volume [letter]” Then press Enter.
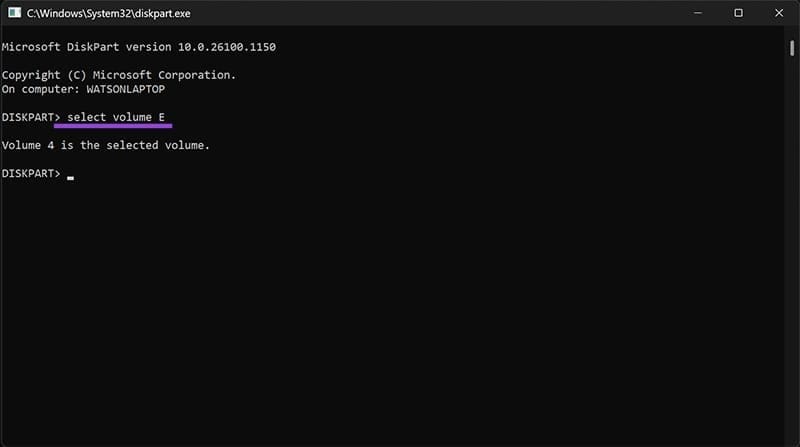
To step 3. Type “remove letter=[letter]” and press “Enter” to remove the drive letter and return it to hidden mode.
Step 4. Restart your computer and make sure the disk (and warning) is gone.
Clean your temporary files
Another way to ensure you don't see the "Low Disk Space" warning is to free up some space on your drive. It may seem obvious, but temporary files stored on your computer's main drive are often overlooked as a way to free up significant space. Here's how to run Disk Cleanup:
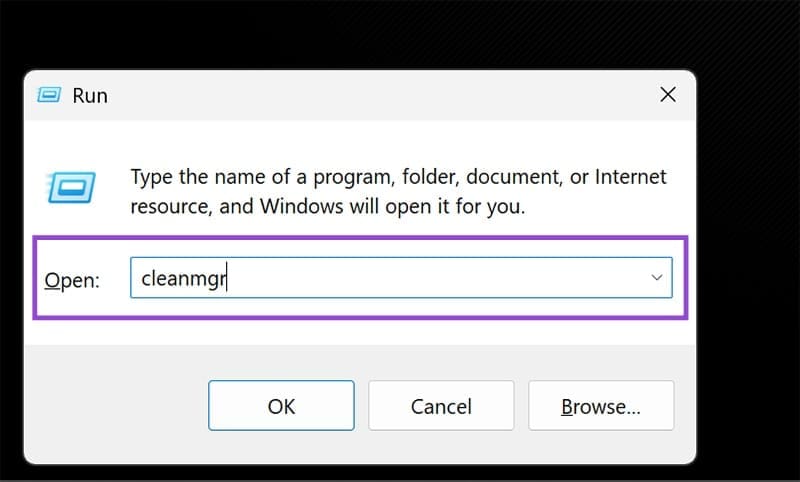
Step 1. Open the Run window. (Win + R) and type “cleanmgrBefore pressing Enter.
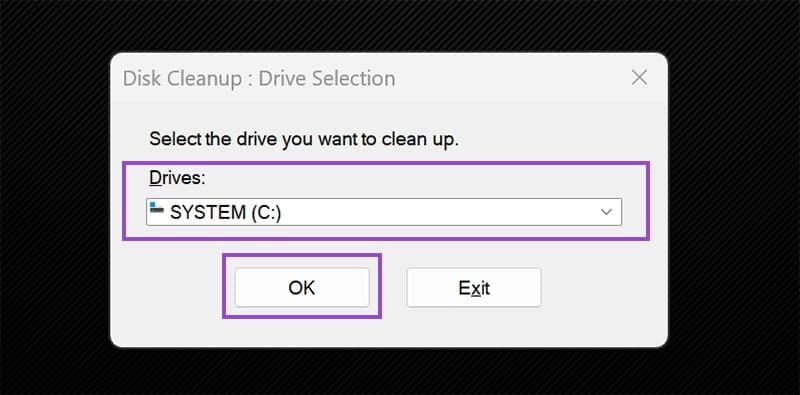
Step 2. Select the drive you want to clean from the drop-down list and press “OK".
To step 3. Give your computer a few minutes to scan for areas that need cleaning.
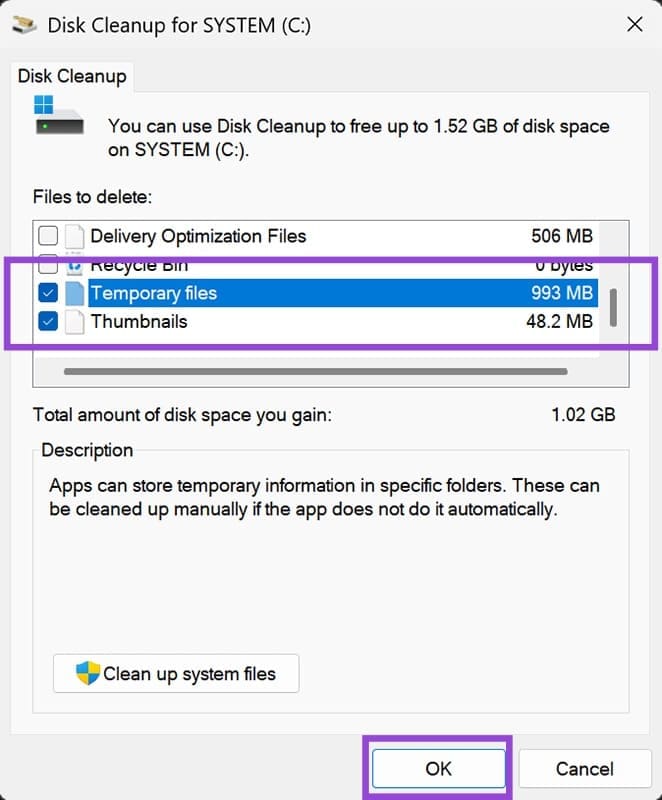
Step 4. The Disk Cleanup window will show you which files can be deleted. Check the box next to "Temporary files" and any other groups you don't need.
Step 5. Click on “OK”, The deletion process will begin.
You can easily disable the low disk space warning in Windows 11 and keep your system running without annoying interruptions. By following the steps outlined, you'll ensure a smoother and more comfortable user experience while maintaining system performance.