While we take the time to appreciate the devices that revolutionized the world, we often overlook the software features that helped us identify these devices. One such feature is Autofill, which can help you fill in one-time passwords (OTPs) and passwords without switching the screen. While some find this feature cool and useful, others find it a privacy concern. So, if you want to know how to enable and disable Autofill On Android, you've come to the right place.
Android's autofill feature saves you time by automatically filling out forms, passwords, and other information when you browse the web or use apps. This feature generally uses information you've stored on your device and granted access to. We'll walk you through how to turn the feature on or off and keep you up-to-date with all your Android autofill settings. Let's get started.
Note: Steps may vary depending on your Android device and Android version. You can still use the search option to find them.
How to turn on autofill on Android
If autofill is not enabled on your device, you can follow the steps below to turn on autofill on Android:
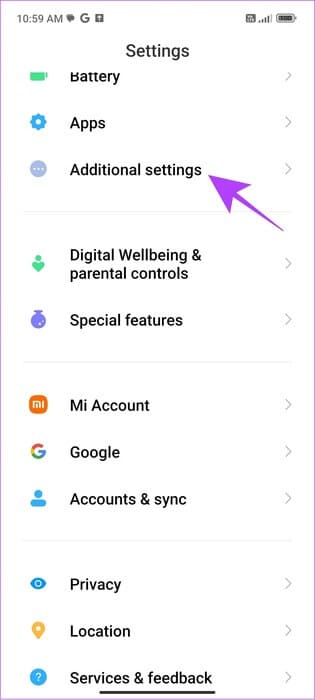
Step 1: Open Settings> Click on Additional settings.
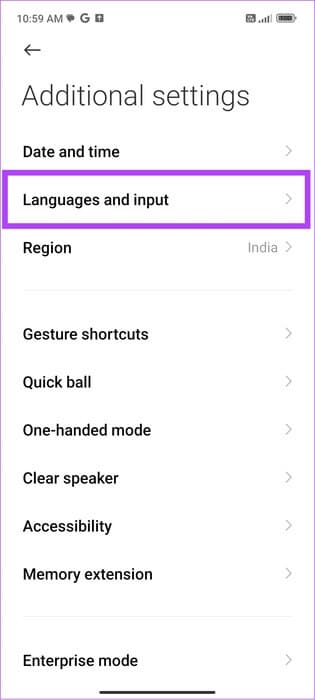
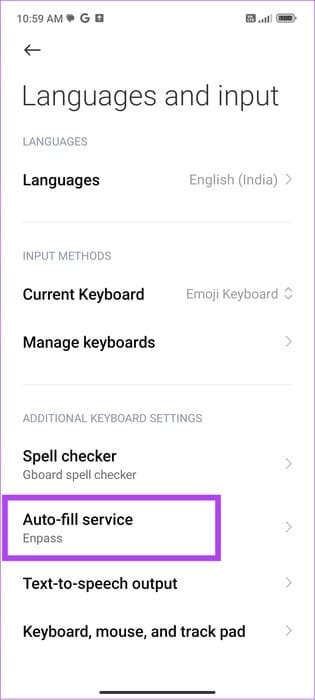
Step 2: Click on “Language & Input” > Select “Autofill Service.”
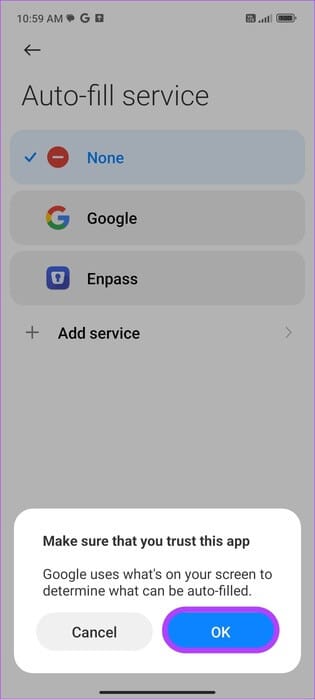
Step 3: Now choose Google.
Step 4: Click on OK For confirmation.

How to enable third-party autofill services
You can also use third-party autofill services on your Android smartphone in addition to Google Autofill. Here are the steps to follow:
Step 1: Open Settings> Click on Additional settings.

Step 2: Click on “Language and Input” > Choose Autofill Service


Step 3: Now, choose Add a serviceYou will be redirected to a page. Play Store With some suggestions.


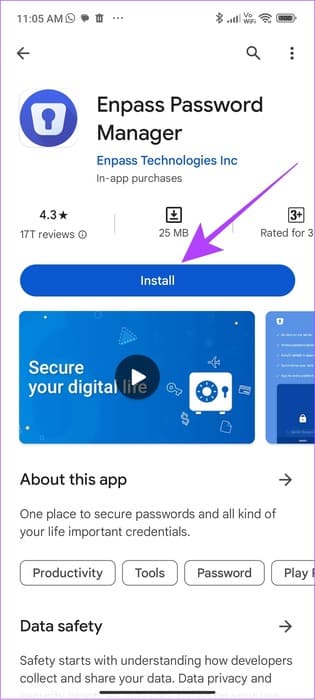
Step 4: Click on The application and select stabilizing.
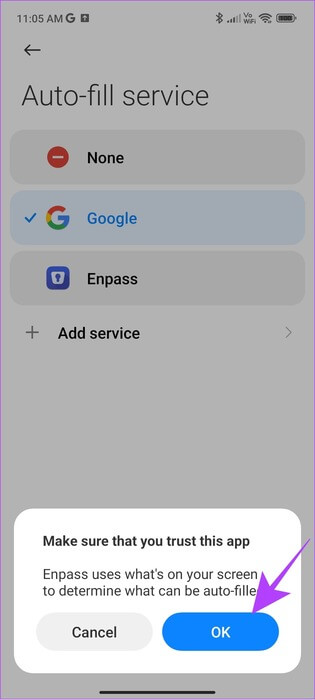
Step 5: Once installed, return to the Autofill Service page and tap on the third-party app you installed.

Step 6: Click on OK For confirmation.
Turn off autofill on Android
If you are concerned about your data, you can also turn off this feature.
Step 1: Go to Settings> Click on Additional settings.
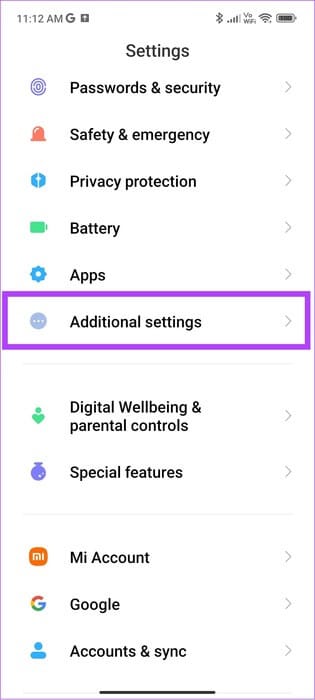
Step 2: Click on “Language and Input” > Choose Autofill Service

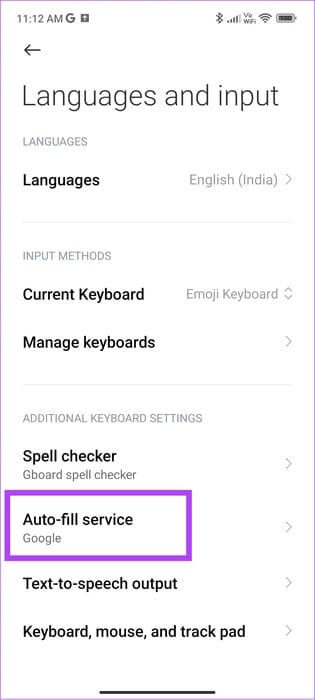
Step 3: Now choose nothing.

Apart from that, you can also turn off many other autofill options.
Turn off autofill for other services
Step 1: Open Settings> Click on Google And choose Autofill.
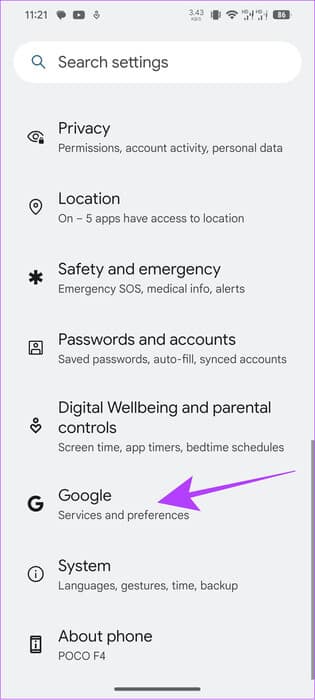
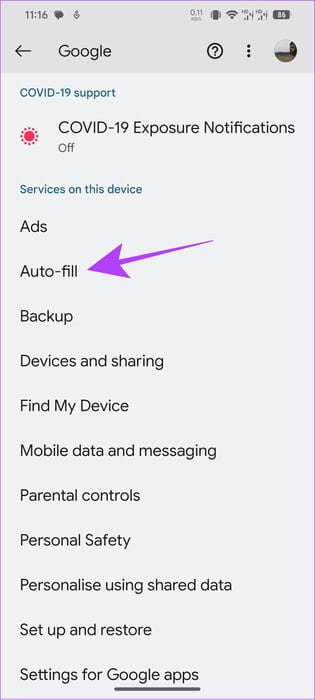
Step 2: Click on “Share phone number” and turn off “Share phone number” To stop sharing your phone number.


Step 3: Now, go back and choose SMS verification codes And turn it off:
- Autofill Service: Disable autofill to read any one-time or verification texts you receive.
- Default browser: The default browser prevents access to OTP or verification texts on your device using autofill.


How to clear Google autofill data on Android
If you're concerned about your data security, you can turn off autofill and clear autofill information on Android. Here's how:
Note: These steps are for Google Autofill only. If you use any third-party apps, you'll need to delete the data within the app. Typically, the information will be saved within the Autofill list.
Delete phone number
Step 1: Open Settings> Click on Google And choose Autofill.


Step 2: Click on Autofill with Google And choose personal information.

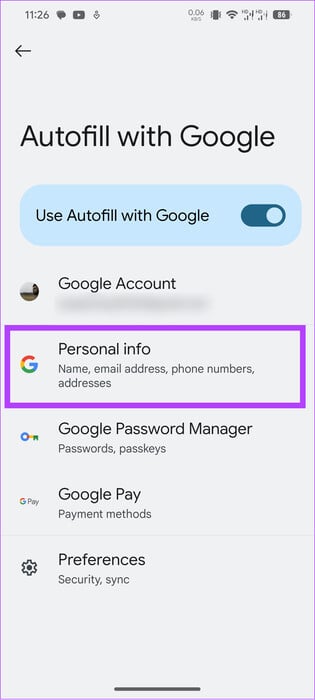
Step 3: From this page, choose the phone.
Step 4: Now, press The number you want to delete.
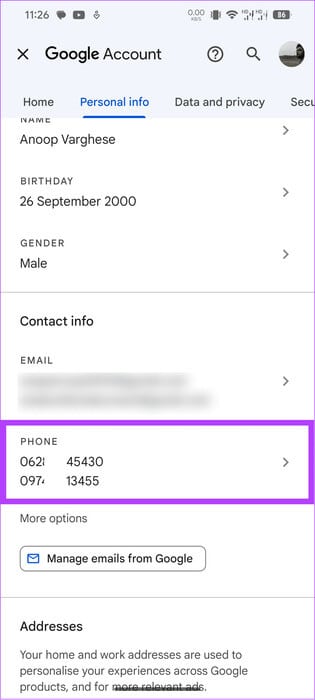
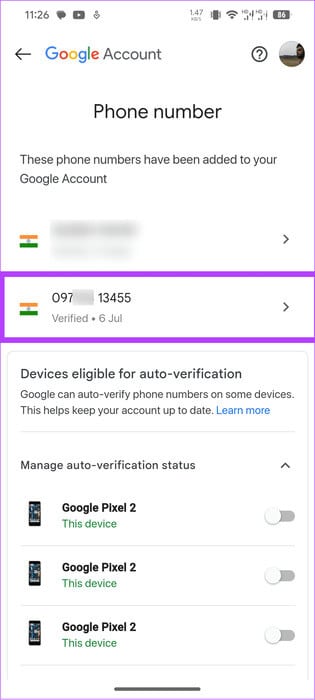
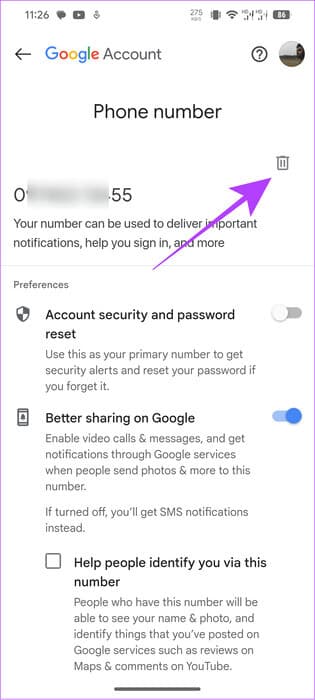
Step 5: Click on trash icon Next to the number you want to delete.
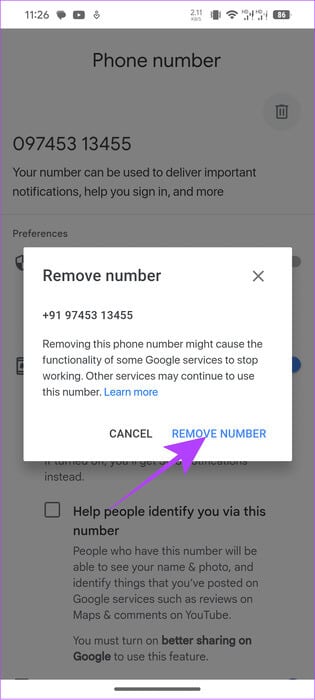
Step 6: Choose Remove number For confirmation.
Tip: You can also tap the pencil icon > Change number and tap Update number.
Delete title
Step 1: Open Settings> Click on Google And choose Autofill.


Step 2: Click on Autofill with Google And choose personal information.


Step 3: Choose The address you want to delete.
Step 4: Click on removal.
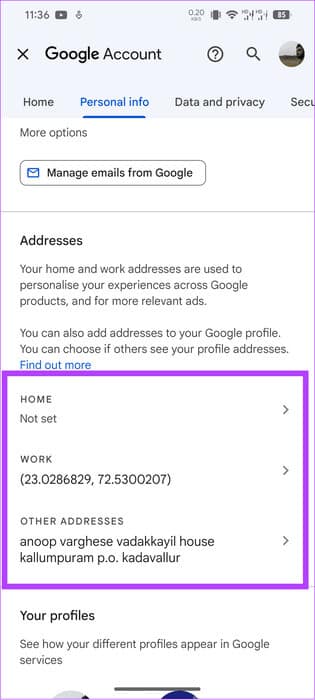

The data will be removed immediately without any confirmation being required.
Remove passwords
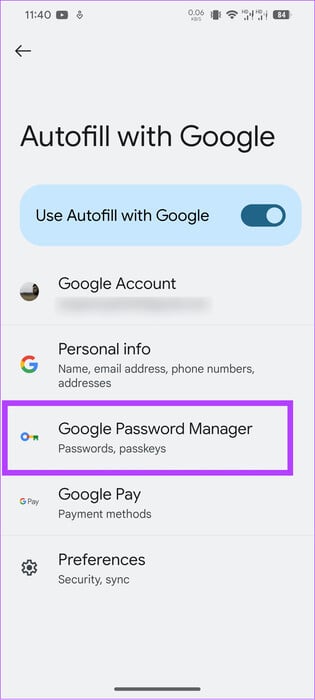
Step 1: Open Settings> Click on Google And choose Autofill.


Step 2: Click on Google Password Manager.
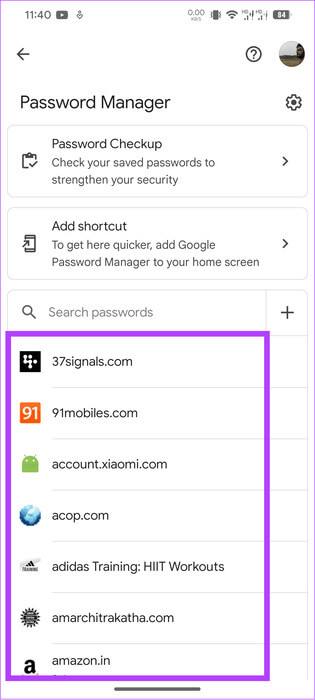
Step 3: Choose Password which you want to delete and verify your account.
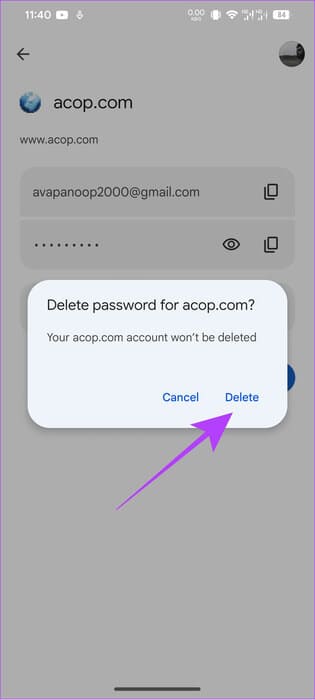
Step 4: Locate delete Then press delete For confirmation.

Frequently Asked Questions About Android Autofill
Q1. Is autofill safe on Android?
The answer: Google's default password managers and autofill options have strong policies for protecting user data. However, that doesn't mean your data is safe from potential snoopers or hackers. The best course of action is to use Best Password Manager With a strong data protection policy.
Q2. What additional precautions can I take when using autofill?
The answer: To enhance security when using services like autofill or password managers, consider: Enable two-factor authentication (2FA) Use your password manager and update your master password regularly. Make sure your device and software are updated with the latest security patches.
Use amenities with caution.
Autofill helps us save time while also being useful by storing passwords, fetching one-time passwords, and automatically adding them to various services. However, if you're concerned about the data being shared with the service, we hope our guide on enabling and disabling autofill on Android helps. Have more questions? Share them in the comments section below.


