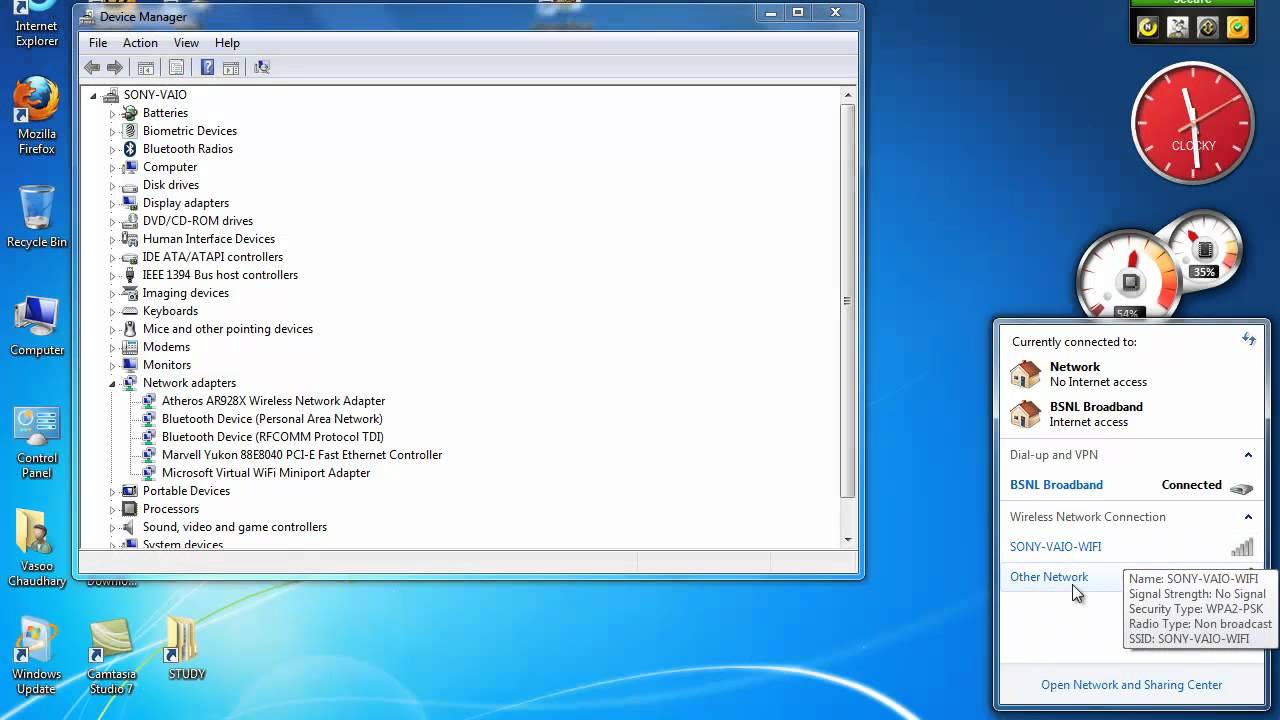
Are you upset about not being discovered? Webcam problem You may know that updating or reinstalling it through Device Manager will help. But what if your webcam isn't in Device Manager? Don't worry, you're on the right page. Your webcam can be located in Cameras, Imaging Devices, or Universal Serial Bus Controllers in Device Manager. Be sure to search for it in all of these options. If you can't find it, we have a helpful guide that will teach you how to fix your Windows 10 laptop camera not being detected. The methods mentioned here can be used on HP, Dell, Acer, and other laptop brands alike.
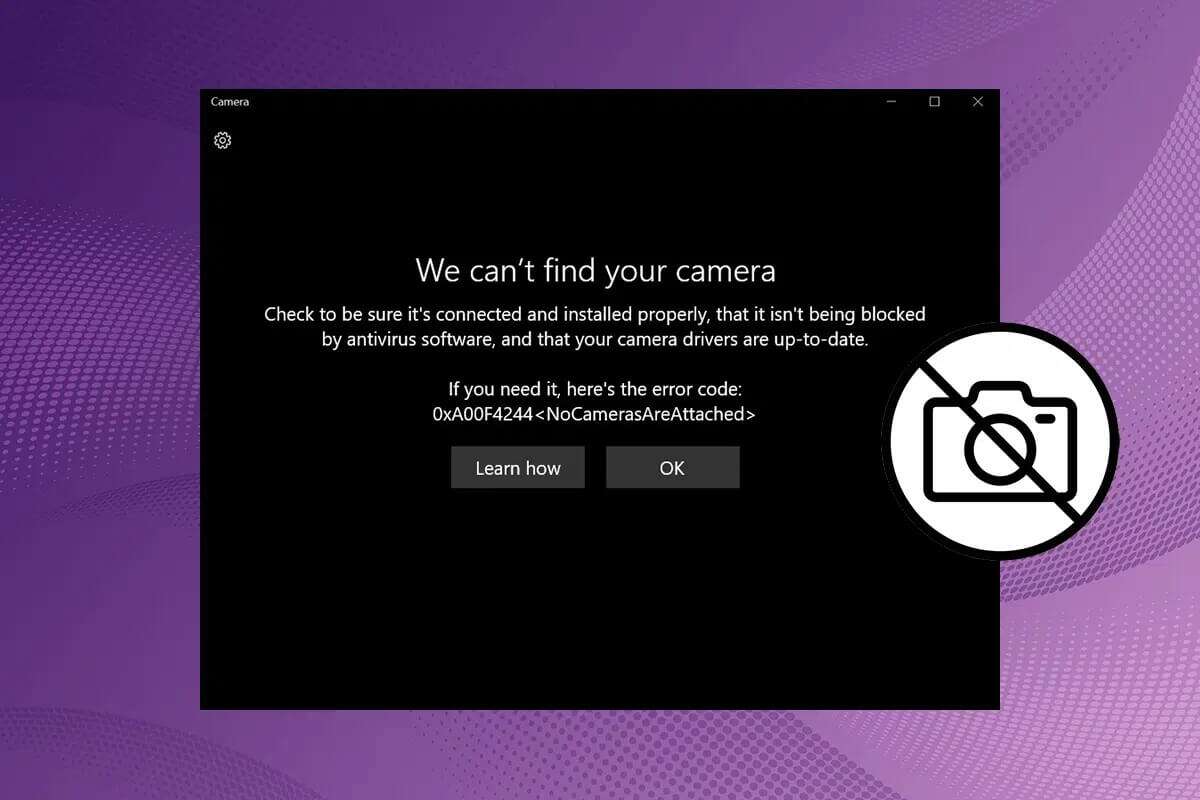
How to Fix Laptop Camera Not Detected on Windows 10
The webcam not in Device Manager issue most often occurs with externally connected webcams. Built-in webcams rarely cause this issue. If it does occur, it could be due to the following reasons:
- Webcam disabled
- Problems with camera or computer hardware
- Outdated drivers
- old windows
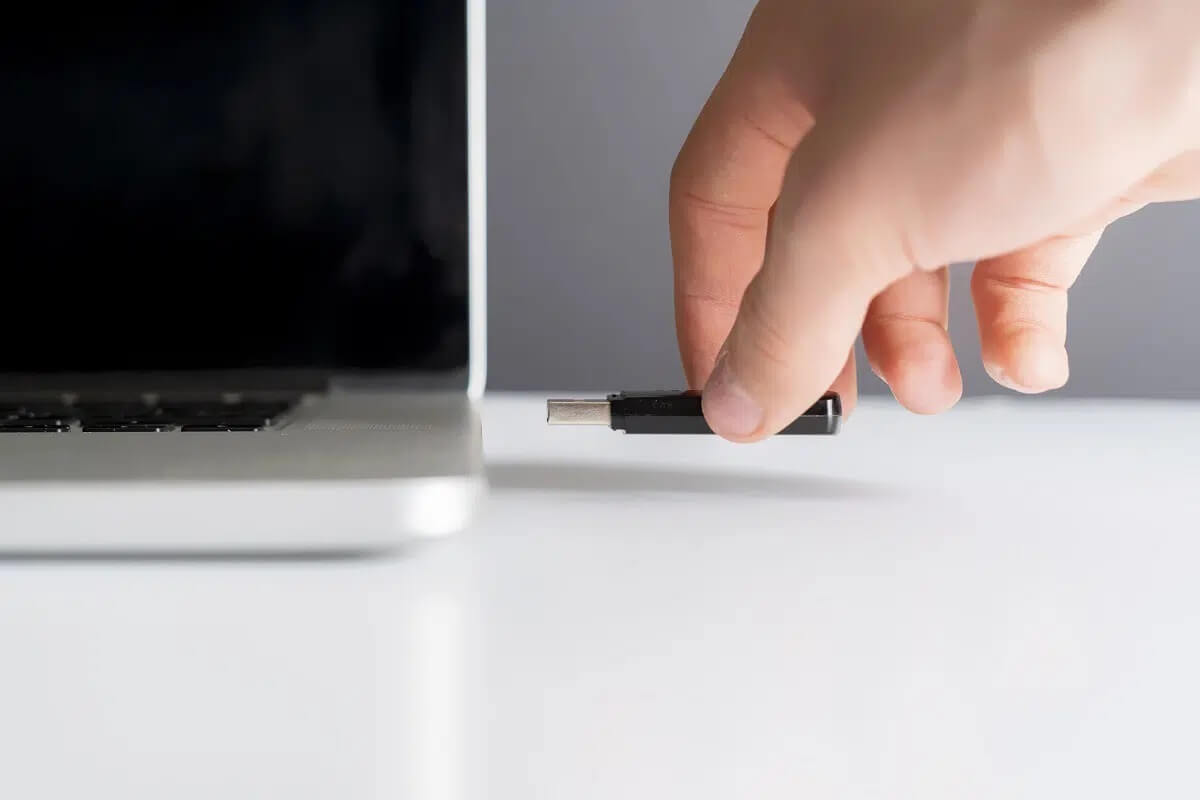
- USB device is broken
Method 1: Enable camera access
First, always check to see if the settings are set correctly. Follow the steps below to check if your computer's webcam is enabled:
1. Press the keys Windows + I At the same time to open Settings.
2. Click Privacy settings.
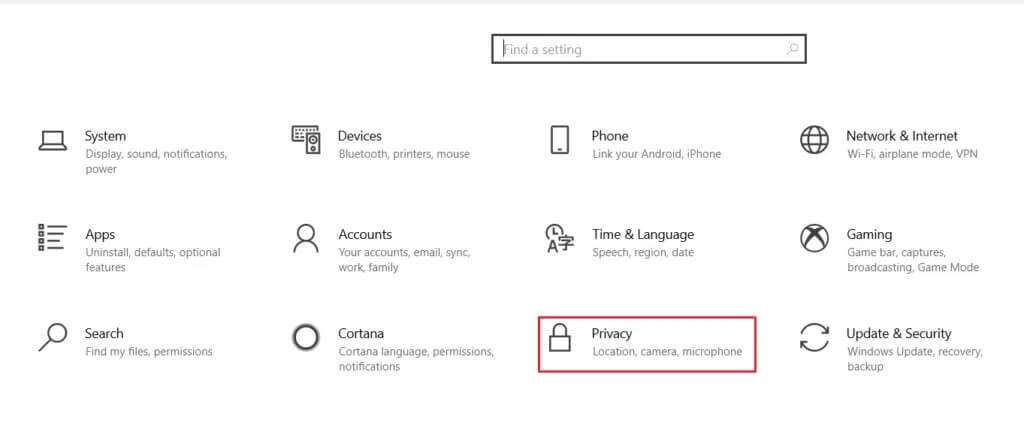
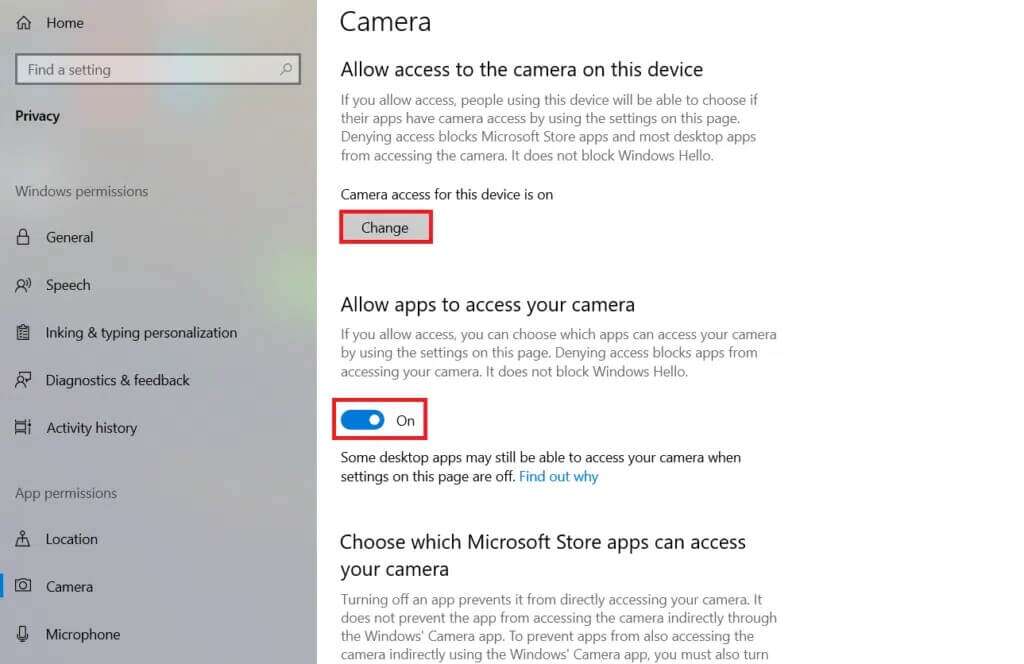
3. Then click on the option Camera On the right side of the screen under the category App permissions.
4. Make sure the message is displayed. “Access the camera for this device” running.
If not, click A change And do itTurn on the toggle switch To access the camera for this device.
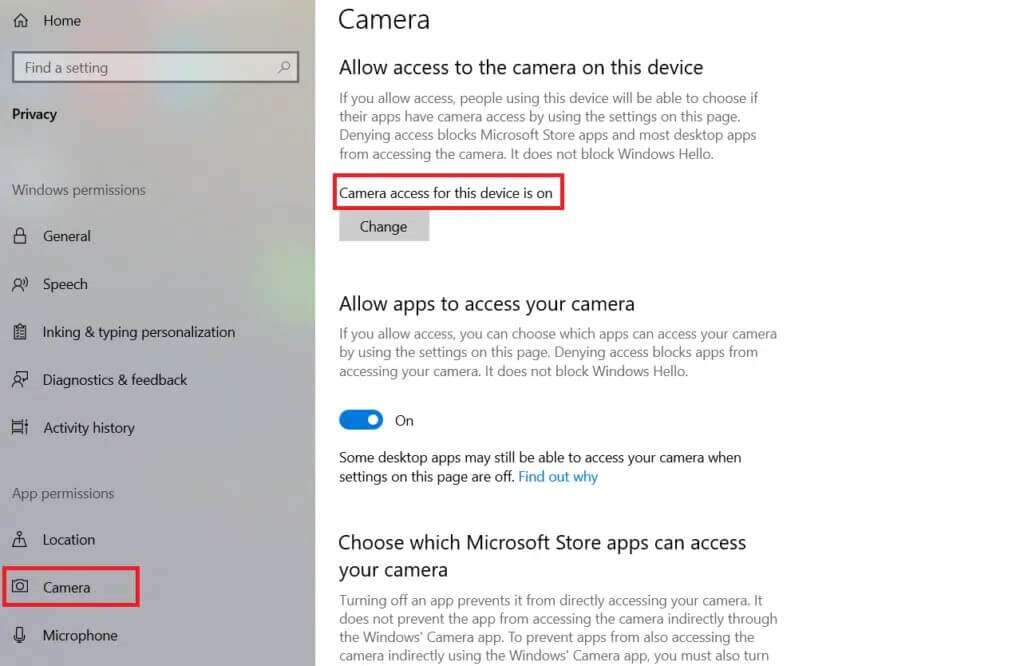
5. Next, turn on the toggle switch under Allow apps to access the camera category.
Note: If you own a Lenovo laptop, you can enable the camera directly by pressing the camera function key on your keyboard.
Method 2: Enable USB Device
You may also encounter an issue where your webcam isn't detected when your USB device is disabled. Fix this issue with the following steps:
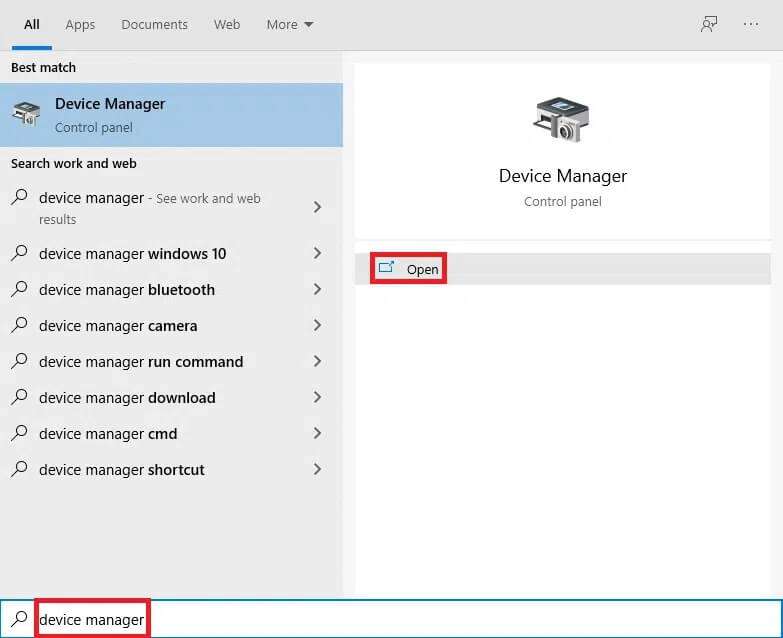
1. Press the . key Windows , And type device Manager , and click to open.
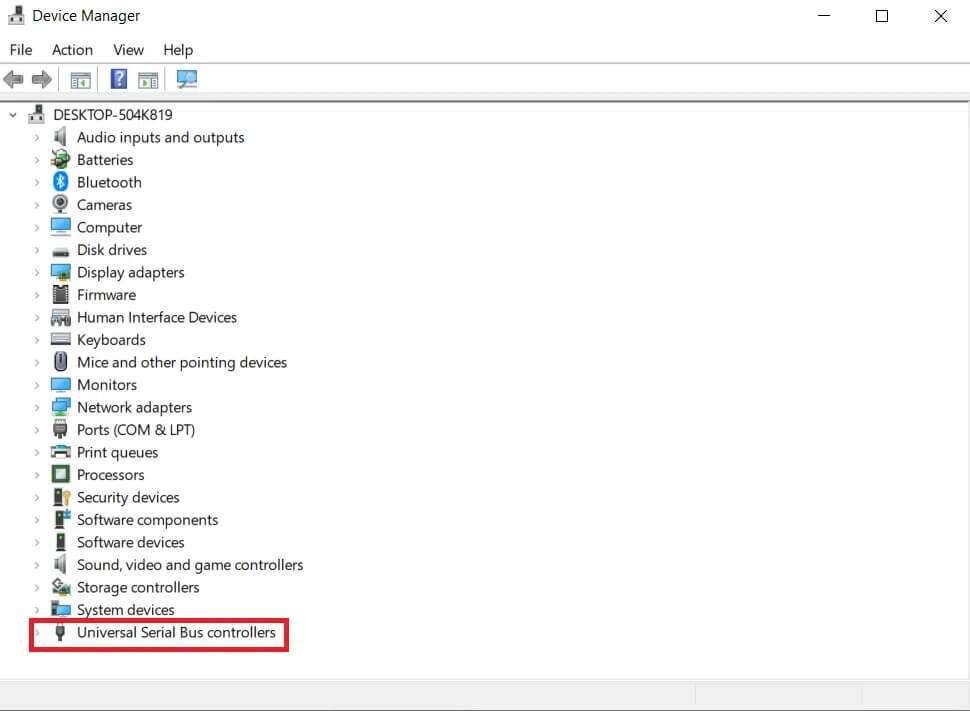
2. Double-click Universal Serial Bus Controllers to expand it.
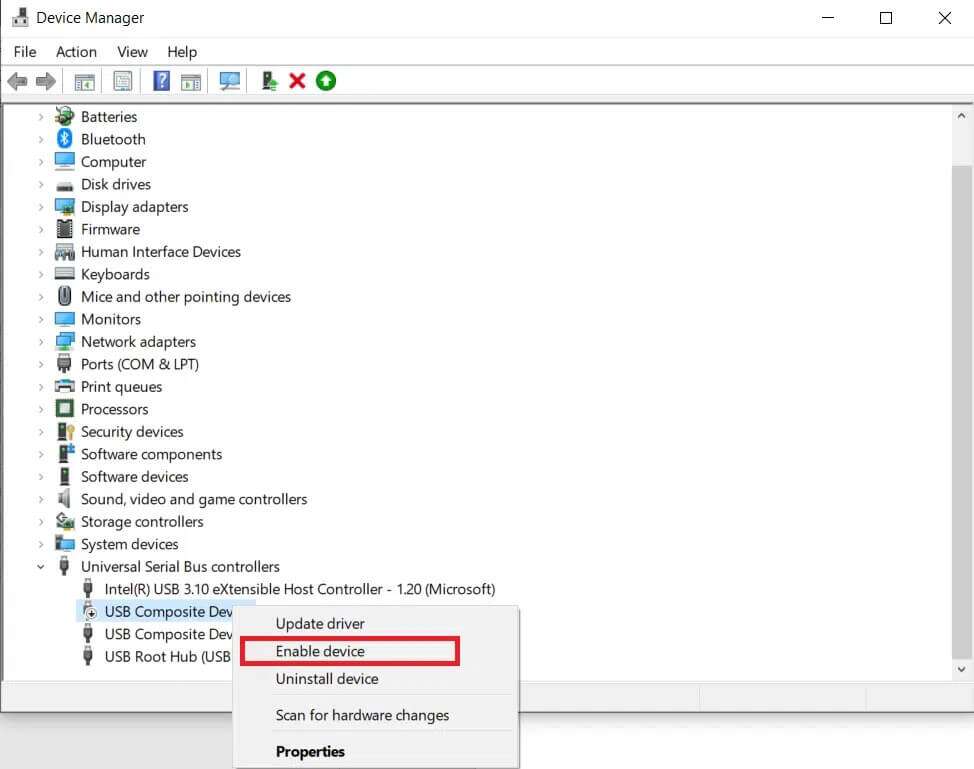
3. Then, right-click on Disabled USB driver (such as USB Composite Device) and select Enable device , As shown below.
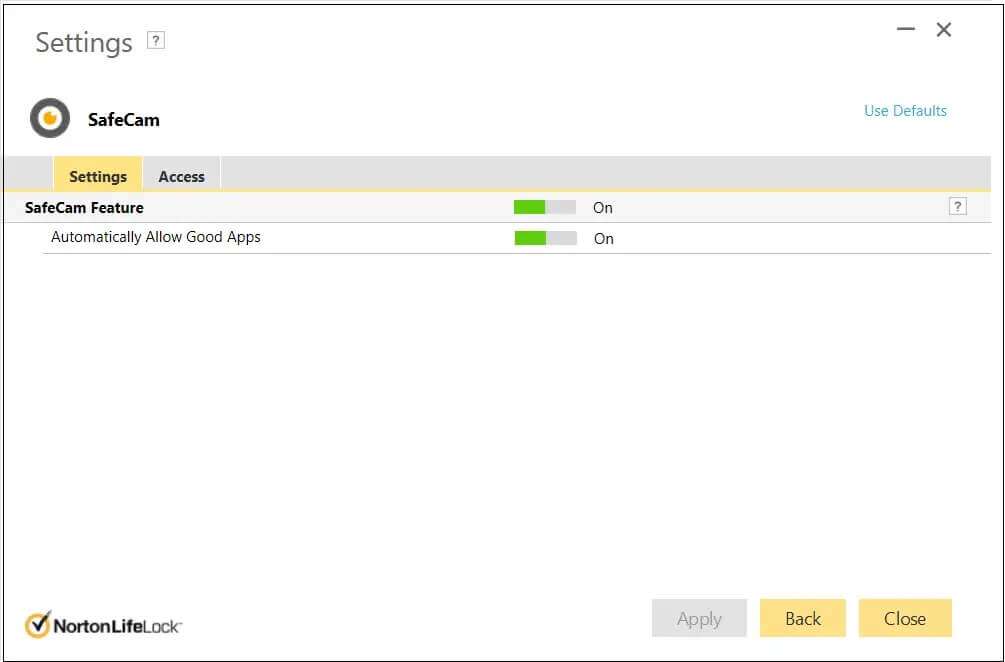
Method 3: Turn off webcam protection
Antivirus applications monitor for virus attacks and malware intrusion. They also protect users from a number of other things. Web protection, for example, ensures that users do not visit any suspicious websites or download any malicious files from the internet. Similarly, privacy mode software regulates which applications have access to your laptop's camera, which may unknowingly cause problems. Simply turn off the webcam protection option and see if your HP laptop camera not being detected issue is resolved.
Note: We've shown the steps for Norton SafeCam. You can also turn off your webcam protection in other third-party apps.
1. Open your antivirus program (such as Norton Safecam) by double-clicking its shortcut icon.
2. Go to the tab Access
3. Turn on webcam access, as shown below.
Method 4: Run the Hardware and Devices Troubleshooter
Any minor issues can be easily fixed using the Windows troubleshooter. In this case, it's recommended that you run the hardware troubleshooter to fix the issue of your laptop's camera not being detected:
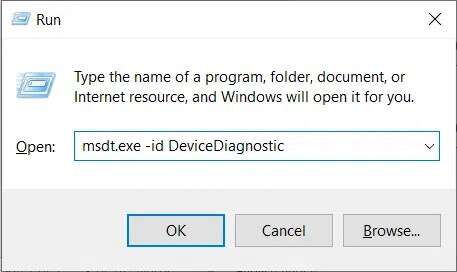
1. Press the keys Windows + R together on the keyboard to open the dialog box "employment".
2. Write msdt.exe -id DeviceDiagnostic in the area Search and press the key Enter.
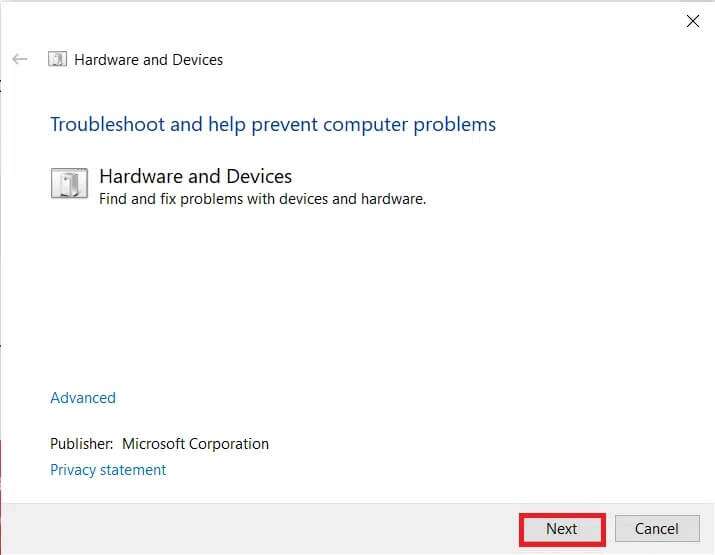
3. This will open the command. Hardware Troubleshooter . Click next one.
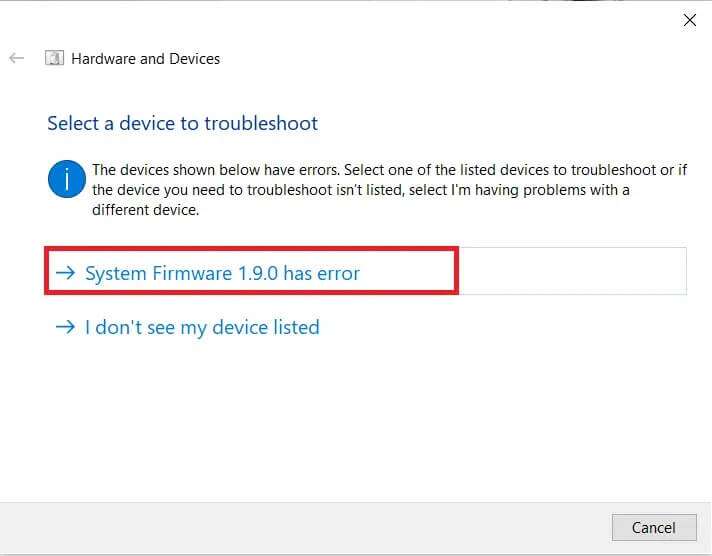
4. After finding the problem, the troubleshooter will display the issue. Click on this topic.
5. In the next window, click Apply this fix.
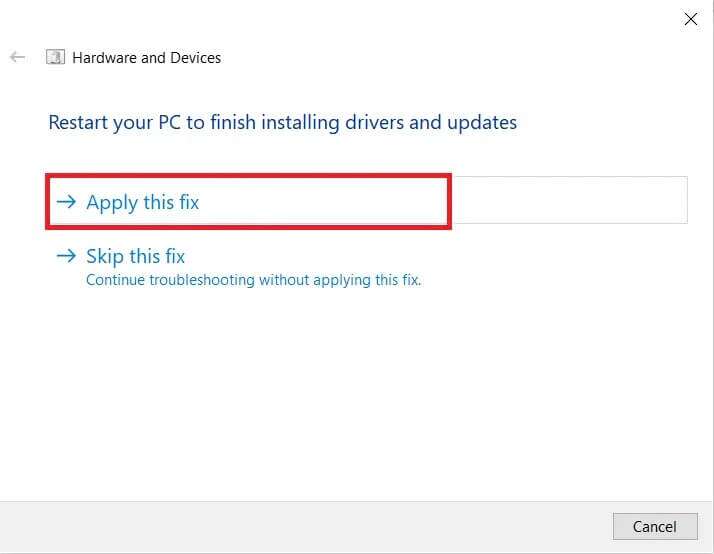
6. Now, restart your computer.
Method 5: Search for the camera device
Windows may have failed to detect your camera, resulting in your webcam not being detected in Device Manager. Therefore, scanning your laptop's camera will help resolve the issue.
1. Press the . key Windows , And type device Manager , and click to open.
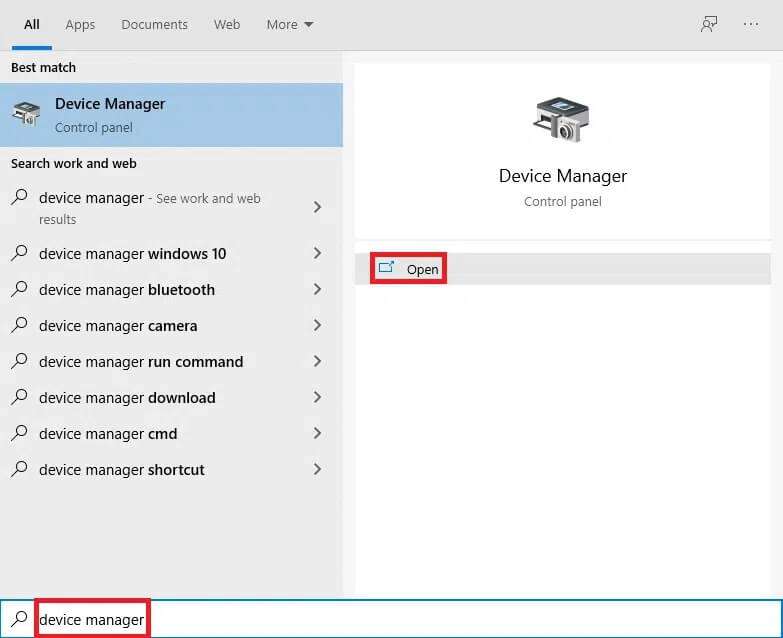
2. Here, click on Scan for hardware changes icon as shown below.
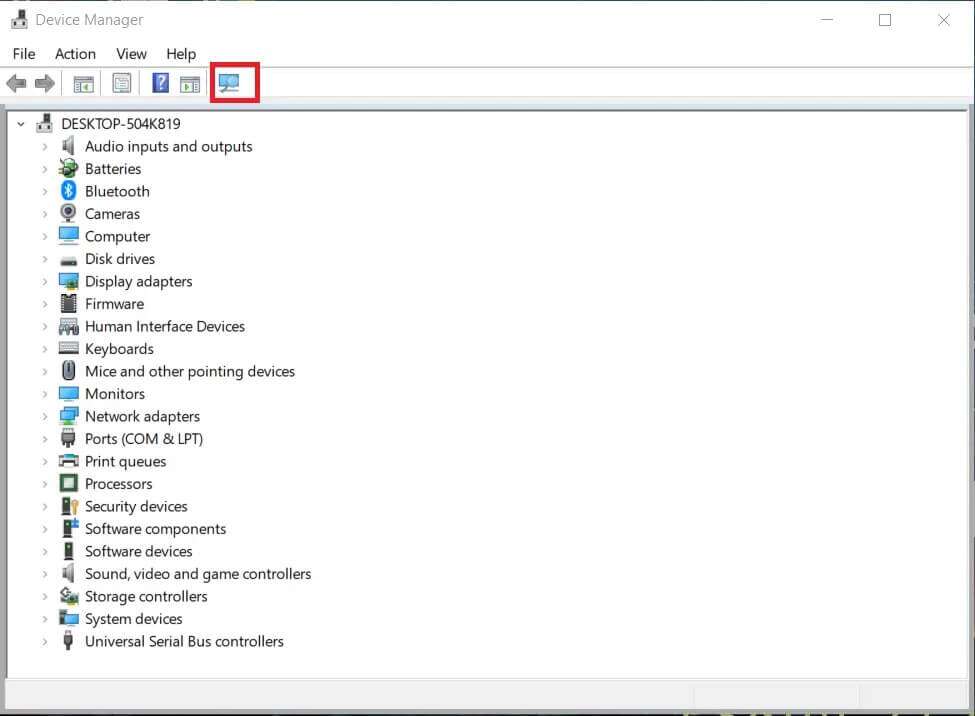
3. If the camera appears after scanning, it means that Windows has successfully detected it. Restart your computer.
Method 6: Update camera drivers
If you are having an issue where your HP laptop camera is not detected even after clearing the driver, try updating the driver.
1. Turn on Device Manager As shown in the fifth method.
2. Next, double-click on Camera adapter to expand it.
3. Right click on Webcam driver (like the built-in webcam) and click Driver Update.
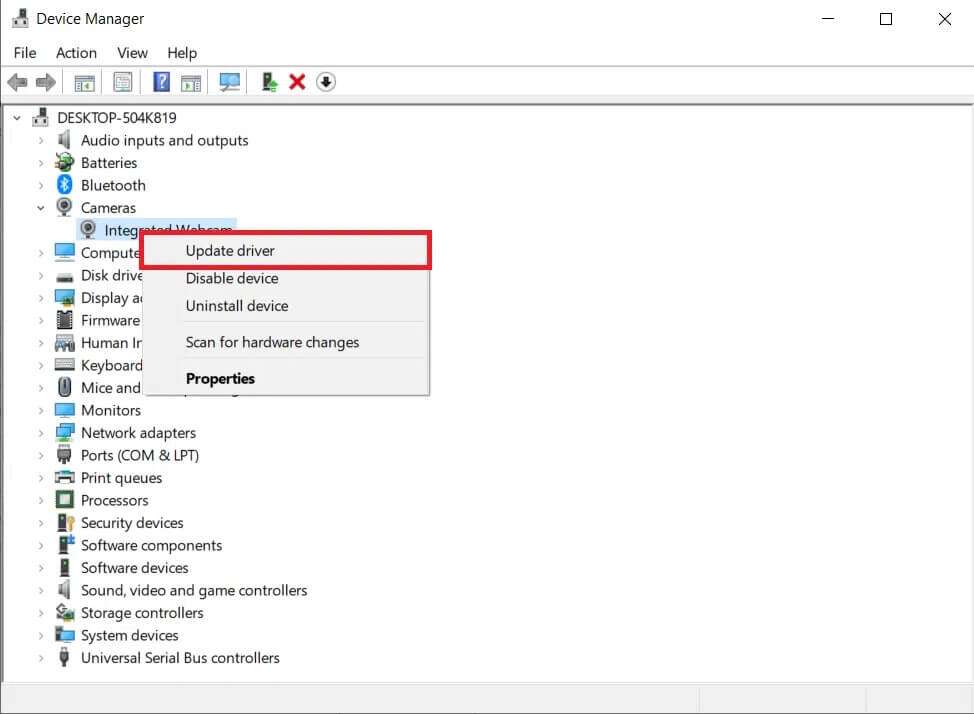
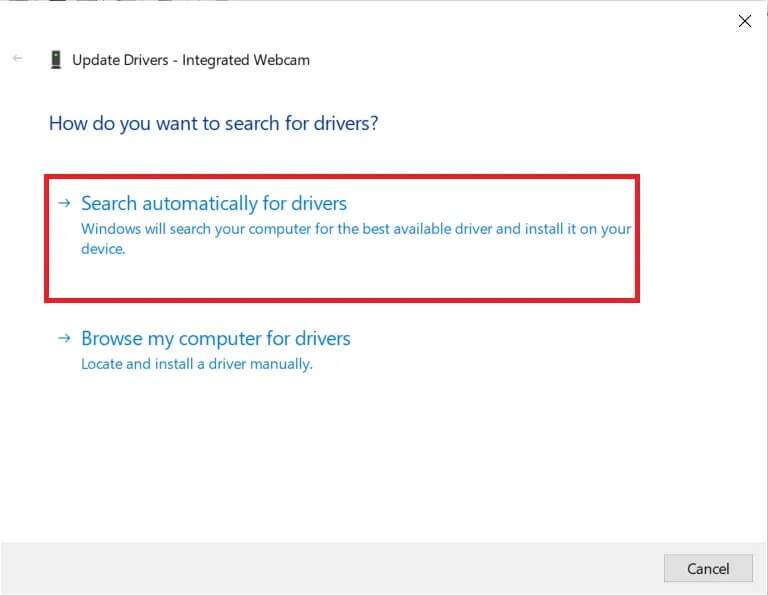
4. Next, select Search automatically About drivers.
5a. If the drivers are already updated, the best drivers for your device will be displayed as already installed.
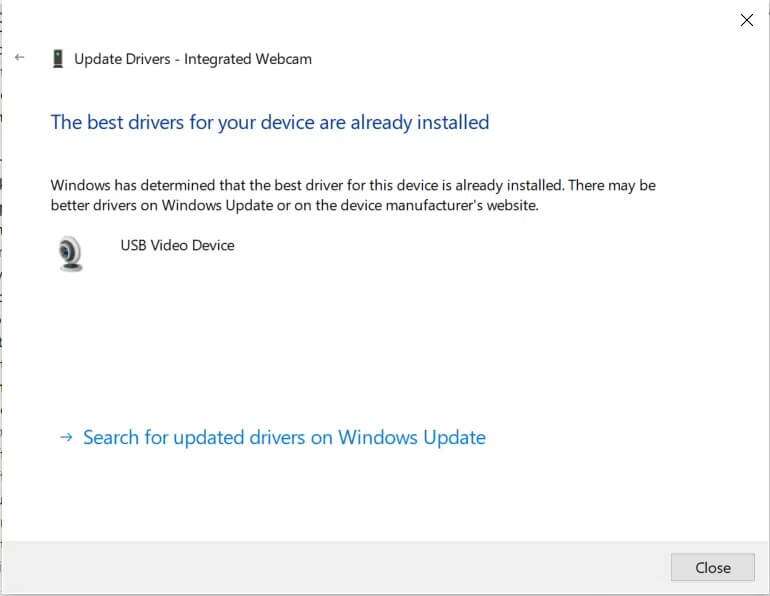
5b. If the drivers are outdated, they will be updated automatically. After this process, restart your computer.
Method 7: Add a webcam manually
Windows also allows you to manually add your webcam to Device Manager. Follow these steps to fix the issue of your laptop's camera not being detected.
1. Go to Device Manager As I did in the fifth method.
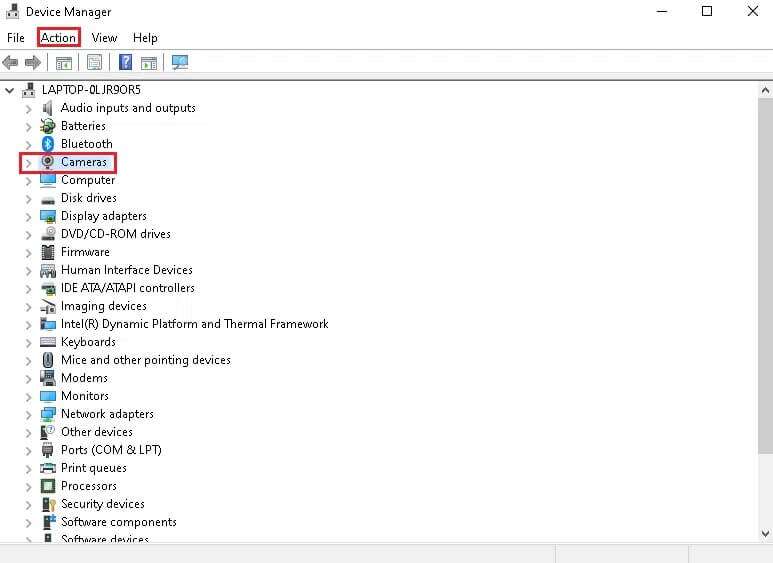
2. Select Cameras From the menu, click on Action In the top menu.
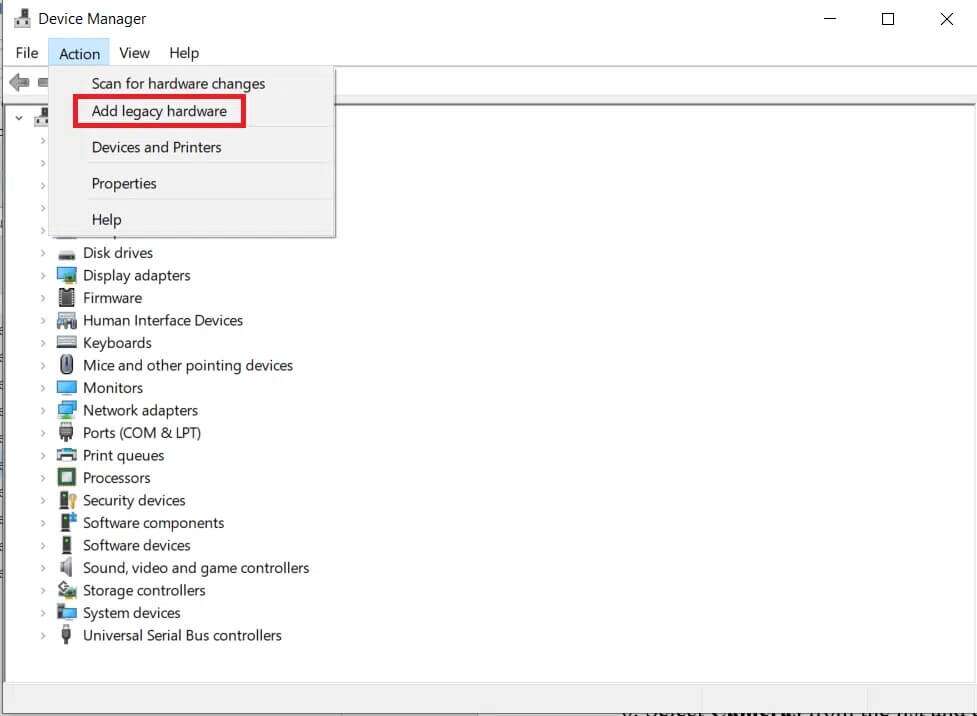
3. Then click Add old devices.
4. In a window Add device , click the . button Next>.
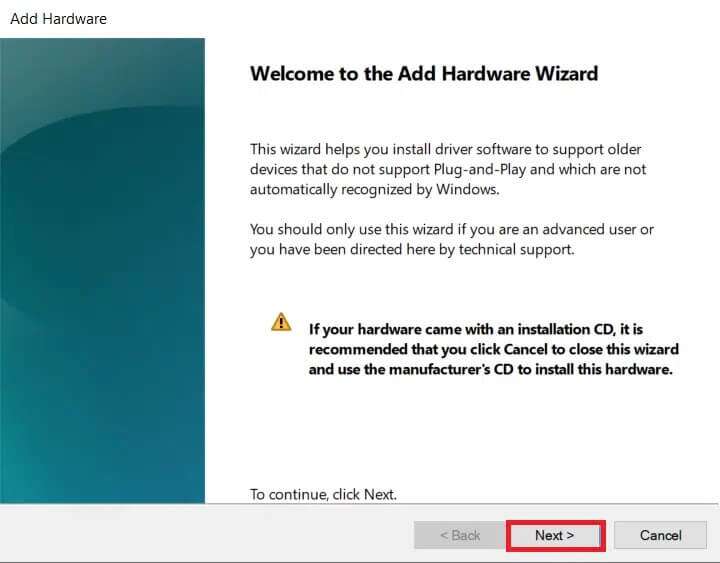
5. Select an option Install the device which I select manually from a list (Advanced Options) and click the button Next>.
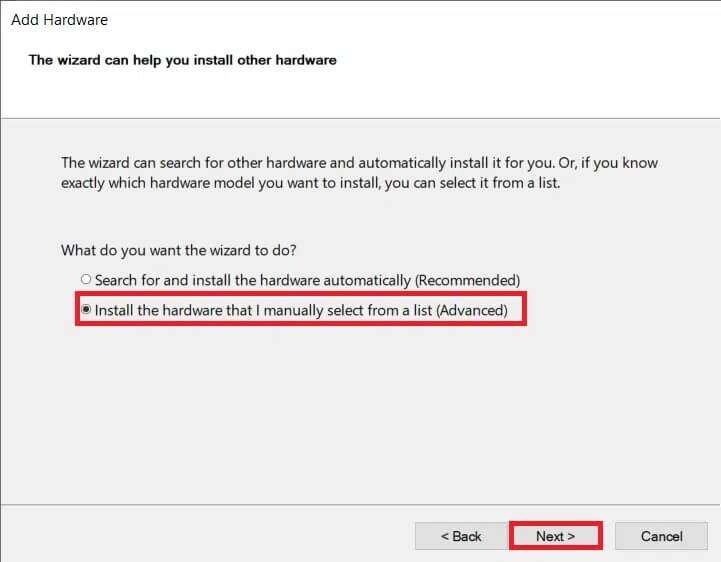
6. Select Cameras From the menu click on the button Next>.
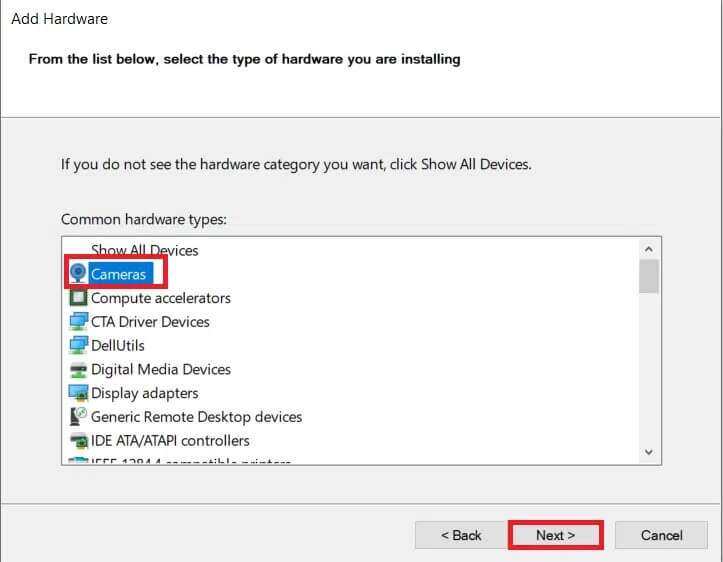
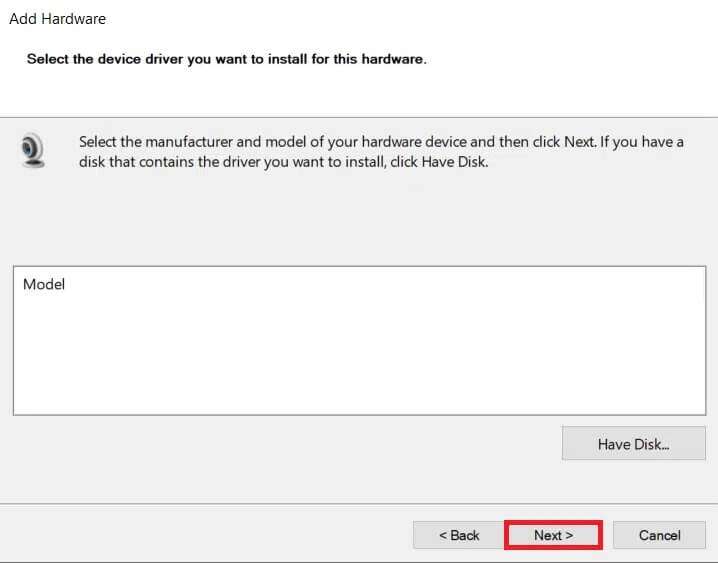
7. Choose Webcame template and click the . button Next>.
Note 1: If you have downloaded your webcam driver, click Have disk. Also, if you can't find your webcam in this window, skip to step 6, select Imaging devices, and click Next.
8. Wait for the webcam addition process to complete. Restart your computer.
Method 8: Install the manufacturer's webcam drivers
Installing a webcam app from the manufacturer's website may also fix this issue. Make sure to restart your device after installing it.
- For Dell systems, visit the page Drivers Dell Install the webcam application by entering the system model or service mark.
- Likewise, for HP, visit the page HP Driver Install the relevant application.
Method 9: Reset the Camera app
Resetting the camera app may also help resolve the issue of your laptop camera not being detected.
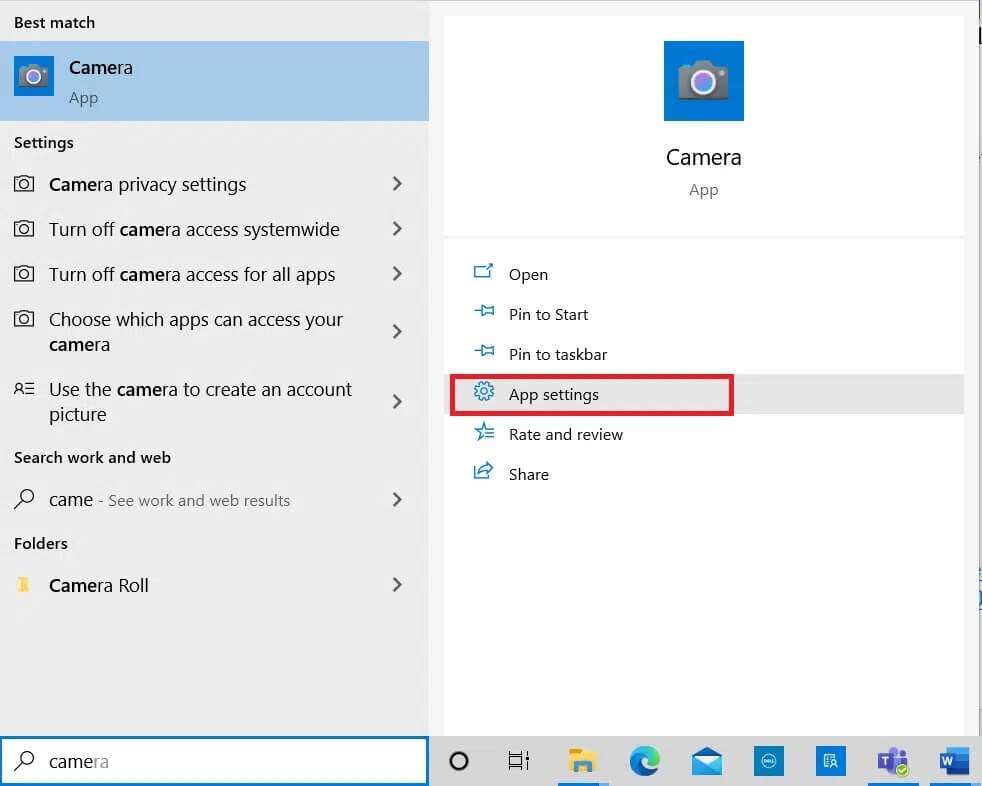
1. Click START YOUR , And type Camera , and click Application settings.
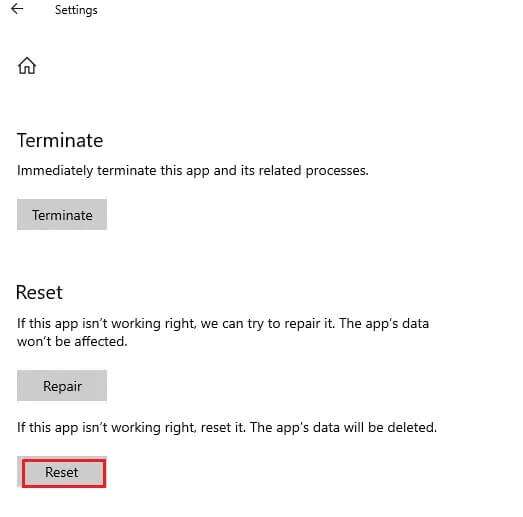
2. Scroll down in the window. "Settings" and click the . button "Reset" within the section "Reset".
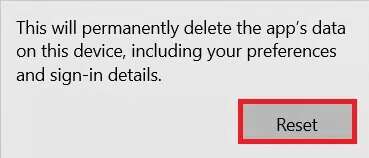
3. Confirm the claim by clicking the button. "Reset" once again.
4. The reset will take some time. A tick mark will appear next to the reset option after it's complete. Close the window and try again.
Method 10: Update Windows
Updating Windows is one of the simplest ways to fix the issue of your laptop's camera not being detected. Follow these steps to fix the issue of your HP laptop's camera not being detected by updating your Windows system:
1. Press the keys Windows + I At the same time to open Settings.
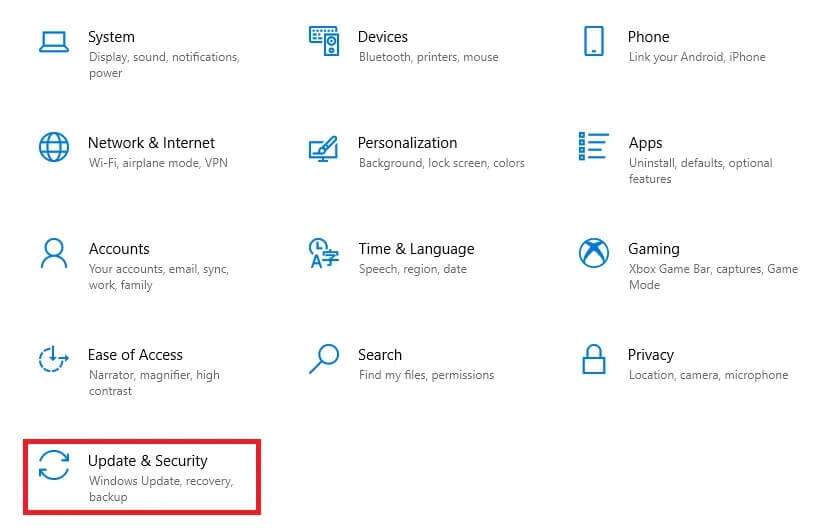
2. Click Update and security Among Other options.
3. Now, click on the button Check for updates.
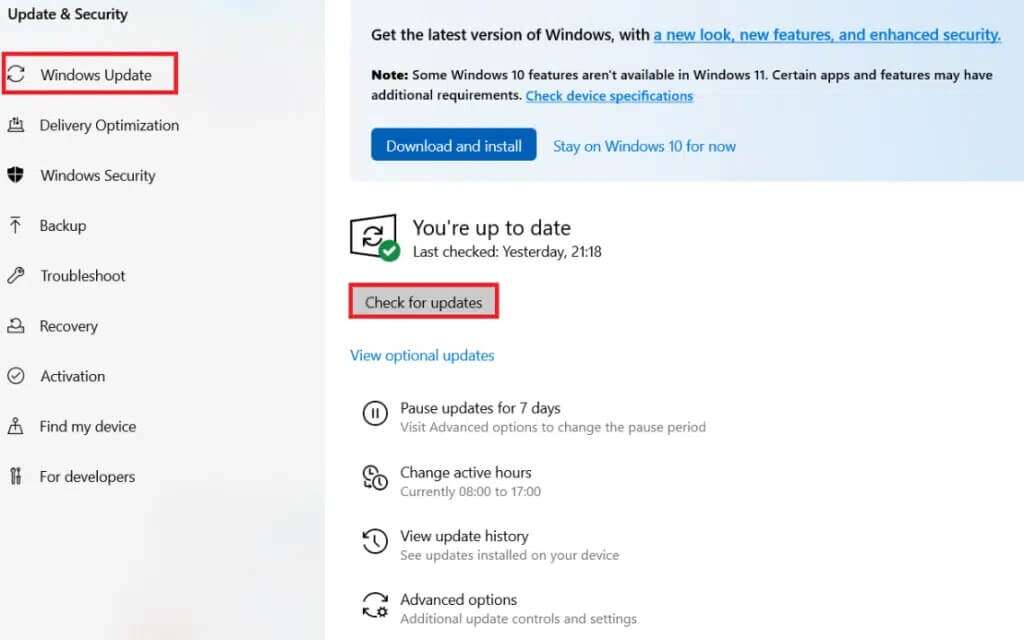
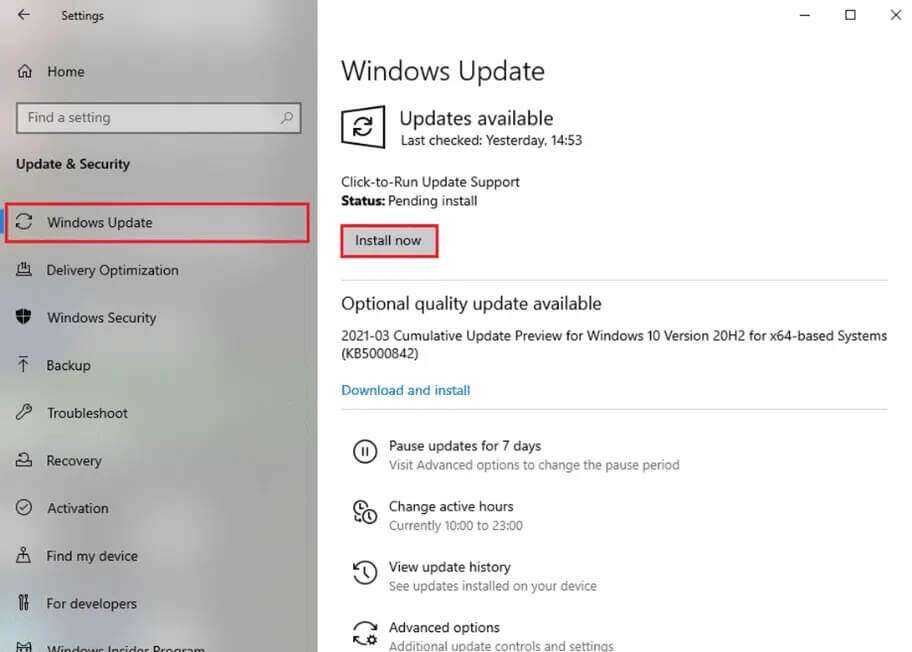
4 a. If available new update , Click INSTALL NOW And restart the computer to implement it.
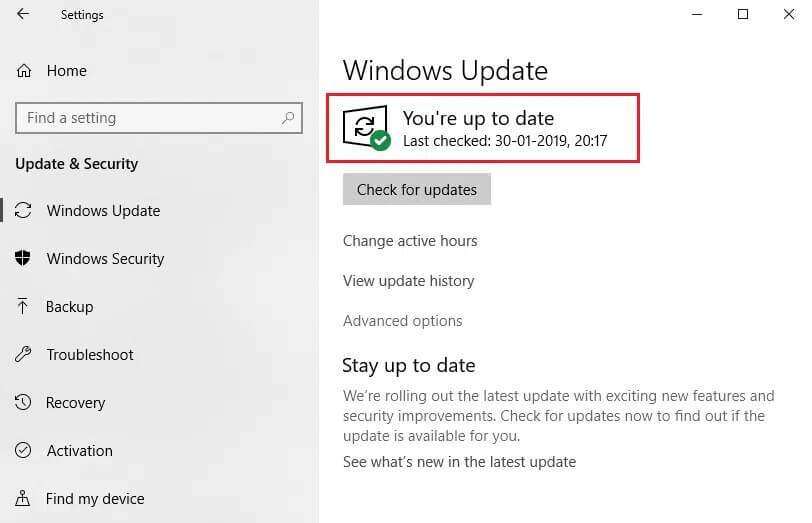
4b. If Windows is up to date, you will see an updated message.
Frequently Asked Questions (FAQ)
Q1. Will resetting your computer help fix the webcam not in device manager issue?
answer. Yes, this method will help resolve the issue. However, make sure to back up your files and installed apps before resetting. You can choose the Keep my files option during the reset, but this option will still remove installed apps and settings.
Q2. Will changing BIOS settings help fix HP laptop camera not being detected issue?
answer. Yes, this will help resolve the issue. However, making any changes to BIOS settings is not recommended. Improper changes will result in unexpected results for your device.
We hope this guide effectively helped you fix the laptop camera not being detected in Windows 10. Let us know which of the above methods worked best for you. Drop your queries and suggestions in the comments section, if any.


