يعد تثبيت نسخة جديدة من Windows 11 أو 10 عملية سهلة إلى حد ما. ومع ذلك، يتعثر بعض المستخدمين أثناء تثبيت نظامي التشغيل Windows 10 و11 ويشاهدون رسالة “لم يتم العثور على برامج تشغيل الأجهزة”. ونتيجة لذلك، لا يمكنهم تجاوز شاشة تحديد القرص.

يمكن أن تنشأ هذه المشكلة بسبب وجود جهاز تثبيت وسائط تالف، ومنافذ خاطئة، وبرامج تشغيل مفقودة، وتنسيق قسم القرص غير الصحيح. سنناقش سبع طرق لحل هذا الخطأ وتثبيت نظام التشغيل Windows بنجاح على جهاز الكمبيوتر الخاص بك.
1. فحص/تبديل منافذ USB
إذا واجهت رسالة “لم يتم العثور على برامج تشغيل الأجهزة”، تأكد من أن وسائط التثبيت تحتوي على خطأ برامج التشغيل الصحيحة أثناء تثبيت نظام التشغيل، فيجب عليك التبديل إلى منفذ USB مختلف على جهاز الكمبيوتر الخاص بك”. افصل USB من جهاز الكمبيوتر الخاص بك، وقم بتوصيله بمنفذ USB آخر (2.0 أو 3.0)، وأعد محاولة التثبيت.
حتى أن بعض المستخدمين تجنبوا هذا الخطأ عن طريق إغلاق نافذة المطالبة بتثبيت برنامج التشغيل والعودة إلى شاشة الترحيب. بعد ذلك، افصل محرك أقراص USB ثم قم بتوصيله بمنفذ USB آخر، وتابع عملية التثبيت.
2. تحقق من محرك أقراص USB الموجود على نظام آخر
بعد إنشاء محرك أقراص USB قابل للتمهيد لنظام التشغيل Windows، إذا واجهت تثبيت Windows يفتقد برنامج التشغيل، فيجب عليك التحقق من ذلك على نظام آخر. إذا لم تواجه المشكلة وتمكنت من تجاوز صفحة الإعداد الأولى، فهذا يعني أن هناك مشكلة في منفذ USB أو إعدادات النظام أو برامج التشغيل.
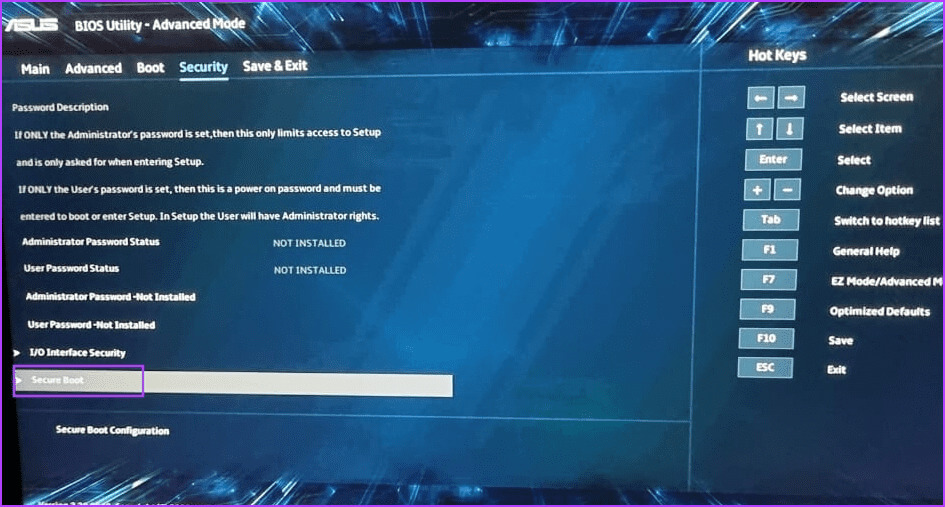
3. تعطيل CSM والتمهيد الآمن
يمكن أن تتداخل ميزات CSM والتمهيد الآمن مع عمليات التثبيت، لذا يجب عليك تعطيلها باستخدام إعدادات BIOS. يمكنك تثبيت Windows 11 بدون Secure Boot إذا كان لديك TPM 2.0 وUEFI على جهاز الكمبيوتر الخاص بك. فيما يلي كيفية تعطيل Secure Boot في BIOS:
الخطوة 1: أعد تشغيل جهاز الكمبيوتر الخاص بك.
الخطوة 2: اضغط على المفتاح F المخصص (عادةً المفتاح F2 أو Esc) للوصول إلى BIOS. تحتاج إلى التحقق من المفتاح المعين من قبل الشركة المصنعة للكمبيوتر الشخصي للوصول إلى BIOS.
خطوة 3: بعد الدخول إلى BIOS، قم بالتبديل إلى علامة التبويب الأمان. لاحظ أن هذا هو BIOS لأجهزة الكمبيوتر التي تحتوي على اللوحات الأم من ASUS. لذلك سيبدو BIOS الموجود على جهاز الكمبيوتر الخاص بك مختلفًا من جانبك. بغض النظر، يجب عليك البحث عن خيار Secure Boot (التمهيد الآمن) في جميع علامات التبويب في BIOS.
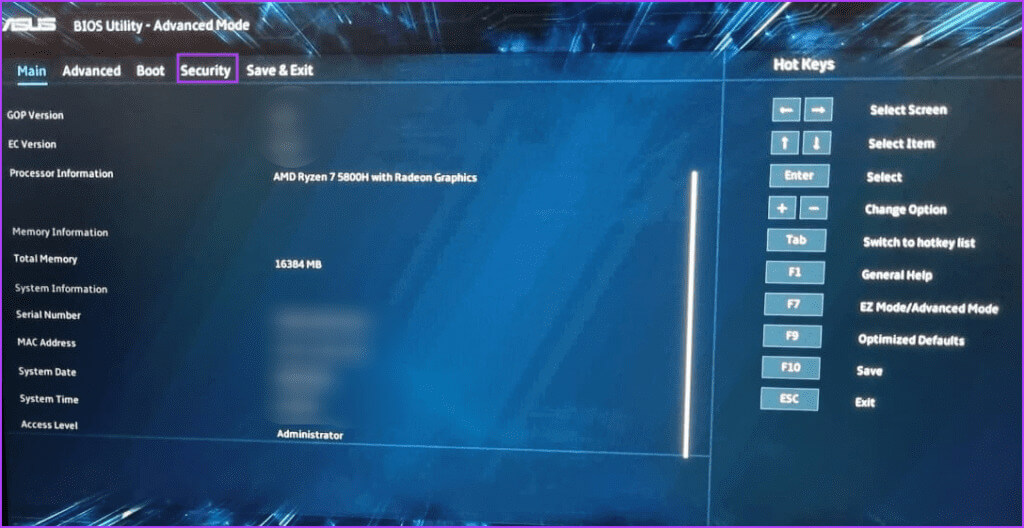

الخطوة 4: انقر على خيار التمهيد الآمن.
الخطوة 5: انقر فوق خيار Secure Boot Control وحدد الخيار Disabled.
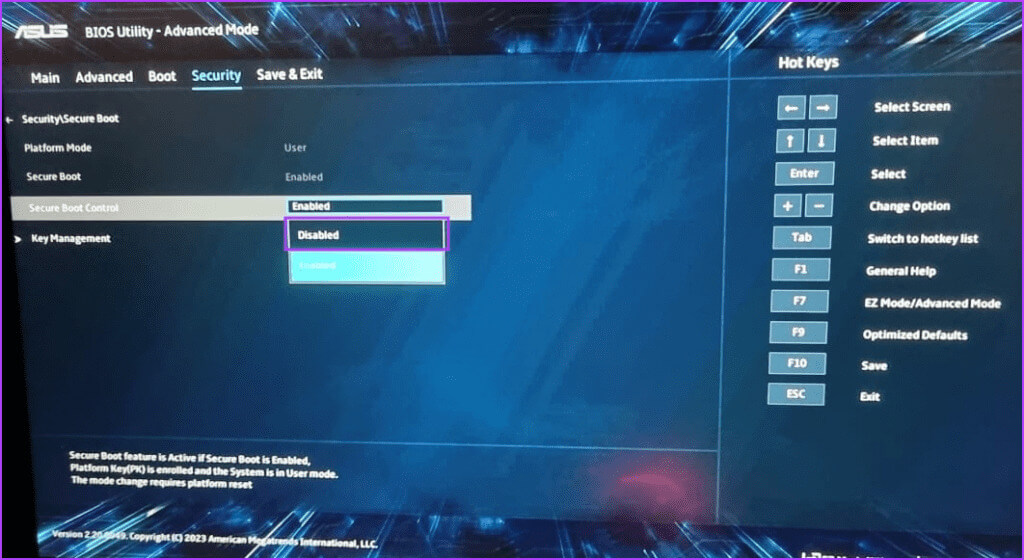
خطوة 6: اضغط على المفتاح F10 لحفظ التغييرات والخروج من BIOS.
الخطوة 7: سيتم إعادة تشغيل جهاز الكمبيوتر الخاص بك ويجب عليك التمهيد باستخدام وسائط تثبيت Windows USB. تابع التثبيت وتحقق مما إذا كان إعداد Windows يواجه نفس الخطأ.
وبالمثل، قم بتعطيل وضع CSM، وهو أيضًا ميزة في BIOS تتيح الدعم لتثبيت أنظمة التشغيل الأقدم.
4. تنزيل وتثبيت برامج التشغيل المفقودة
يمكنك أيضًا مواجهة الخطأ عندما لا يكون لدى Windows برنامج تشغيل لجهاز التخزين. لذلك، يجب عليك تنزيل برامج التشغيل المفقودة باستخدام جهاز كمبيوتر آخر ونسخ برامج التشغيل إلى محرك أقراص USB الخاص بتثبيت Windows. يمكنك أيضًا استخدام محرك أقراص USB آخر.
إذا كان جهاز الكمبيوتر الخاص بك يستخدم معالج Intel، فقم بتنزيل واستخراج برنامج تشغيل Intel Rapid Storage Technology (IRST) لطراز جهاز الكمبيوتر الخاص بك. سيتعين على مستخدمي AMD القيام بنفس الشيء وتنزيل واستخراج برامج تشغيل AMD RAID Driver (SATA، NVMe RAID).
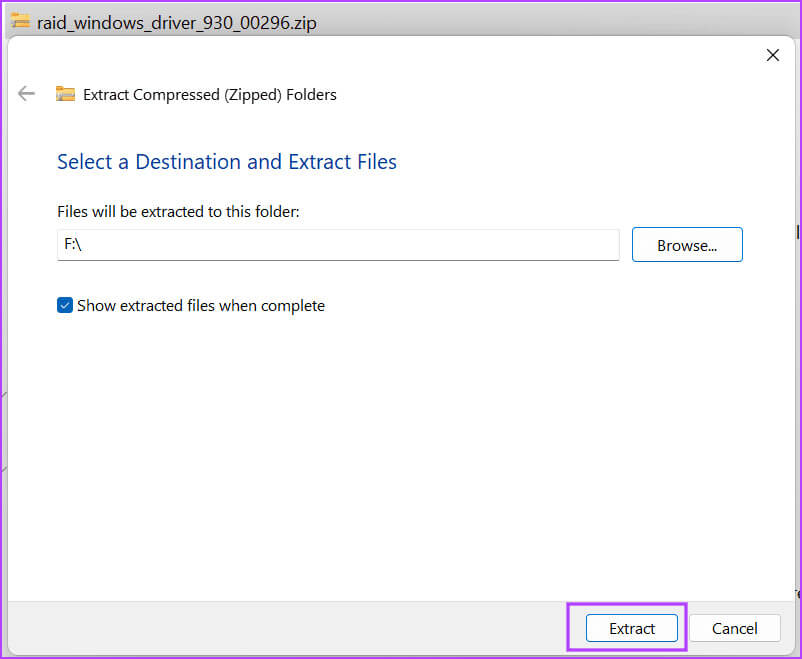
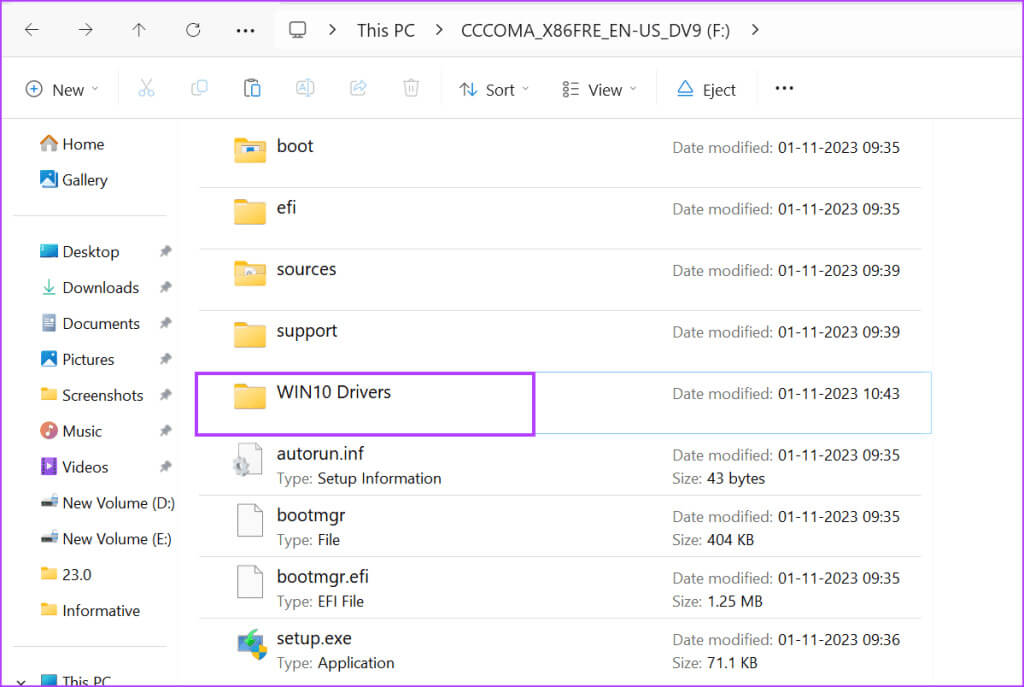
بعد ذلك، انسخ مجلد برامج التشغيل المستخرج إلى وسائط تثبيت Windows USB.
كرر الخطوات التالية:
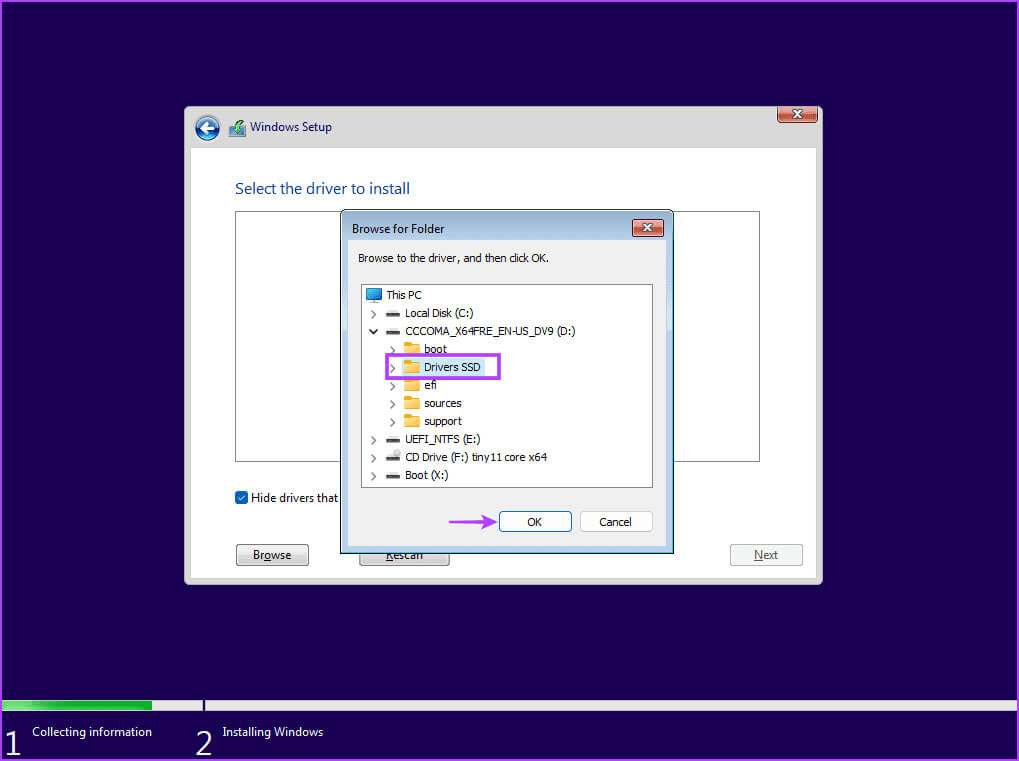
الخطوة 1: قم بتشغيل جهاز الكمبيوتر الخاص بك والتمهيد باستخدام وسائط تثبيت Windows USB حتى تصل إلى المكان الذي يطلب منك الإعداد تحميل برامج التشغيل. إذا قمت بنسخ برامج التشغيل إلى محرك أقراص USB آخر، فقم بتوصيله.
الخطوة 2: انقر على زر التصفح.

خطوة 3: حدد مجلد برنامج التشغيل المناسب وانقر على زر موافق.
الخطوة 4: انقر على برنامج التشغيل لتحديده ثم انقر على زر التالي.
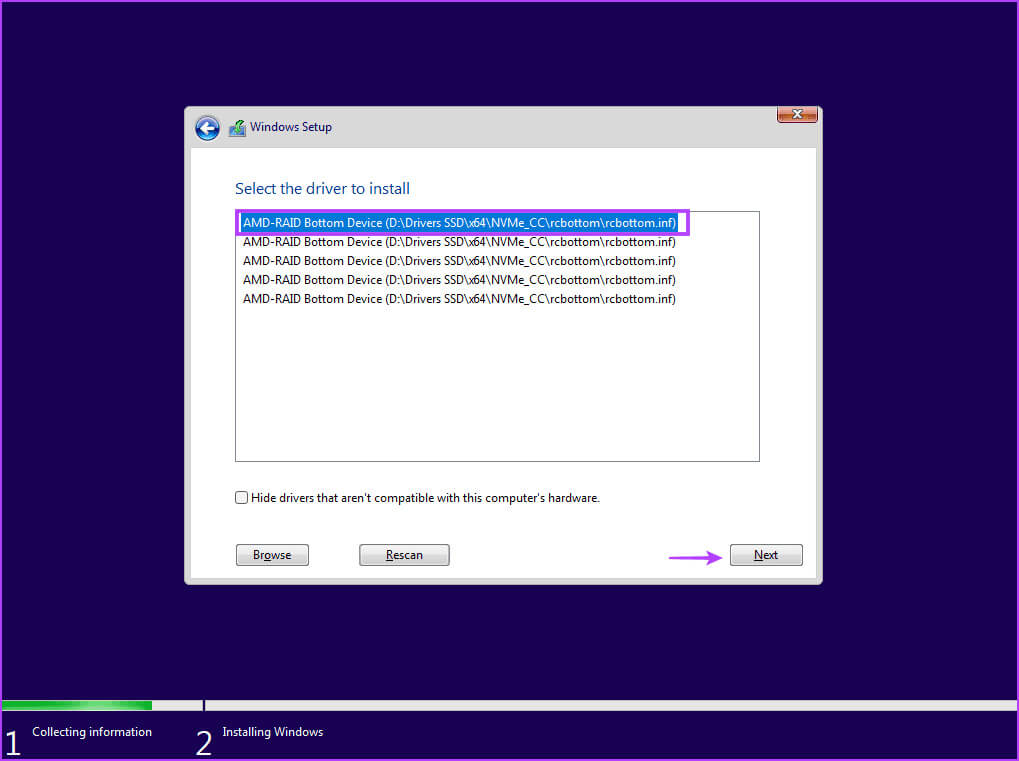
الخطوة 5: بعد تثبيت برنامج التشغيل بنجاح، اختر محرك أقراص للتثبيت واستمر في الإعداد.
5. حاول تثبيت الإصدار 32 بت (لنظام التشغيل Windows 10)
إذا كنت تواجه مشكلة في تثبيت نظام التشغيل Windows 10، فجرب الإصدار 32 بت من نظام التشغيل بدلاً من الإصدار 64 بت. يعد هذا حلاً مؤقتًا نجح مع العديد من المستخدمين، ولكن سيتعين عليك الالتزام بالإصدار 32 بت على نظام التشغيل. ومتى أردت التغيير، سيتعين عليك تثبيت الإصدار 64 بت من Windows.
6. أعد إنشاء وسائط تثبيت USB
تعد وسائط تثبيت USB التالفة أيضًا سببًا لظهور الخطأ عند محاولة تحديد محرك الأقراص ومتابعة تثبيت Windows. لذلك، يجب عليك إعادة إنشاء وسائط تثبيت Windows USB بمساعدة أداة Windows Media Creation أو Rufus.
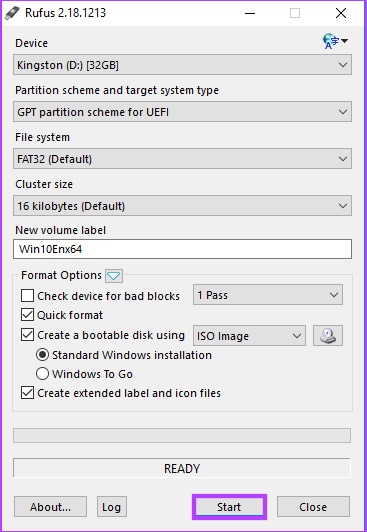
تأكد من تنزيل أحدث ملف ISO من موقع Windows الرسمي واستخدامه لإنشاء وسائط تثبيت Windows USB. قم بتوصيل محرك أقراص USB بجهاز الكمبيوتر الخاص بك وتحقق من استمرار التثبيت دون أي أخطاء.
7. تحويل القرص إلى GPT
يتطلب Windows 11 أن يدعم الكمبيوتر UEFI، ويجب أن يكون محرك التخزين بتنسيق GPT. إذا كان قرص التخزين الأساسي بتنسيق MBR، فيجب عليك تحويله إلى GPT قبل تثبيت نظام التشغيل. ومع ذلك، قم بإنشاء نسخة احتياطية لجميع ملفاتك الشخصية الموجودة على كافة الأقراص إلى قرص ثابت خارجي قبل اتباع هذا المسار.
سوف نستخدم الأداة المساعدة Diskpart لتحويل القرص من MBR إلى GPT والذي يتضمن مسح القرص بالكامل. إليك كيفية القيام بذلك:
الخطوة 1: اضغط على اختصار لوحة المفاتيح Shift + F10 لفتح موجه الأوامر في صفحة إعداد Windows.
الخطوة 2: اكتب الأمر التالي واضغط على Enter لتشغيل الأداة المساعدة Diskpart:
diskpart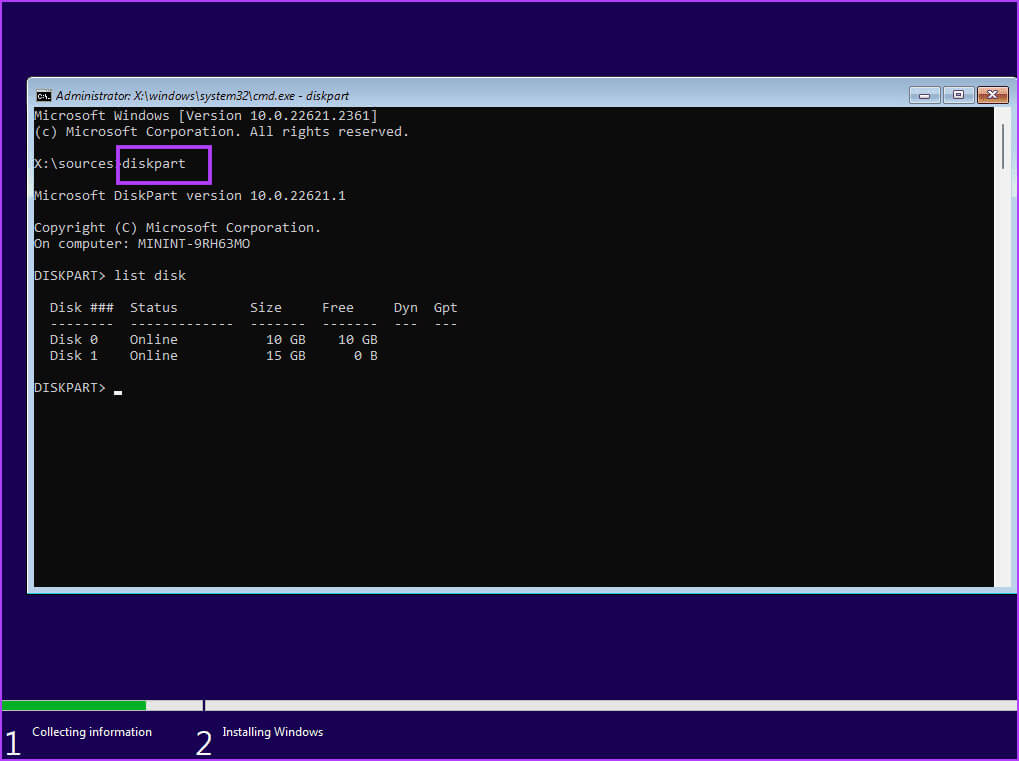
خطوة 3: بعد ذلك قم بتنفيذ الأمر التالي:
List disk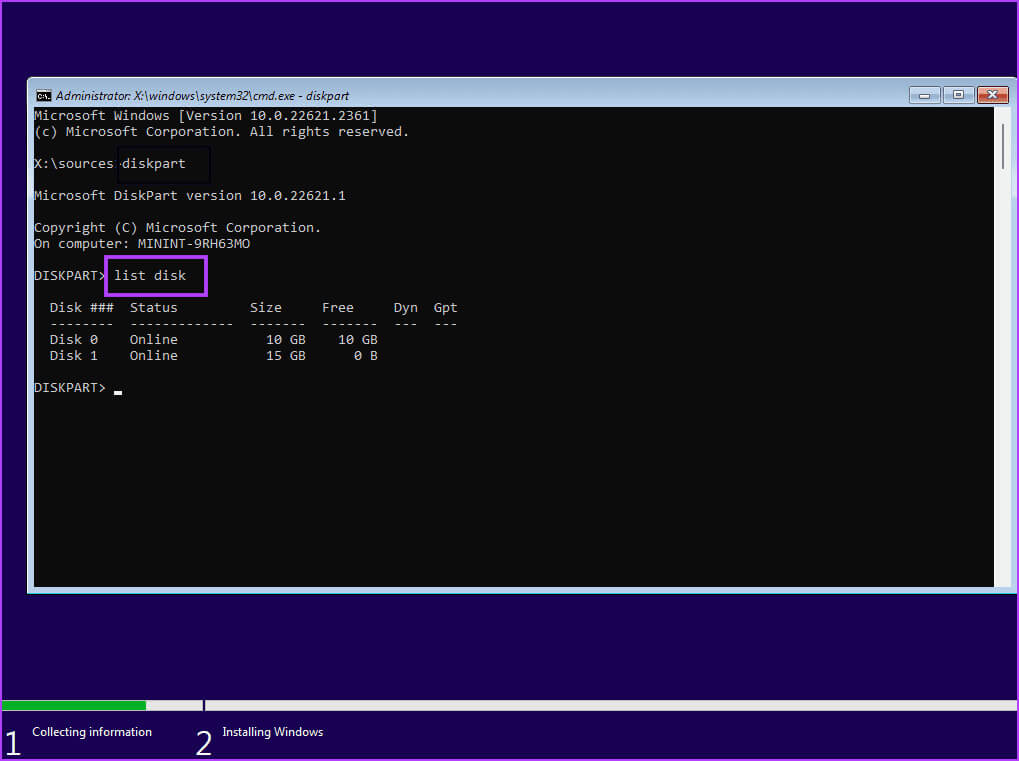
الخطوة 4: سترى قائمة بجميع الأقراص بما في ذلك وسائط تثبيت Windows USB. لاحظ رقم قرص النظام الخاص بك. الأمر لتحديد القرص هو:
Select disk disknumberالخطوة 5: استبدل جزء رقم القرص بالرقم الفعلي للقرص من القائمة. لذلك، يصبح الأمر النهائي في حالتنا:
Select disk 0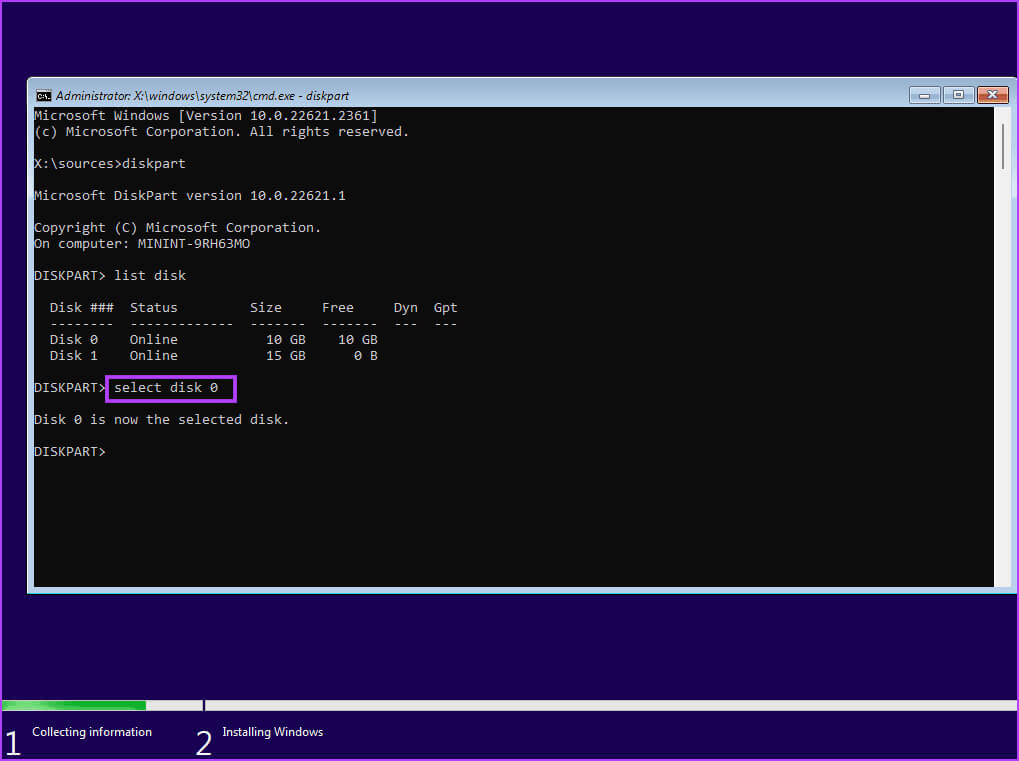
خطوة 6: بعد تحديد القرص، قم بتنفيذ الأمر التالي:
Clean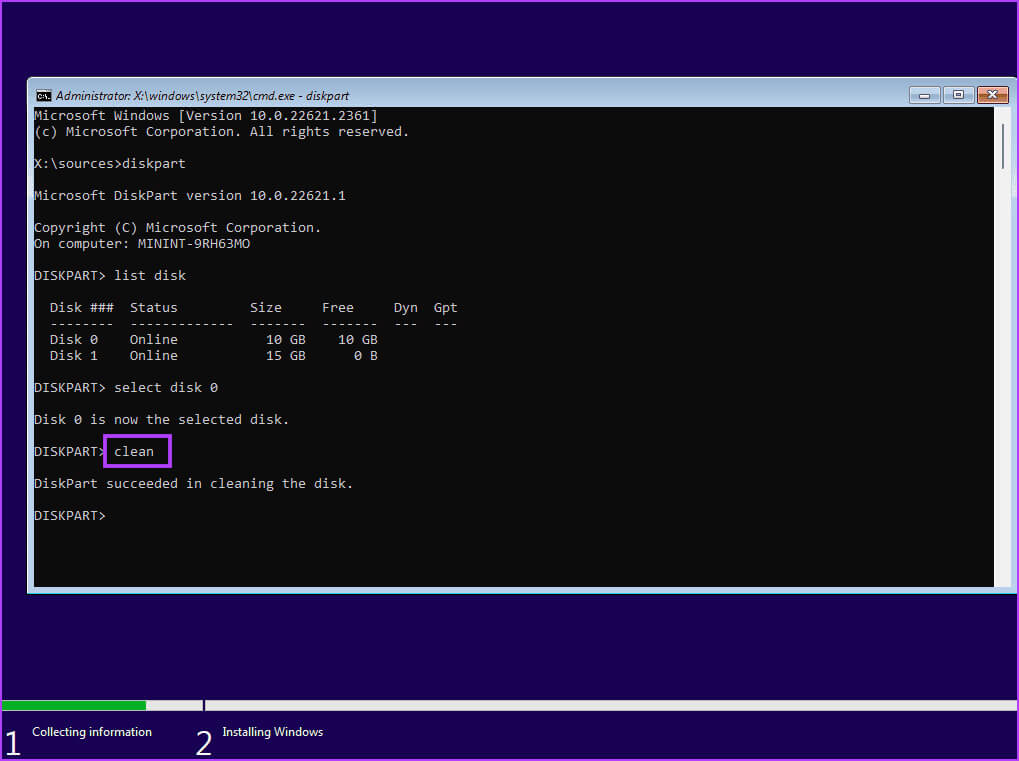
الخطوة 7: يتم مسح القرص المحدد وتنظيفه. قم بتنفيذ الأمر التالي لتحويله إلى GPT:
Convert gpt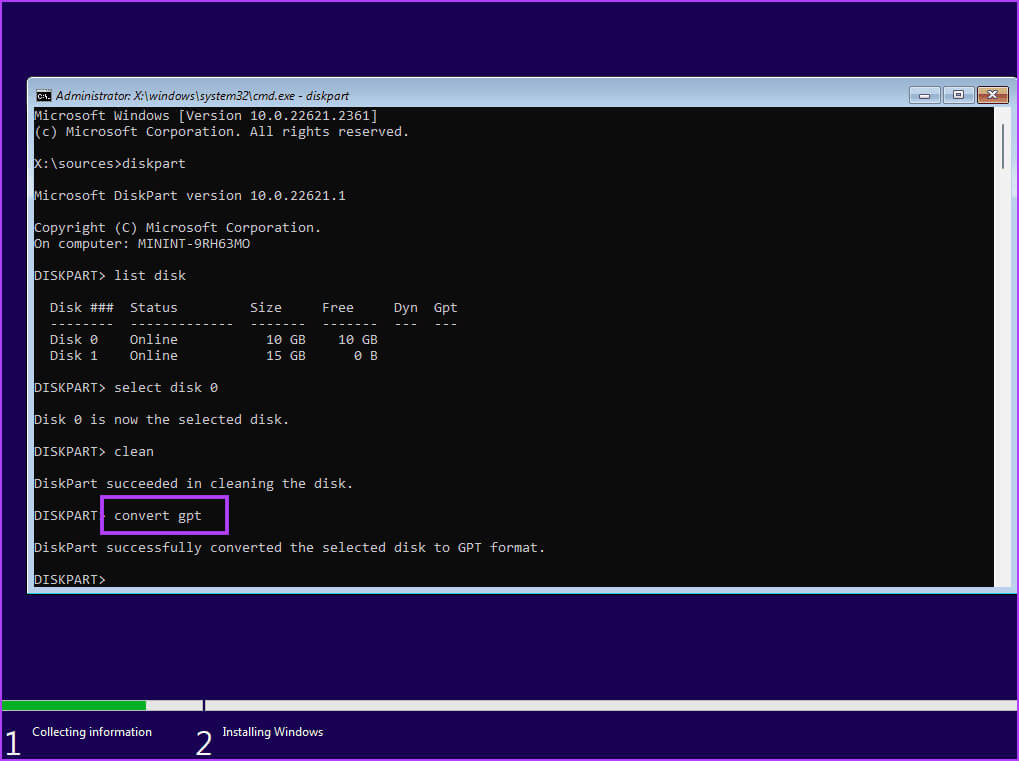
الخطوة 8: بعد ظهور رسالة نجاح تنفيذ الأمر، قم بتنفيذ الأمر التالي:
List disk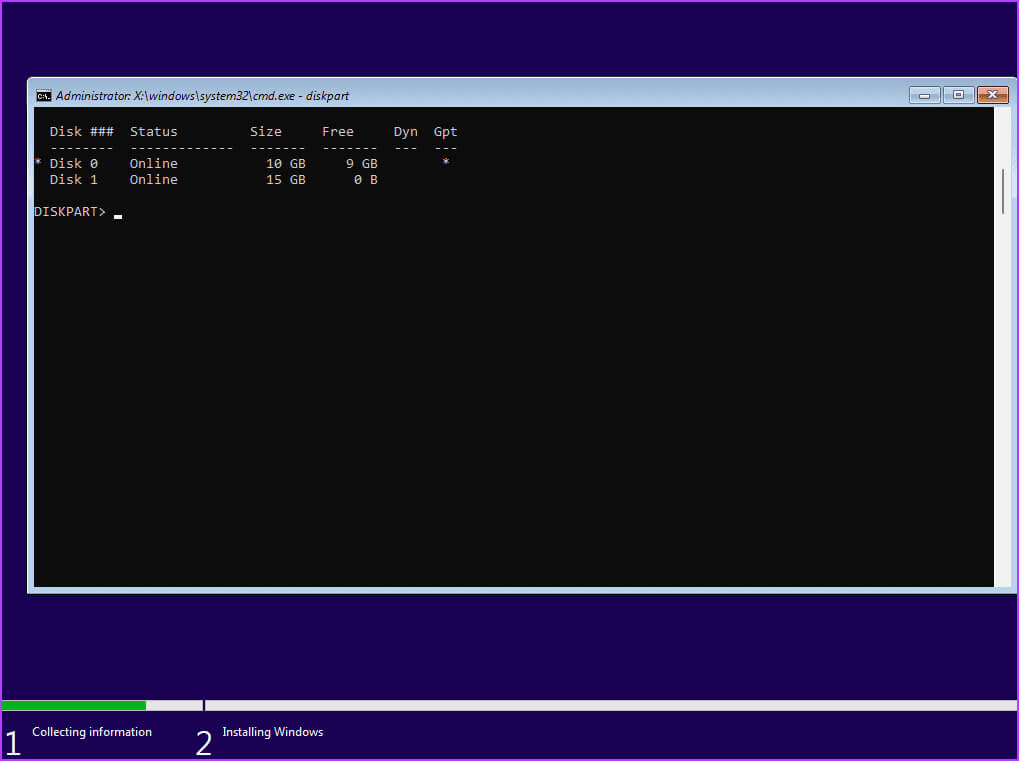
خطوة 9: ستلاحظ ظهور علامة النجمة (*) أمام القرص أسفل عمود GPT. يشير إلى أن القرص بتنسيق GPT الآن.
الخطوة 10: أغلق نافذة موجه الأوامر وتابع تثبيت Windows.
تم تثبيت Windows بنجاح
كانت هذه هي الطرق السبع لإصلاح مشكلة “لم يتم العثور على برامج تشغيل الأجهزة الموقعة” أثناء تثبيت Windows 10 أو 11. تحقق من وسائط تثبيت Windows USB، وقم بتعطيل CSM وSecure Boot، ثم قم بتثبيت برامج التشغيل المفقودة. بعد ذلك، أعد إنشاء وسائط تثبيت USB وقم بتحويل القرص إلى MBR لتثبيت Windows بنجاح.