Microsoft revealed Windows 11 unveiled It's scheduled to arrive in fall 2021. The biggest question is whether you can install or upgrade from Windows 7 or Windows 10 to Windows 11. Fortunately, Microsoft has released PC Health Check App To check and report whether your computer can run Windows 11. However, Many users are watching An error when running the application says “This PC can’t run Windows 11” on systems that are barely a few years old.

Windows 11 offers hundreds of notable features including key features like Android app support and snappy layouts that were Always present in PowerToys (Such as Fancy zones) and many other changes.
Also, Microsoft has identified Features Requirements So you can check and verify if your computer meets these requirements to run it. For example, DirectStorage only works with NVMe SSDs, and Auto HDR requires you to have an HDR display to get the most out of it.
While you're trying out the new Windows 11, it's important to know whether it will run on your PC. So, get the PC Health Check app first.
Download the PC Health Check app
Let's find out why PC Health Check is throwing this error and how you can fix it.
Windows 11 requirements
While Windows 11 will be available as a free upgrade for existing Windows users, it comes with a list of basic hardware requirements.
- 1 gigahertz (GHz) or faster processor with two or more cores on a compatible 64-bit processor or system on a chip (SoC)
- At least 4GB RAM
- At least 64GB storage space
- UEFI and Secure Boot are capable of this.
- TPM 2.0
- DirectX 12 / WDDM 2.x compatible graphics card
- The screen must be >9 inches with HD (720p) resolution.
- Microsoft account and active internet connection.
PC Health Check may cause an error when one or more of the requirements are not met.
Also, another way to check if Windows 11 will work on your system is to determine if your computer's processor appears in the Windows 11 supported processors list:
Windows 11 Supports Intel Processors


Windows 11 supports AMD processors

Two of the most common reasons why the PC Health Check app shows that your PC can't run Windows 11 are due to TPM 2.0 and Secure Boot features.
Most computers sold after 2016 will include a Trusted Platform Module (TPM) for Intel and AMD platforms. However, TPM is not enabled by default on many desktop and laptop computers.
On the other hand, you've always had the option to use or disable Secure Boot from your computer's UEFI (Unified Extensible Firmware Interface).
What is TPM and Secure Boot?
TPM module or Trusted Platform Module is a cryptographic processor. Or a microchip installed to provide hardware-level security. By default, newer motherboards have an integrated TPM chip, while slightly older motherboards have TPM connector pins for adding the module separately.

represented TPM chip function It encrypts data sent to and from the computer. This process ensures that unauthorized changes cannot be made without administrator approval. Critical data such as keys, passwords, and certificates are stored in TPM chips in a secure and isolated manner.
Enable TPM and Secure Boot for your computer
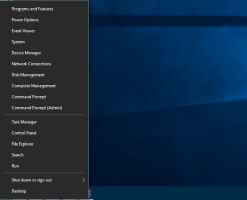
Before we begin, save all your work as you will have to restart your computer. There Two ways to enter the UEFI screen But we recommend doing this from Windows Settings.
The UEFI screen you see on your computer may differ slightly from what you see here and that's okay.
Most importantly, you'll look for the UEFI boot and security settings. This is where you'll find the TPM and Secure Boot options if your computer is running Windows.
Note: Intel platform-based UEFIs mention TPM as TPM, while AMD platforms refer to the option as fTPM (firmware-based Trusted Platform Module).

Depending on the manufacturer of your desktop or laptop, the UEFI display may vary. However, you'll find basic instructions, such as using the arrow keys to select. You can also check your UEFI menu at the bottom of the screen. If you're unsure of the changes you've made, you can exit the BIOS and make sure you haven't saved any changes before restarting your computer.
When you find your way into the UEFI settings, look for TPM in the Security option.
Step 1: Go to the Security tab where you will find TPM At the bottom of the list. If the current TPM status is set to Installed, it means that you have a TPM on your computer running Windows. WindowsGo to Change TPM State and change the value to Maybe.
Note: On some motherboards or laptops, the TPM will be set to a discrete mode. You will need to change this to firmware and save the change.

Step 2: Now, go to the Boot tab and make sure that Secure Boot is set to Enabled.

Step 3: Now you should save your changes and exit the mode. UEFIBy default, it is F10 This is the key to save changes and exit the mode. When prompted to save changes, select yes Save and exit. Your computer will restart automatically.
Once you see the desktop, run the PC Health Check app again and this is what it should look like.

2019
After confirming whether your computer can run Windows 11, you should be ready to install it. Microsoft plans to release the Windows 11 beta to Windows Insiders starting June 28, 2021. The general release of Windows 11 is scheduled to arrive during the holiday season this year. The good news is that existing Windows 10 users will be eligible for a free upgrade to Windows 11.
Will you upgrade to Windows 11?