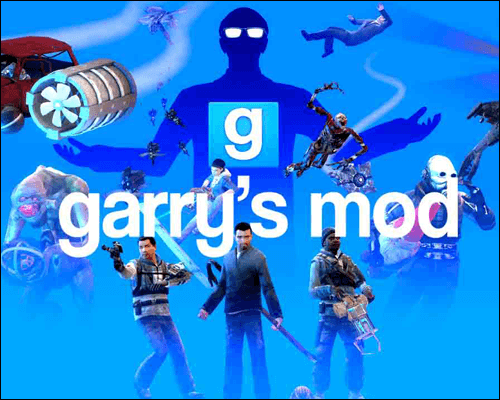
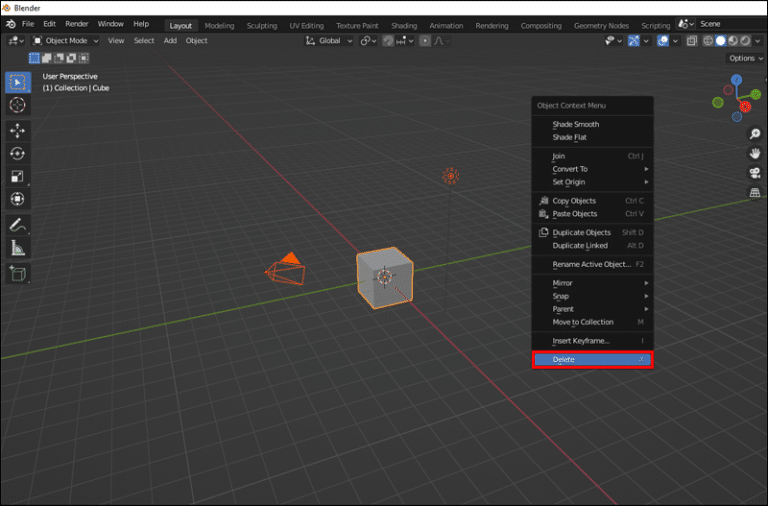
يسمح Garry’s Mod أو GMod للاعبين بفعل أي شيء تقريبًا. يمكنك استيراد نماذج مخصصة لاستخدامها كأعداء أو شخصيات غير قابلة للعب أو حلفاء. طالما أنه بالتنسيق الصحيح ، يمكنك استخدامه.

يحب العديد من لاعبي GMod صنع نماذج اللعب الشخصية الخاصة بهم. ومع ذلك ، فإنهم يحتاجون إلى بعض المعرفة المحددة لإنشائها. تابع القراءة للعثور على خطواتنا المبسطة لإنشاء نماذج التشغيل.
كيفية صنع نموذج لعب GMod مخصص
إذا كنت ماهرًا بالفعل في صنع نماذج ثلاثية الأبعاد باستخدام البرنامج المناسب ، فيمكنك إنشاء شخصيات مختلفة لمعظم الألعاب ، بما في ذلك Garry’s Mod. ومع ذلك ، لا يعرف الجميع كيفية صنع النماذج. لحسن الحظ ، غالبًا ما يشارك منشئو المحتوى نماذج مجانية مع مجتمع الألعاب ، والتي يمكنك استخدامها كأساس لمجتمعك.
يمكنك تنزيل أي نموذج تريده ، ولكن تزويره أمر حيوي أيضًا. يتضمن تزوير النموذج الجمع بين مظهر الشخصية والأجزاء التي تقوم بالتحريك الفعلي. بعد التزوير ، يمكنك التحرك باستخدام Playermodel الخاص بك.
بدون تزوير ، لن تتمكن GMod من تحريك نموذجك.
قبل أن نبدأ في إنشاء Playermodel ، دعنا نلقي نظرة على البرامج والأدوات اللازمة التي تحتاجها.
- Garry’s Mod
بالطبع ، ستحتاج إلى اللعبة إذا كنت تريد استخدام نموذج اللعب. بدونها ، ستصنع نموذجًا سدى.
ستحتاج إلى Blender لتجهيز نموذجك وتحرير الزخارف. من بين جميع البرامج ، ستقضي معظم الوقت مع هذا البرنامج. نوصي بشدة بتعلم بعض الأساسيات قبل الشروع في هذه العملية.


- Crowbar
Crowbar هو ملف مترجم ومترجم .mdl. ستستخدمه في تجميع النماذج بعد خطوات التجهيز.
يمكن لأي شخص تنزيل أداة المصدر مجانًا. سيسمح لنسختك من Blender بدعم محرك المصدر. سوف يتعامل مع جميع ملفات SMD و DMX الخاصة بك.
بعد تنزيل Paint.NET ، يأتي ملحق VTF التالي. سيتم إنشاء ملفات VTF الخاصة بك باستخدام هذا البرنامج.
- VTF Edit
ستحتاج إلى VTF Edit لإنشاء ملفات VMT. يمكنه أيضًا فتح ملفات VTF الخاصة بك.
- Source SDK
Source SDK هو البرنامج الذي استخدمته Valve سابقًا لإنشاء ألعابهم ، وتحتاجه لتشغيل GMod. يمكن لأي مستخدم Steam تنزيله.
هناك بعض الأدوات الأخرى التي قد ترغب في تنزيلها. يشملوا:
- Notepad ++
- GFCScape
- أداة النشر GMod (إذا كنت ترغب في مشاركتها مع العالم في Steam Workshop)
بعد تنزيل البرنامج ، يجب أن تحصل على نموذج الشخصية والهيكل العظمي وملف QC لطراز مختلف. هذه متاحة للتنزيل في Steam Workshop و Garry’s Mods ، من بين مواقع الويب الأخرى.
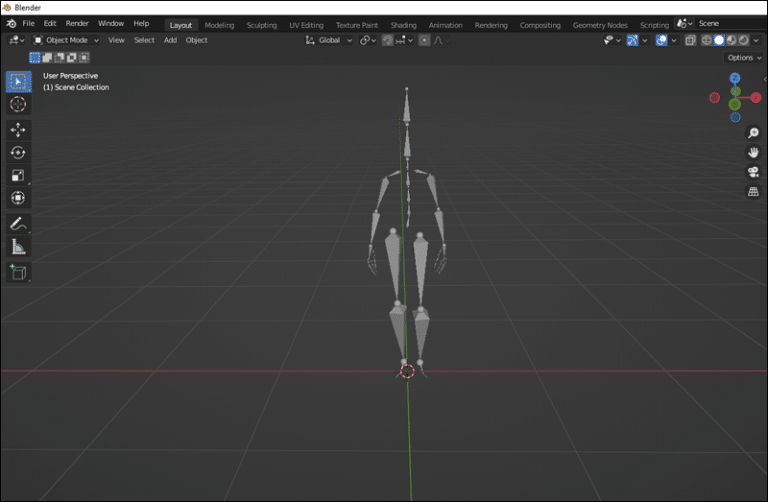
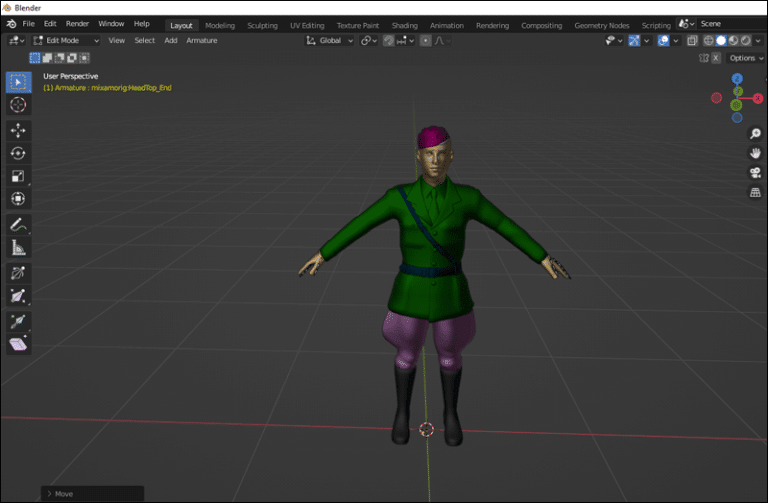
المرحلة الأولى – فتح نموذج اللعب في الخلاط
بعد الحصول على كل شيء على جهاز الكمبيوتر الخاص بك ، فإن أول مسار للعمل هو الجمع بين الهيكل العظمي للنموذج المرجعي ونموذج شخصيتك. يجب عليك أيضًا تثبيت أداة المصدر في Blender للتصدير بالتنسيق المناسب.
دعونا نلقي نظرة على العملية.
- قم بتشغيل Blender على جهاز الكمبيوتر الخاص بك.

- قم بإزالة كل شيء في المشهد.

- قم باستيراد النموذج المرجعي إلى Blender.

- احذف شبكة النموذج المرجعي حتى تترك العظام فقط.

- قم باستيراد النموذج المخصص.

- اضبط النموذج والهيكل العظمي حتى يتلاءم كلاهما معًا.

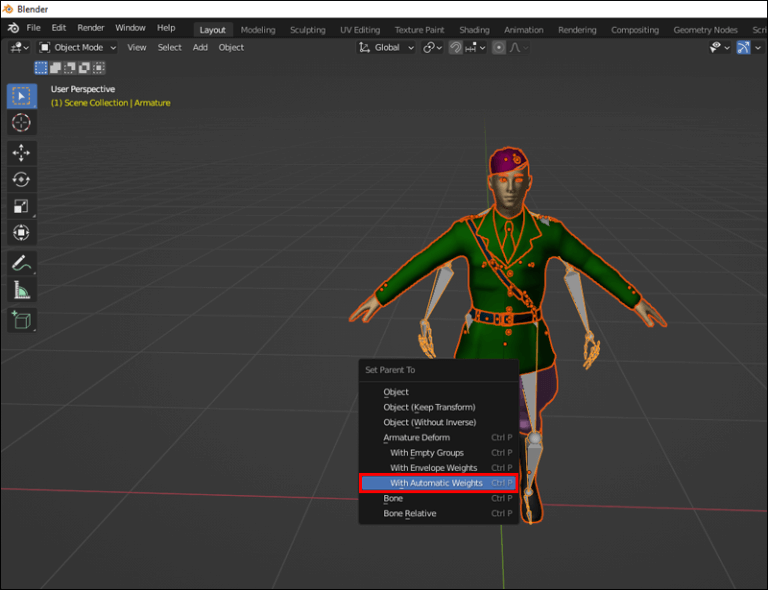
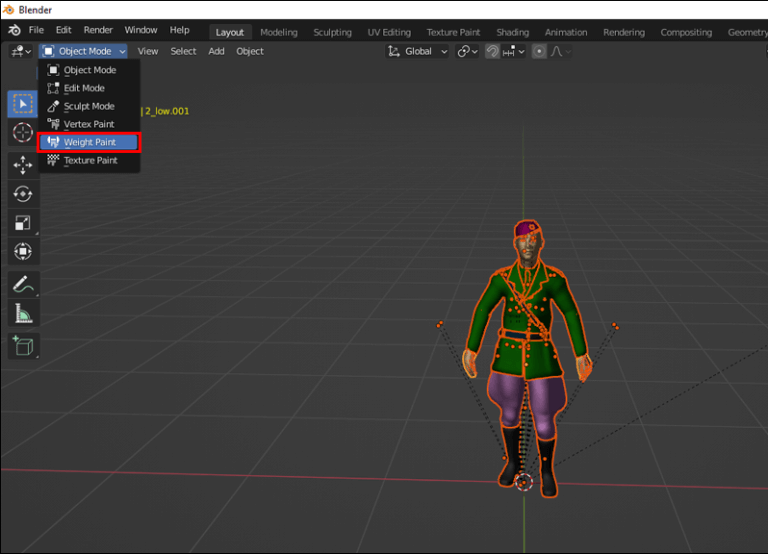
المرحلة الثانية – تصدير نموذج اللعب مع الخلاط
- ادخل إلى “Objectmode” واضغط باستمرار على مفتاح Shift.

- انقر بزر الماوس الأيسر فوق النموذج الخاص بك ثم فوق الهيكل العظمي.

- اضغط باستمرار على Ctrl + P ثم حدد “باستخدام الأوزان التلقائية”.

- استخدم “رسم الوزن” لإجراء المزيد من التعديلات.

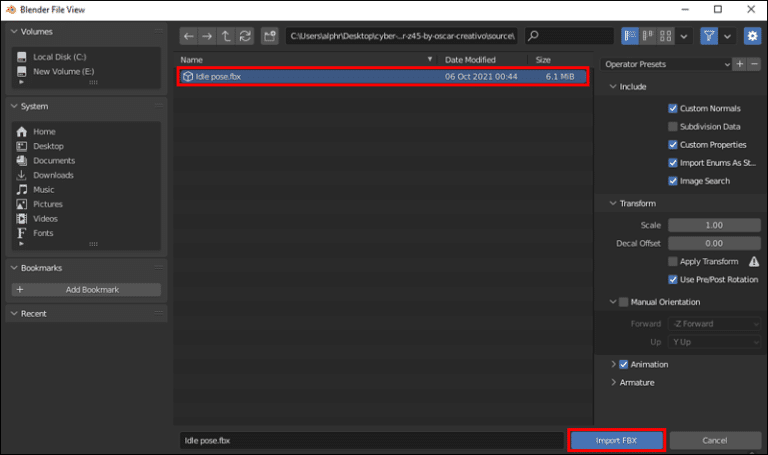
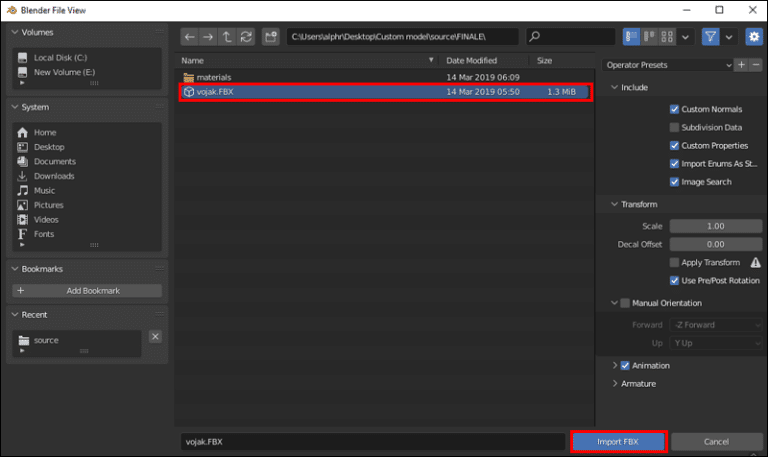
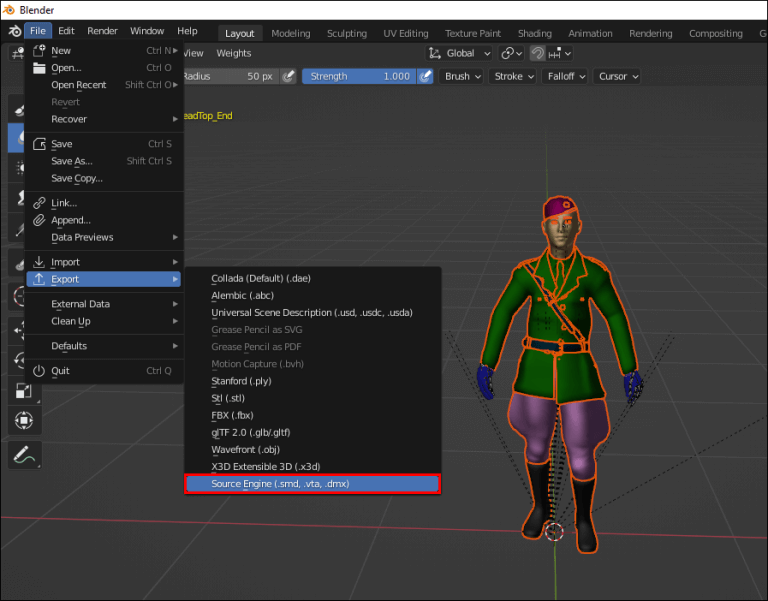
- عند الانتهاء ، انتقل إلى المشهد وابحث عن خيار التصدير في SMD.

- اسم النموذج المخصص الخاص بك كما يحلو لك.

- قم بتصدير النموذج الجديد إلى مجلد النموذج داخل مجلد mods الخاص بك.

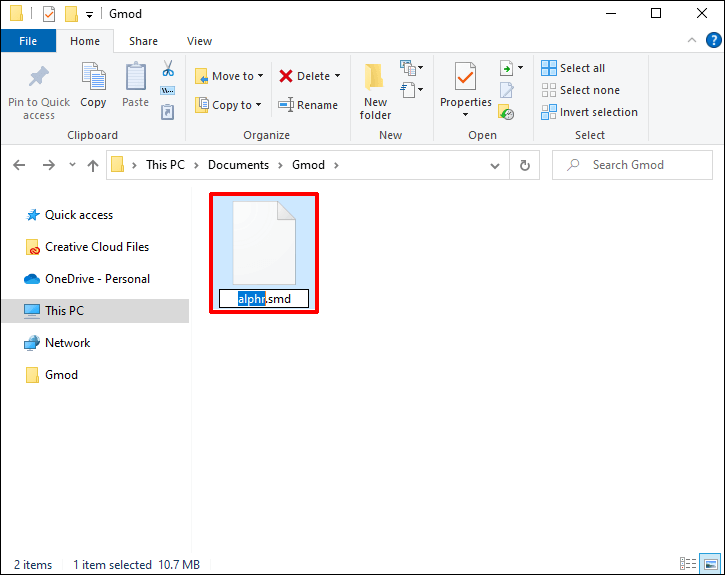
احتفظ بالنموذج الأصلي في حال ارتكبت خطأ أو أردت البدء من جديد. قد تضطر إلى القيام بذلك إذا كنت لا تزال تتعلم.
المرحلة الثالثة – تعديل نسيج نموذج اللعب
على الرغم من أن هذه الخطوة ليست ضرورية تمامًا ، إلا أن تعديل الزخارف يمكن أن يساعد في تحسين مظهر نموذجك. إذا كنت تعتقد أن بعض الأجزاء ستبدو أفضل مع التحرير ، فابحث عنها. تتطلب هذه الخطوة Paint.NET مع البرنامج المساعد VTF.
اترك Blender مفتوحًا ، أو إذا قمت بإغلاقه ، فأعد تشغيله. ستحتاج إلى خلاط طوال العملية برمتها.
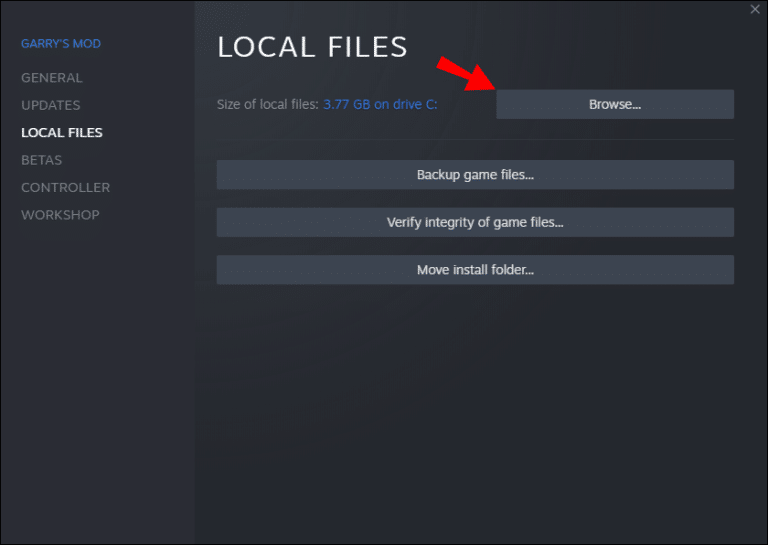
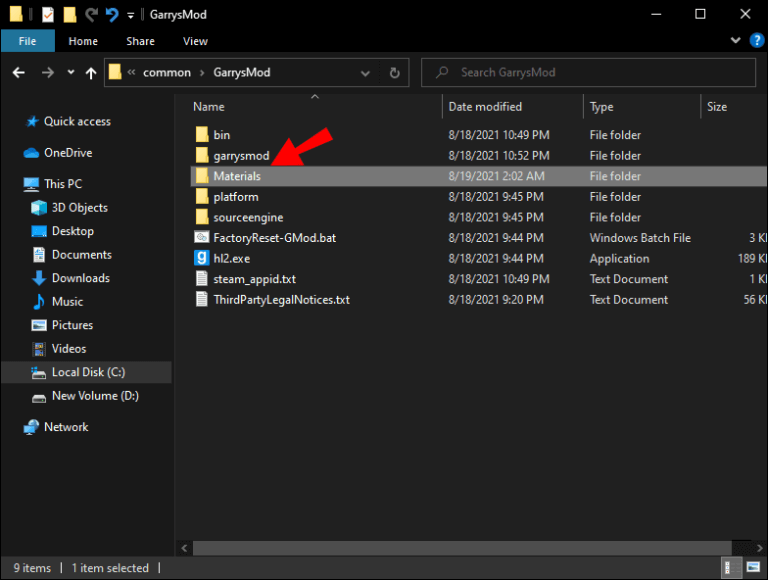
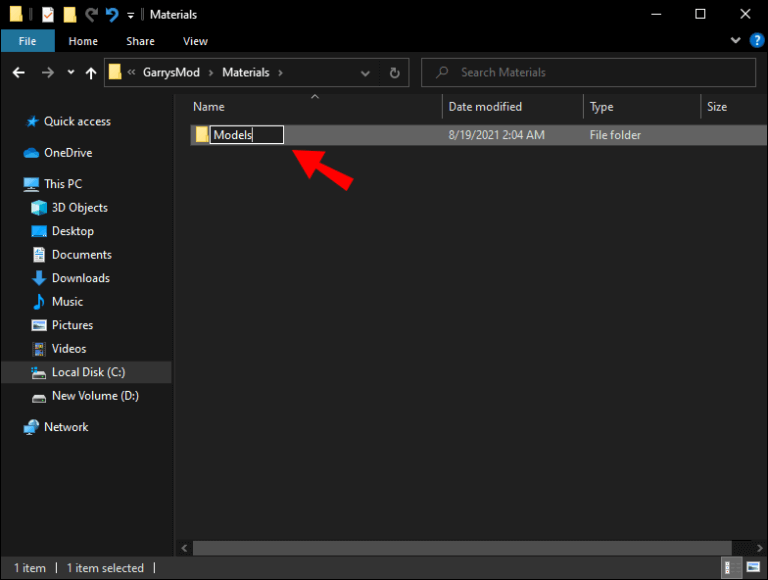
- انتقل إلى مجلد وضع GMod الخاص بك.

- توجه إلى “المواد”.

- أنشئ مجلدًا بداخله يسمى “الطرازات”.
- يجب أن يكون لديك سلسلة تشبه “modefolder> / material / Models / (أدخل اسم النموذج هنا).”
- إذا كان نموذجك مزودًا بأنسجة ، فيمكنك العثور عليها في الملف المضغوط.
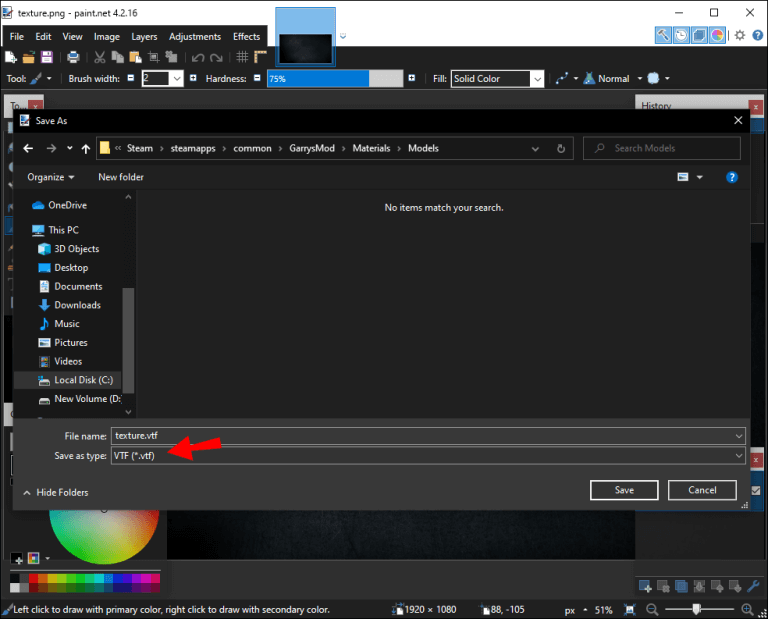
- افتحها في Paint.NET.
- احفظ كل منهم في مجلد النموذج كملفات .vtf.

VMTs والقوام
- بعد ذلك ، افتح الأنسجة في VTF Edit مع نافذة Blender أخرى وضعها جميعًا في ملف .vmt واحد.
- افتح ملف النموذج الأصلي الخاص بك.
- توجه إلى لوحة المواد.
- حدد مادة وانقر على أيقونة “نسيج” بجوار كل منها.
- افتح نسيج المادة في تحرير VTF.
- في VTF Edit ، انتقل إلى “أدوات” وحدد خيار إنشاء ملف .vmt.
- احتفظ بجميع الخيارات كما هي باستثناء تغيير “LightmappedGeneric” إلى “VertexlitGeneric”.
- احفظ جميع ملفات .vmt في نفس المجلد مثل ملفات .vtf المقابلة ، مع انتقال الشعر إلى ملف vmt المسمى “hair” ، على سبيل المثال.
- تأكد من أن ملفات .vmt لها مسار الملف الصحيح إلى ملف .vtf الخاص بك.
- كرر لجميع ملفات المواد.
في هذه المرحلة ، من الشائع أن تخطئ في تهجئة الكلمات. سيكون من الأفضل إذا قمت بفحص أسماء الملفات مرتين وثلاث مرات قبل الانتقال. يمكن أن تصبح الملفات التي بها أخطاء إملائية مشكلة وتعيقك.
المرحلة الرابعة – قم بإعداد ملف QC الخاص بك
- قم بتنزيل ملف QC للنموذج المرجعي إذا لم تكن قد فعلت ذلك.
- انسخ كل شيء باستثناء “(أدخل اسم النموذج هنا). smd.”
- ضع الملفات في مجلد جديد في مجلد نموذج SMD المعدل.
- افتح ملف QC باستخدام Notepad أو Notepad ++.
في هذه المرحلة ، ما عليك سوى تعديل بعض التعليمات البرمجية. في ما يلي مثال للقسم الذي تحتاج إلى تعديله (كما تم إنشاؤه بواسطة Crowbar 0.19.0.0):
$modelname "player/(name)/RealModel/(insert name here).mdl"
$model "(name)" "(name).smd"
$cdmaterials "models\Player\(name)\"
قد تحتوي على كلمات مختلفة قليلاً ، لكن هذا هو القسم الوحيد الذي تحتاج إلى تعديله. - قم بتغيير “$ modelname” إلى أي اسم طالما أنه ينتهي بـ mdl.
- غيّر “$ model” إلى اسم نموذجك المخصص ، واحرص على تضمين .smd.
- تأكد من أن “$ cdmaterials” هو المسار المادي الفعلي ، وقد تضطر إلى إضافة “\” في نهاية المسار للتأكد من أن Crowbar يستهدف المجلد الصحيح.
قد يبدو المسار كالتالي:
(models\Player\(insert model name here)\
المرحلة الخامسة – تجميع نموذج التشغيل في Crowbar
الآن ، ملفات QC جاهزة أخيرًا ليتم تجميعها. ستحتاج إلى Crowbar لهذه الخطوة التالية ، لذا تأكد أولاً من تثبيته بشكل صحيح.
- قم بتشغيل Crowbar وافتح ملفات QC الخاصة بك.
- قم بإنشاء مجلد فرعي باستخدام Crowbar وقم بتسميته بنفس اسم Playermodel الخاص بك.
- حدد GMod كلعبة مستهدفة.
- تجميع نموذج اللعب.
سيكون لديك ملفات .mdl على يديك الآن. الخطوة التالية هي تحويلها إلى ملفات gma.
المرحلة السادسة – استخدام Lua
أنت بحاجة إلى Lua لمساعدة GMod في تحميل ملفات Playermodel الخاصة بك وموادها. سينتهي بك الأمر بملف .lua ، ولن تحتاجه بعد إنشاء هذا الملف.
- انتقل إلى مجلد الوظائف الإضافية في GMod.
- ضع مجلد النموذج الخاص بك هناك.
- افتح مجلد mod ، وافتح المجلد المسمى “lua” ثم مجلد “autorun” بداخله.
- استخدم Notepad أو Notepad ++ لإنشاء ملف .lua.
- اكتب الكود التالي في الملف:
player_manager.AddValidModel (“SonicMiku” ، “الطرازات / المشغل / (الاسم) / (الاسم) / (أدخل الاسم هنا) .mdl”)
سيحمل المسار اسم نموذجك الأصلي. على هذا النحو ، قد يبدو مختلفًا. - قم بتغيير المسار إلى ملف .mdl الذي حصلت عليه بعد التحويل البرمجي.
المرحلة السابعة – الاستيراد إلى GMod
- إطلاق GMod.
- حدد Playermodel الخاص بك.
- قم باستيراده إلى اللعبة.
- إذا نجحت ، يمكنك استخدام نموذج التشغيل الآن.
هذه العملية معقدة نوعًا ما ، ولكنها تتطلب تدريبًا لإنشاء نماذج Playermodels الخاصة بك واستيرادها.
كيفية جعل دوول نموذج لعب في GMod
لجعل أي نموذج لعب خاص بك ، عليك أولاً تثبيت ملحق باسم PAC3. ثانيًا ، يجب أن يكون لديك دمية مستوردة إلى اللعبة.
مع معالجة هذه المتطلبات الأساسية ، دعنا ندخل في العملية.
- افتح GMod.
- تأكد من أن لعبتك في الوضع المتقدم.
- افتح PAC Playermodel Editor.
- انقر بزر الماوس الأيمن فوق بشرتك الحالية.
- أضف “كيانًا”.
- انقر بزر الماوس الأيمن فوق بشرتك مرة أخرى ، ولكن حدد “نموذج” هذه المرة.
- افتح الخصائص وابحث عن النموذج الخاص بك.
- انقر فوقه لتحديده.
- دوول هو الآن نموذج اللعب الخاص بك.
بالمقارنة مع إنشاء واستيراد نموذج اللعب ، فإن هذه العملية بسيطة نسبيًا.
كيف تجعل نموذج اللعب الخاص بك غير مرئي في GMod
يمكن أن تتيح لك هذه الحيلة أن تصبح غير مرئي تمامًا في GMod. ما تحتاجه هو نموذج AlyxFakeFacotry NPC وأي برنامج لمعالجة النماذج مثل PAC3.
إليك دليل أساسي للتحول إلى غير مرئي:
- قم بتنزيل وفك ضغط ولصق ملفات AlyxFakeFacotry في مجلد “الإضافات” من GMod.
- إطلاق GMod.
- تفرخ نموذج FakeAlyx في Gmod. لا يمكنك رؤية النموذج الفعلي لأنه غير مرئي.
- استخدم أداتك للنقر بزر الماوس الأيمن على نموذج FakeAlyx.
- بعد إعادة تحميل نموذجك ، ستصبح غير مرئي.
لا أحد يستطيع رؤيتك في هذا النموذج بسبب طبيعة نموذج NPC. إذا كان لديك نموذج آخر غير مرئي ، فسيكون أيضًا بديلاً مقبولاً.
انظر إلى نموذجي الرائع
إذا سئمت من نماذج Playermodels الافتراضية ، فإن تزوير وتجميع نماذجك الخاصة يمكن أن ينعش GMod من أجلك. يساعد المظهر الجديد في جعل وضع اللعبة مثيرًا ، خاصة إذا كنت تلعب مع آخرين. طالما يمكنك إنشاء النموذج ، يمكنك استخدامه داخل اللعبة.
ما النموذج الذي تستخدمه عند لعب GMod؟ هل حاولت إنشاء Playermodel من البداية؟ واسمحوا لنا أن نعرف في قسم التعليقات أدناه.