If you're working on a text-heavy document and want to make it easier to refer to or navigate, you might want to try line numbering. Line numbering is common and particularly useful for legal professionals. You can find line numbers within legal texts such as contracts, making it easier for users to navigate the document. If your word processor is Microsoft Word, Number the lines in the document By default, these numbers will be invisible unless you reveal them in your document. Also, whether lines are visible in the entire Word document or just part of it is up to you to decide. Here's how to add and remove line numbers in Microsoft Word.

How to Add Line Numbers in Microsoft Word
The line numbering feature in Microsoft Word is located on the Layout tab of the Word ribbon. Using it, you can select whether to add line numbers to an entire Word document, a section of the document, or a specific section. Here's how it works:
Add line numbers to the entire document
Here's how to add line numbers to an entire document:
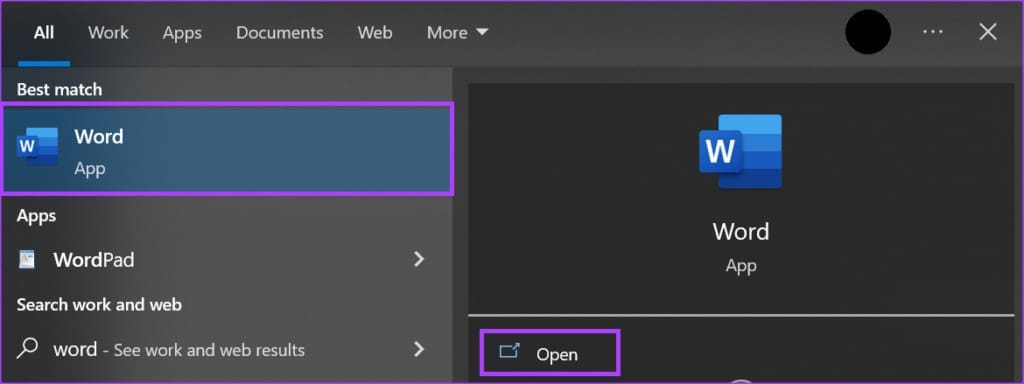
Step 1: Click the button "Start" On the taskbar and type Word To search for the application.
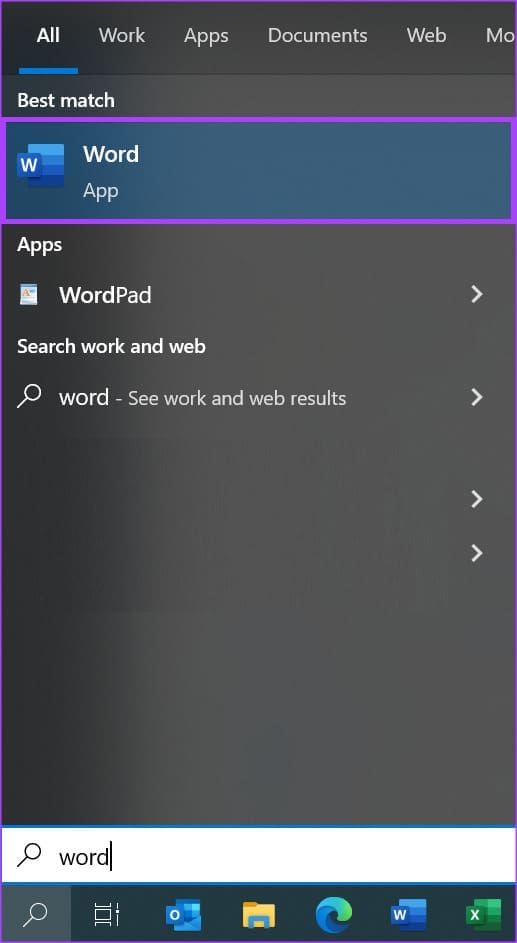
Step 2: From the results, click Application Or Microsoft Word document to open it.
Step 3: Select all the text in your Word document by pressing the keys. Ctrl + A at same time.
Step 4: On the Microsoft Word ribbon, click the tab planning.

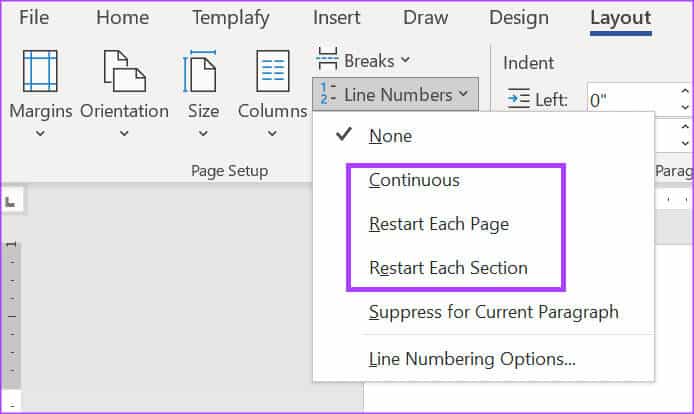
Step 5: within a group page Setup, click the . button Line numbers.

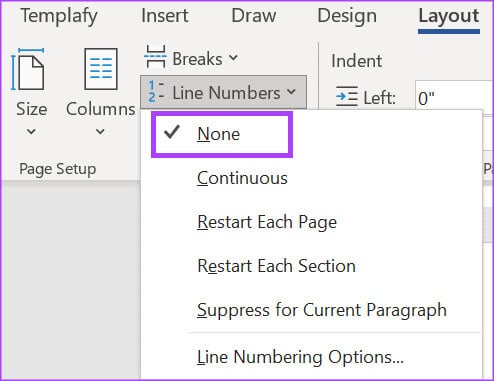
Step 6: From the drop-down list, select any of the following: Options next:
- continuous: Consecutive line numbers in your document
- Restart each pageStart line numbering from 1 on every page of the document.
- Restart each section: Start line numbering with 1 after each section break in your document.
If your document doesn't appear after selecting your preferred line number format, make sure the page width is in print layout.
Add line numbers to a section or multiple sections of a document
Here's how to add line numbers to a section or sections of your document:
Step 1: Click the button "Start" On the taskbar and type Word To search for the application.

Step 2: From the results, click Application Or Microsoft Word document to open it.

Step 3: Select the section or sections in a document. Word The one you want to provide line numbers to.
Step 4: On the Microsoft Word ribbon, click the tab planning.

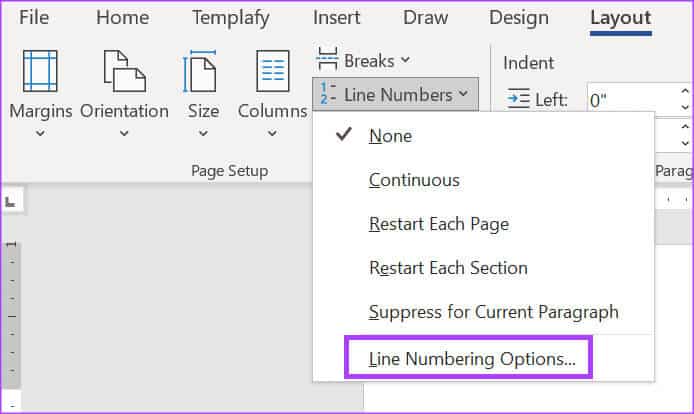
Step 5: In the Page Setup group, click the button. Line numbers.

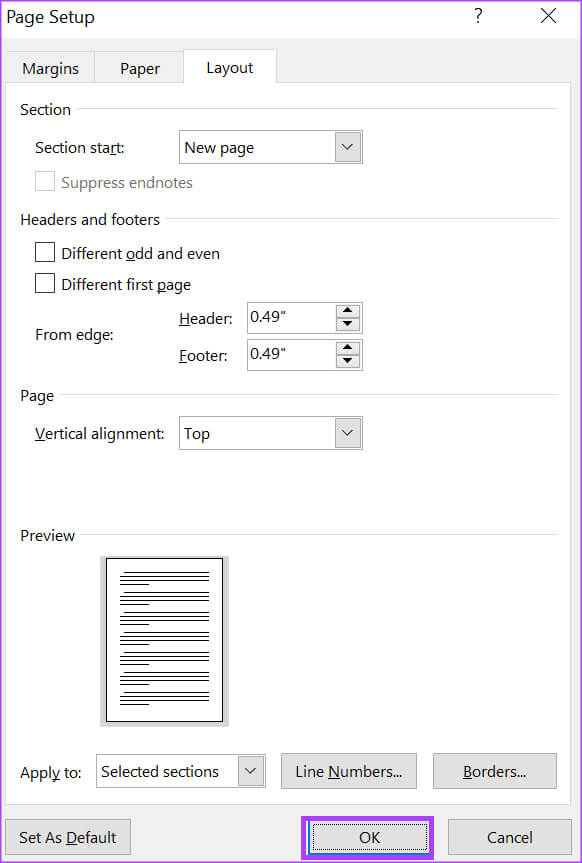
Step 6: From the drop-down menu, select Line numbering options To start the Page Setup dialog box.
Step 7: Click the tab "planning" in the dialog box Page Setup.
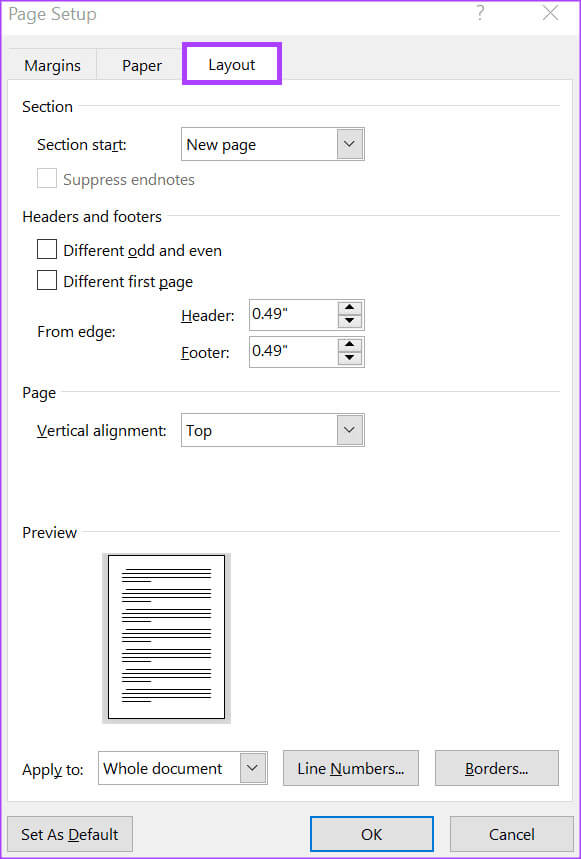
Step 8: In section "Apply to"Click the drop-down menu and then click Selected Sections.
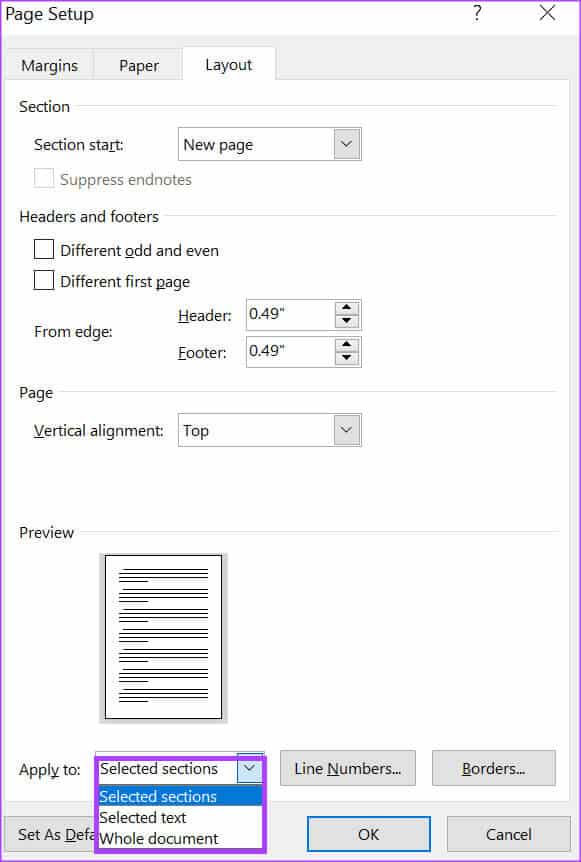
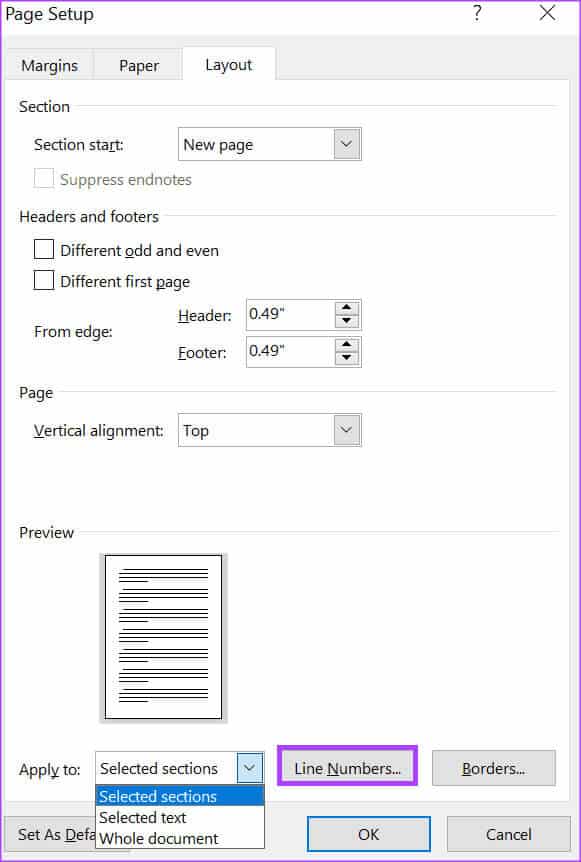
Step 9: Click the button Line numbers To run the dialog box Line numbers.
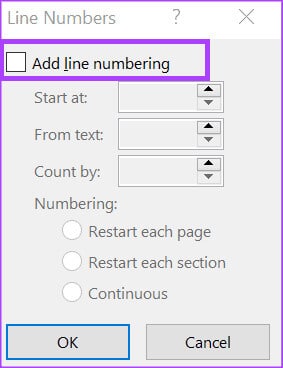
Step 10: Put Marker In the box next to Add line numbering, select the type of numbering you want by filling in the following options:
- Start at: The number you want the line numbers to start from.
- From the text: How far back in the text do you want the line numbers to appear?
- Count by: The intervals at which you want line numbers to appear.
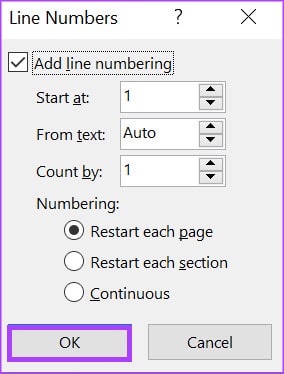
Step 11: Click "OK" To close the dialog box and save your changes.
Step 12: Click "OK" To close the dialog box "Page setup".
How to remove line numbers in Microsoft Word
If you no longer want numbered lines to appear in your Word document, here's how to remove them:
Step 1: Click the button "Start" On the taskbar and type Word To search for the application.

Step 2: From the results, click Application Or Microsoft Word document to open it.

Step 3: On the Microsoft Word ribbon, click the Layout tab.

Step 4: In the Page Setup group, click the button. Line numbers.

Step 5: From the drop-down menu, select nothing. This should remove the line numbers from your document.
Creating columns in Microsoft Word
Adding and removing line numbers in Microsoft Word is one way to customize your document layout. Another way you can change the page layout of a Word document is to Create text columnsThe column layout of the text is what you typically find in newspapers and magazines.


