There are a lot of new features introduced with Windows 11, some of which can be set up and customized with a little work in the settings. One of them is creating a restore point in Windows 11, right-clicking on the desktop menu. Today, we'll talk about the same topic and discuss some ways to add a context menu to create a restore point. restore point in Windows 11.
How to Add a Restore Point Context Menu in Windows 11
Windows 11 offers a very good interface compared to previous versions of Windows, despite the bugs and stability issues that Microsoft is slowly addressing to improve the user experience. You can create a restore point in the right-click menu in Windows 11 as a shortcut to use in case you need to perform a "system recovery".
Is it possible to add "Create a restore point" to the right click menu?
Considering Windows 11 in this story, it's entirely possible to add a restore point to the context menu, and we'll achieve this through simple methods. Some relevant points regarding the Windows 11 context menu are listed below.
- Customizable right-click menu or context menu.
- By making and creating some valuable changes in the registry file and implementing the right steps, we can customize it.
Here are the possible ways to do this.
Method 1: Create and merge the registry file
This is perhaps the best and easiest way to create a restore point, and it saves a lot of time by making a few simple changes to the Registry Editor files. Follow these steps:
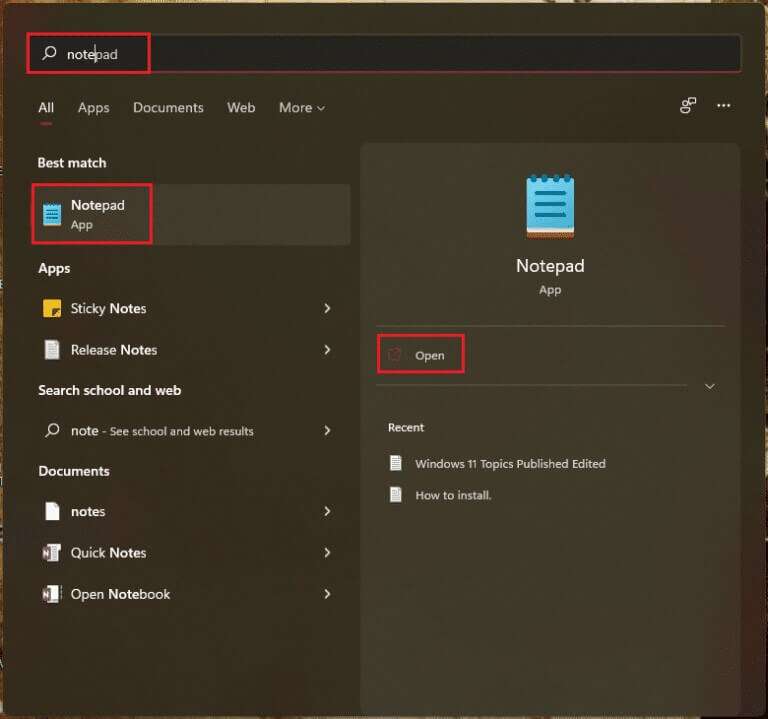
1. Click search icon , And type notepad , then tap to open.
2. Paste the following text into: Untitled frame – Notepad.
[HKEY_CLASSES_ROOT\Directory\Background\shell\Create Restore Point]
"HasLUAShield"=""
"Icon"="SystemPropertiesProtection.exe"
[HKEY_CLASSES_ROOT\Directory\Background\shell\Create Restore Point\command]
@="PowerShell -windowstyle hidden -command \"Start-Process cmd -ArgumentList '/s,/c, PowerShell Checkpoint-Computer -Description \"Manual\" -RestorePointType \"MODIFY_SETTINGS\"' -Verb runAs\""
[HKEY_LOCAL_MACHINE\SOFTWARE\Microsoft\Windows NT\CurrentVersion\SystemRestore]
"SystemRestorePointCreationFrequency"=dword:00000000

3. Then click a file and select an option Save as….

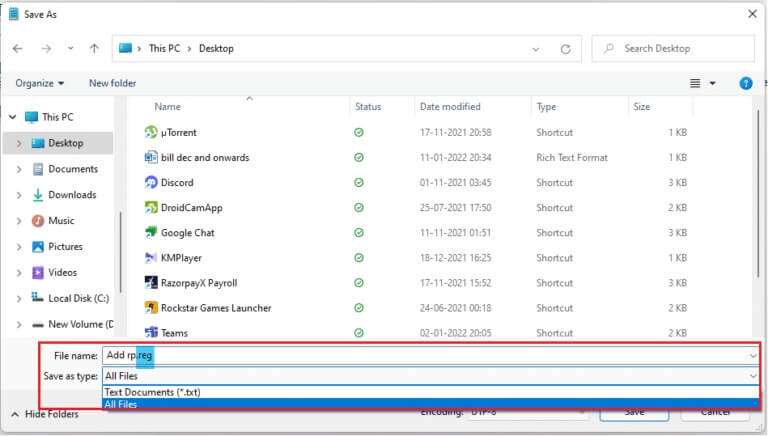
4. Add an extension .Reg to file name and select Save as type For all files. Now, Save the file In the location you want.
5. Now open .reg file Saved, a registry editor warning will appear about adding the file to the registry, click "Yeah" to follow.

6. Then restart your computer.
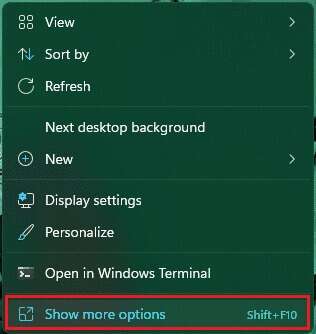
7. Finally, right-click on an empty space on the desktop and click Show more options.After that, you will get an option Create a restore point.
Method 2: Use Registry Editor
You can create an option to add a restore point creation context menu on Windows 11 by configuring the Registry Editor. Follow these steps to do so:
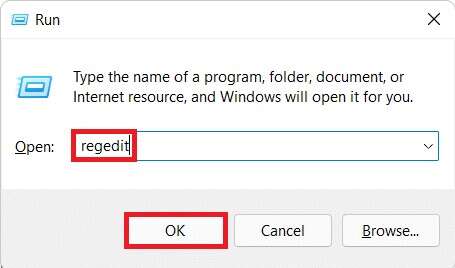
1. Launch the dialog box. "employment" By pressing the keys Windows + R together.
2. Write regedit And click "OK" to open the Registry Editor.
3. Navigate to the following location path from the address bar.
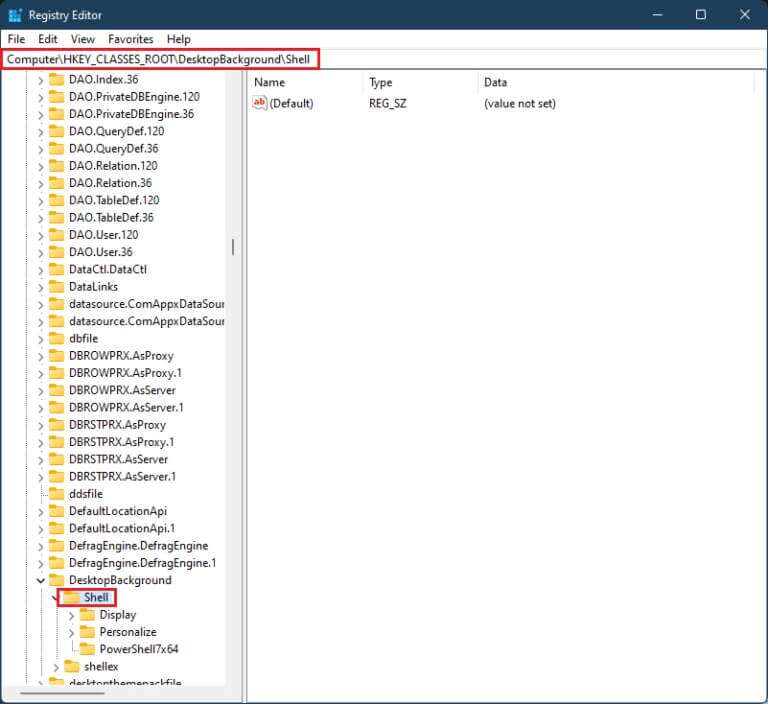
Computer\HKEY_CLASSES_ROOT\DesktopBackground\Shell
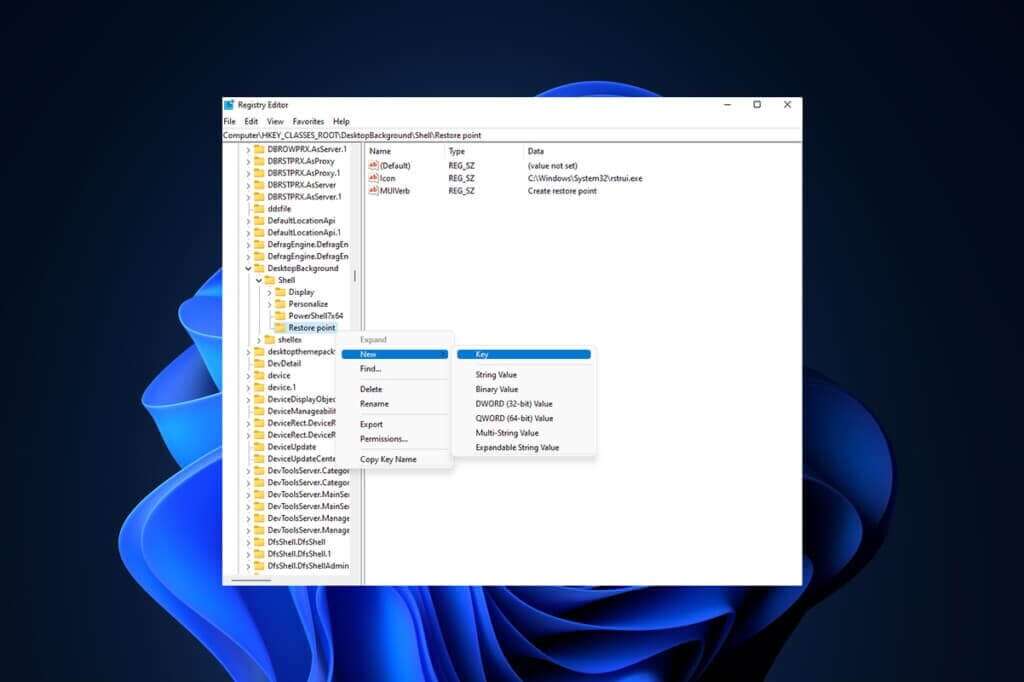
4. Right click on Shell folder In the right pane, then hover over "new" Then click "key".
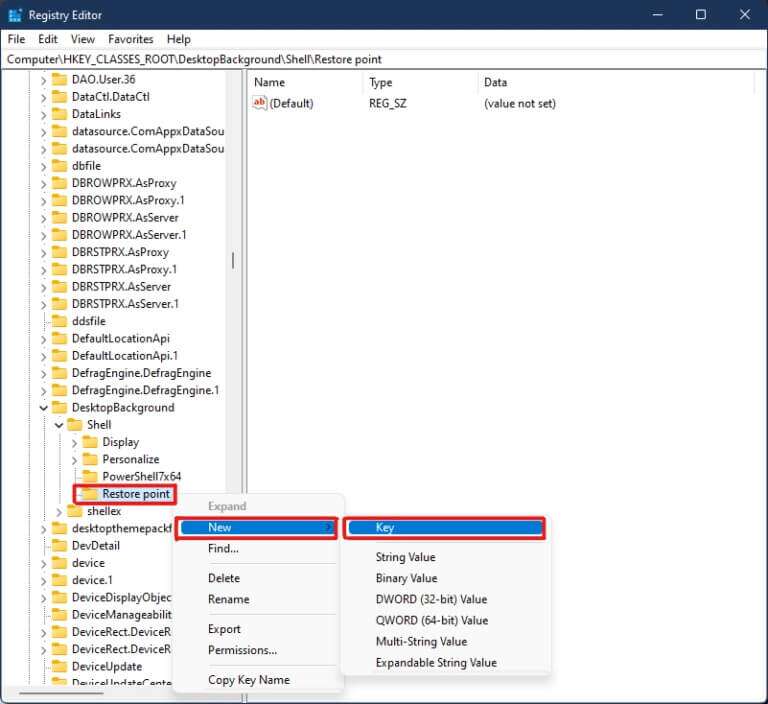
5. Rename the new folder that was created as a restore point, right-click on the empty area in the right pane and select New > String value.
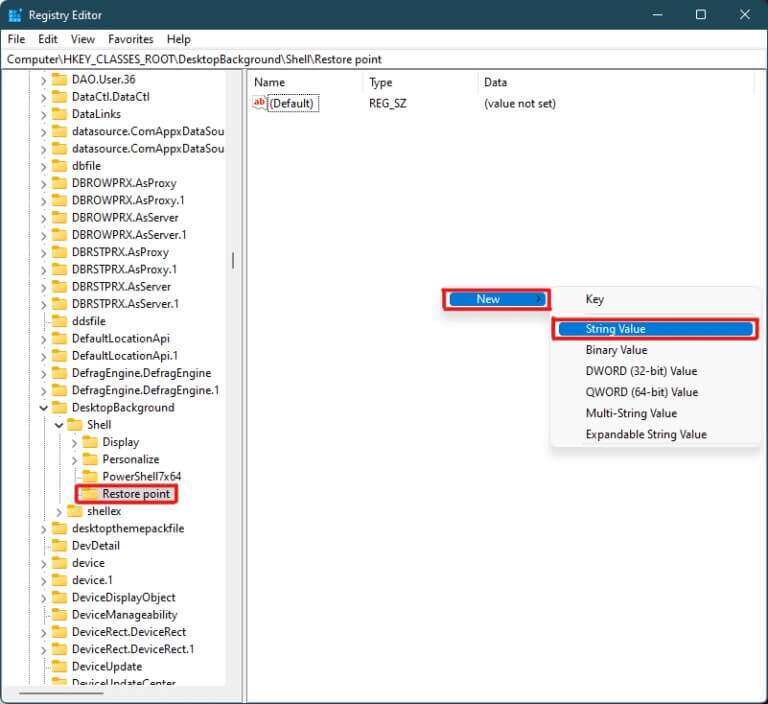
6. Rename String value The newly formed name MUIVerb.
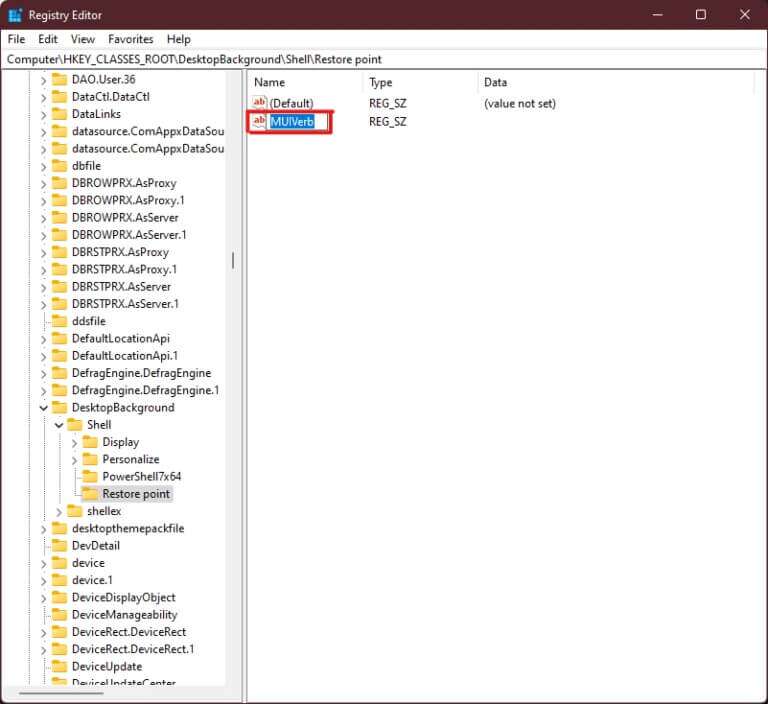
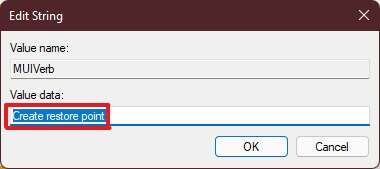
7. Double-click on MUIVerb Series And type Create a restore point Under the Value Data section, click "OK" to save the changes.
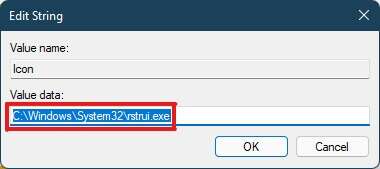
8. Now, create another file forString value As shown in Step 5. And rename the value to Icon.
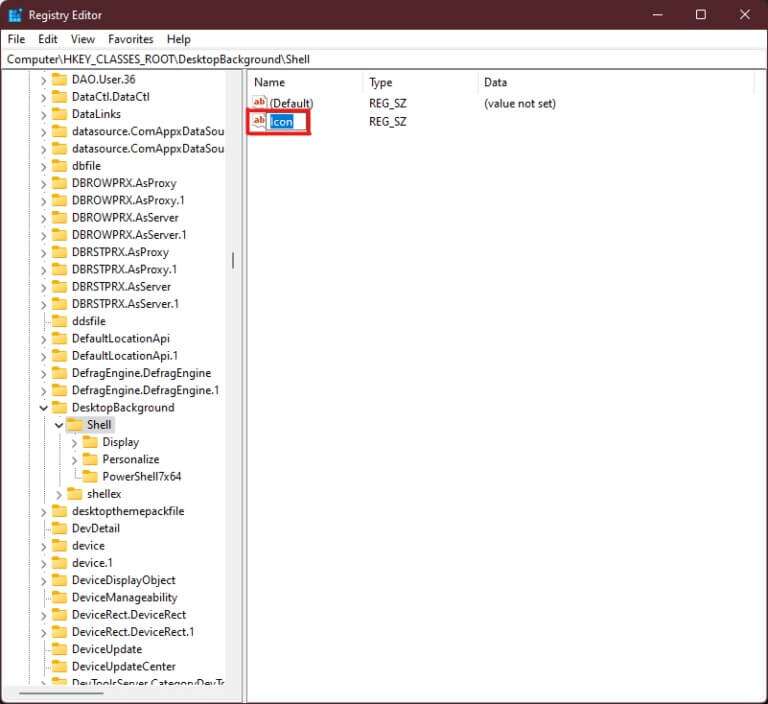
9. Double-click on Icon String And type C:\Windows\System32\rstrui.exe Within the option value data. Click "OK" to save the changes.
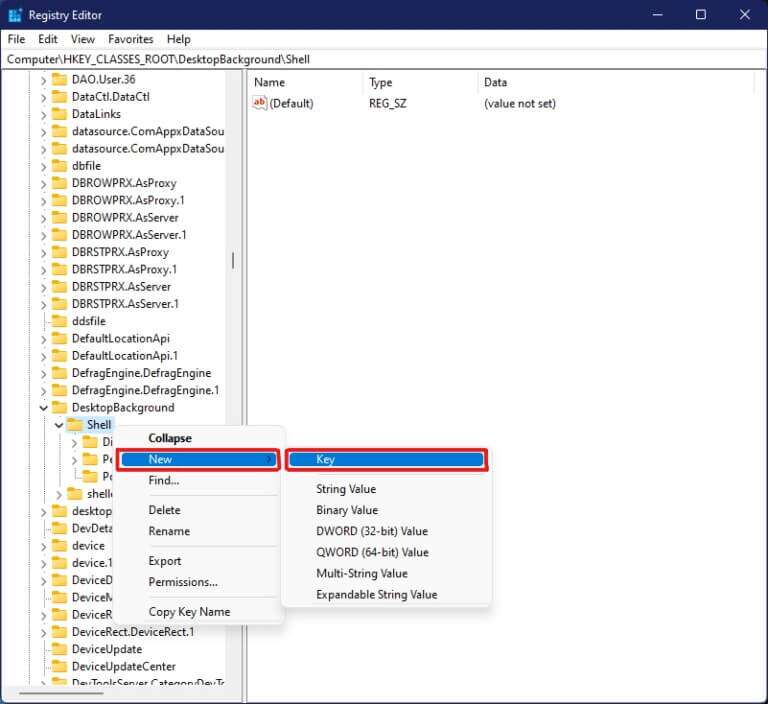
10. Now right click on restore point folder which was previously formed in the left pane and select New > Key.
11. Rename Key folder This is in the name of command.
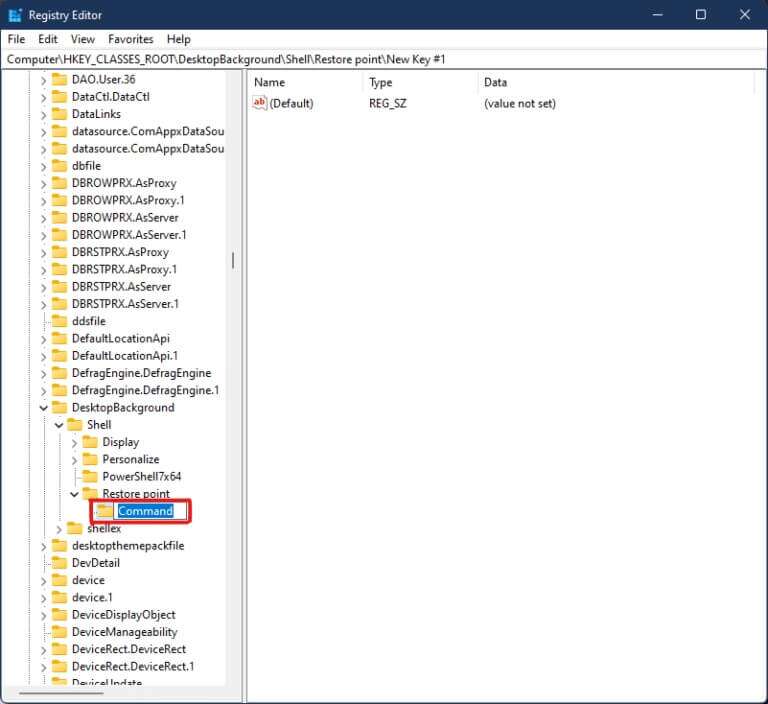
12. Now, in Command folder , double-click Value (default).
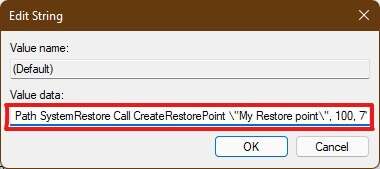
13. Type the following text in the Value data field and click "OK" to save the changes.
powershell.exe -c start -verb runas cmd '/k wmic.exe /Namespace:\\root\default Path SystemRestore Call CreateRestorePoint \"My Restore point\", 100, 7'
14. Close Registry Editor وRestart your computer Running Windows 11.
15. Finally, right-click on the empty space on the desktop and click Show more options To display the option Create a restore point.
These are the two possible ways to create a restore point in the right-click menu in Windows 11.
I hope this article helps you bring different ways to add context menu. build up restore point In Windows 11, we hope at least one of the methods in our guide today helps you. Share your experiences in the comments section below and which method works best for you. If you encounter any other difficulties or have any suggestions, please let us know or contact us.


