Setting the right brightness level on your laptop is important to avoid eye strain, especially if you spend long hours working or gaming. Surprisingly, many users struggle with implementing third-party software in Windows 11 to adjust the screen brightness on their laptops. While your laptop may have a physical switch to adjust the brightness, mashing it up will be pointless if the software is unresponsive. Don't worry. Here are 7 useful troubleshooting tips that will help fix brightness not working on Windows 11 laptops.

1. Change brightness from Action Center or app settings
If you can't seem to adjust the screen brightness,Using the function keys on the keyboard You can resort to alternative means to achieve the same thing.
Click on Windows key + A To launch Action Center on Windows 11 and use Slider next to Brightness To modify it.

Alternatively, you can adjust brightness from the Settings app. Here's how.
Step 1: Click on Windows key + I to turn on Settings app. then open Display settings.

Step 2: use Slider located below Brightness To adjust the screen brightness.

2. Disable auto-brightness
Next, you can check if automatic brightness is enabled on your computer. If it is, your laptop may not allow you to adjust brightness manually.

Step 1: Click start menu icon and select gear icon to turn on Settings app.

Step 2: in the tab "the system" , Click "an offer".

Step 3: Click Arrow next to Brightness to expand it. Then, deselect squares which states “Automatically change brightness when lighting changes” and “Helps improve battery life by optimizing displayed content and brightness.”.

Try changing the brightness again to check if it works.
3. Update the display driver
Display drivers on your computer. Of course, if they are These drivers are corrupted or outdated. You may encounter such issues. To fix this, you can update your display drivers by following the steps below.
Step 1: Open start menu , And type device Manager , And press Enter.

Step 2: Expand Display adapters, right-click Display drivers, and select Update driver.

Next, follow the on-screen instructions to:Update display drivers.
4. Use a basic display adapter from Microsoft.
If the problem persists even after updating your display driver, you can try switching to the original Microsoft display adapter driver on Windows. Here's how.
Step 1: Click search icon In the taskbar, type device Manager and select First result that appear.

Step 2: Expand Display adapters , right-click on your driver, and select Driver Update from the list.

Step 3: Locate “Browse my computer for drivers”.

Step 4: Next, tap “Let me choose from a list of drivers available on my computer.”

Step 5: Locate Microsoft Basic Display Adapter Drivers And press Next To install it.

Once installed, restart your computer and then check if you can change the brightness.
5. Re-enable general monitoring drivers
Universal PnP (Plug and Play) display drivers help you connect external displays without any additional configuration. But if you are experiencing Problem changing brightness on your external display You can try disabling and re-enabling the Generic PnP display driver.
Step 1: Click on Windows key + S To open Window Search, type device Manager , And press Enter.

Step 2: in window Device Manager Come on Expand Monitors , right click on Generic PnP Monitor and select Disable device from the list.

Step 3: Restart your computer Follow the steps above to enable. Generic PnP Monitor.

6. Repair system files
If some important system files are missing on Windows 11, it may affect some basic features like brightness adjustments. To fix this, you can run an SFC scan by following the steps below.
Step 1: Click on Windows key + X and select Windows Terminal (Admin) option from the resulting list.

Step 2: Type the command mentioned below and hit Enter.
SFC / scannow

If a problem persists after the scan, choose the necessary options to repair your Windows 11 laptop and restart it to apply the changes.
7. Windows 11 Update
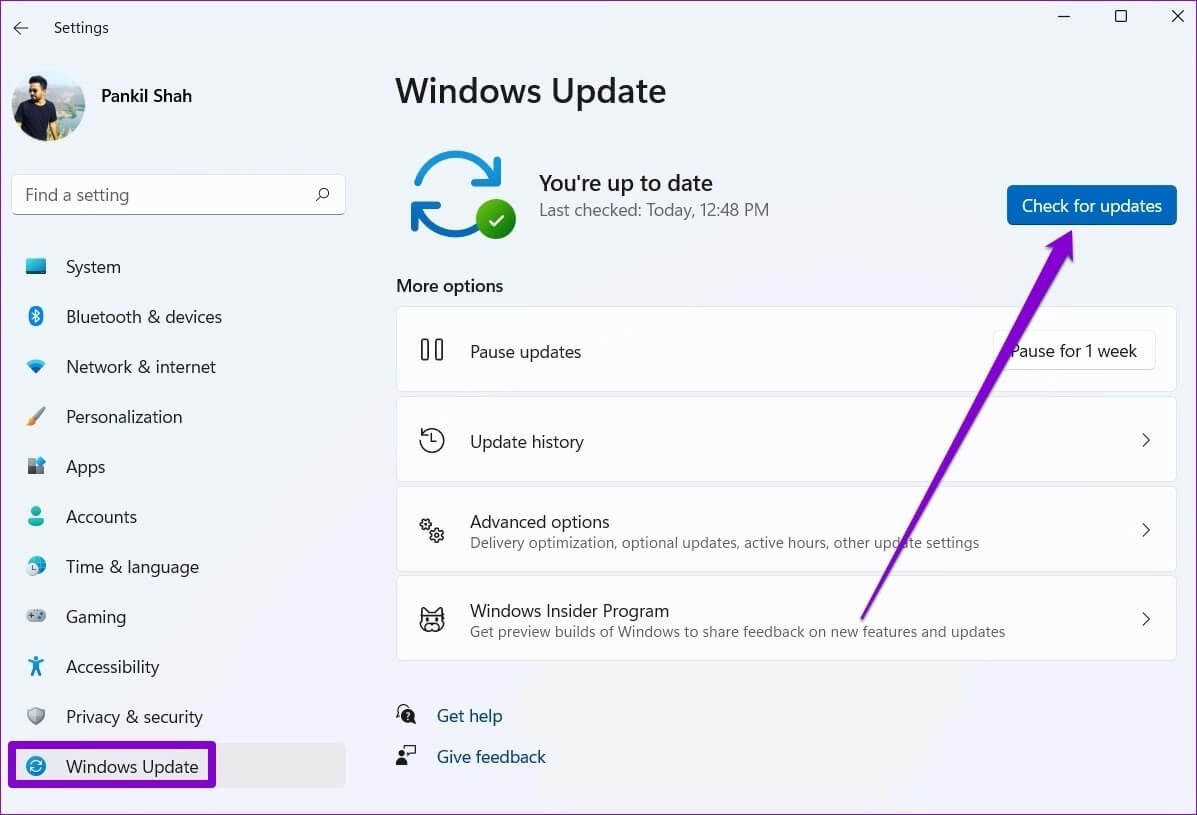
Finally, you can check for any pending updates for Windows 11. If the brightness issue is not working due to a bug in a specific build of Windows 11, updating it will often help.
To check for software updates on Windows, press Windows key + I to open the Settings app. Go to the Windows Update tab on the left, then click the Check for updates button on the right.
Download and install any pending Windows 11 or driver updates. Then restart your laptop and see if these updates help resolve the brightness issue.
Bright enough to soothe your eyes
Finding the right brightness setting can make working long hours bearable. While Windows offers features like Auto brightness وnight lighting They may stop working from time to time. Check out the solutions above to fix brightness not working on Windows 11 laptops, and fixing such issues won't take long once you do this.