If you're a Windows user, you've probably noticed that your screenshots are saved to the desktop by default. This isn't always the most convenient location for screenshots. Fortunately, it's easy to change the default screenshot location in Windows 11.
Microsoft Windows offers a handy screenshot key right on the keyboard. Simply press the Prt+Sc key and take a screenshot. The default location is set to the Screenshots folder in OneDrive on Windows. This works for those who sync every screenshot to their OneDrive storage. Fortunately, you can change the screenshot location to a different folder in Windows 11.
Windows also saves screenshots to your Pictures folder, which automatically syncs with your OneDrive account. Here's how to change the screenshot location and store it only on your PC.
Change the screenshot location in Windows 11
You may want to change the screenshot storage location to Documents or another folder just to keep a handy backup. Follow the steps below to make the changes.
Step 1: Press Windows + E keys to open File Explorer.
Step 2: Select “This PC” from the left sidebar.
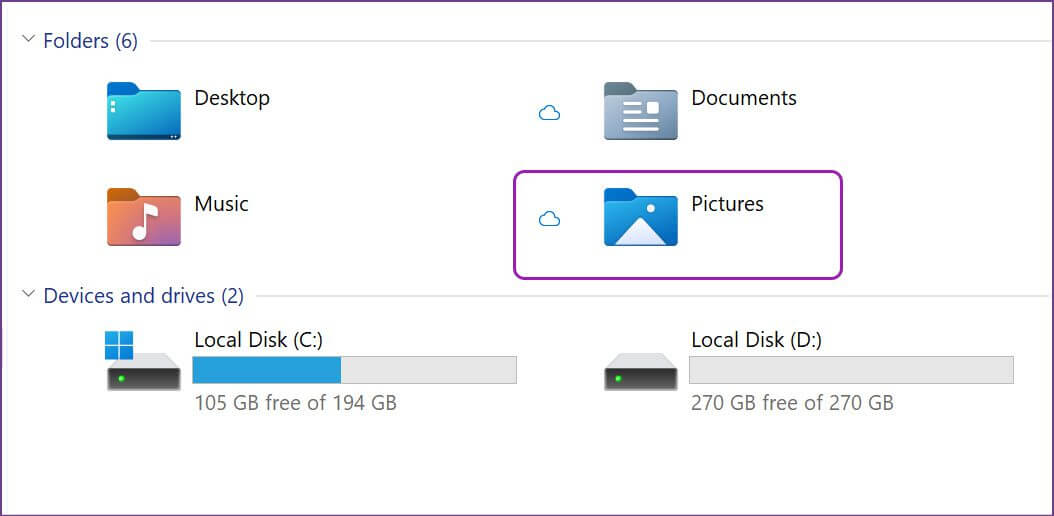
Step 3: Double-click the Photos folder in the left pane. If you see a cloud icon next to the Photos folder, it means your screenshots are automatically synced to your OneDrive account.
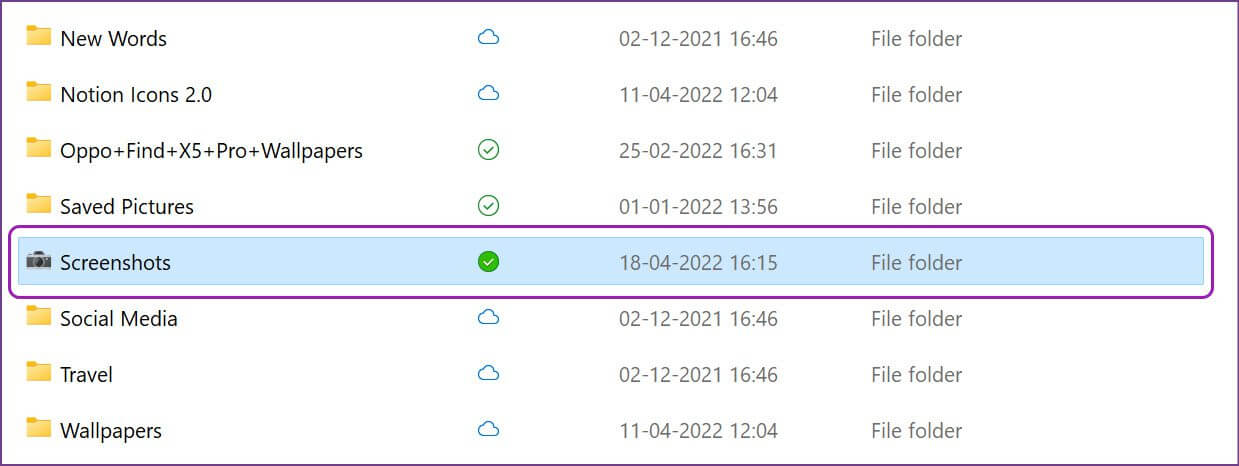
Step 4: Find the Screenshots folder from the list and right-click on it.
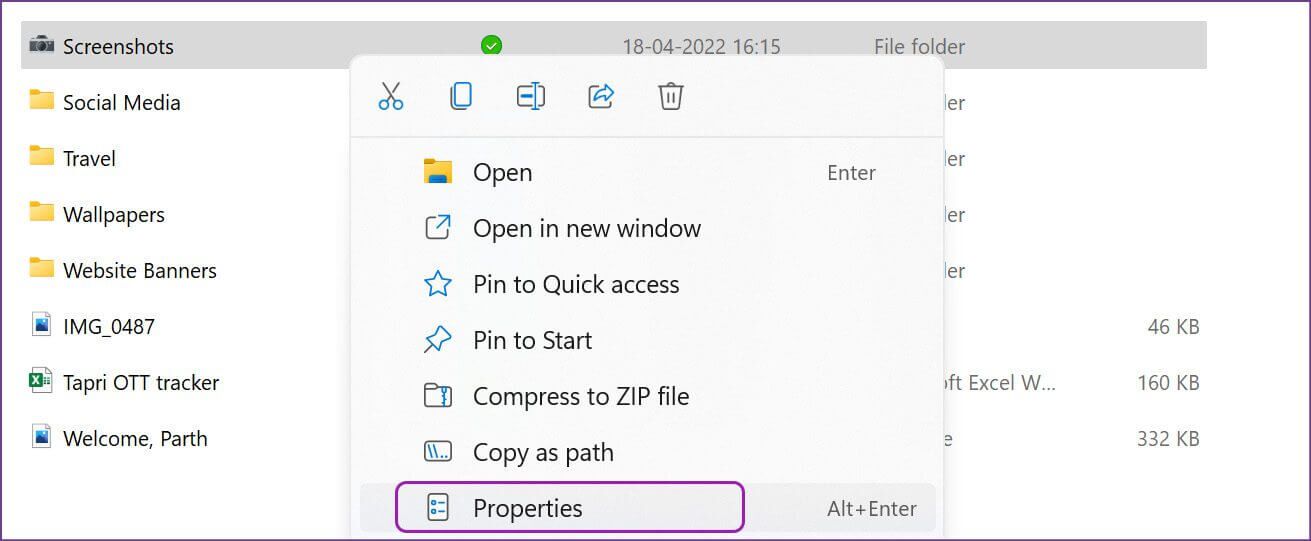
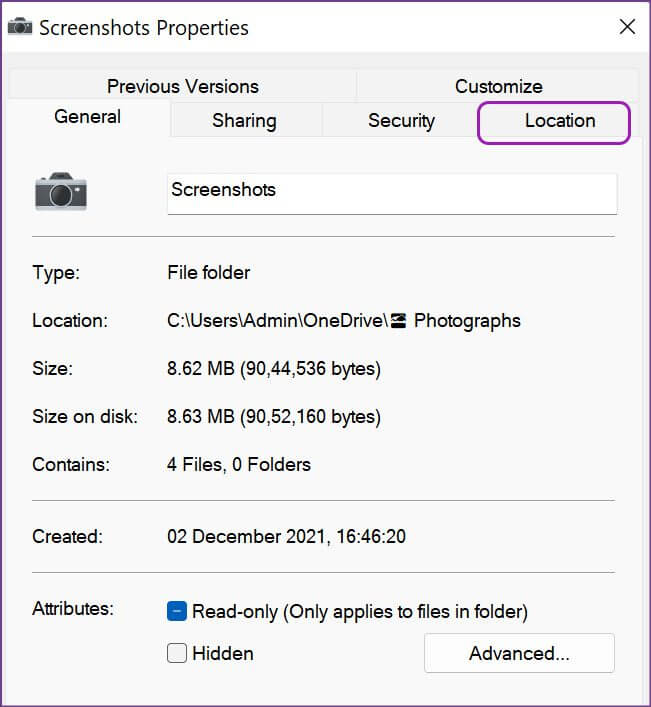
Step 5: Select Properties from the context menu or use Alt+Enter keys.
Step 6: Select the “Location” tab at the top.
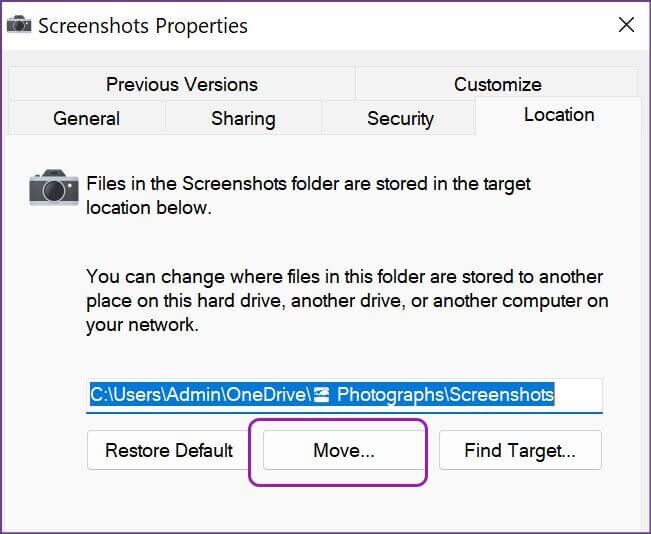
Step 7: Select Move and it will open the default screenshot location in Windows 11.
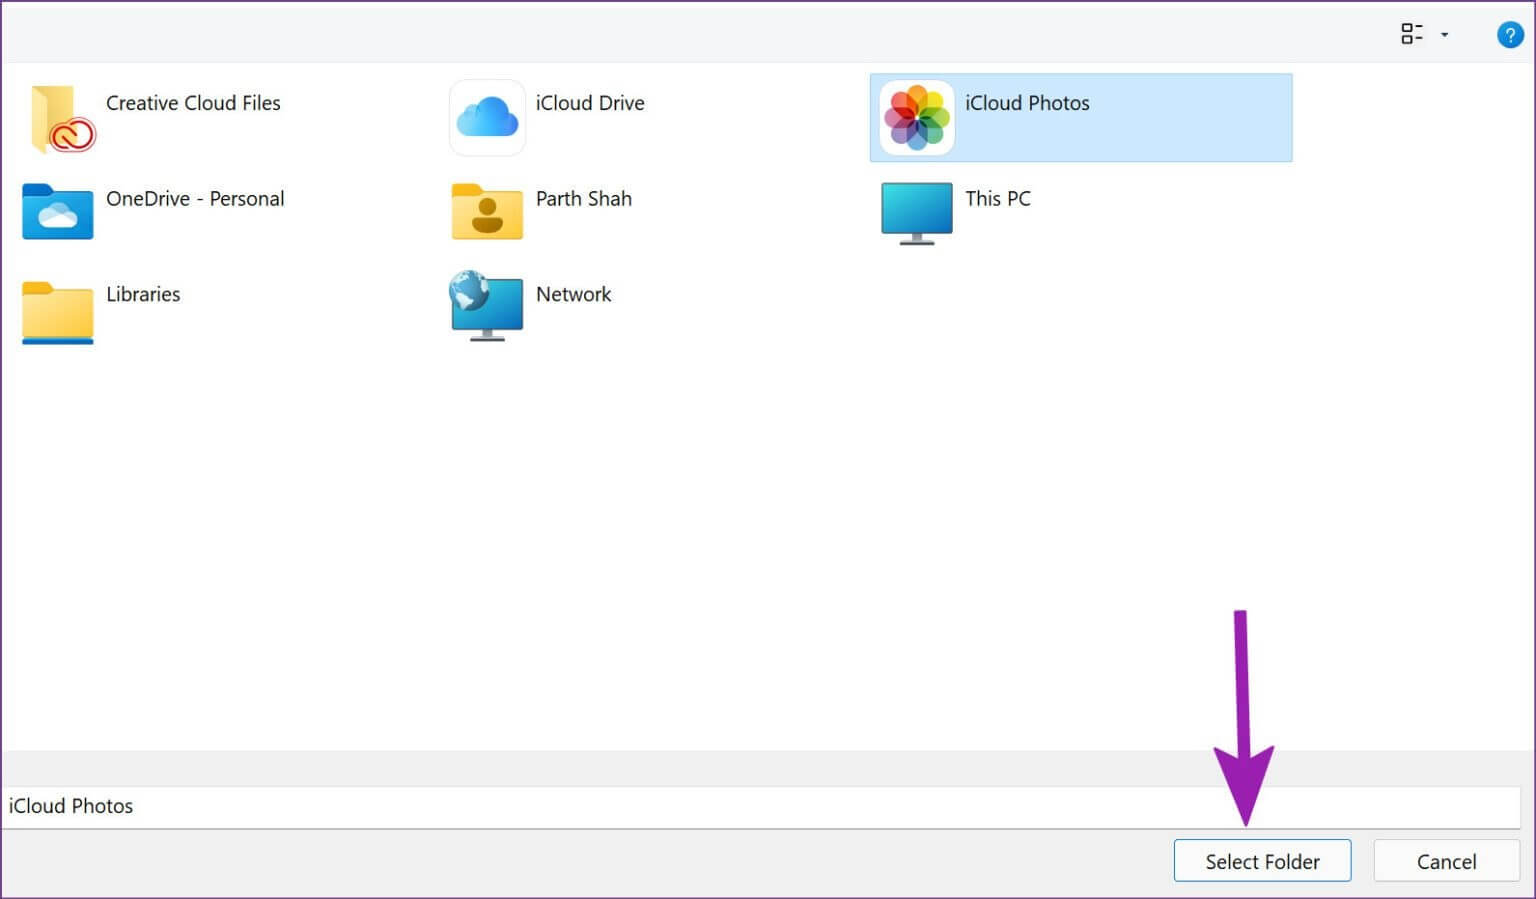
Step 8: Select a new folder or drive as the new location to save the screenshots.
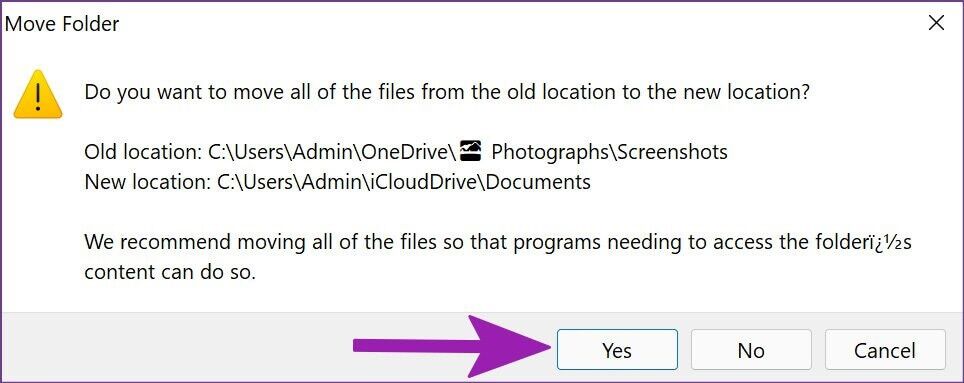
Windows 11 will ask you if you want to move all files from the old location to the new one. You can skip it or click "Yes" to move all your previous screenshots to a new folder.
If you have Google Drive or iCloud set up on your Windows 11 PC, you can select a folder and sync your screenshots directly to your favorite cloud storage service.
Change the location of a screenshot using the Snipping Tool
The Snipping Tool is another easy-to-use screen capture method on Windows 11. Using the Prt+Sc key, you can capture the entire screen, including the taskbar, clock, and even the app menu bar. Most users prefer to choose the Snipping Tool to capture a specific portion of the screen.
However, the Snipping Tool won't immediately save the screenshot to a folder. It will simply copy the screenshot and present a pop-up window for you to add any annotations.
Step 1: Whenever you want to take a screenshot, use Windows + Shift + S keys and make sure the Snipping Tool is turned on.
Step 2: Capture the screen and a pop-up window will appear in the Notification Center. When you tap it, the Snipping Tool will open on a larger screen.
Step 3: Use the highlighter, pen, clipping tool, and ruler to make changes. Click the Save icon in the upper-right corner or use the Windows + S keys to save the screenshot.
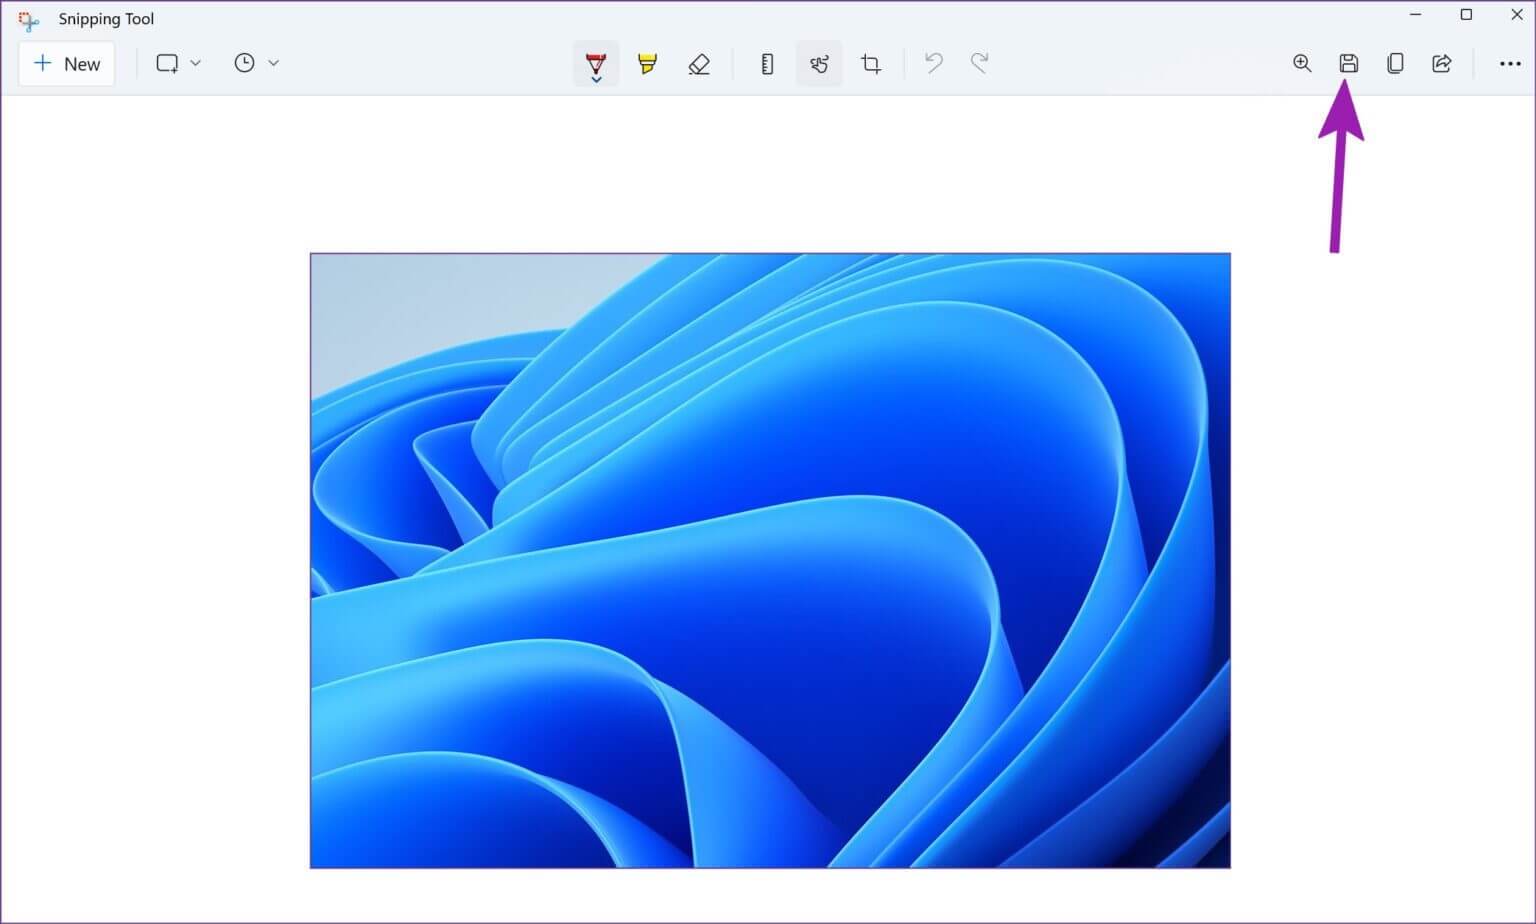
Step 4: The Snipping Tool will ask you to select a folder to save the screenshot. After you select a relevant folder, the Snipping Tool app will remember the location and use it to save all future screenshots.
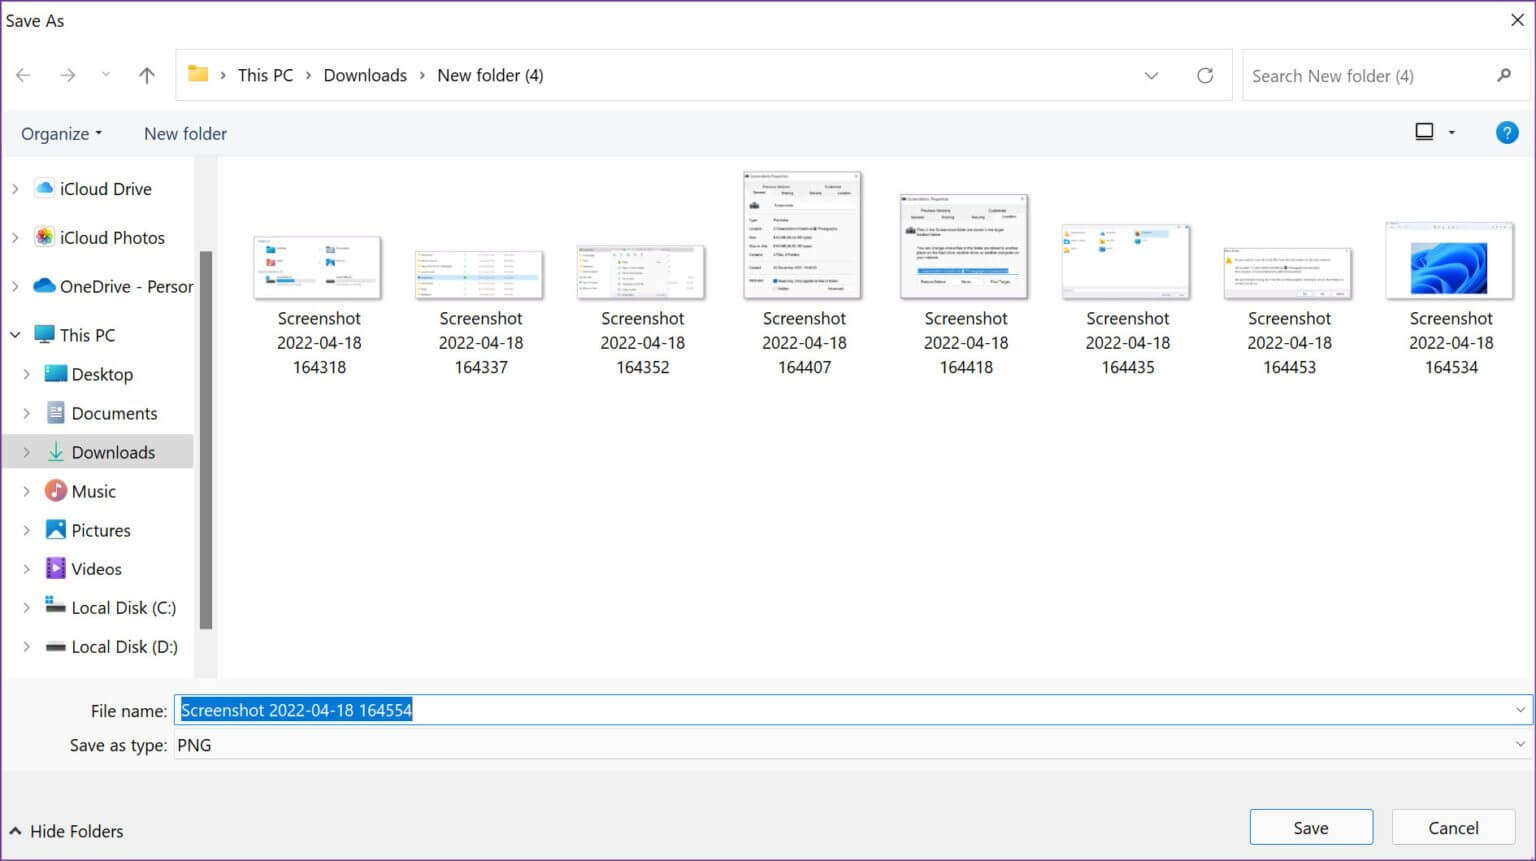
So the next time you press Windows + S keys from the Edit menu, Snipping Tool will ask for a location to save the folder and remember it.
Reverse screenshot location to default
If you change your mind and want to undo the change to save screenshots to the original Pictures folder, you can easily do so from the file manager.
Step 1: Press Windows key + E to open File Explorer on Windows 11.
Step 2: Select the current folder you are using to save screenshots.
Step 3: Right-click the screenshot folder and select Properties.
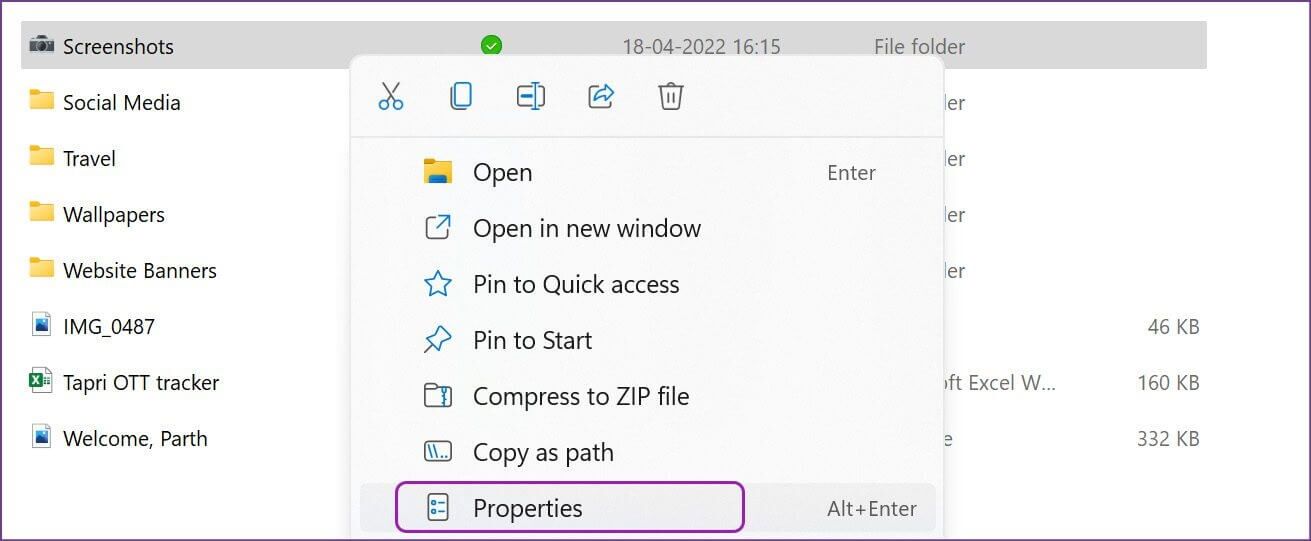
Step 4: Go to the Location tab.
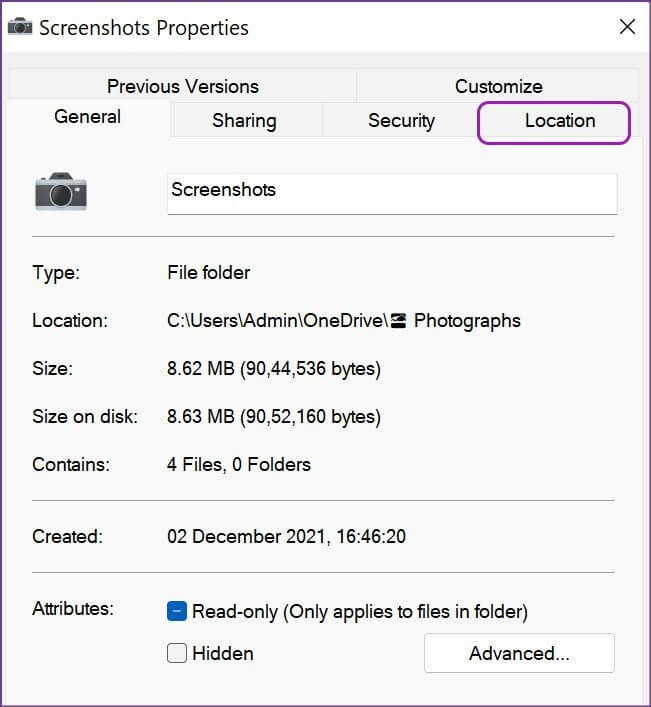
Step 5: Select the Restore Default button. However, if you delete the previous Pictures > Screenshots folder, the system will prompt you to create one.
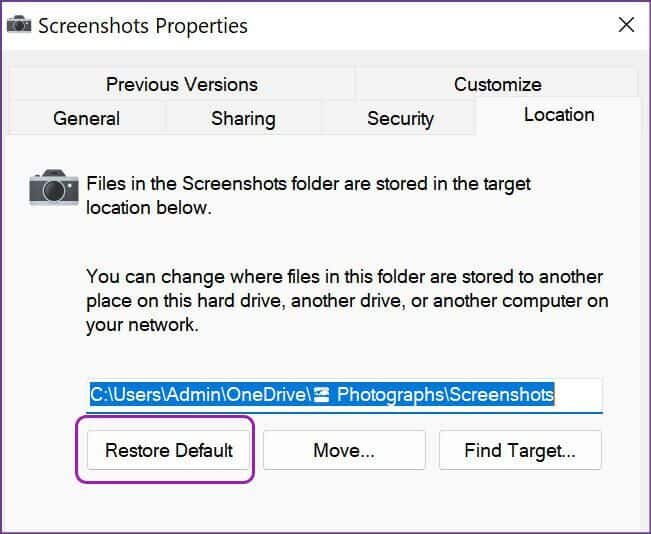
Step 6: Click Yes and you will have the option to move all screenshots from the current folder to the default folder.
Step 7: Confirm your decision and return to the original folder to save screenshots in Windows 11.
Bonus tip: Free up some space in your Screenshots folder.
If you use OneDrive to save screenshots, it will quickly fill up space on your computer and OneDrive. You have the option to free up space on your computer if you want to save a copy online.
Step 1: Open File Manager by pressing Windows Key + E and go to OneDrive to open the Photos folder in your primary drive as shown above.
Step 2: Find the Screenshots folder and right-click on it.
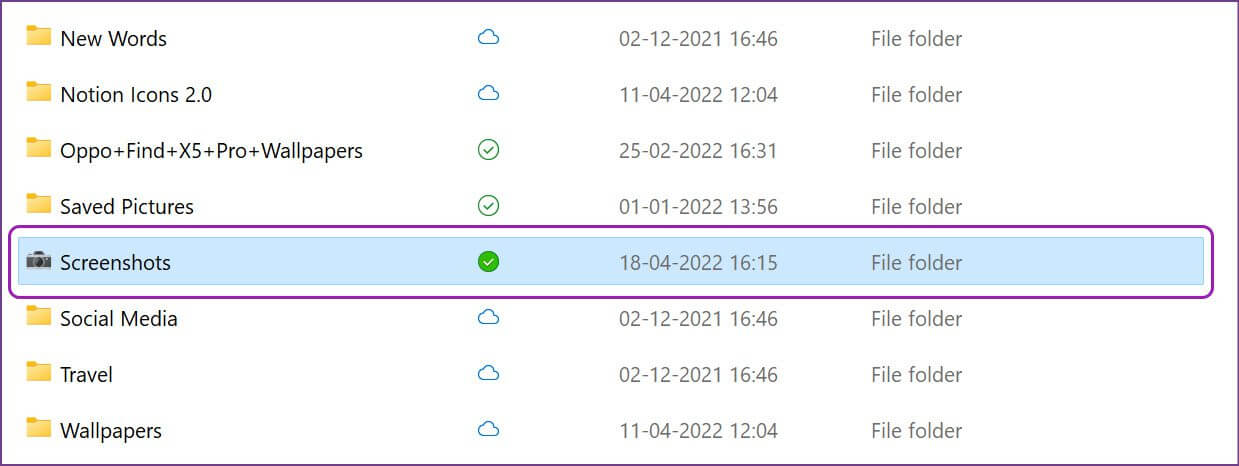
Step 3: Select the “Free up space” option and the system will delete all saved screenshots from local storage.
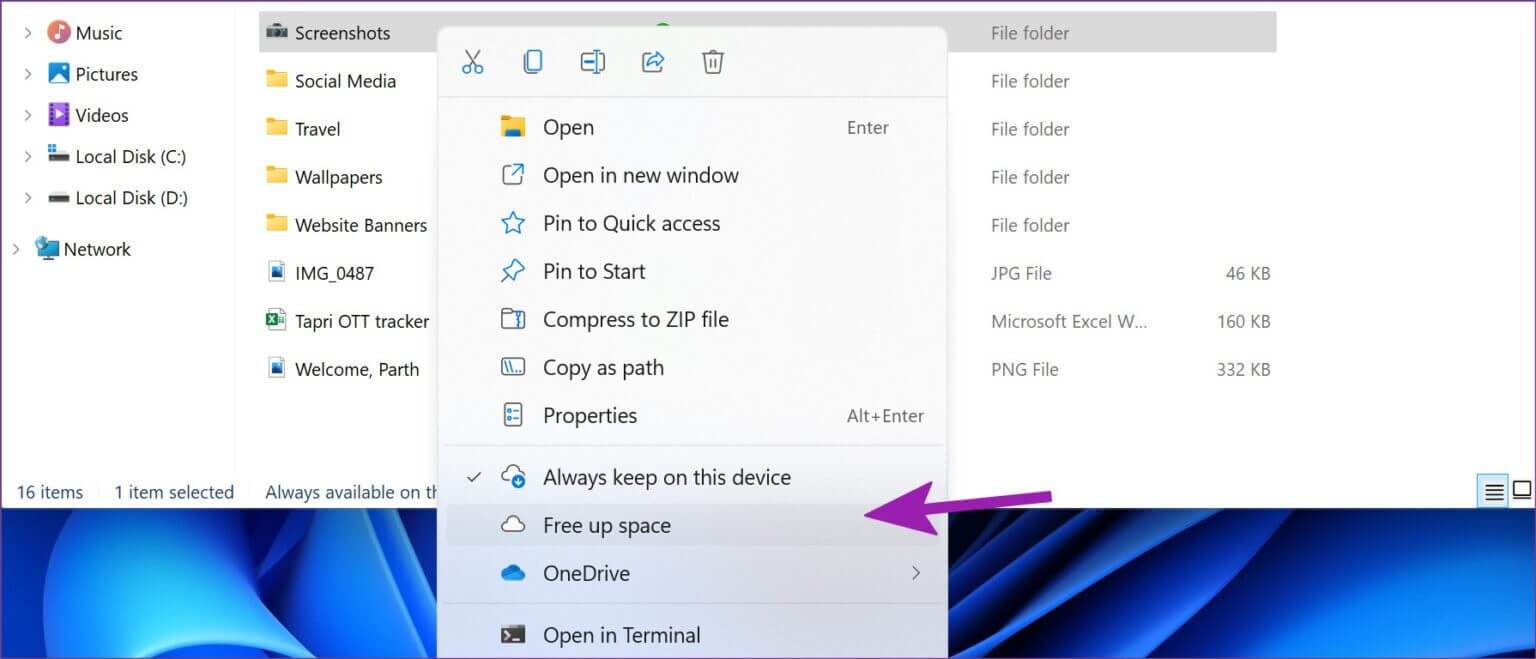
You should only follow this if you are running out of storage space on your Windows 11 PC.
Manage screenshots in style on Windows 11
The default screenshot location in the Pictures folder in OneDrive may not be everyone's cup of tea, especially for those who don't use Microsoft's cloud storage solution. Use the steps above to change the screenshot location in Windows 11 without any problems.


