Slack هي منصة شائعة للتواصل والتعاون الجماعي. يسمح لك بإنشاء قنوات لمواضيع أو مشاريع أو مجموعات مختلفة من الأشخاص. ومع ذلك، ليس المقصود من جميع القنوات أن تكون عامة. إذا كنت تريد معرفة كيفية جعل قناة Slack خاصة، فأنت في المكان الصحيح. ستوضح لك هذه المقالة كيفية نقل قناة عامة إلى قناة خاصة أو إنشاء قناة خاصة جديدة.

في بعض الأحيان، تحتاج إلى مناقشة أمور حساسة، أو مشاركة مستندات سرية، أو إجراء محادثة مركزة مع مجموعة مختارة من أعضاء الفريق. يضمن إنشاء قناة خاصة أن الأفراد المقصودين فقط هم من يمكنهم الوصول إليها.
دعونا نفهم المزيد ونكتشف الفرق بين القناة العامة والخاصة على Slack.
الفرق بين قنوات SLACK العامة و الخاصة
في مساحة العمل، تخدم قنوات Slack العامة والخاصة أغراضًا مختلفة. تشبه القنوات العامة ساحة المدينة، حيث يمكن للجميع المشاهدة والانضمام إليها. تعمل هذه القنوات على تعزيز الشفافية، وتظهر في دليل قنوات Slack لسهولة البحث، وتعمل كمراكز للمناقشات والإعلانات والمشاريع التعاونية على مستوى الفريق. يمكن لأي شخص أن يساهم.

وفي المقابل، تعمل القنوات الخاصة كغرف اجتماعات آمنة لا يمكن الوصول إليها إلا عن طريق الدعوة. لا تظهر هذه القنوات في دليل القنوات، مما يضمن السرية، لذا فهي مثالية للمناقشات السرية أو المشاريع الحساسة أو عمليات التعاون المركزة بين أعضاء الفريق.
في جوهر الأمر، يعتمد الاختيار بين القنوات العامة والخاصة على حاجتك إلى الشفافية وعلى من يجب أن يكون جزءًا من المحادثة. القنوات العامة مفتوحة للجميع، بينما توفر القنوات الخاصة مساحة آمنة وسرية للمناقشات المحدودة. مع هذا الفهم، لنبدأ بالخطوات.
نصيحة: كيفية جدولة الرسائل في Slack على الهاتف المحمول وسطح المكتب
كيفية جعل قناة SLACK الحالية خاصة
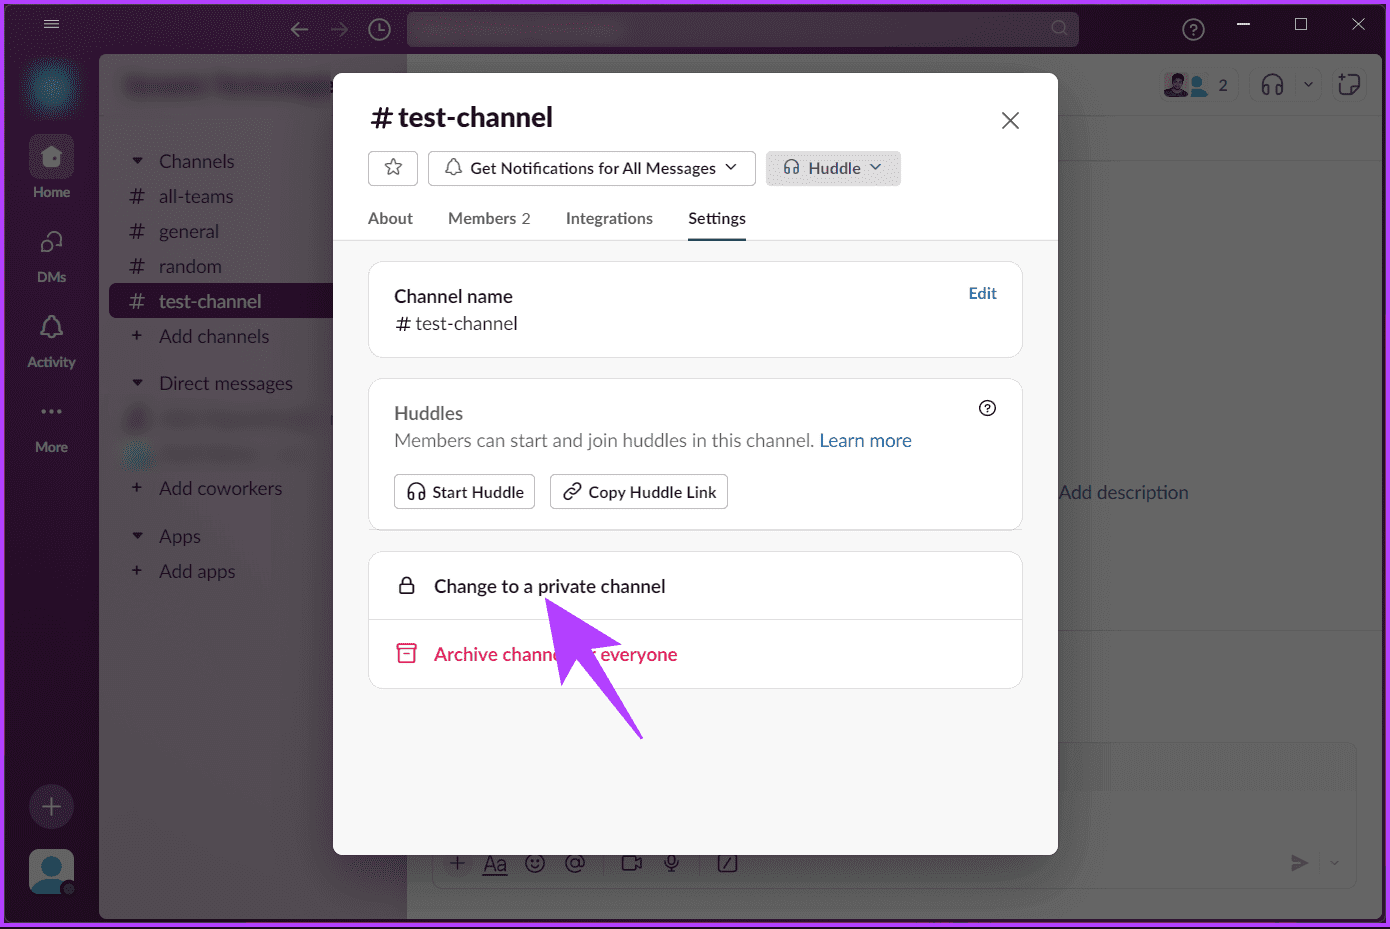
يعد جعل قناة عامة موجودة خاصة على Slack أمرًا بسيطًا، ولكن لا يمكن القيام بذلك إلا من قبل المستخدمين، وهم المالكين والمسؤولين ومديري القنوات. علاوة على ذلك، فإن القدرة أو الخيار للقيام بذلك يقتصر على سطح المكتب حتى كتابة هذه المقالة.


الآن، إلى الفروق الدقيقة. عندما تقوم بتحويل قناة عامة إلى قناة خاصة، سيتم أيضًا نقل أشياء مثل سجل القناة والأعضاء. علاوة على ذلك، ستكون جميع الملفات المشتركة في القناة حتى نقطة التحويل متاحة للعامة. الآن، دعونا نصل إلى الخطوات.
الخطوة 1: أولاً، قم بتشغيل تطبيق Slack أو افتحه على جهاز الكمبيوتر الذي يعمل بنظام Windows أو Mac.
الخطوة 2: ضمن القنوات، انتقل إلى القناة العامة التي تريد جعلها خاصة.
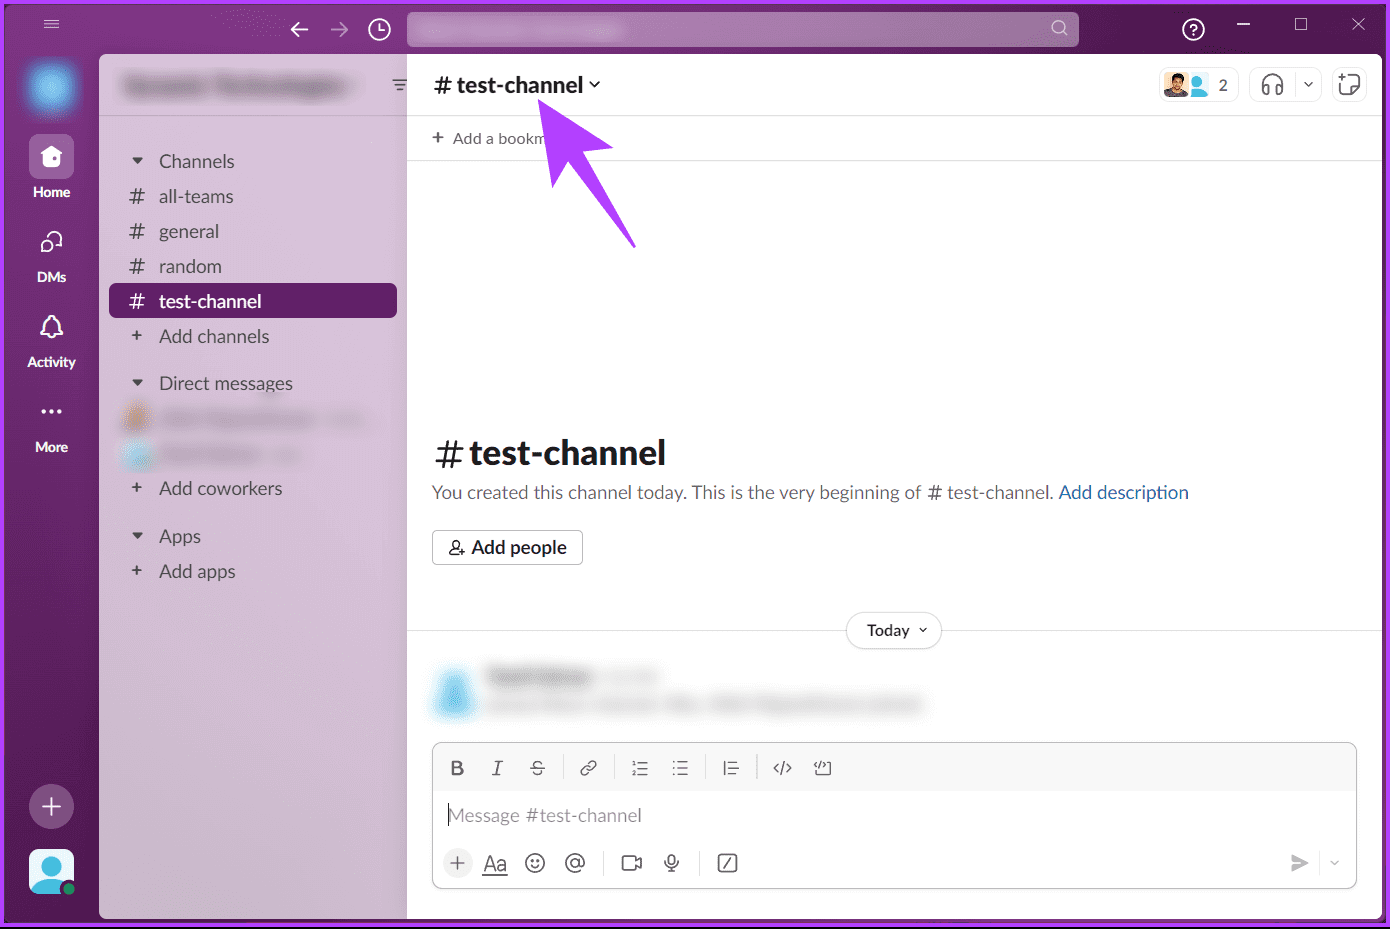
خطوة 3: بمجرد دخولك إلى القناة، انقر فوق أيقونة شيفرون (السهم) بجوار اسم القناة في شريط التنقل العلوي.
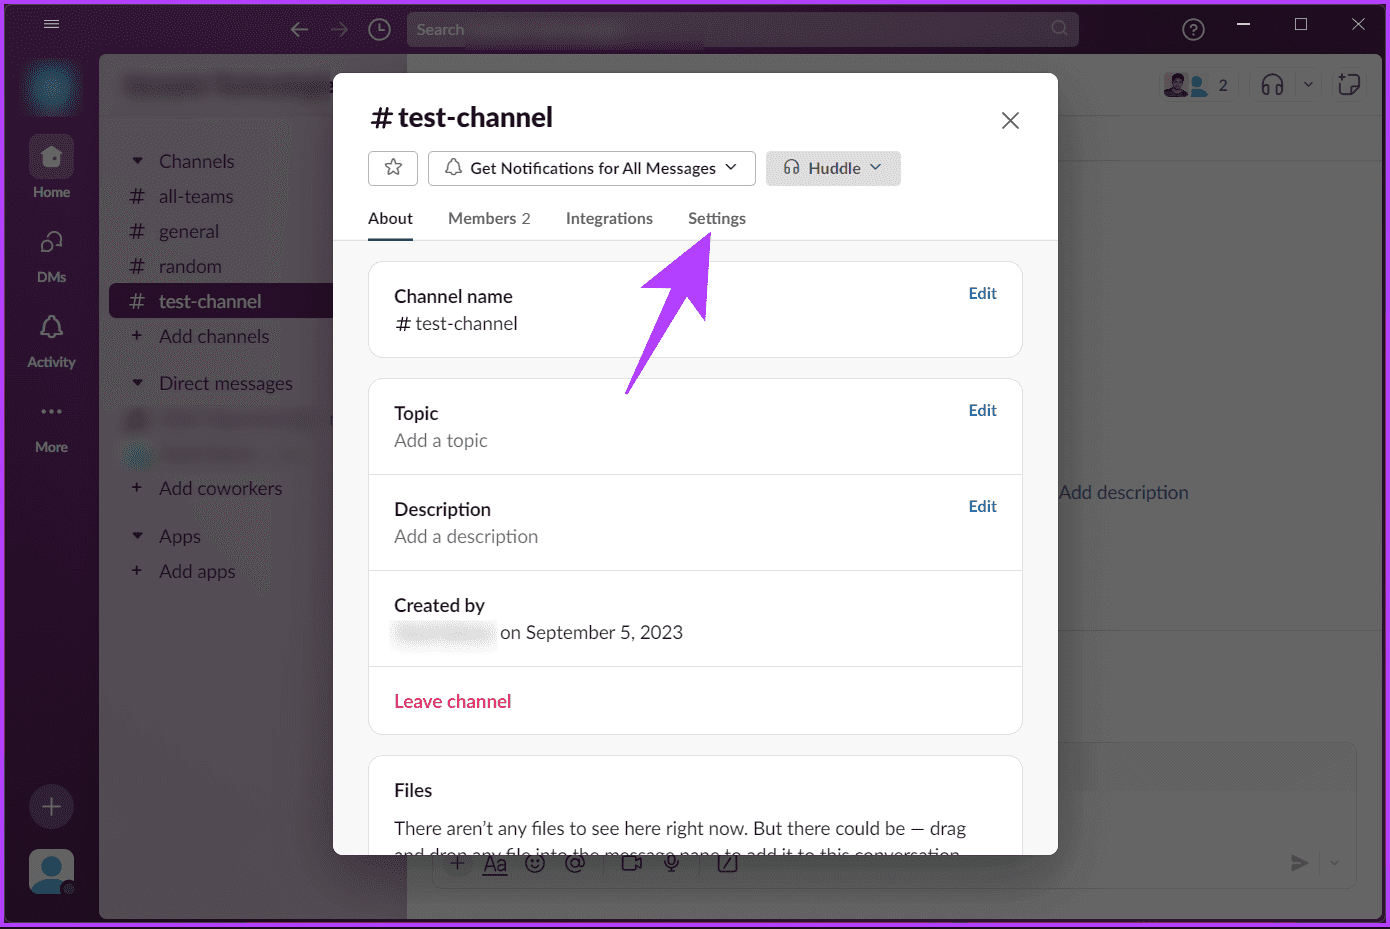
الخطوة 4: في النافذة المنبثقة، انتقل إلى الإعدادات.
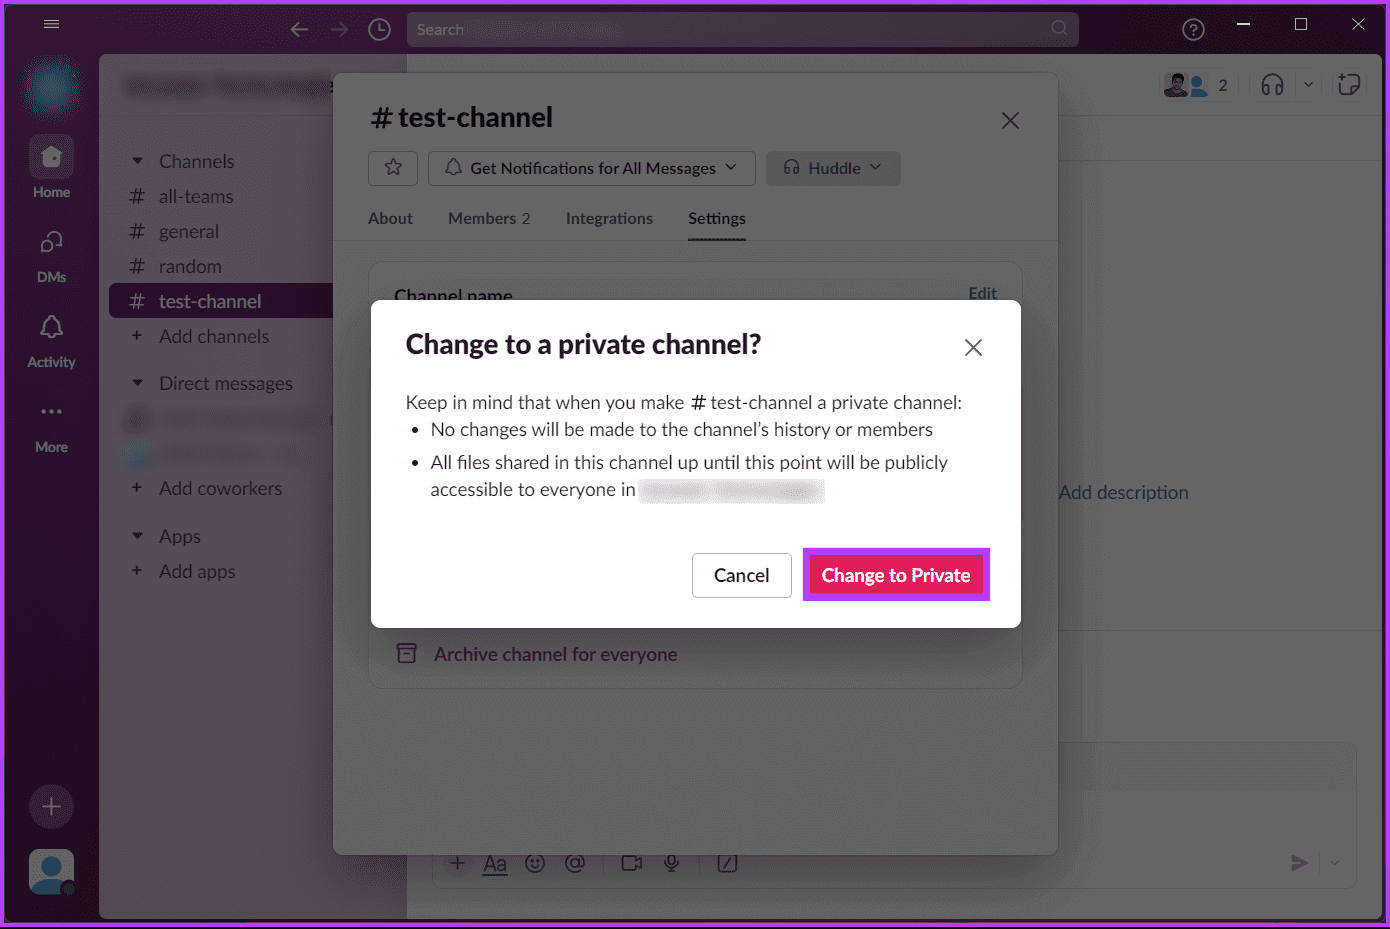
خطوة 6: سترى رسالة تأكيد. انقر فوق “التغيير إلى خاص”.
من المهم أن تعرف: طرق سهلة لإنشاء استطلاع في Slack على أي جهاز
كيفية إنشاء قناة Slack خاصة
إن إنشاء قناة خاصة جديدة على Slack له الكثير من الامتيازات. أحد أهمها هو أنه يمنحك بداية جديدة، مما يعني أنه يمكنك إضافة أشخاص محددين ومشاركة الملفات أو المعلومات السرية دون أي ارتباك حول حالة القناة.
لنبدأ بالخطوات الخاصة بسطح المكتب.
على سطح المكتب
الخطوة 1: أولاً، قم بتشغيل تطبيق Slack أو افتحه في متصفحك المفضل على سطح المكتب. تسجيل الدخول باستخدام بيانات الاعتماد الخاصة بك.
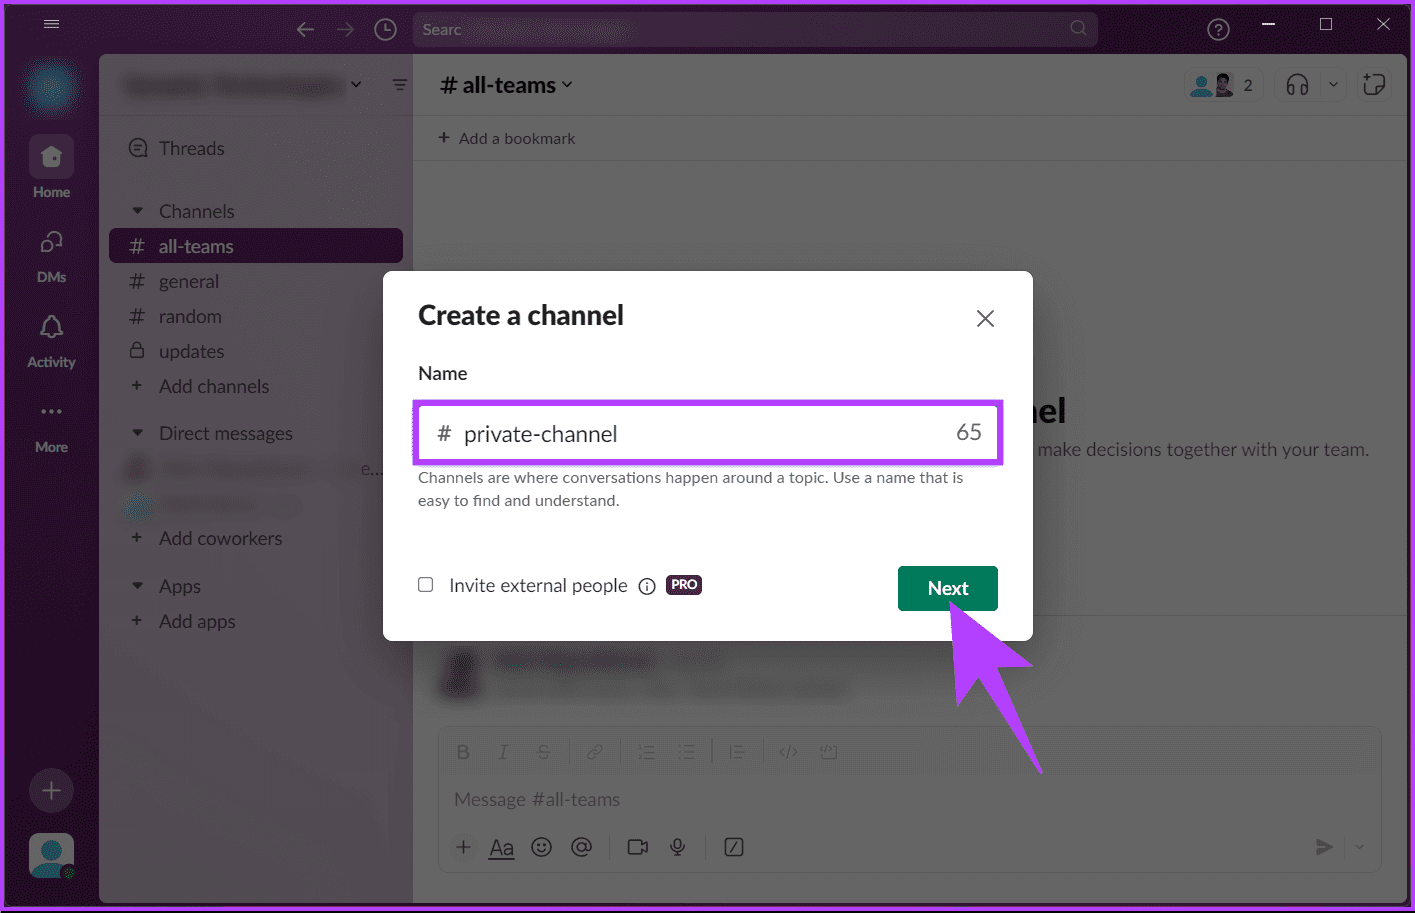
الخطوة 2: في الشريط الجانبي، ضمن العناوين الفرعية للقنوات، انقر فوق “إضافة قنوات”. من القائمة المنسدلة، اختر “إنشاء قناة جديدة”.

ملاحظة: يجب أن يكون اسم القناة فريدًا داخل مساحة العمل الخاصة بك. إذا كان اسم القناة موجودًا بالفعل، فلا يمكنك إنشاء اسم آخر.
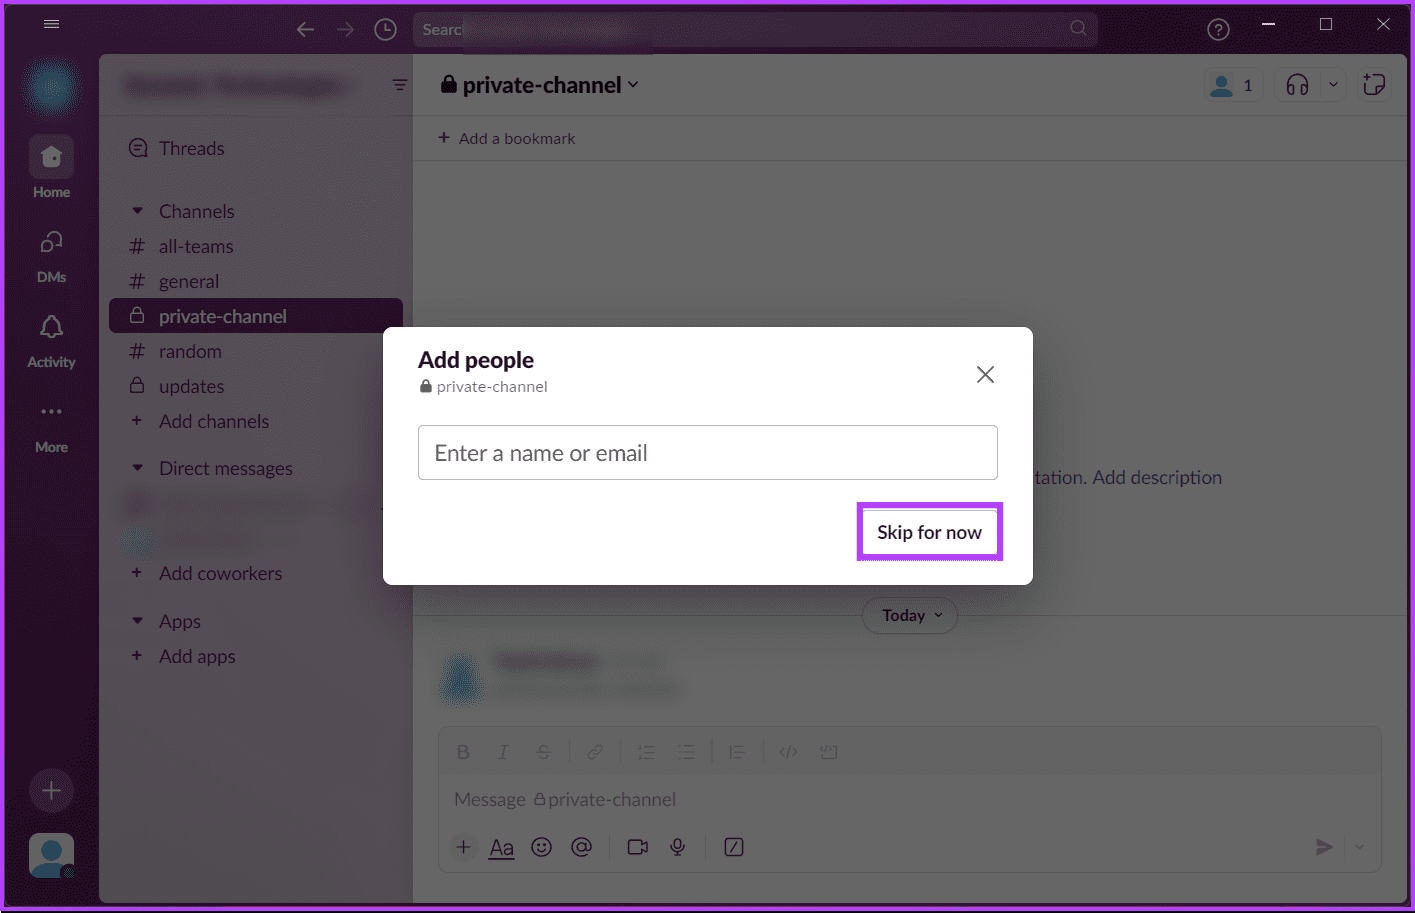
الخطوة 5: الآن، سيطلب منك Slack إضافة أشخاص إلى قناتك. يمكنك إضافتهم عن طريق كتابة أسمائهم أو عنوان بريدهم الإلكتروني. إذا كنت لا تريد إضافة أي شخص، فانقر فوق “تخطي الآن”.
على تطبيق Slack للجوال
خطوات إنشاء قناة على تطبيق Slack للجوال هي نفسها بالنسبة لنظامي التشغيل Android وiOS. للتوضيح، نحن نسير مع Android. إذا كنت تستخدم نظام iOS، فيمكنك المتابعة.
الخطوة 1: قم بتشغيل Slack على جهاز Android أو iOS الخاص بك. قم بتسجيل الدخول إلى مساحة العمل الخاصة بك.
ملاحظة: إذا كنت جزءًا من مساحات عمل متعددة، فتأكد من أنك في المساحة الصحيحة قبل المتابعة.
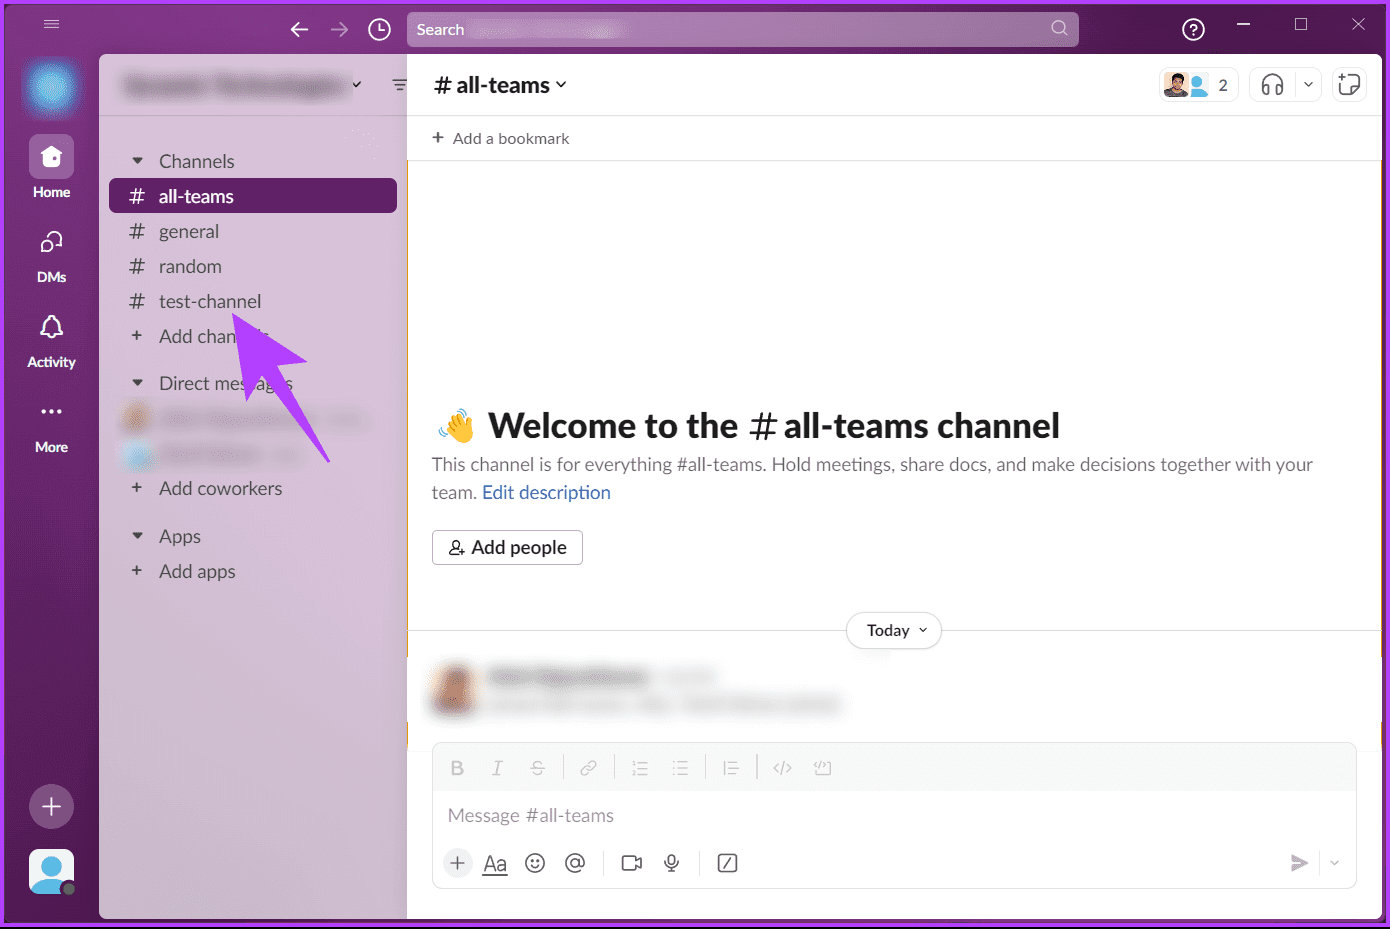
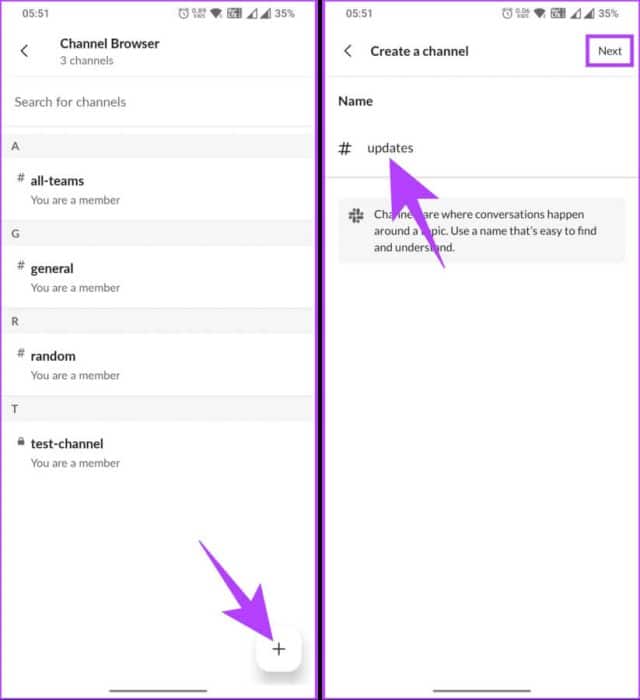
الخطوة 2: ضمن القنوات، اضغط على إضافة قناة.
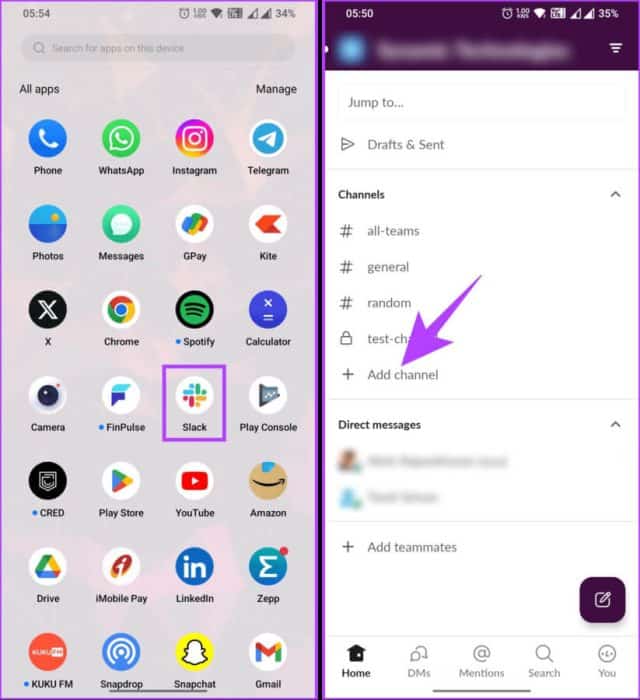
ستصل إلى قائمة القنوات التي تحتوي عليها مساحة العمل. إذا كانت القناة المقصودة التي تبحث عنها غير متوفرة، فتابع الخطوات الموضحة أدناه.
خطوة 3: اضغط على زر علامة الزائد (+) العائمة. في شاشة “إنشاء قناة”، قم بتسمية القناة وانقر فوق “التالي”.
ملاحظة: يجب أن تكون أسماء القنوات فريدة لمساحة العمل الخاصة بك. إذا كان اسم القناة موجودًا بالفعل، فلن تتمكن من إنشاء اسم آخر.
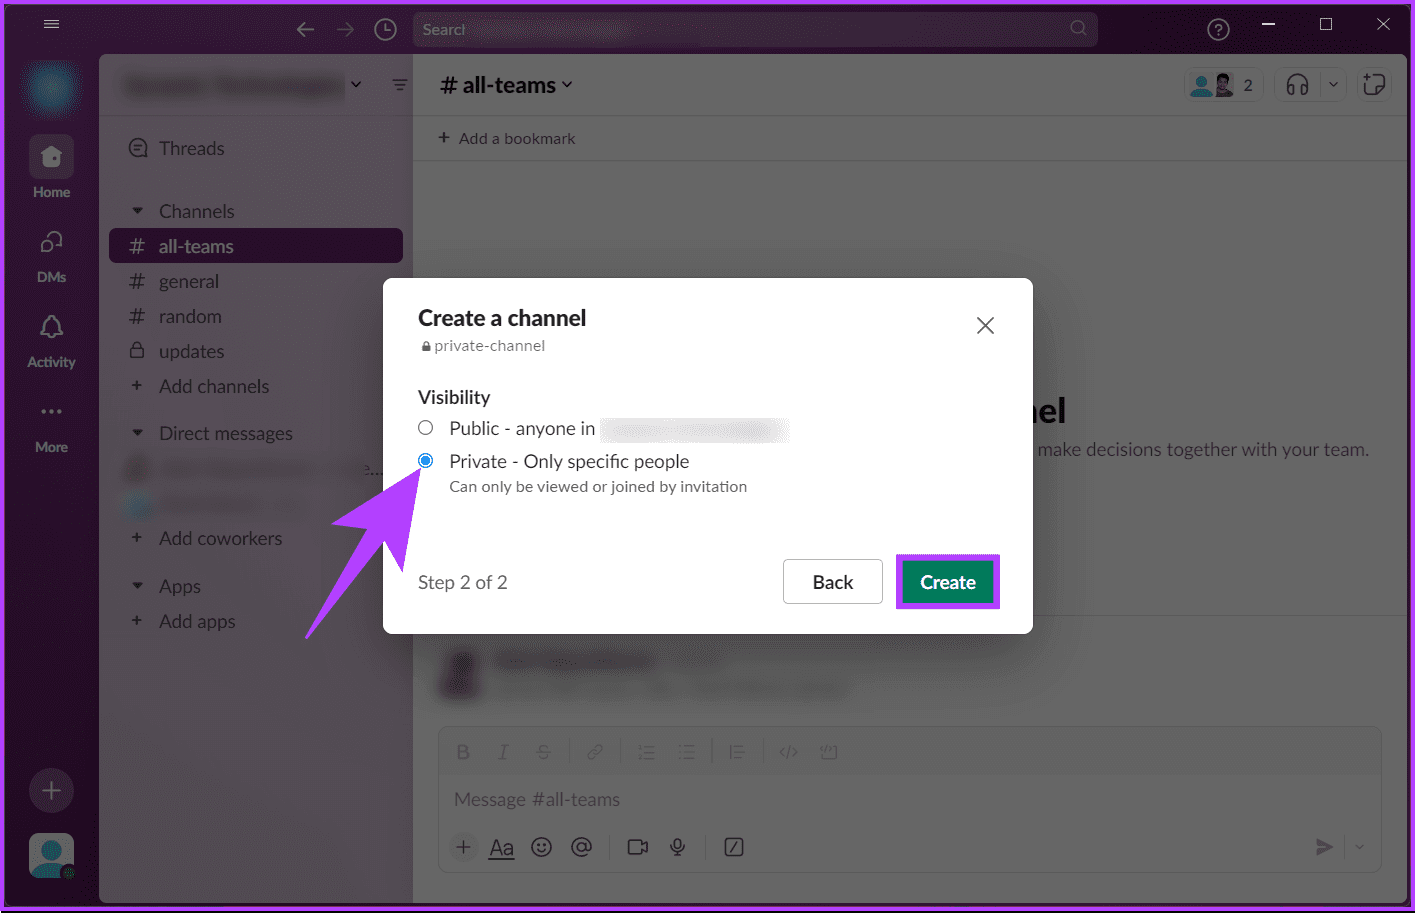
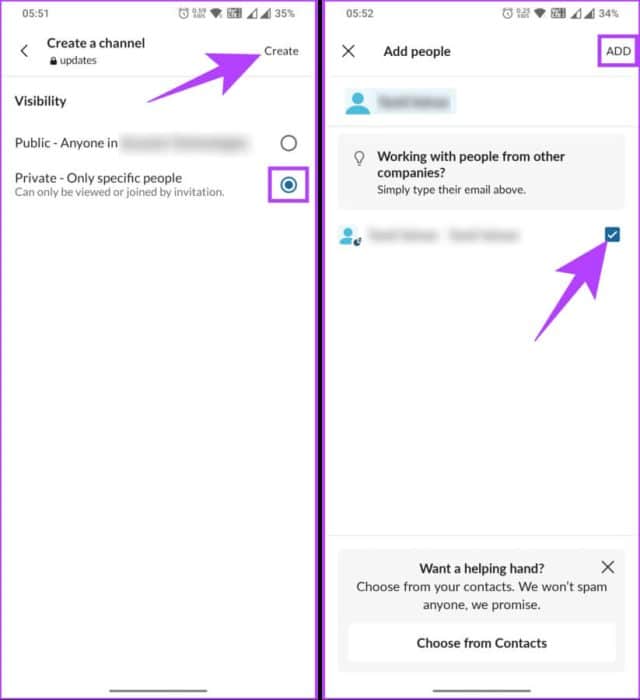
الخطوة 4: في الشاشة التالية، ضمن “الرؤية”، اختر “خاص – لا يمكن عرض سوى أشخاص محددين أو الانضمام إليهم عن طريق الدعوة”، ثم انقر فوق “إنشاء”.
سيطالبك Slack بتحديد ما إذا كنت تريد إضافة أشخاص إلى القناة أم لا. إذا كنت لا ترغب في الإضافة، فانقر على العلامة المتقاطعة (X) في الزاوية اليسرى العليا. ومع ذلك، إذا كنت تريد، اتبع الخطوات أدناه.
الخطوة 5: يمكنك كتابة اسم الأشخاص أو الاختيار من بين الأشخاص الموصى بهم الذين تريد إضافتهم إلى قناتك الخاصة والنقر فوق “إضافة”.
هذا كل شيء. قناتك الخاصة الجديدة جاهزة للبدء بمحادثة. إذا كانت لديك أي استفسارات لم نتناولها في المقالة، فراجع قسم الأسئلة الشائعة أدناه.
الأسئلة الشائعة:
س1. هل يمكنني جعل القناة عامة مرة أخرى بعد أن أصبحت خاصة؟
الجواب: نعم، يمكنك دائمًا الرجوع وجعل قناتك الخاصة عامة مرة أخرى ليتمكن الجميع من الانضمام إلى المحادثة.
س2. هل يمكنني دعوة ضيوف أو مستخدمين خارجيين إلى قناة Slack خاصة؟
الجواب: نعم، يمكنك دعوة الضيوف أو المستخدمين الخارجيين إلى قناة Slack خاصة. ومع ذلك، تأكد من أنك مشترك في اشتراك Slack المدفوع. بمجرد دعوة الضيوف إلى قناتك الخاصة، سيتلقون دعوة عبر البريد الإلكتروني تحتوي على تعليمات حول كيفية الانضمام إلى القناة.
س3. هل رسائل قناة Slack الخاصة مشفرة؟
الجواب: نعم، يتم تشفير رسائل قناة Slack الخاصة. يقوم Slack بتشفير كافة بيانات العميل أثناء النقل والسكون بشكل افتراضي. بمعنى آخر، رسائلك آمنة ومحمية من الوصول غير المصرح به.
تذهب الخاص
الآن بعد أن عرفت كيفية جعل قناة Slack خاصة أو إنشاء قناة خاصة جديدة على Slack، أنت جاهز تمامًا لتعزيز الإنتاجية ورفع مستوى تجربة التعاون لفريقك. قد ترغب أيضًا في قراءة كيفية مغادرة مساحة عمل Slack.