Have you ever wondered where the wallpaper images displayed on your Windows computer come from? These images are curated by Windows Spotlight.With Windows Spotlight, your computer regularly downloads new images and uses them as your lock screen wallpaper. Spotlight also offers tips on how to improve productivity. In this article, we'll learn how to save Spotlight images on Windows 11.
Although downloading Spotlight for continuous images However, the images aren't in a format that makes them usable for other purposes. This means they aren't the usual .JPG or .PNG images. So you'll have to work a bit to save them and use them elsewhere.
So, if you want to use or store Spotlight images for personal use, here's what you should do.
Locate Spotlight Images in a File Folder on Windows
By default, Windows saves Spotlight images to a folder called AppData. However, this folder is hidden. Here's how to locate it:
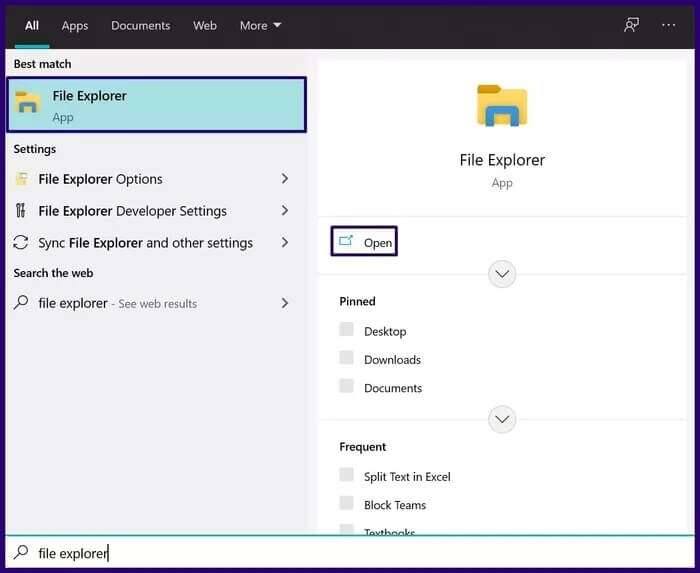
Step 1: Launch File Explorer.
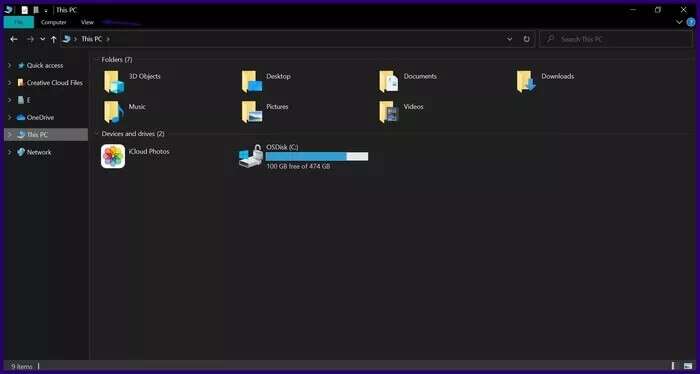
Step 2:Select the View tab.
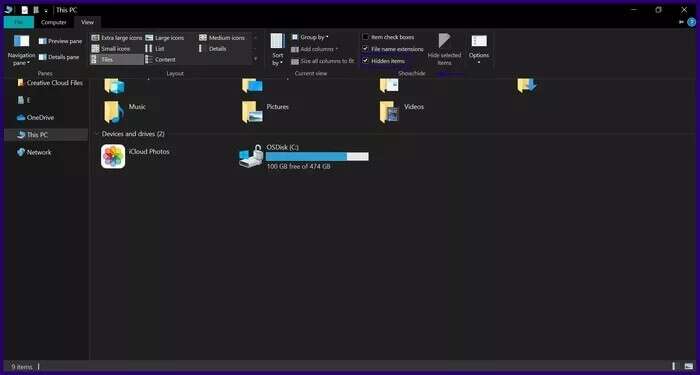
Step 3: Under the Show/Hide group, select the check box next to Hidden items to make sure that all hidden folders and files become visible.
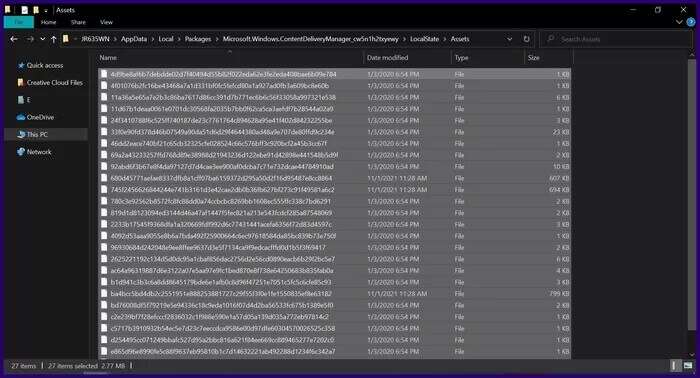
Step 4: Navigate to the assets folder by copying and pasting the following path into the address bar of File Explorer:
%userprofile%\AppData\Local\Packages\Microsoft.Windows.ContentDeliveryManager_cw5n1h2txyewy\LocalState\Assets
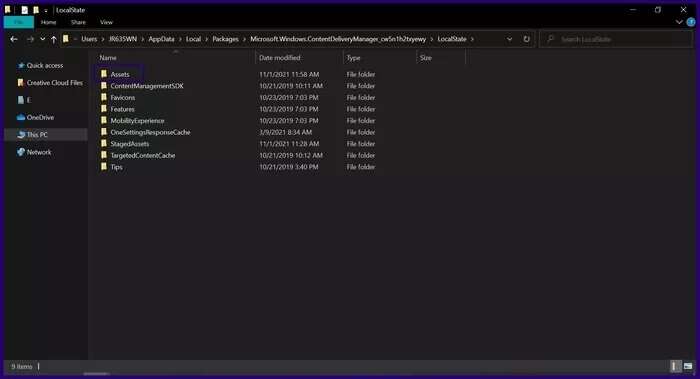
Once you're in the Assets folder, you'll see several files representing Spotlight images. However, these files don't have extensions, making them unusable unless extensions are added.
Change the file extension to a usable image file type.
To change the extension of Spotlight images and make them usable, here's what you need to do:
Step 1: Create a new folder in a preferred location on your computer.
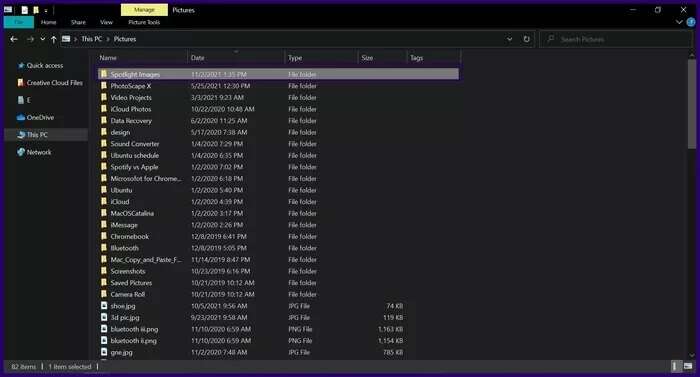
Step 2: Select all files in the Assets folder that contain Spotlight images by pressing Ctrl+A on your keyboard.
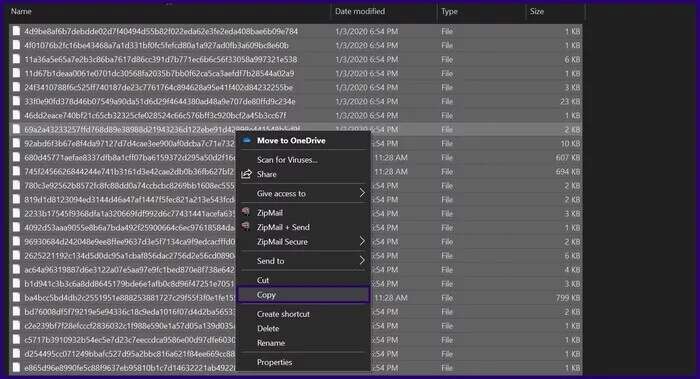
Note: When you try to copy files, you may receive a warning message from Windows stating that some files could harm your computer. This is because you're moving them from a system folder and they don't have specific file extensions. For this reason, Windows doesn't recognize "file types."
Step 4: Paste the files into the new folder by pressing Ctrl+V on your keyboard. Alternatively, you can right-click inside the folder and select Paste from the options menu.
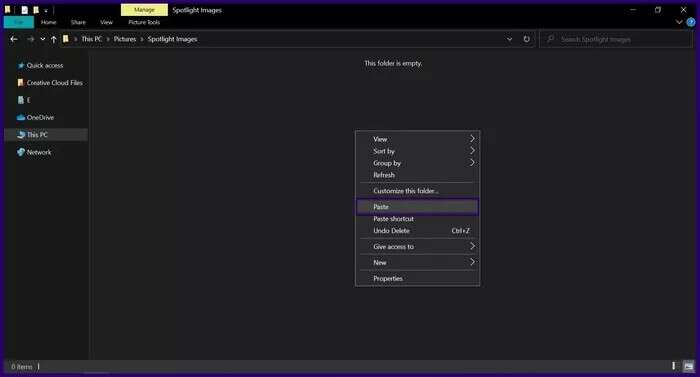
Step 5: Select a file at the top of the File Explorer window.
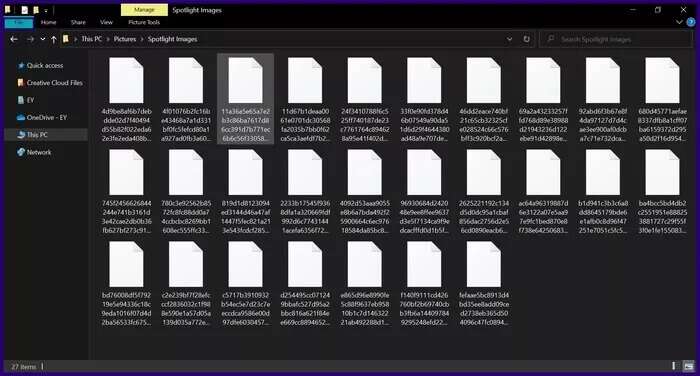
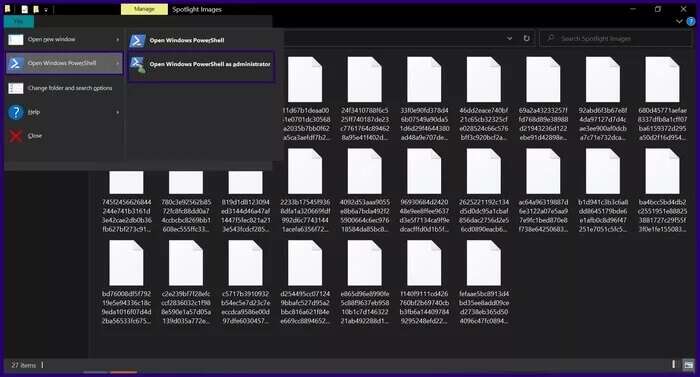
Step 6: Click Open Windows PowerShell and select Open Windows PowerShell as administrator.
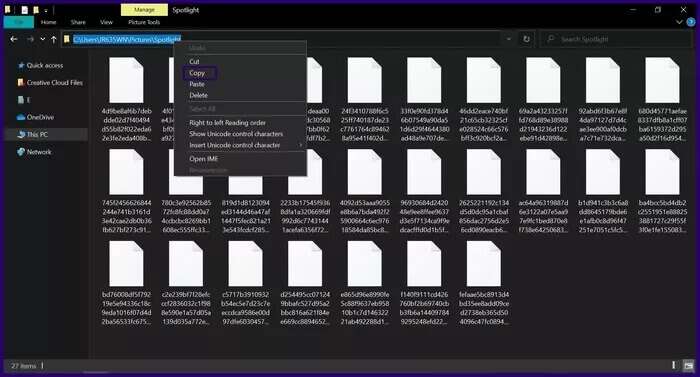
Step 8: In Windows PowerShell, type cmd, leave a space, and paste the copied path.
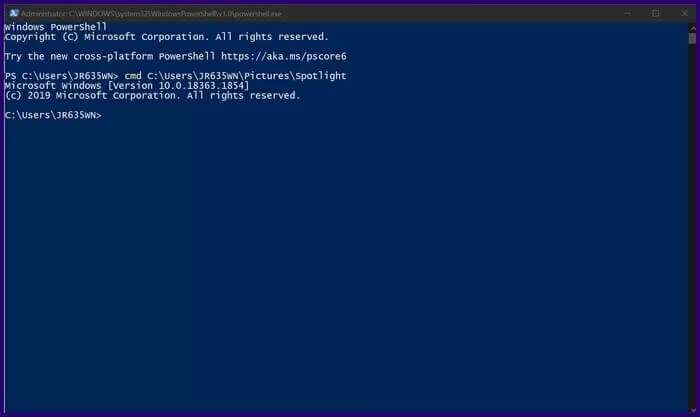
Step 9: Enter the command below and press Enter on your keyboard and this should change the file extension to jpg.
ren * *.jpg
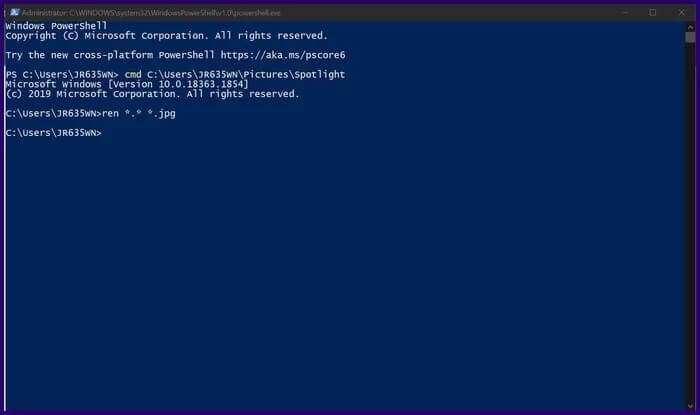
Step 10: Exit the command prompt and then press F5 on your keyboard to refresh the folder.
The images should now be in jpg format and ready to use.
Automatically download local images
While following the steps above helps locate old Spotlight images and convert them into usable files, doing so can be tedious all the time. Windows 11 doesn't offer a feature that allows automatic downloading; however, you can download third-party apps from the Microsoft Store that do the trick. Here are the steps to follow:
Step 1: Launch the Microsoft Store.
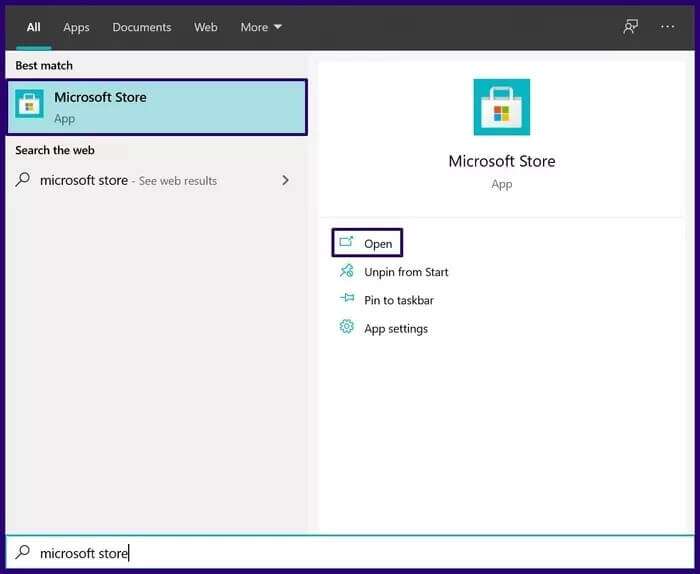
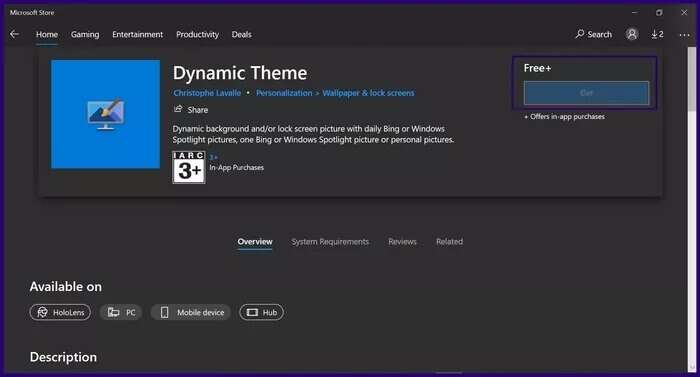
Step 2: Find a dynamic theme and select Get.
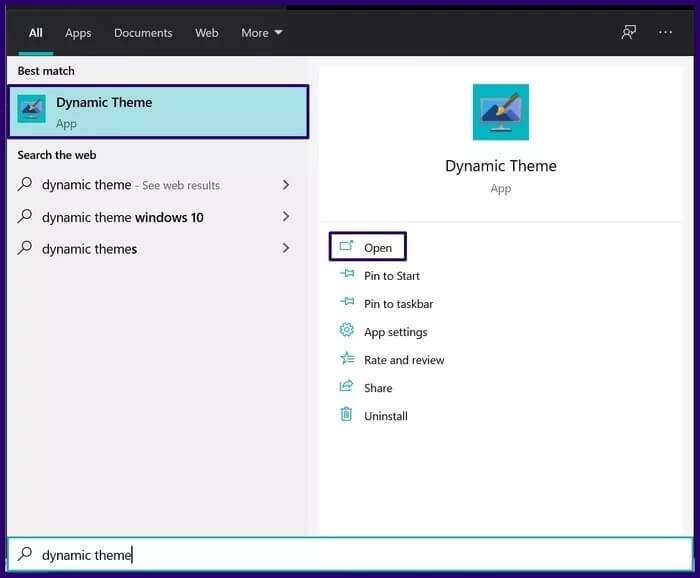
Step 3: Launch the Dynamic Theme app from the Start menu.
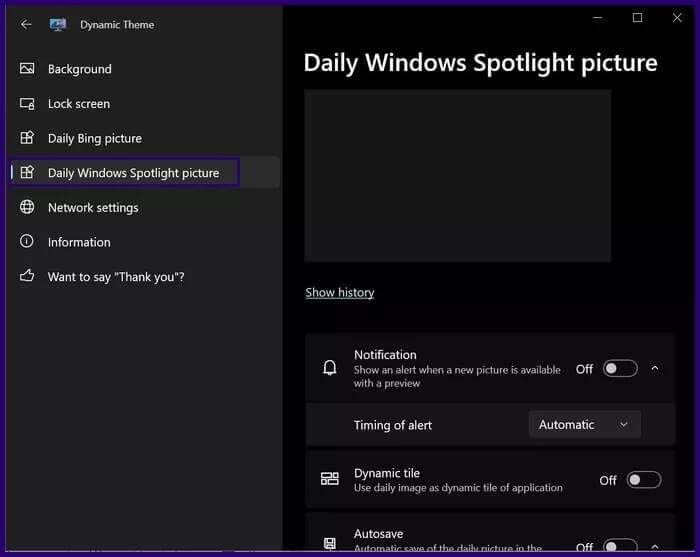
Step 5: Scroll through the options list and enable the toggle for auto-save.
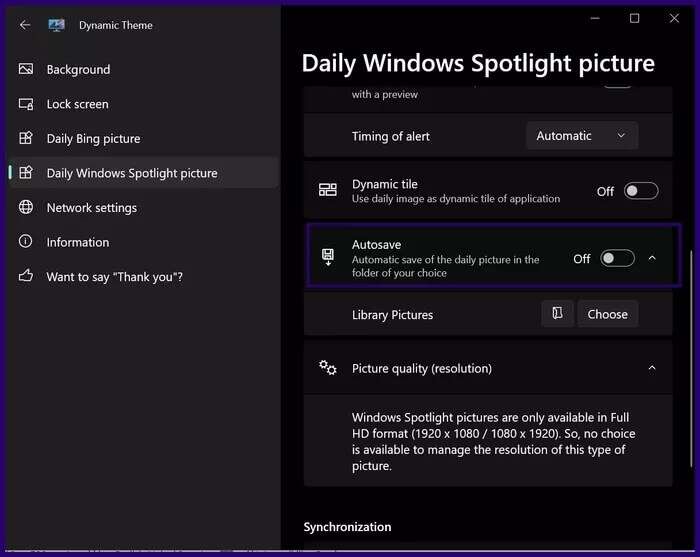
Step 6: Choose the folder where you want to save your photos.
After taking these steps, Spotlight images should be downloading to your computer daily.
Change the theme in Windows 11
Now that you know how to save Spotlight images on Windows 11, those beautiful wallpapers that always appear on your Windows lock screen, you can also consider changing the theme of your Windows 11 PC.


