Battery Saver mode helps extend the battery life of your Windows PC by reducing the amount of power the system uses. You can conserve energy and keep your device running longer. This article will guide you on how to enable or disable Battery Saver mode on a Windows 11 laptop.
You may be wondering what happens when you enable Battery Saver mode. Well, when you enable Battery Saver mode, the system automatically adjusts settings such as screen brightness, background apps, and notifications to reduce power consumption.
Some features, such as app performance or background app updates, may be affected. However, you can still use your device and access most apps and features. Additionally, you can turn on the feature manually or automatically. We'll show you both methods. Let's get started.
How to manually turn on or off battery saver mode
Let's start by manually turning on or off Battery Saver on Windows. There are two ways to do this. We've sorted the methods from easy to moderate. Let's get started.
1. Use quick settings
Quick Settings combines Wi-Fi, Sound, and Battery in the taskbar. Battery Saver is undoubtedly a part of this too. Follow the steps below to enable or disable it.
Step 1: Click Battery, Wi-Fi, or Sound icon In the taskbar to open Quick Settings.

Step 2: Under Quick Settings, single-click on the option Battery Saver (Background will be highlighted.)
Note: If you want to turn it off, click once on Battery Saver (this will turn off the highlight).
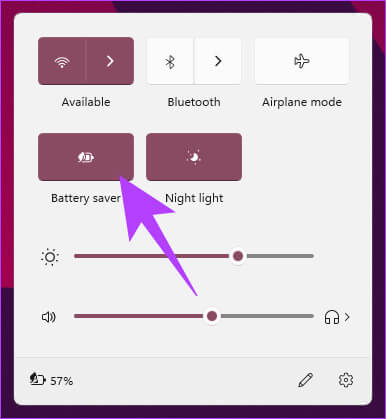
That's it. You've successfully enabled battery saver on your Windows PC. If the battery icon is missing from the taskbar or if Windows quick settings not working , then move on to the next method.
2. Using the Settings app
Battery Saver can be turned on using Application "Settings" On WindowsThe steps are easy to follow. Follow along.
Step 1: Click on Windows key On the keyboard, type Settings , and click to open.
Note: Alternatively, you can press “Windows key + i” on your keyboard to open the Settings app.
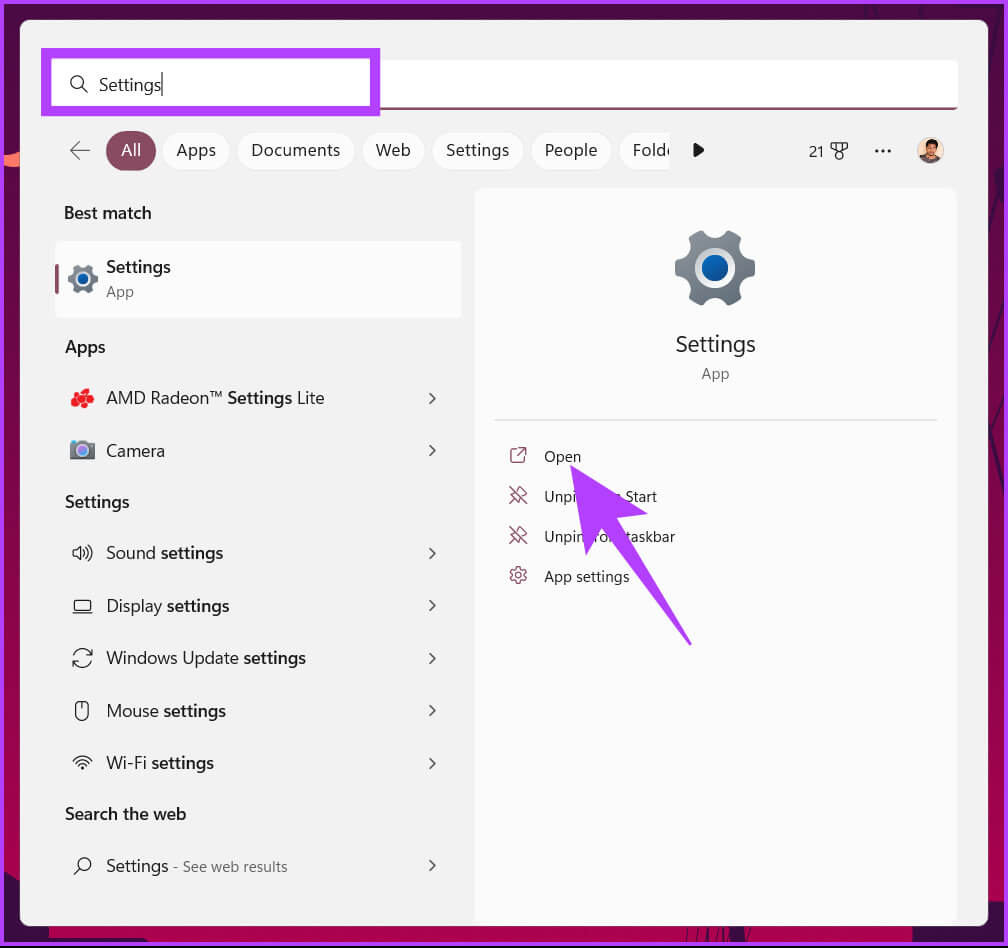
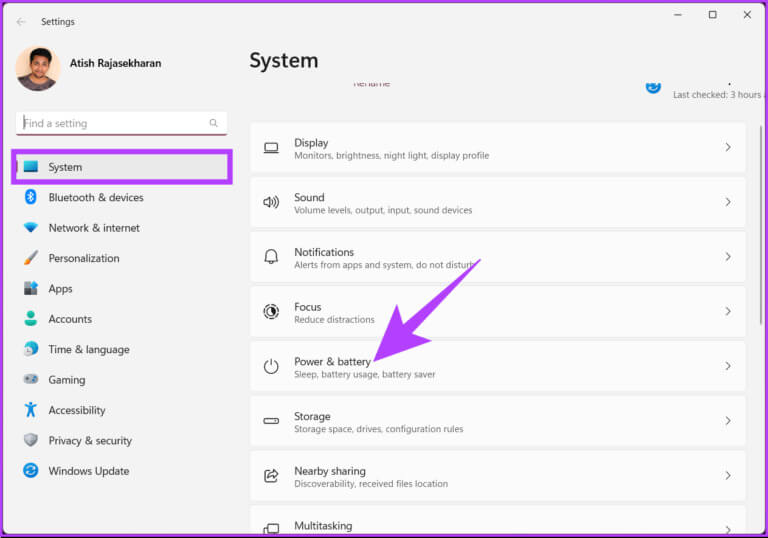
Step 2: Within the system, go to "Power and Battery".
Step 3: Scroll down and under Battery, tap to expand. Battery saver.
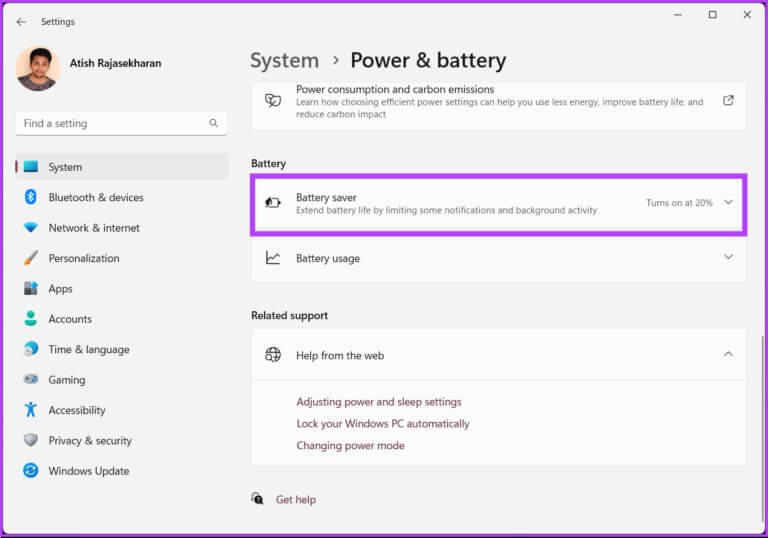
Step 4: Finally, click on the option. “Play Now” To enable battery saving.
Note: You can click the “Play Now” button to turn it off as well.
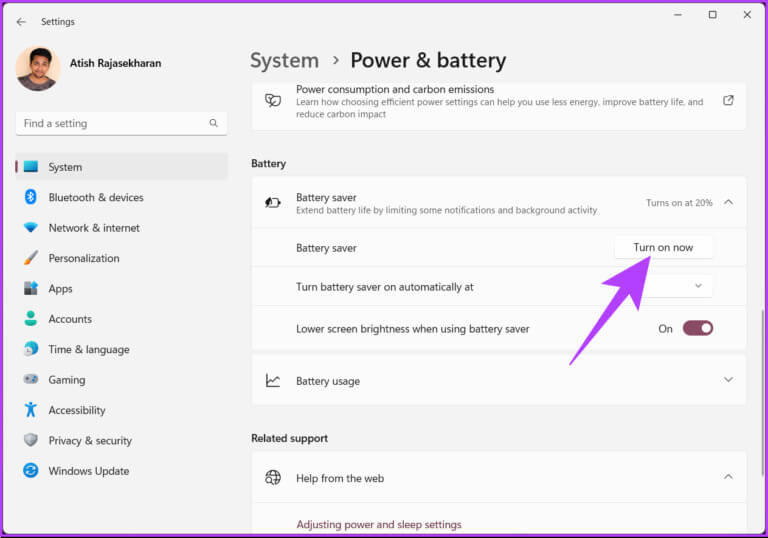
Using this, you have successfully turned on battery saver on Windows.
Tip: To quickly disable the battery saver feature on a Windows laptop, plug the device into a power outlet.
If you don't want to do it manually, schedule Battery Saver to run automatically. Want to know how? Read on.
How to turn battery saver on or off automatically
Automatically turning on or off Battery Saver on your Windows PC makes manual work easier. You don't have to monitor your computer's battery level; Windows will do it for you. There are two ways to automatically enable or disable Battery Saver on Windows. Let's explore each one.
1. Using the Settings app
Setting Battery Saver to turn on automatically in Windows is very simple. You can set a value that determines whether you want Battery Saver to turn on or off on your Windows PC. Follow these steps.
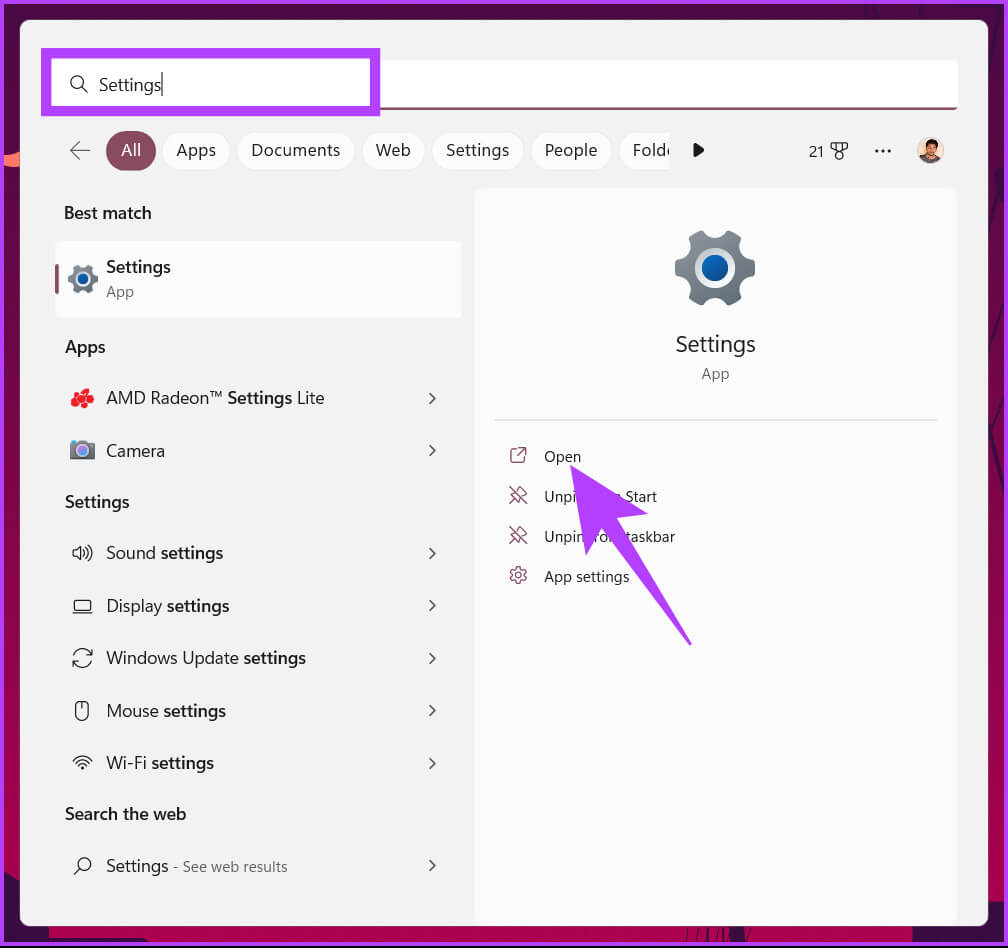
Step 1: Click on Windows key On the keyboard, type Settings , and click to open.
Note: Alternatively, you can press “Windows key + i” on your keyboard to open the Settings app.
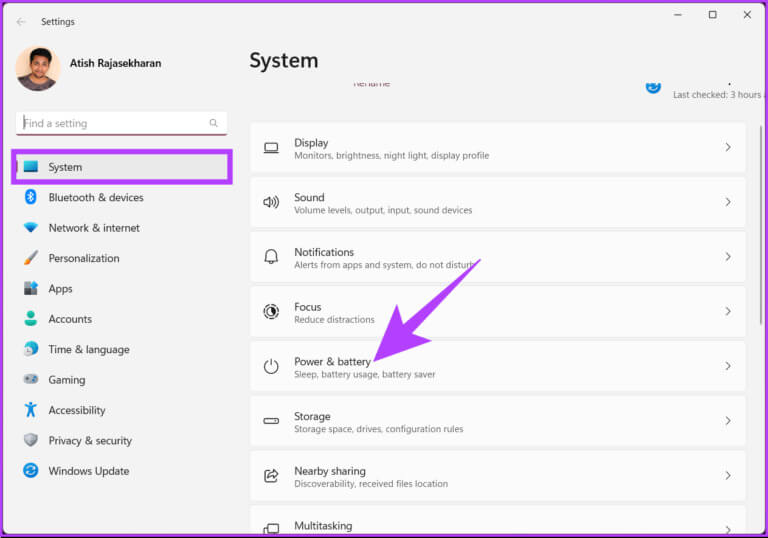
Step 2: Within the system, go to "Power and Battery".
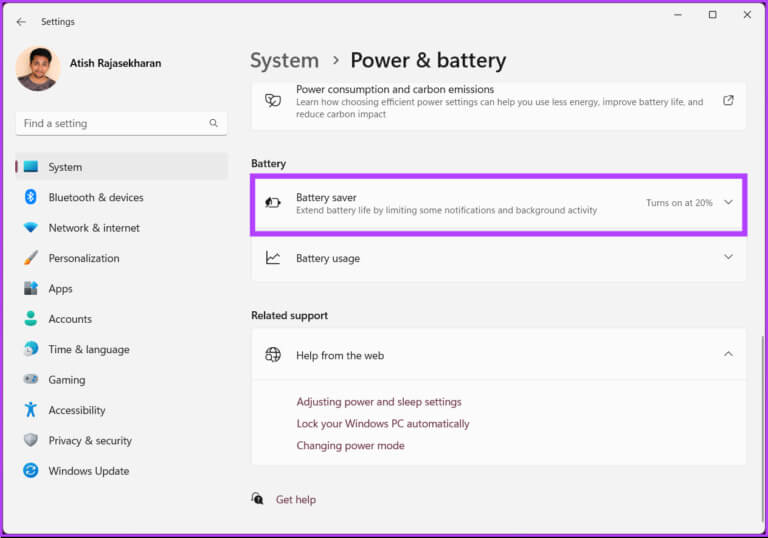
Step 3: Scroll down and under Battery, tap to expand. Battery saver.
Step 4: Click the chevron (arrow) icon next to the option. “Turn on battery saver automatically in”. Select the ratio according to your requirements.
Note: If you want to keep Battery Saver on, select Always. Conversely, if you don't want Battery Saver to turn on, select Never.
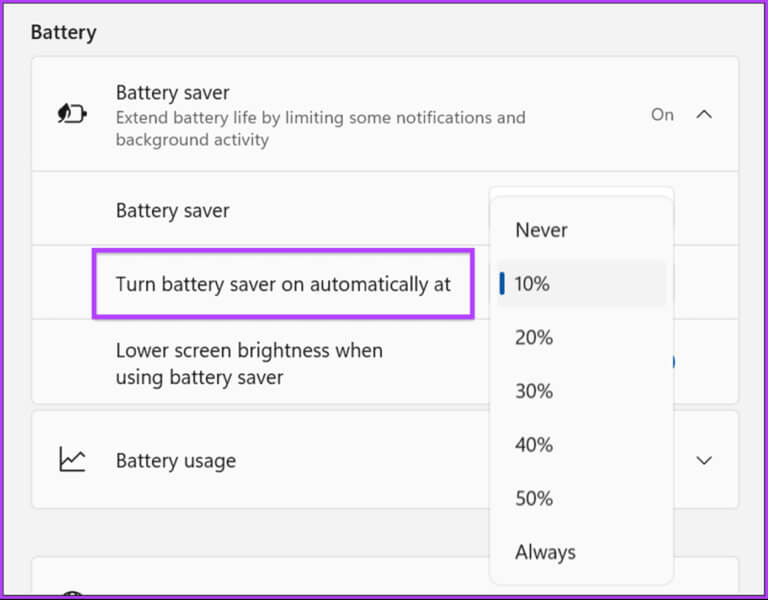
There you go. You've successfully enabled battery saver on your computer with ease. If the steps are too long for you, you can do the same thing using Windows PowerShell For faster results, check out the following method.
2. Use PowerShell
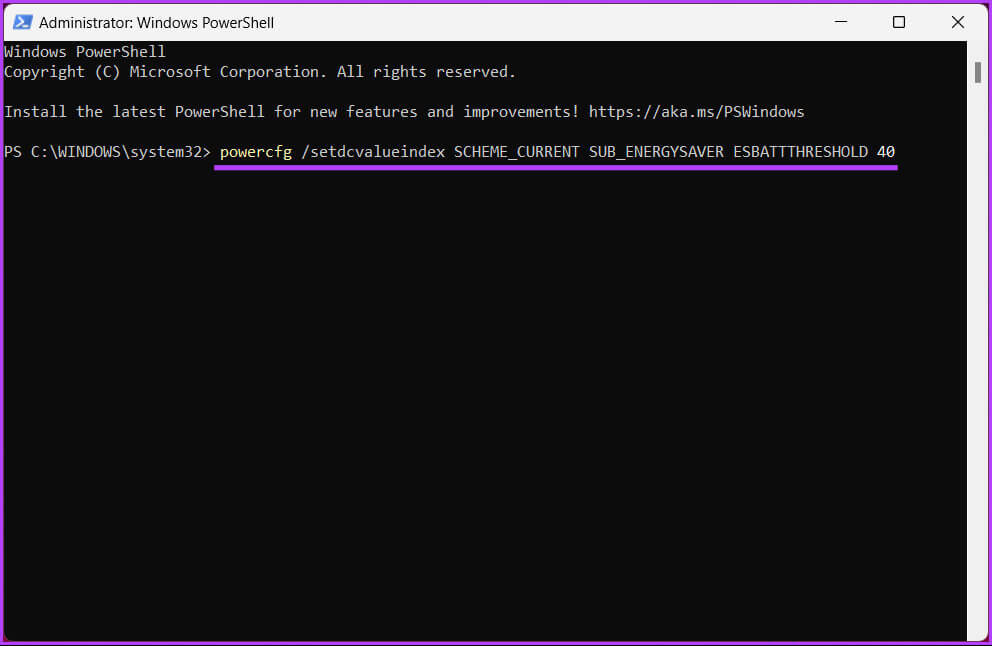
Running Battery Saver using PowerShell is quick and simple. However, if you're not familiar with running commands in Windows, we recommend following the method above.
Step 1: Click on Windows key On the keyboard, type Windows PowerShell , and tap "Run as administrator".
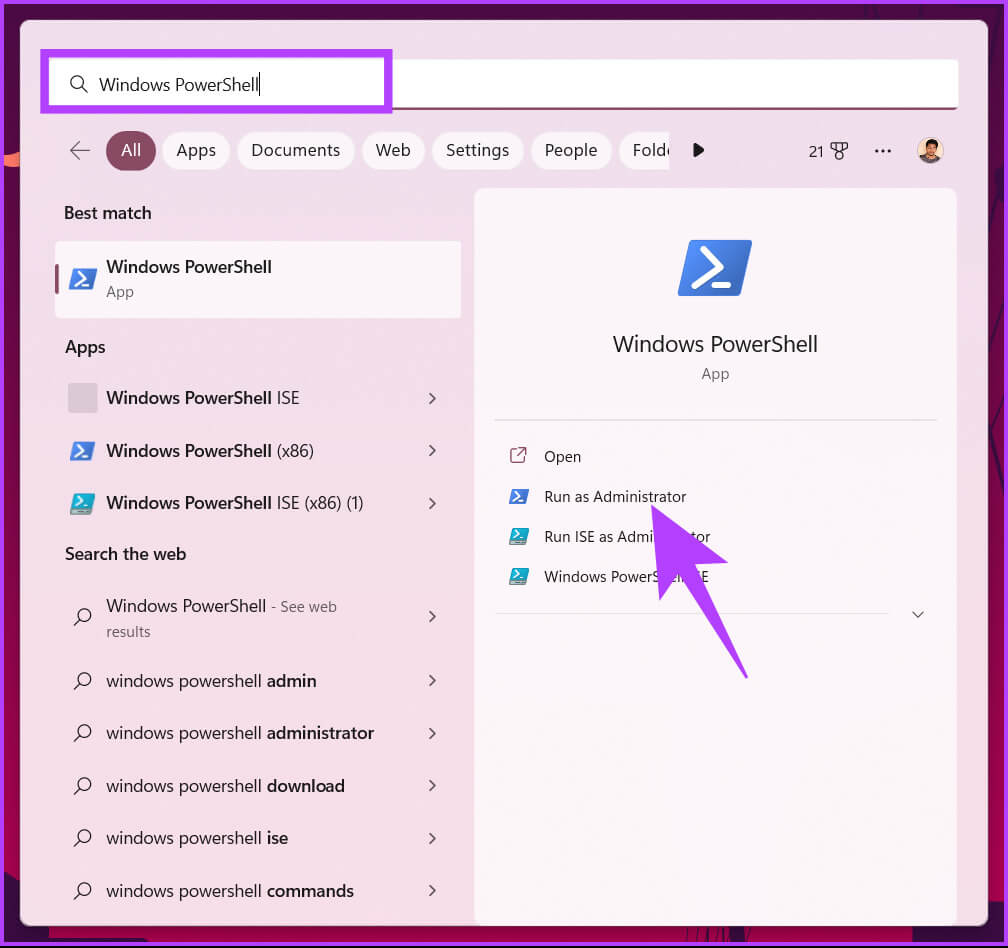
At the prompt, select Yes.
Step 2: Type the command below and press Enter.
Note: Replace With a number from 1 to 100. You can set it to 0, which means never turn on battery saver, or 100, which means always turn on.
powercfg /setdcvalueindex SCHEME_CURRENT SUB_ENERGYSAVER ESBATTTHRESHOLD
