Outlook allows you to automatically forward emails sent to your inbox to any other Outlook or email accounts, such as Gmail, AOL, iCloud Mail, Yahoo!, etc. Depending on your device, you can either set up automatic forwarding in Outlook using the Forwarding section of Outlook Settings or create an automatic forwarding rule using Outlook's Rules feature. This tutorial walks you through the steps.

Set up automatic forwarding in the new Outlook for Windows and the web
You can set up automatic forwarding for both personal and enterprise Outlook accounts. Follow the steps below to do this on the web version as well as the new Outlook for Windows app, which was released in September 2022 and is available to all Office Insiders.
- Log in to Outlook account Your.
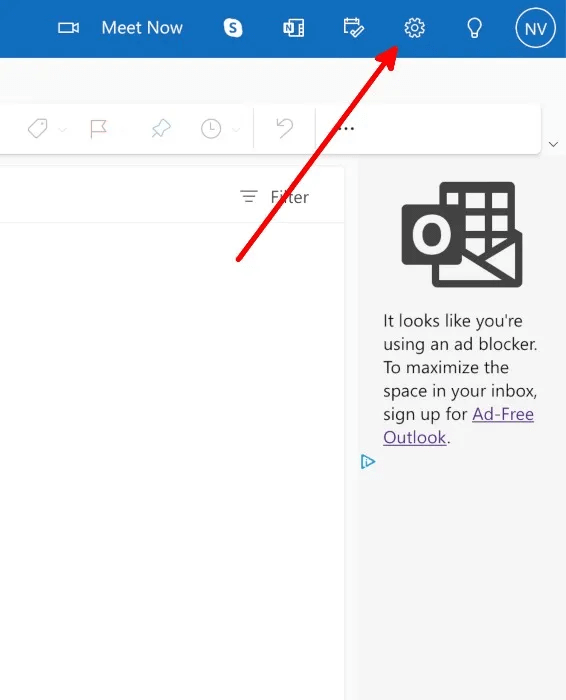
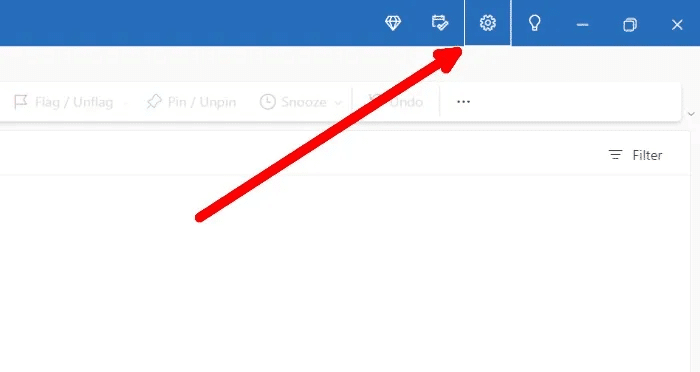
- Click the gear icon in the top right to open Settings menu.
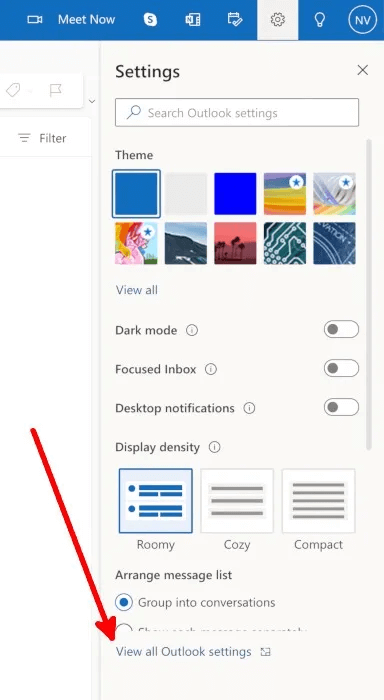
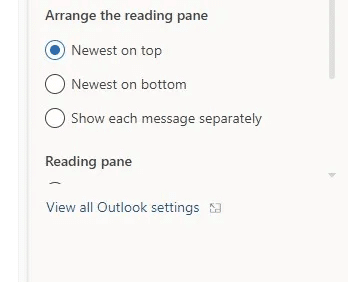
- Click “View all Outlook settings.”
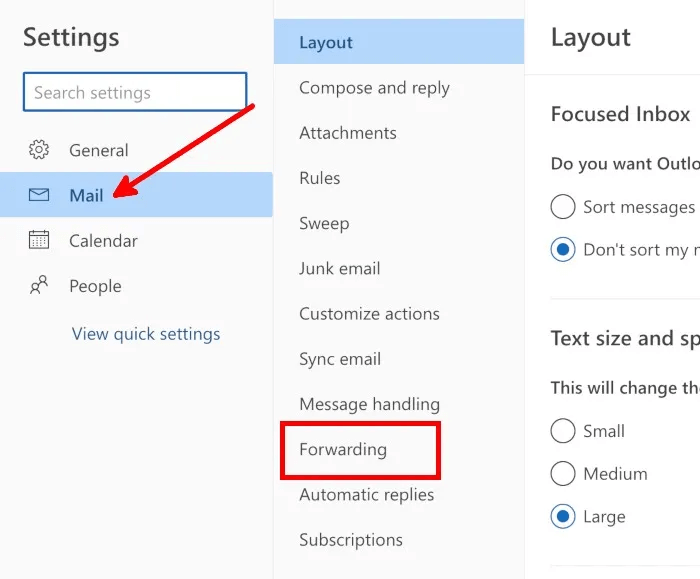
- Go to Mail -> Forwarding To change your account's automatic redirection settings.
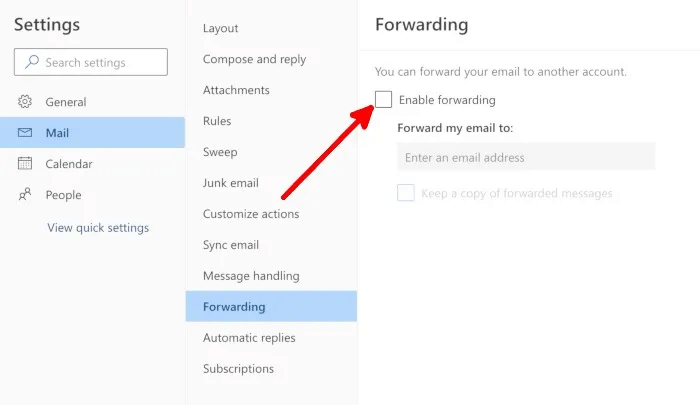
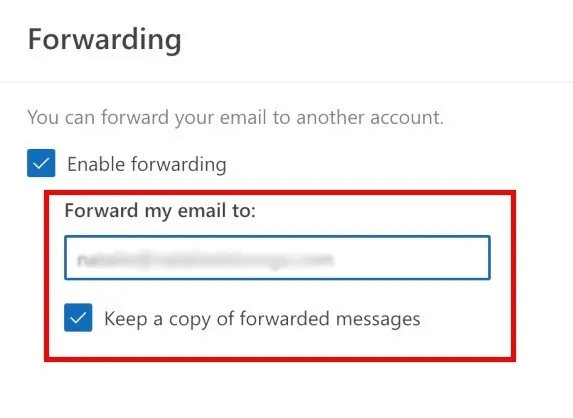
- check box Enable redirection.
- Type a forwarding email address and choose whether to keep a copy of forwarded emails.
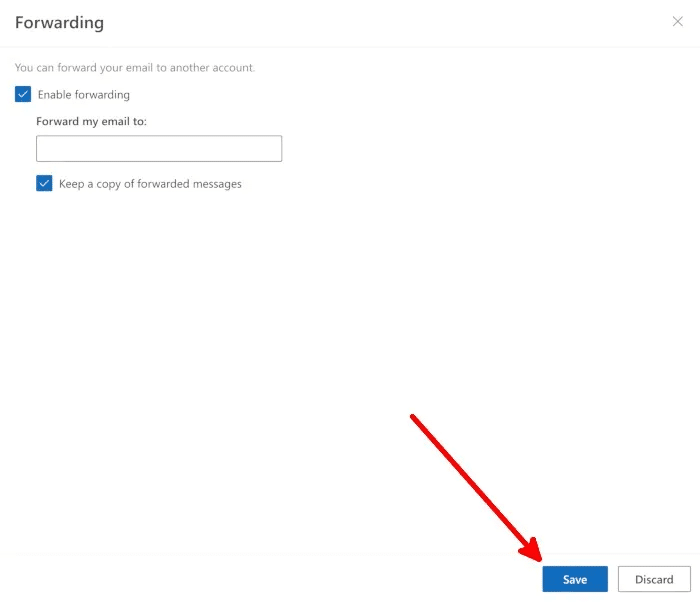
- Click "save" At the bottom to apply your auto-redirect settings.
Tip: You can also Set up automatic forwarding in Gmail To forward emails to Outlook and other email accounts.
Set up automatic routing using rules in Outlook for Windows and the web
Both older and newer versions of Outlook for Windows allow you to create rules and set up email forwarding. The option is also available in the web version of Outlook.
New Outlook app and web
If you want to create an automatic forwarding rule using the new version of Outlook for Windows or the web version, follow these instructions:
- Launch the new Outlook for Windows app.
- Click gear icon to open a window Settings popup.
- Click View all Outlook settings At the bottom.
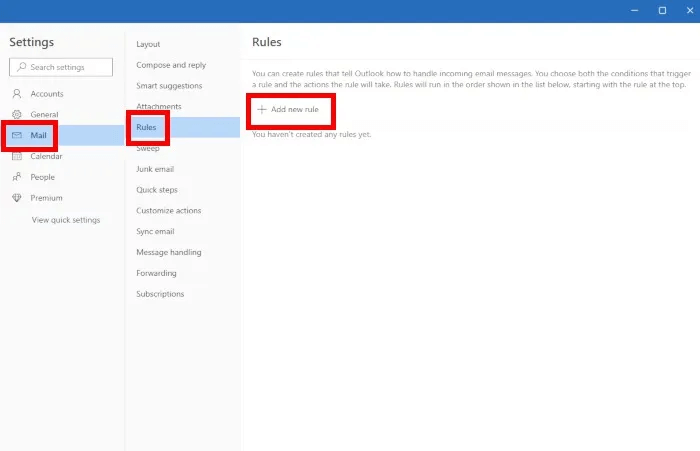
- In the Settings window, go to Mail -> Rules -> Add New Rule To create a new rule.
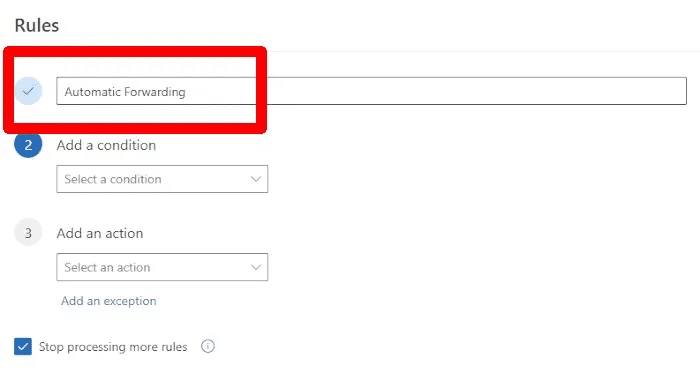
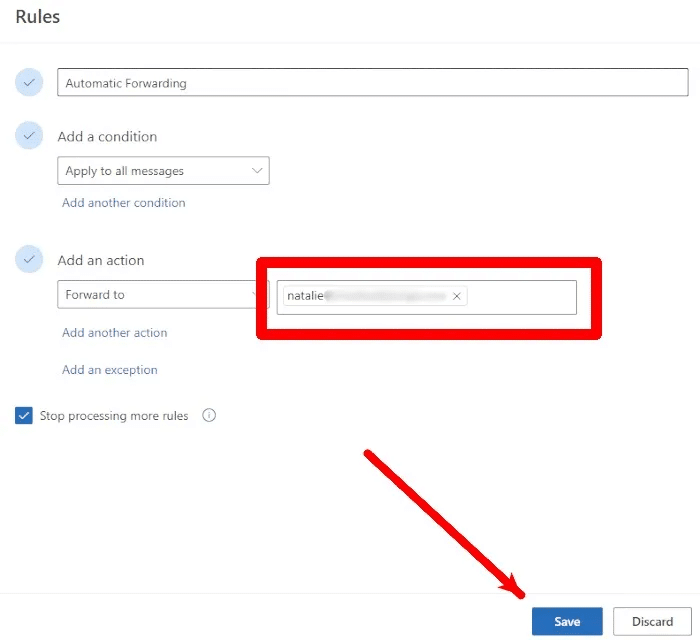
- Type a relevant rule name to make it easier to manage. Since you're setting up automatic redirection, use something like "Automatic redirection".
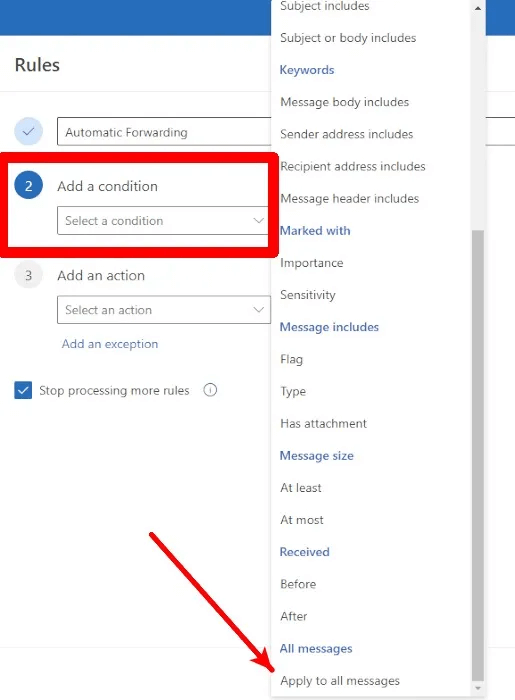
- Add a condition. For example, if you want to forward all emails that go to your inbox, select “Apply to all messages.”
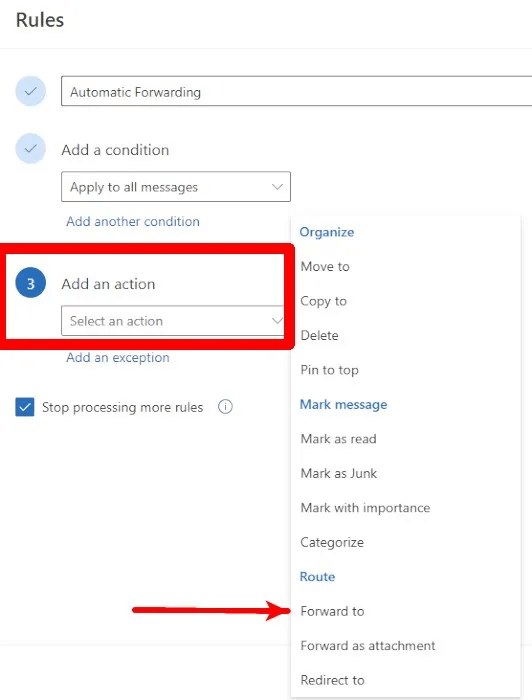
- Select an action in Add an actionTo redirect automatically, select “Redirect to”.
- Type the redirection address and click "save".
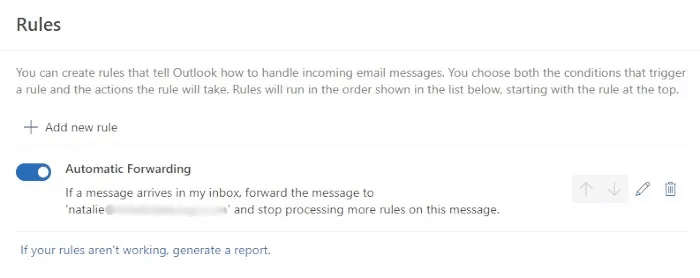
- The redirect rule you created must be in the list. "Rules" In the Outlook app.
Old version of Outlook for Windows
You can also create an automatic forwarding rule in the classic Outlook interface by following these steps:
- Run the old version of Outlook for Windows.
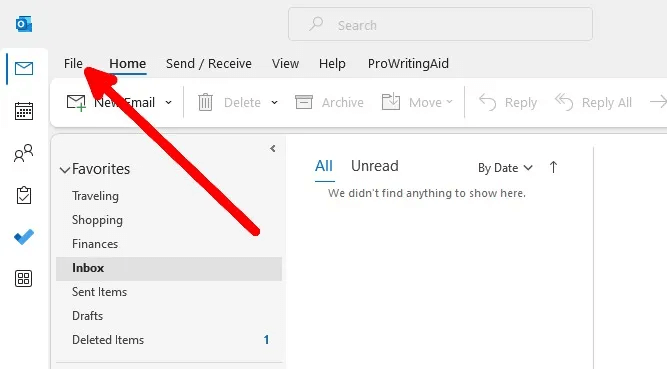
- Click "a file" In the application window.
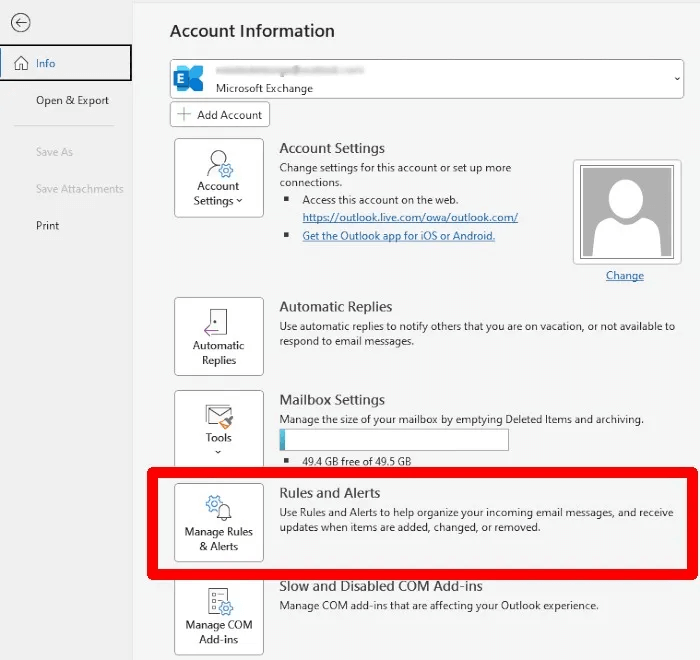
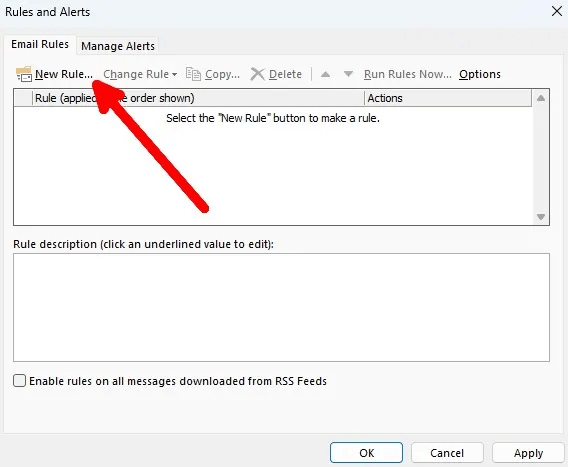
- To create a rule, click Rules and Alerts.
- tap on "New rule."
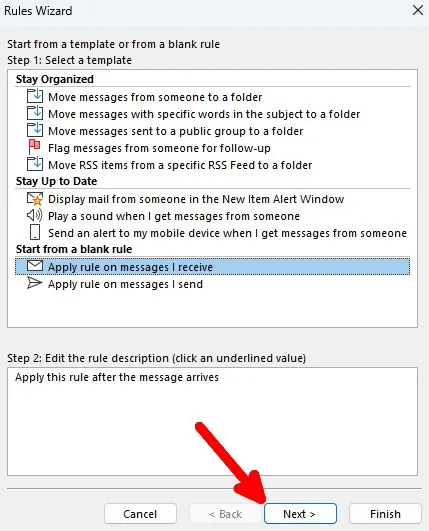
- Locate “Apply the rule to the messages I receive.” , Then click "the following".
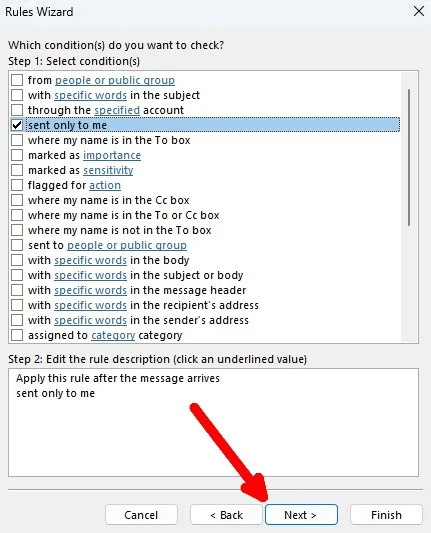
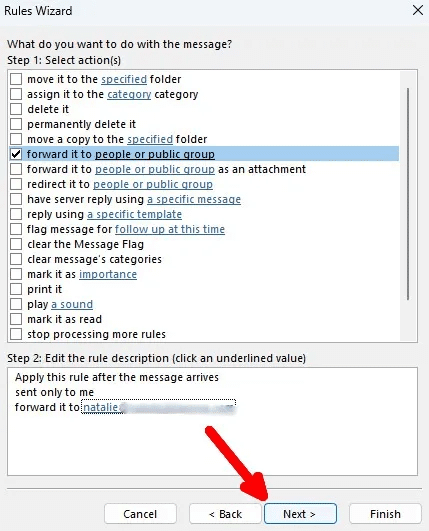
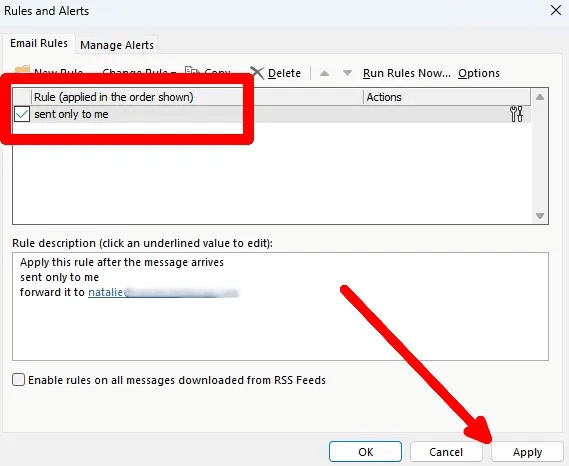
- Select the condition. If you want to forward only messages addressed to your email address, check the box next to "Sent to me only."
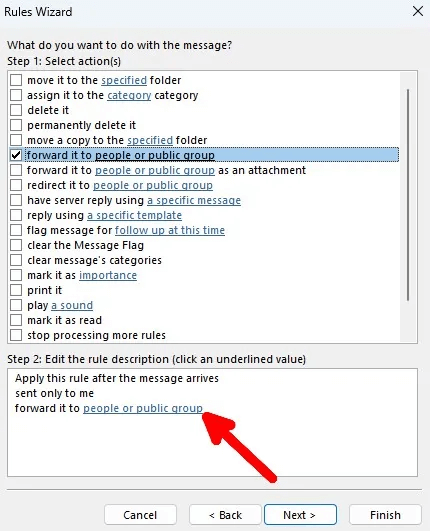
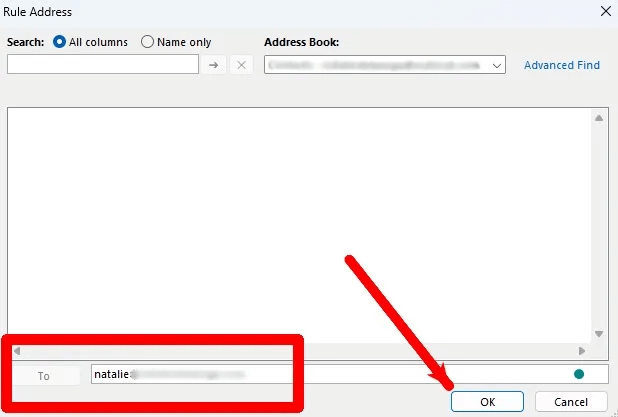
- Select an action. For example, check the box next to “Redirect to people or public group” , then click the underlined value to add redirect addresses.
- Add a forwarding email address, then click "OK".
- Once you return to the previous window, check the forwarding address you added, and then click "the following".
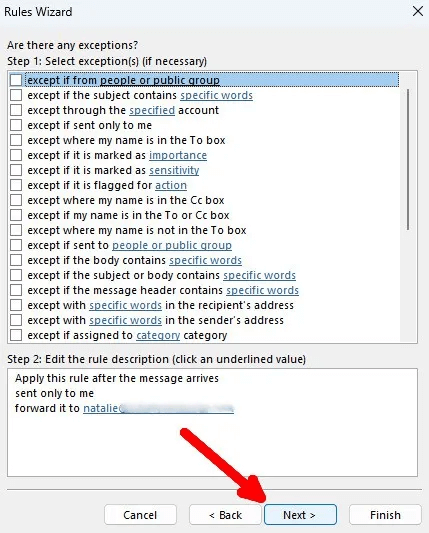
- Specify exceptions. This step is optional. If you don't need to add exceptions, click "the following".
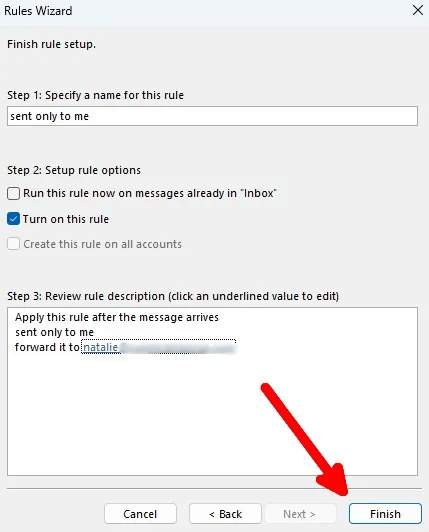
- Review the rule you created, and then click "ending".
- After creating the rule, you should see it in the rules list. If it is there, click "application".
Good to know: If you have a Mac that is used by family members or trusted contacts, you can Enable automatic login on your Mac.
Set up automatic forwarding using rules in Outlook for Mac
If you're using the Outlook desktop app for Mac, you can set up automatic forwarding in Outlook using rules.
Note that the rules feature is not supported in the new version of Outlook for Mac. To create rules, you need to switch to the old version of Outlook by going to the menu bar and clicking "Help -> Revert to Old Outlook." To switch back to the new Outlook, simply click the toggle button next to "New Outlook" in the top right of the Outlook app window on your Mac.
- Launch the Outlook for Mac app.
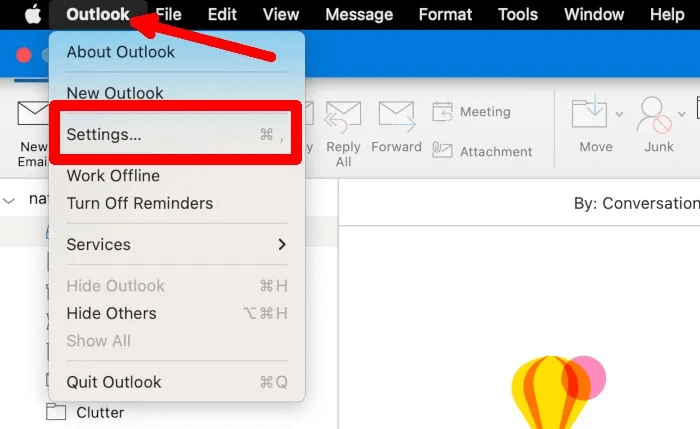
- From the menu bar, click “Outlook” , Then click "Settings". You can also press Command + ,.
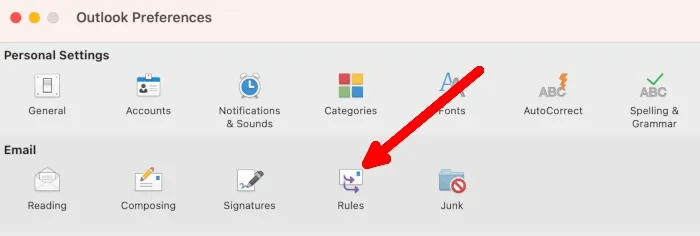
- in window Outlook Preferences, tap on "The rules".
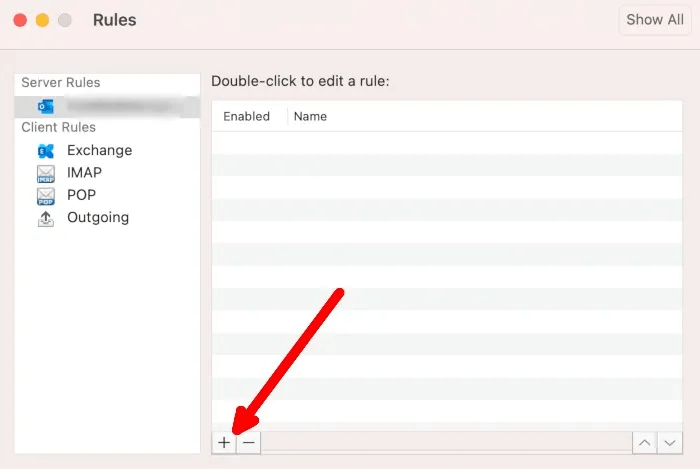
- Inside a window "Rules" Click the plus icon at the bottom to add a new rule.
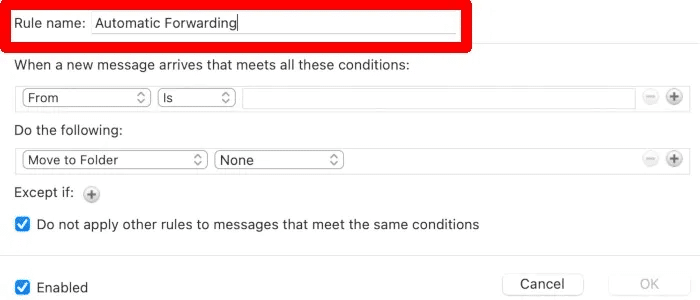
- Type a relevant rule name so you can easily manage the rules when creating more than one rule. In this case, you can use something like: "Automatic redirection".
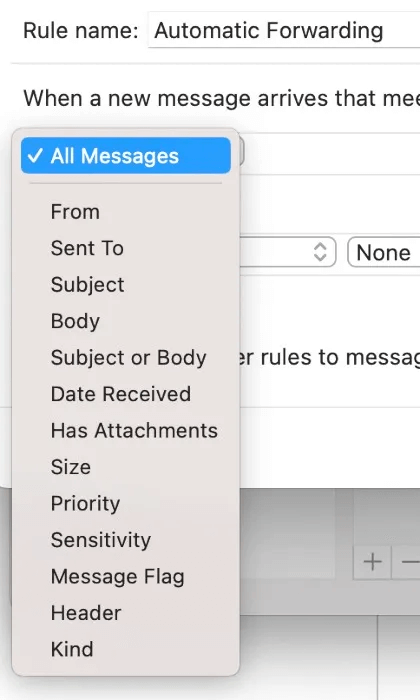
- Specify a condition within “When a new message arrives that meets all of these conditions”This will automatically filter out the messages you want to forward. You can select All messages To forward all your emails or specify a filter.
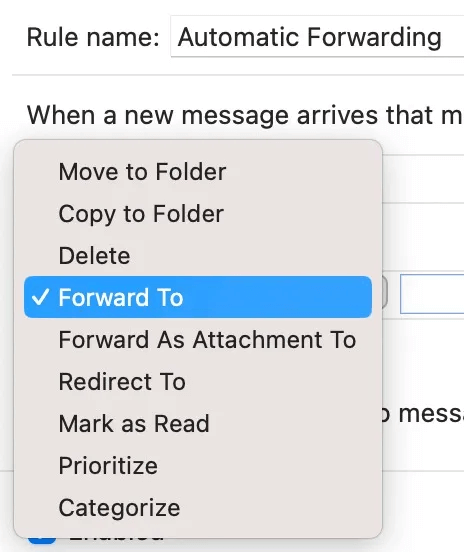
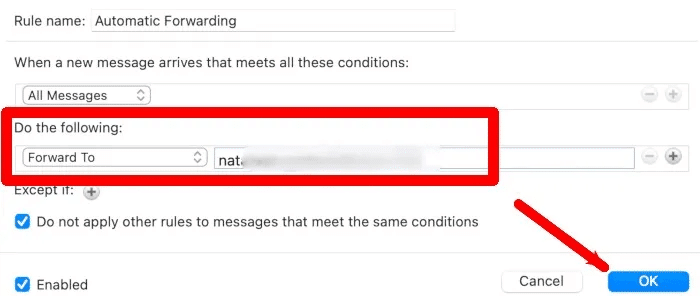
- Select an action under “Do the following”Since you are setting up automatic forwarding, select “Redirect to”.
- Type a forwarding email address and click "OK".
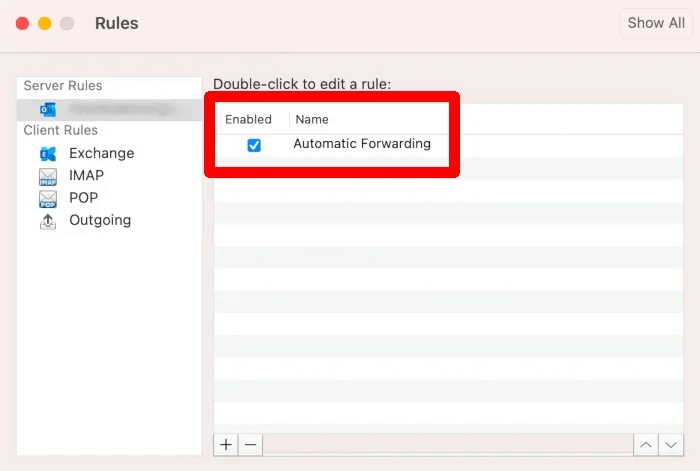
- You should see the new rule in the list in the window. "The rules".
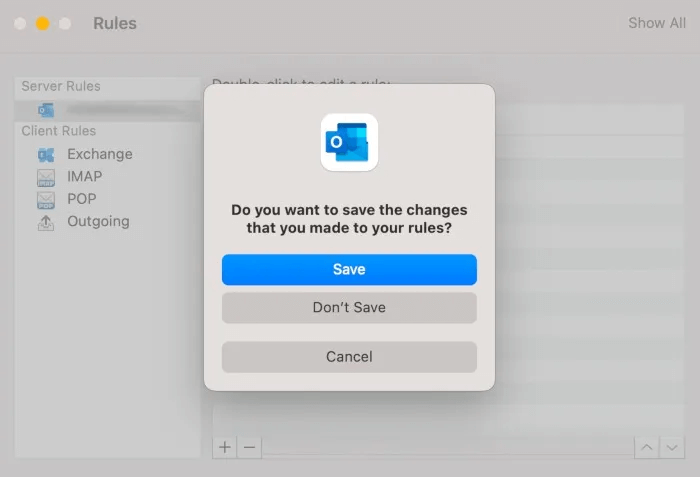
- Make sure to click on "save" When you are prompted to apply the changes you made.
Tip: Send more friendly emails.Using emojis in Microsoft Outlook for Windows.
Frequently Asked Questions
Q1: Can I set up auto-forwarding with more than one forwarding address?
The answer: You can add more than one forwarding email address if you set up automatic forwarding through Outlook's rules feature. If you choose to use the non-rule method, note that you can only add one forwarding email address.
Q2: Can I filter which emails will be forwarded?
The answer: You can only filter emails that will be forwarded if you have set up automatic forwarding using the Outlook Rules feature. Filters are not available if you have enabled automatic forwarding outside of the Outlook Rules section. To set up filters for forwarded emails, you need to access the Rules section, as explained above.
Q3: Do I need a Microsoft 365 subscription to access the automatic forwarding features in Outlook?
The answer: No. Additionally, additional automatic forwarding features will not be unlocked with a Microsoft 365 subscription. If you want to check out the benefits of a Microsoft 365 subscription for your Outlook account, go to Microsoft support website.
