A rather interesting addition to the operating system. Windows 10 version 1903 It is reserved storage. As the name suggests, it is a certain amount of Storage It is set aside by the operating system for a specific set of tasks. Now this raises several concerns, such as what kind of tasks?

More importantly, can you disable reserved storage? Or is it even possible to do so? This can be confusing if you're committed to storage or don't want it taking up disk space on Windows 10 without your permission.
So let's explore and find out what reserved storage is, and whether it's worth the time to go ahead and disable it.
How it works
When you perform a new installation of the operating system Windows 10, version 1903 The operating system will automatically allocate at least 7 GB of drive space. Otherwise known as reserved storage, this will count toward the total storage space on the primary system partition.
However, Windows 10 won't perform this customization if you're simply updating your PC from a previous version (1809 or earlier), although you can manually activate the storage reserve if you wish (details below).
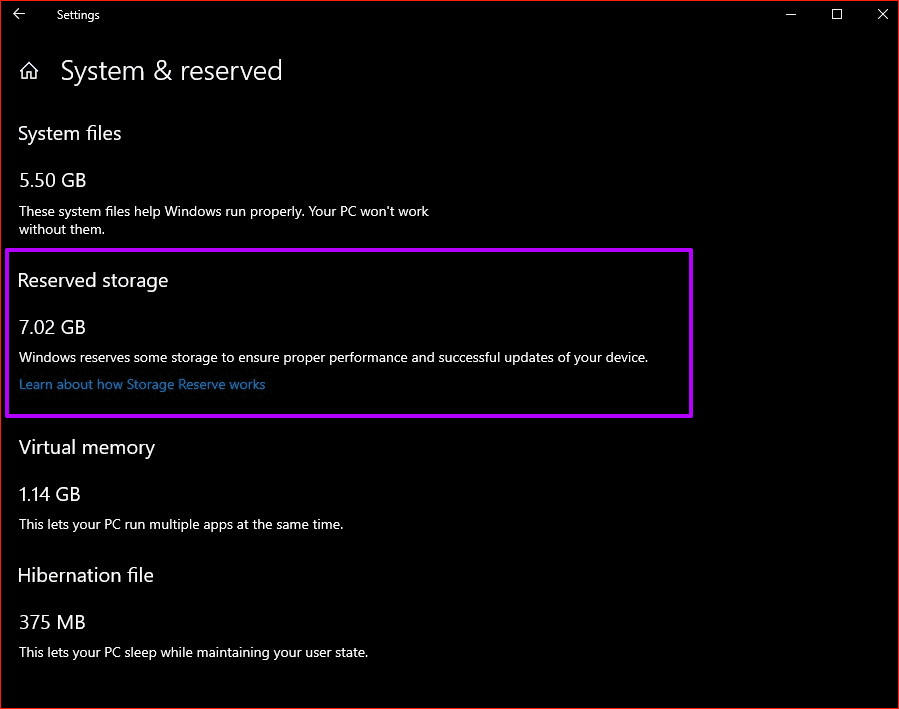
- Tip: To check the exact size of your storage reserve, type "storage settings" in the Start menu and press Enter. Then, click Show more categories, and then click System & Reserved.
The rationale behind reserved storage is quite simple – it allows for a smoother process when installing cumulative updates and features in the future.
For example, if your device is running low on storage space, updates will still download and install properly because they can simply use the reserved storage instead. In other words, you don't have to worry about updates failing due to a lack of storage.
Is 7GB of storage wasted?
But doesn't reserved space mean that 7GB of storage is unused most of the time? Well, not really. Windows 10 will use reserved storage to store temporary files, too.
When cumulative updates and new features become available, Windows 10 will automatically remove temporary files from the storage pool to pave the way for their installation. At other times, it will use Storage Sense to manage obsolete files as a way to prevent reserved storage from filling up.


But doesn't reserved space mean that 7GB of storage is unused most of the time? Well, not really.
In short, reserved storage is the new home for temporary files created by the operating system. This means that free space on the primary partition will no longer be used for this purpose.
Reserved storage
Often, you may see that the reserved storage space consumes more than 7 GB of space on the primary partition. This happens when you have many optional features enabled or additional languages installed. Increasing the storage reserve helps preserve it for future updates.
You can reduce this excess storage consumption by removing unnecessary optional features and languages.
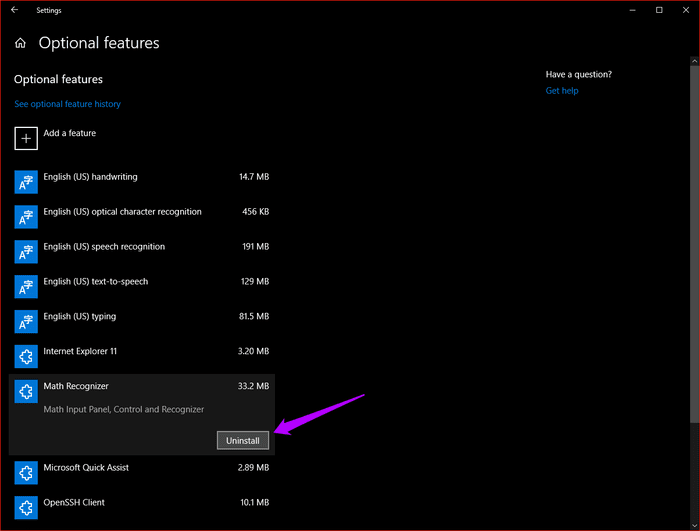
In the Start menu, type “manage optional features” in the Start menu to remove optional features, and then press Enter.
In the Optional Features screen that appears, select any unwanted features you want to remove, and then click Uninstall.
- Tip: You can always reinstall optional features by clicking the “Add Feature” option within the same screen.
To remove unwanted languages, type language settings in the Start menu, then press Enter. Select the language you want to remove, and then click Remove.
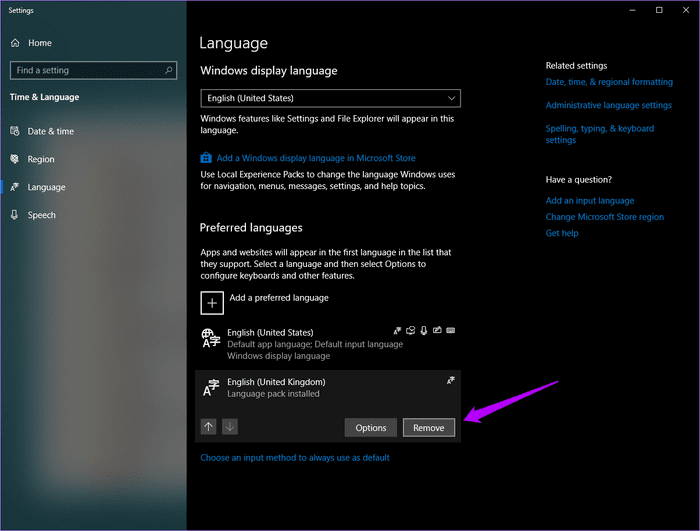
- Tip: To re-add a language, use the “Add a preferred language” option within the same screen.
Disable reserved storage
If you're running out of storage, you can easily disable reserved storage by modifying the system registry. However, the space gain may be minimal because Windows 10 will start using free space to create temporary files due to the storage shortage.
This means you may not see your full 7GB of storage. Installation of cumulative updates and new features may also fail if you don't have enough free space to move around. Consider this before proceeding.
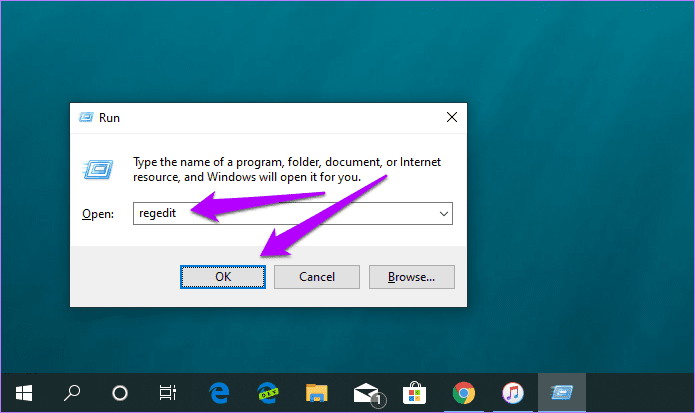
Step 1: Press Windows + R to open the Run box. Then, type regedit. Then, click OK to open the Registry Editor.

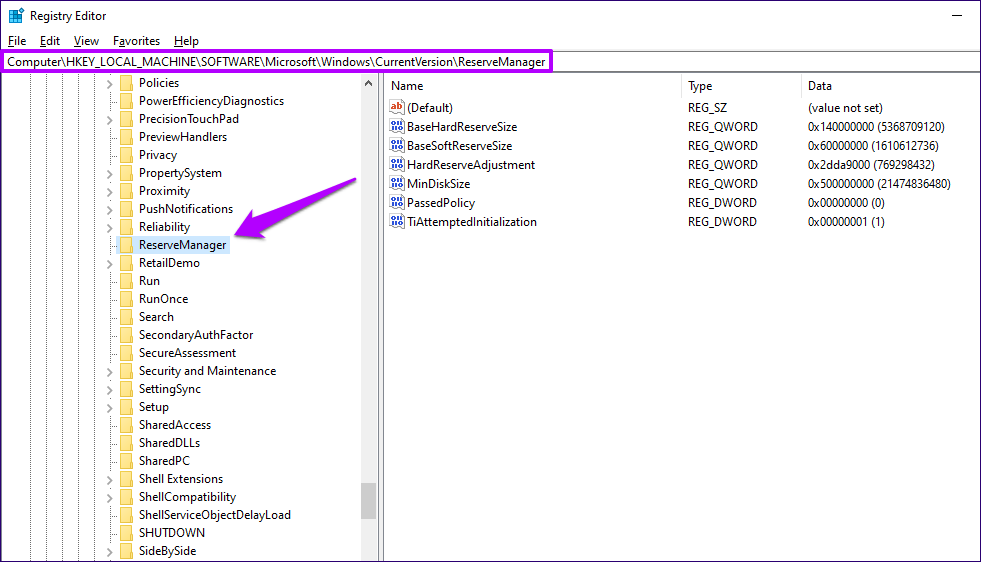
Step 2: Copy and paste the following path into the address bar at the top of the window:
HKEY_LOCAL_MACHINE\SOFTWARE\Microsoft\Windows\CurrentVersion\ReserveManager
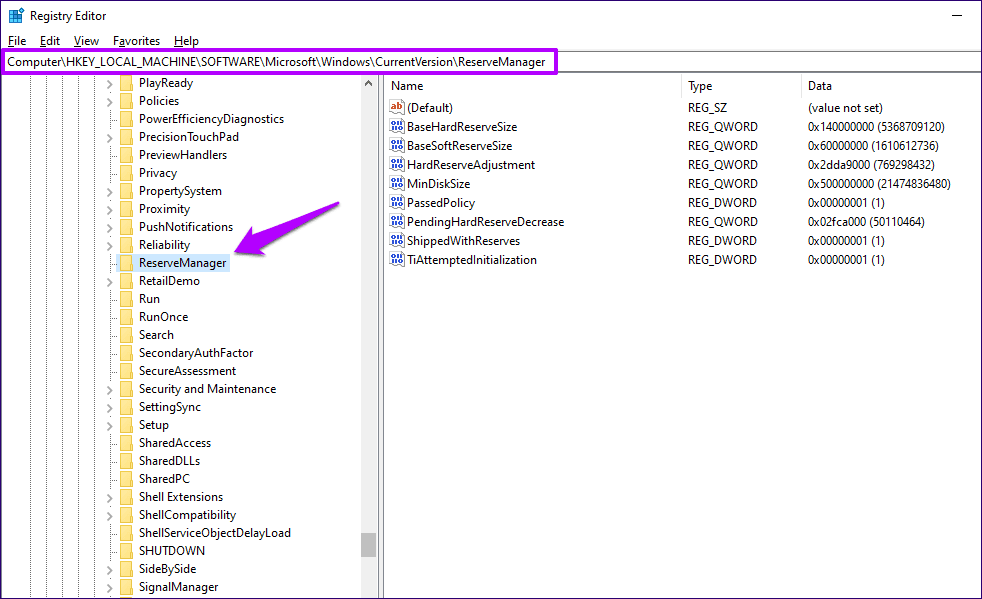
Next, press Enter, and then make sure the folder named ReserveManager is selected in the right pane.
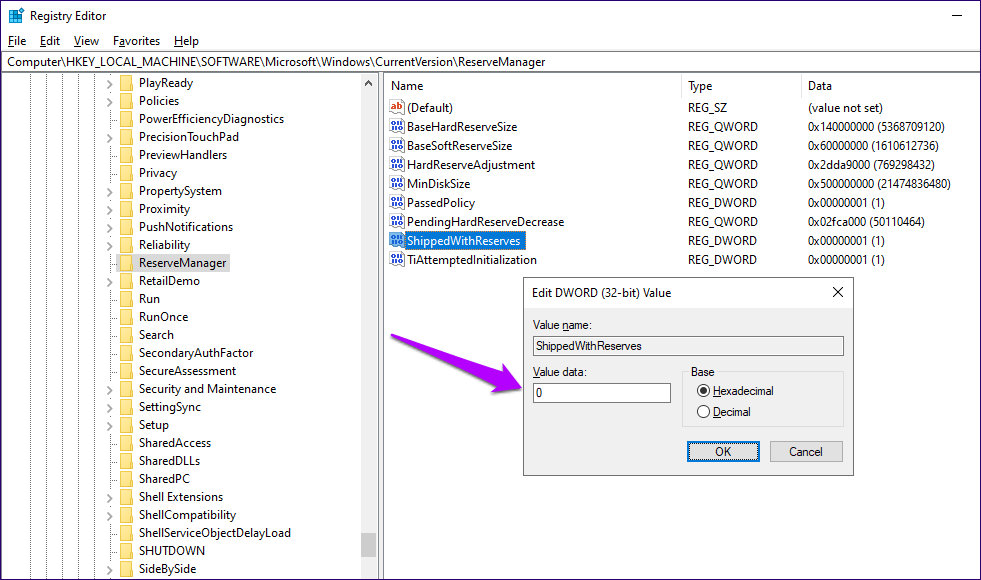
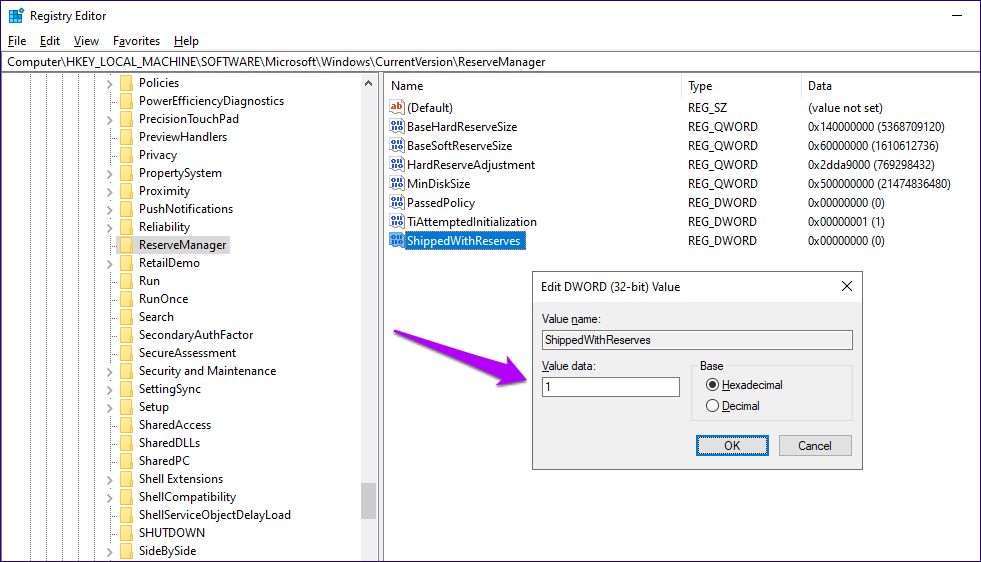
Step 3: Double-click the ShippedWithReserves registry key on the right side of the Registry Editor window. In the pop-up box, enter a value of 0, and then click OK.
Restart your computer. Windows 10 will make the appropriate changes during the restart. You will no longer see the reserved storage partition under the System & Reserved section in Storage Settings.
Enable reserved storage
If you're updating from a previous build, you won't see Reserved Storage listed in the Storage Settings pane. You can, however, enable the feature, but Windows 10 won't reserve the full 7 GB until the next major feature update. The same applies if you've disabled Reserved Storage and want to re-enable it.
- Note: The following steps assume you updated Windows 10 from a previous version, which likely means you'll need to create the relevant registry key from scratch to enable Reserved Storage. If you just want to re-enable Reserved Storage after previously disabling it, skip steps 3 and 4.
Step 1: Press Windows + R to open the Run box. Type regedit, then click OK to open the Registry Editor.
Step 2: Copy and paste the following path into the address bar at the top of the window:
HKEY_LOCAL_MACHINE\SOFTWARE\Microsoft\Windows\CurrentVersion\ReserveManager
Press Enter, and then make sure the folder named ReserveManager is selected in the right pane.
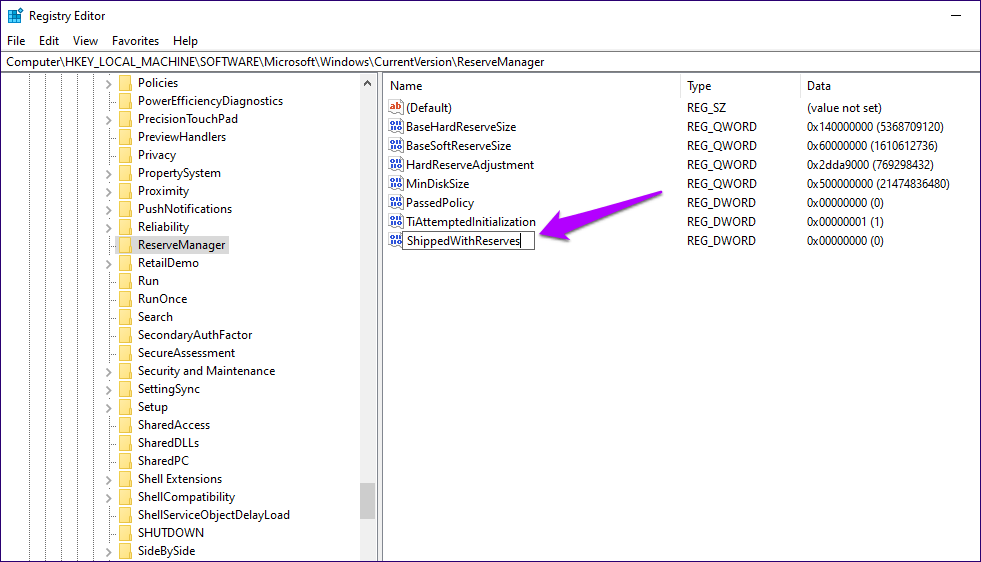
Step 3: Right-click an empty area on the right side of the Registry Editor window, point to New, and then select DWORD (32-bit) Value.

Step 4: Name the newly created registry key ShippedWithReserves.
Step 5: Double-click the newly created ShippedWithReserves key, set the value to 1, and then click OK.
Restart your computer. Although the reserved storage is now active, you won't see the resulting storage reservation until the next major feature update.
It doesn't really matter
Windows 10's reserved storage is actually a well-thought-out implementation, especially since updates can now occur without any storage issues to disrupt things. However, desktops with hard drives that have less space to begin with can suffer particularly from this additional storage allocated by the operating system.
But given that Windows 10 won't waste your reserved storage space, it's not clear whether you'll save much space by disabling it. So, unless you looking For some storage, there is no reason to disable it.