You may encounter an annoying problem in Windows 11 where the system shows that the internet is offline even though your device is actually connected to the network. This could be due to network settings, network driver issues, or DNS settings. In this article, we'll review the most common causes and how to resolve them effectively to ensure seamless connectivity.
Quick tips
- In most cases, this is a minor visual issue that may go away automatically or after a system reboot.
- If you are modifying registry settings, make sure to create a backup beforehand.
- This issue may be more common if you are using a proxy server or a direct Ethernet connection to your router.
When it comes to system issues, the "No Internet Connection in Windows 11, but the Internet is working" error is relatively simple, as you'll usually be able to connect to the Internet anyway. However, it can be annoying if you're trying to diagnose other issues or if it's coupled with slow internet, which could indicate a deeper problem. Here's what to do when you see the "No Internet Connection in Windows 11" icon but the Internet is still available.
Quick solutions to the problem “No Internet connection in Windows 11, but the Internet is working”
Before trying comprehensive troubleshooting steps, these quick fixes may completely resolve the issue:
- Disconnect from the VPN or proxy servers, as they can create a virtual network that your device detects as having priority over your current connection, but which doesn't actually have internet access. Restarting your computer or internet router may resolve some temporary issues.
- Reconnect to another network, then return to the original network. If your computer has multiple Ethernet ports (usually due to using a range extender), try using a different port.
- Temporarily disable your antivirus software.
- Make sure your Windows system is fully up to date, even with optional updates.
- Go to Settings “Network and the Internet"Click on “Network reset.”
Solution 1: Disable TCP/IP v6
Although IPv6 became a standard in 2025, many ISPs do not use it for computers for various reasons (including high costs). However, some settings may attempt to detect IPv6 status and report the absence of an IP address (which is why the "No Internet Access" icon appears in Windows 11 with the Internet).
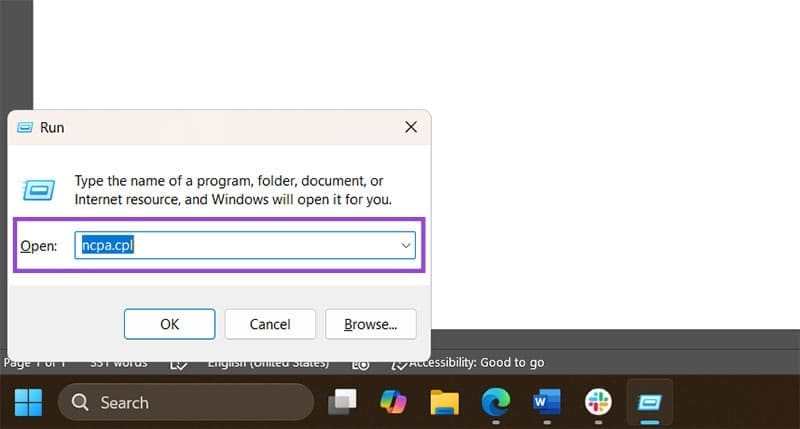
Step 1: Open the tool "employment". You can right click on the icon. "Start" Select it, or press “Windows + R”.
Step 2. Type or paste ncpa.cpland press Enter.
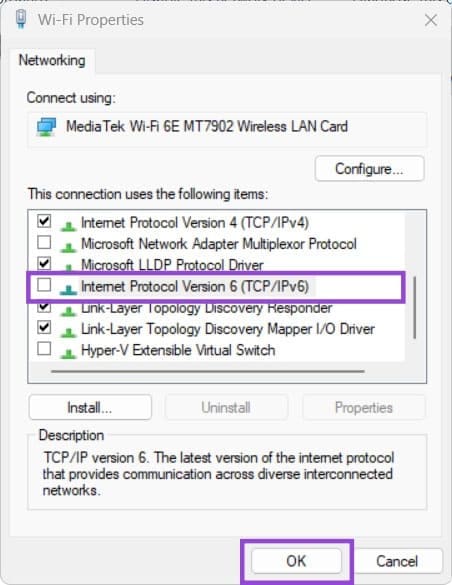
To step 3Right-click on the currently active network, and then choose "Properties". The active network will appear with its name as status.


Step 4. Scroll down and uncheck “Internet Protocol Version 6 (TCP/IP v6)”, then click “OK".
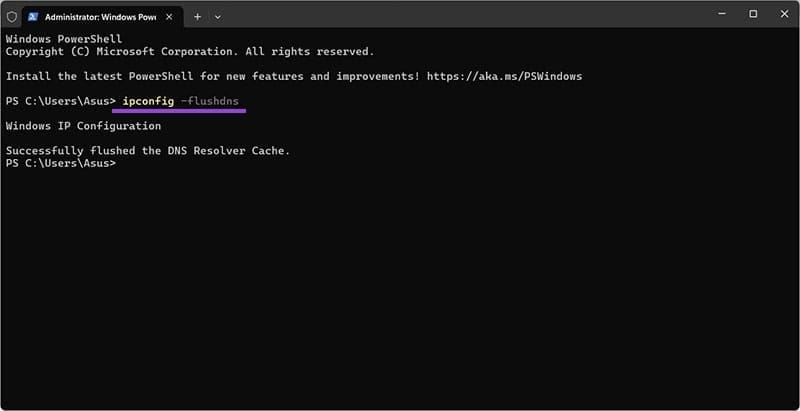
Step 5. Flush the DNS cache. This is done by opening a command prompt (terminal) as administrator (also available from the right-click menu on the Start icon), and then running the command “ipconfig /flushdns” or “ipconfig -flushdns.”
Solution 2 – Modify the system registry
An incorrect system registry (usually due to updates or system settings) may force your computer to check for incorrect IP addresses to access the internet. This problem can be resolved in the system registry editor using Google's DNS instead of Microsoft's.
Step 1: Open the Run tool and type "Regedit" Then press Enter. Confirm that the User Account Control window appears.
Step 2: Navigate to the following address (you can paste it into the navigation box above, but you'll need to drag the current address to select it):
HKEY_LOCAL_MACHINE\SYSTEM\CurrentControlSet\Services\NlaSvc\Parameters\Internet
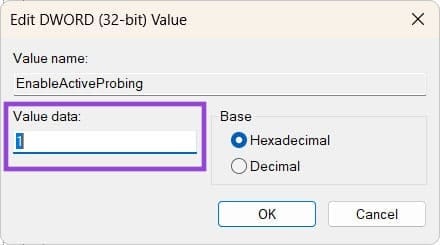
Step 3: In the right pane, double-click “EnableActiveProbing” Make sure the value is 1, then click on "OK".
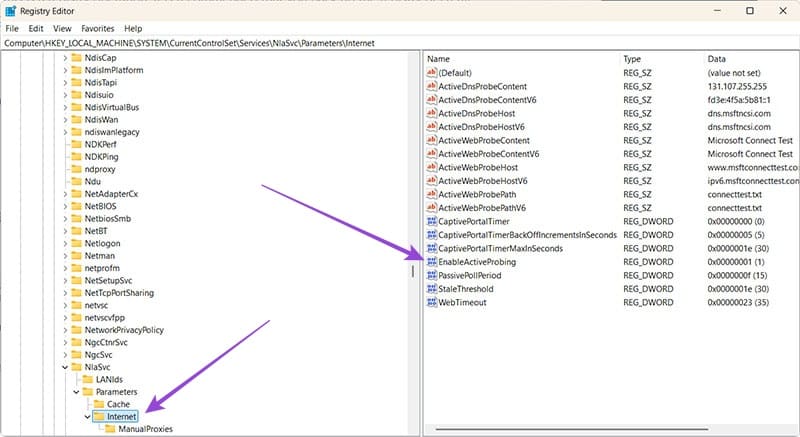
Step 4. Modify the following entries in that panel as follows:
ActiveDnsProbeContent: 131.107.255.255
ActiveDnsProbeContentV6: fd3e:4f5a:5b81::1
ActiveDnsProbeHost: dns.msftncsi.com
ActiveDnsProbeHostV6: dns.msftncsi.com
ActiveWebProbeContent: Microsoft Connectivity Test
ActiveWebProbeContentV6: Microsoft Connectivity Test
ActiveWebProbeHost: www.msftconnecttest.com
ActiveWebProbeHostV6: ipv6.msftconnecttest.com
Step 4b: You can use the following alternative entries:
ActiveDnsProbeContent (REG_SZ): 8.8.4.4
ActiveDnsProbeContentV6 (REG_SZ): XNUMX:XNUMX:XNUMX::XNUMX
ActiveDnsProbeHost (REG_SZ): dns.google
ActiveDnsProbeHostV6 (REG_SZ): dns.google
ActiveWebProbeHostV6 (REG_SZ): www.msftconnecttest.com
Step 5. Go to:
HKEY_LOCAL_MACHINE\SOFTWARE\Policies\Microsoft\Windows\NetworkConnectivityStatusIndicator
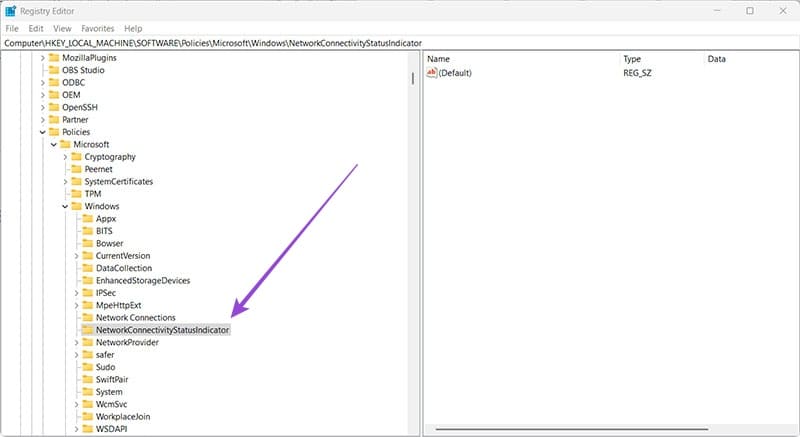
To step 6. If there is an entry named “NoActiveProbe”, set its value to 0 or delete it.
Step 7. Close the Registry Editor. You may need to restart your computer.
Solution 3 – Repair Corrupted Files
If you experience internet outages in Windows 11 for a period of time, but the connection remains normal, you may have a corrupted file. This can be resolved via the Command Prompt.
Step 1: Open a command window as administrator.
Step 2: Execute the following commands one by one, and wait for the previous command to complete:
sfc / scannow
dism / online / cleanup-image / restorehealth
If Windows can't repair corrupted files (but detects them), you may need to perform a clean installation.
You can easily fix the problem of no internet connection in Windows 11 by following the appropriate steps for network settings, updating drivers, and adjusting DNS settings, ensuring your device remains connected to the network without interruption.