Whether you have received AirPods Pro Whether you're new to your AirPods this holiday season or are debating whether to invest in new earbuds for the new year, you may be wondering, "What should I do with a pair of AirPods Pro?" AirPods Pro aren't just a regular pair of earbuds that connect to your phone—there are plenty of little features that enhance your experience while using them. Here are the best AirPods Pro features you should check out.

You have the option to switch between noise cancellation and transparency settings, skip your songs with the press of a button, customize your audio experience and controls, use your phone as a live microphone, can share your music, and have options to locate your AirPods Pro if you misplace them.
1. Noise cancellation and transparency
One of the best features of the AirPods Pro that you should be using, and that the original AirPods don't have, is noise cancellation and transparency. These features are unique to the AirPods Pro due to their comfortable silicone tips that provide a tight seal around your ear and block out much of the ambient noise.
What are these settings?
Active noise cancellation
The noise cancellation setting is available on the earbuds you use when you're on a red-eye flight or on a pair of headphones that fit so snugly in your ears that you have trouble hearing the person next to you. This is a form of passive noise cancellation (the default AirPods Pro state without any setting)—AirPods Pro have active noise cancellation technology to block out sounds you might hear through passive noise cancellation.
The library
Transparency is a setting that lets you hear ambient noise while also allowing you to listen to your music. If you own the original AirPods, the setting is very similar. Due to the natural passive noise cancellation that AirPods Pro offer, Transparency lets you hear the world around you.
Apply sound settings to AirPods Pro
Step 1: turn on AirPods Pro By placing both earbuds in your ears.
Step 2: Once your AirPods Pro are connected, go to Settings app On your iPhone or iPad, tap Bluetooth.

Step 3: Click "I" next to AirPods Pro (You can change its name, as described later in this guide.)


2. Press the trunk
Wondering what that slim stem is that kisses your face on both sides? Well, it has a force sensor built into it to control your music.
When you give the stem a tap (or light pressure), you will hear a click if done correctly.

Play Pause
Give the stem a single tap to play and pause the sound.
Jump forward
If you want to skip to the next song, double-click the stem.
to return to
To go back to the previous song, triple-tap the stem.
3. Customize stem controls
Do you like using earbud controls but not the default settings? You can customize your controls to suit your needs.
Step 1: Once connected AirPods Pro Go to the application Settings On a device iPhone Or iPad And click Bluetooth.
Step 2: Click on blue “i” button located on the right AirPods Pro.
Step 3: Look for the controls on the stem. You can customize what each AirPods Pro earbud does.

Step 4: You can specify:
- Noise control: Toggle noise cancellation, transparency, or turn them off completely.
- Crab: Gives you access to Siri, similar to how you would say “Hey Siri…” if you had voice control enabled.

4. Spatial Sound vs. Stereo Sound
We have the option to switch between spatial and stereo audio with AirPods Pro. What's the difference between the two?
Spatial audio is recorded to make sounds appear to the listener as if you were in the middle of the live recording. If the singer is to your right and the drum kit is to your left, the audio played in your AirPods Pro will reflect this position.
This stereo sound is intensified by delaying sounds by milliseconds to create the illusion of space when recording. These are very general explanations.
Step 1: recoil AirPods Pro Make sure it is connected to your device.
Step 2: Open an app Settings On your iPhone or iPad, go to Bluetooth. Wait for your device to find your AirPods Pro.
Step 3: Click the button "I" Blue next to AirPods Pro.
Step 4: Scroll down until you see SpatialAudio. Click on SpatialAudio.

This will open a new screen where you can click on Different styles. Make sure to put both AirPods In your ear tightly.

Switch between stereo and spatial audio if you want to hear the difference. Make sure to use Audio recorded for spatial audio For the full effect, there are many resources on YouTube, or you can use your device's built-in audio selection.
5. Name your AIRPODS
The default name given to your AirPods Pro once they're synced with your phone is "Your Name's AirPods Pro." It's a functional name, and unlike many other devices with obscure acronyms, it's very easy to tell which device is being synced.
Apple also lets you change the name to whatever you want – and these are the best AirPods Pro features you should be using.
Step 1: Access the menu AirPods Pro By opening the application Settings On a device iPhone Or iPad and choose Bluetooth.
Step 2: Click the button "I" Blue next to AirPods Pro.
Step 3: Click the arrow (>) In the Name tab.

Step 4: Tap the default name given to you to change it and change the name of your AirPods.

6. Check your fitness
When you open the box of your new AirPods Pro, you may notice a small container containing two different-sized tips for you to use. Depending on the size of your ear canals, you may need to replace the tips for a tighter fit.
This is great for ensuring your AirPods stay in your ear during exercise and creating proper noise cancellation and a comfortable seal.
Step 1: Access the menu AirPods Pro Your own open app Settings On your iPhone or iPad, choose Bluetooth.
Step 2: Click the button "I" Blue next to AirPods Pro.
Step 3: Click “Ear tip fit test.”
Make sure each AirPods Pro earbud fits snugly in your ears, and feels as comfortable as if you'd wear them all day.


Step 4: Select Continue, and press the blue button to start the Ear Tip Fit Test. The following sound is a bit loud and may be startling at first if you weren't expecting it.


Step 5: Check your results – Do you have a proper seal? Do one or both of your AirPods Pro tips need adjusting? You can change the tips or try wiggling the AirPods into place to ensure they fit properly in your ear and try the test again.
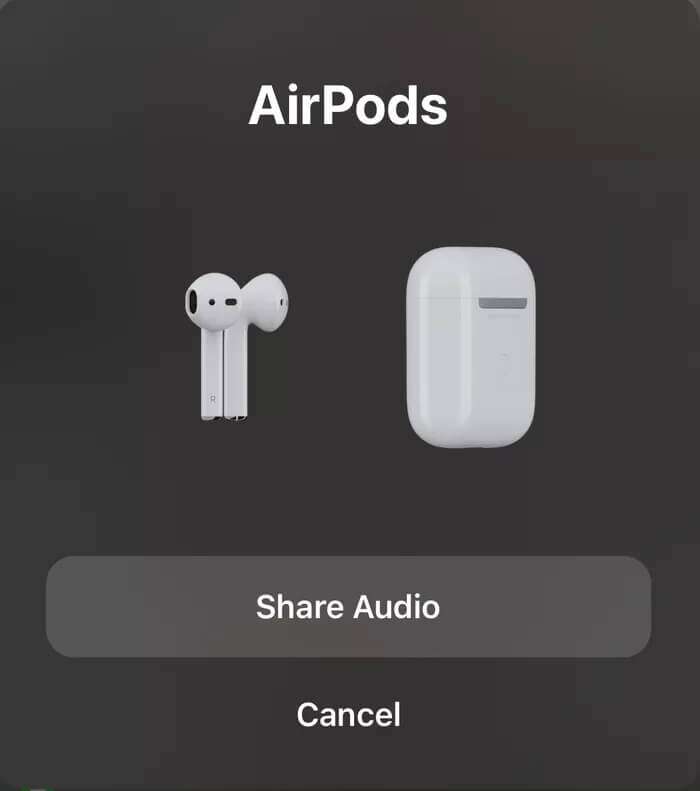
7. Share audio over the air
An easy way to share audio with your friends is to give them one of your AirPods. While this works, you'll lose some of the spatial sound effects we've enabled on our AirPods. If your friend has a pair of AirPods, AirPods Pro, or Beats headphones connected to their iPhone, iPad, or iPod touch, you can share audio with them.
Step 1: recoil AirPods Pro and make sure it's connected to your iPhone and has the music you want to share playing.
Step 2: From your lock screen, tap this icon to the right of your song.

Step 3: Click Share the sound.

Step 4: Click Share audio On a device iPhone Your. If this option doesn't appear, you may need to move closer to your friend's device.

Step 5: Ask your friend to join on their phone or connect their AirPods, AirPods Pro, or Apple Beats.

8. Use the live listening feature.
Live Listen turns your iPhone into a wireless microphone that streams audio to your AirPods Pro. This is useful if you're in a crowded coffee shop and need to talk to someone but can't hear what they're saying.
Step 1: Open an app Settings On your iPhone or iPad, tap Center. control.

Step 2: Scroll through the list Options Until you find the Listen button, tap the plus sign (+) next to it. This adds the Listen button to our Control Center.

Step 4: Swipe up from the bottom of the screen to access Control Center. Click on the button Hearing It looks like an ear.

Step 5: Click "Live Listening". The microphone on your iPhone will amplify ambient sounds, so move it closer to the person you're trying to hear.
Adjust the volume as needed.


You can check your microphone volume (the audio from your phone is displayed) by seeing how many circles turn white. The more circles are filled in, the louder the sound.
Step 6: When you no longer want to use this feature, click “Live listening Again to turn it off.

9. Find lost AirPods
When you misplace your phone, you want to give it a ring to try to locate it via sound—did you know you can do this with AirPods Pro too? If you're a little forgetful or in a hurry, simply put your AirPods Pro aside and forget where you put them. Apple has a feature to help!
As long as your AirPods Pro are near any of your Apple devices and connected to Bluetooth (meaning, this won't work if the battery is dead), you can play a sound to help you find them through the Find My app.
Step 1: Open an app find my. If you don't have the app, you can download it.
Step 2: Click the tab "Devices". This will open a list of all your Apple devices.

Step 3: Look for AirPods Pro that you have misplaced in the list. It will open a menu listing the last seen location.

Step 4: Make sure there are no AirPods in your ear, as the sound is too loud. Click “Play sound” To play a gradually increasing sound.

You can select which AirPods Pro you're looking for and have audio play from both or one at the same time. Your AirPods Pro must be charged for this to work, and they must be close enough to be within range of your phone.
Be one of the AirPods like a pro!
There are many features built into AirPods Pro that make them an incredibly useful and useful piece of technology. Learning how to use AirPods Pro will help make your life more enjoyable and will also help you when you need them.


