خرائط Google هي واحدة من أكثر تطبيقات الملاحة شعبية في السوق. يساعدك الصوت الافتراضي في تحديد الاتجاهات أثناء القيادة حتى لا تحتاج إلى مواصلة النظر إلى الشاشة. ومع ذلك ، يمكنك استخدام صوت مختلف إذا كنت لا تحب الصوت الافتراضي على جهاز iPhone أو Android، وإليك كيفية تغيير صوت التنقل في خرائط Google على iPhone و Android.

تختلف خطوات تغيير صوت التنقل في خرائط Google على أجهزة iPhone و Android بسبب أنظمة التشغيل. هذا ما عليك القيام به.
كيفية تغيير صوت التنقل في خرائط Google لنظام التشغيل Android
هناك طريقتان لتغيير صوت التنقل في الخريطة على Android. يتم شرح كلتا الطريقتين أدناه:
تغيير صوت التنقل من خلال التطبيق
تستخدم Google إعدادات اللغة والمحرك الصوتي لتوفير الاتجاهات المنطوقة ، والتي تتطلب من المستخدمين تشغيل الخريطة لتغيير الصوت. وإليك كيف يعمل.
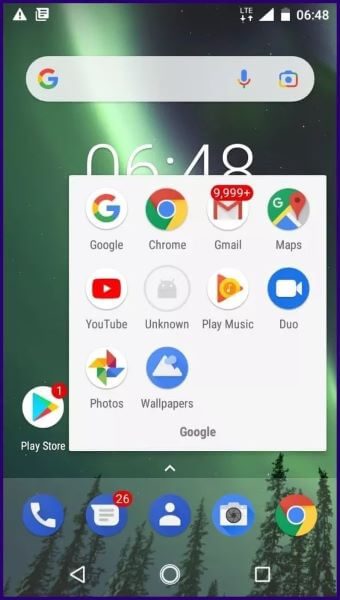
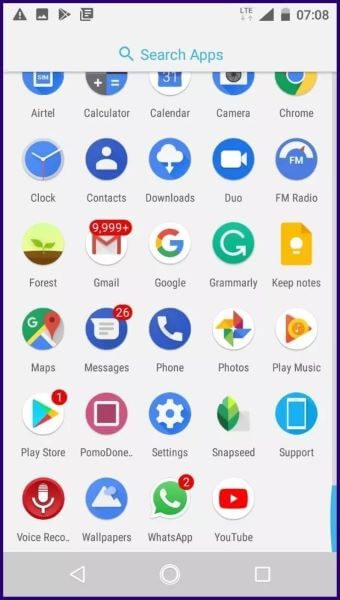
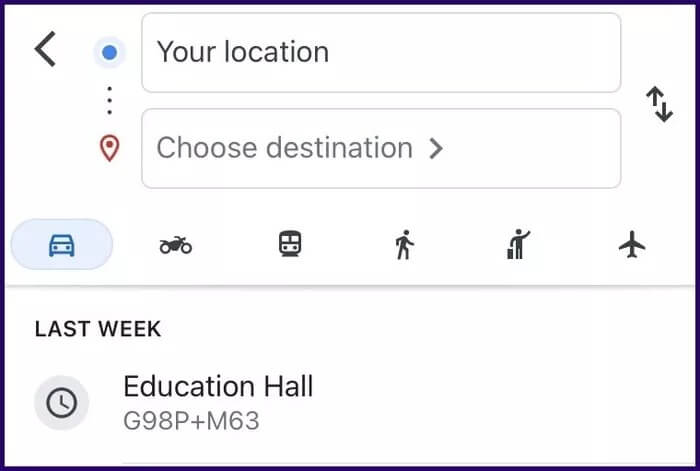
الخطوة 1: قم بتشغيل خرائط Google من خلال النقر على الرمز الموجود على جهازك.
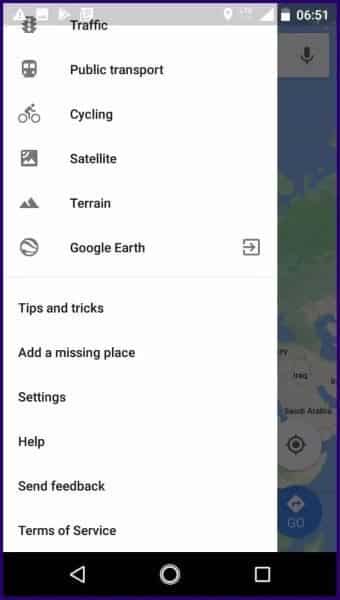
الخطوة 2: اضغط على الخطوط الثلاثة في أعلى يسار الشاشة لفتح القائمة.

خطوة 3: قم بالتمرير عبر القائمة وانقر فوق الإعدادات.


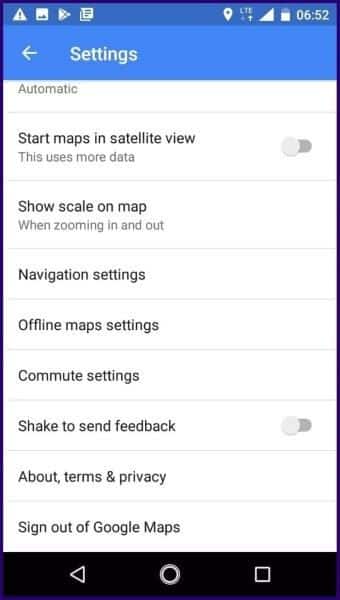
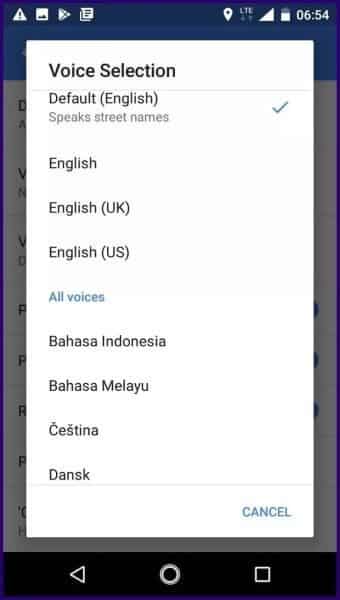
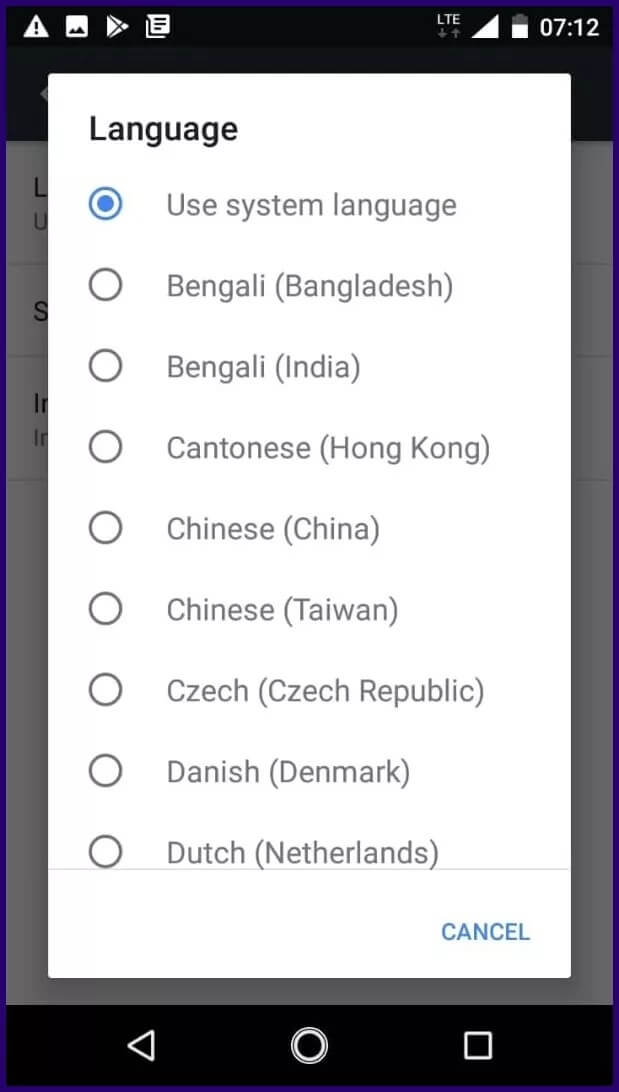
الخطوة 5: ضمن إعدادات التنقل ، انقر فوق الاختيار الصوتي. يجب أن يكون صوت التنقل المستخدم حاليًا في الأعلى مع وجود علامة اختيار بجانبه.
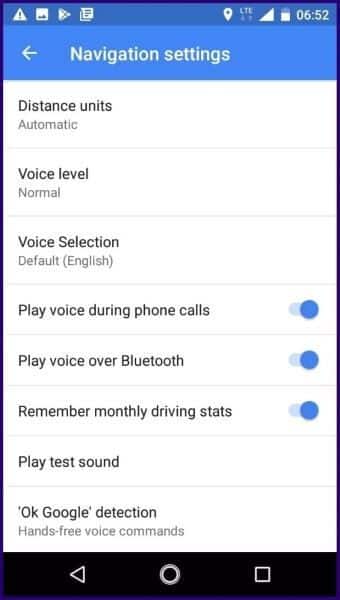
خطوة 6: عند التمرير عبر القائمة ، يجب أن تشاهد جميع خيارات اللغة المتاحة جنبًا إلى جنب مع الاختلافات الإقليمية. اضغط على خيار اللغة الذي تفضله.
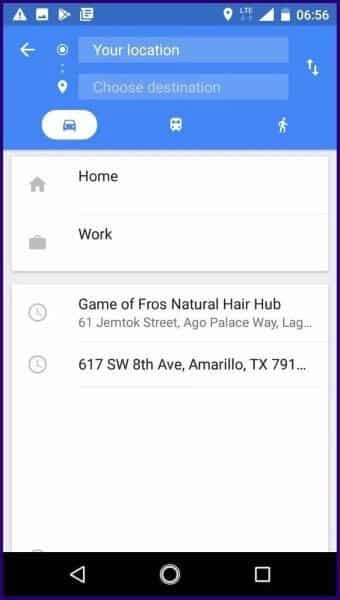
الخطوة 7: بعد تحديد خيار اللغة المفضلة لديك ، يجب إغلاق الإعداد. ارجع إلى عرض الخريطة في تطبيق خرائط Google.
الخطوة 8: اضغط على Go الموجود في الجزء السفلي الأيمن من شاشتك.

خطوة 9: أدخل موقعك والوجهة التي تريدها. اضغط على ابدأ وستسمع خرائط Google بالصوت الجديد الذي حددته.
تغيير صوت التنقل من خلال إعدادات الهاتف
هناك طريقة بديلة لتغيير صوت التنقل على خرائط Google على Android. تتطلب هذه الطريقة تغيير إعدادات اللغة على جهازك. إليك كيفية استخدام هذه الطريقة:
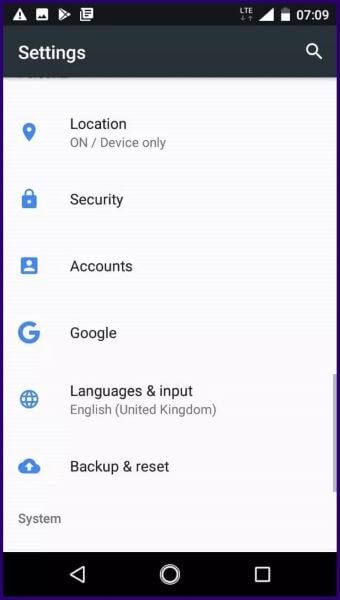
الخطوة 1: قم بتشغيل الإعدادات على هاتفك.
الخطوة 2: قم بالتمرير عبر القائمة وحدد اللغات والإدخال.
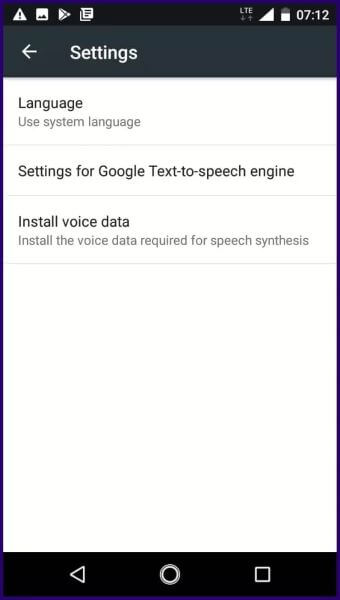
خطوة 3: حدد إخراج تحويل النص إلى كلام.

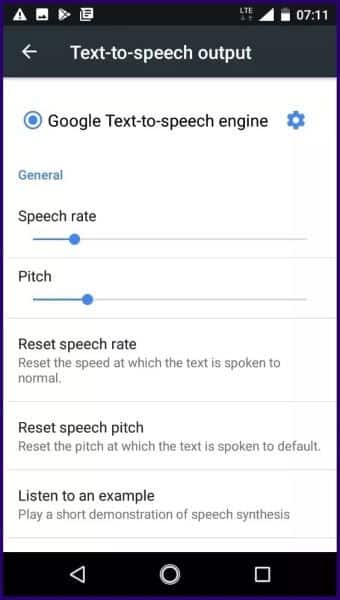
الخطوة 5: اختر اللغة.
خطوة 6: اختر خيار اللغة المفضل لديك.
الخطوة 7: بعد تحديد خيار اللغة المفضلة لديك ، ارجع إلى عرض الخريطة على تطبيق خرائط Google.

الخطوة 8: اضغط على Go الموجود في الجزء السفلي الأيمن من شاشتك.
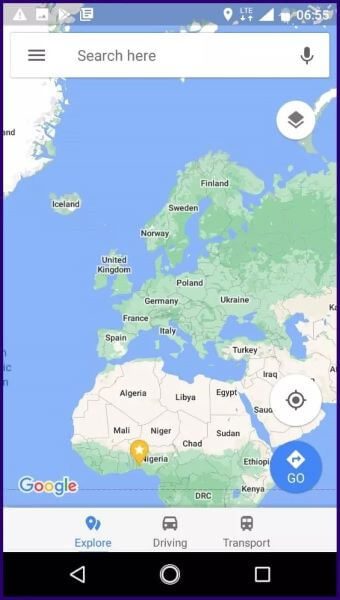
خطوة 9: أدخل موقعك والوجهة التي تريدها. اضغط على ابدأ وستسمع خرائط Google بالصوت الجديد الذي حددته.
كيفية تغيير صوت التنقل على خرائط Google لأجهزة iPhone
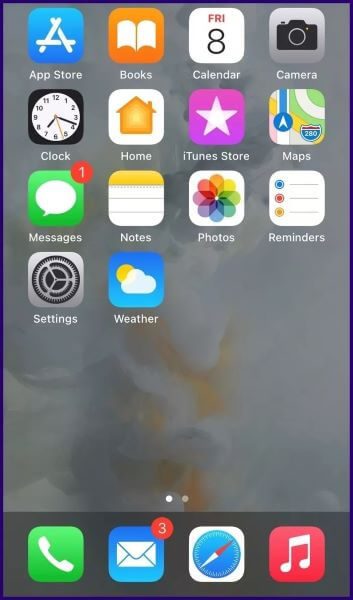
بخلاف أجهزة Android ، لم يتم تثبيت خرائط Google مسبقًا على أجهزة iPhone. يجب على المستخدمين تنزيله من متجر التطبيقات للوصول إليه. يتطلب تغيير صوت التنقل على الخريطة أيضًا إجراء تغييرات على إعدادات iPhone. تحقق من الخطوات أدناه لمعرفة كيفية القيام بذلك:
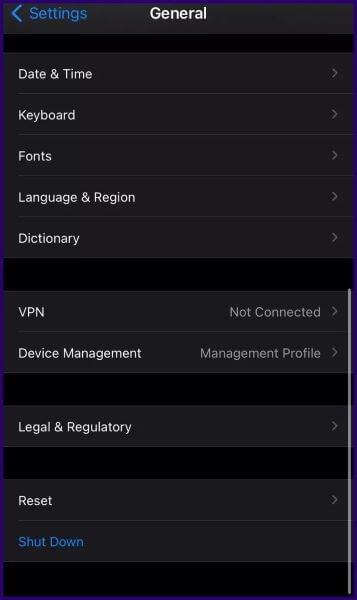
الخطوة 1: قم بتشغيل تطبيق الإعدادات على جهاز iPhone الخاص بك.
الخطوة 2: اضغط على عام.
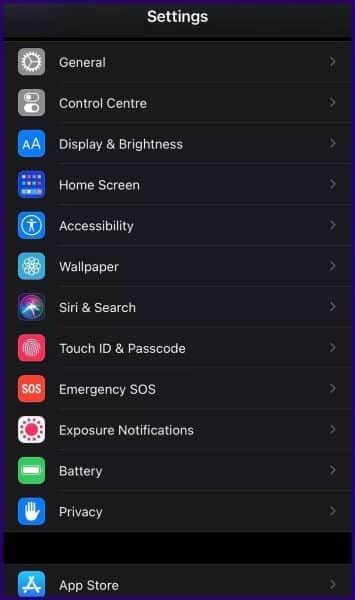
خطوة 3: حدد اللغة والمنطقة.
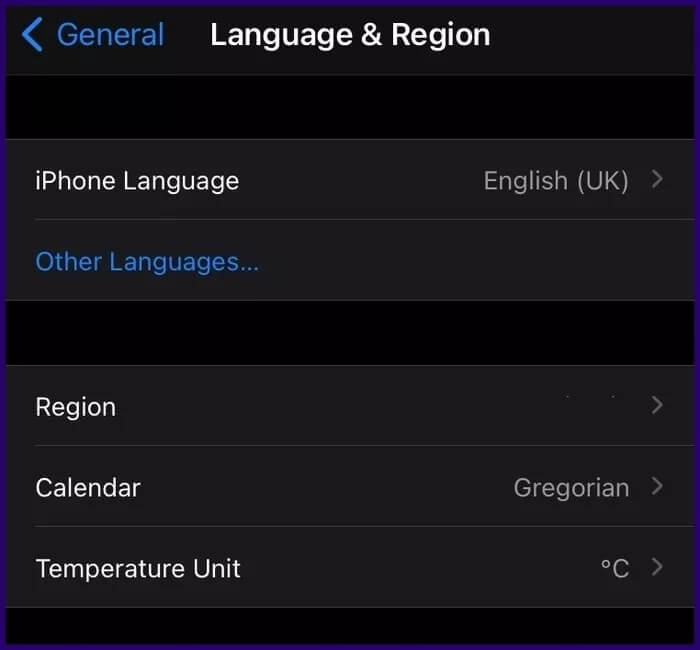
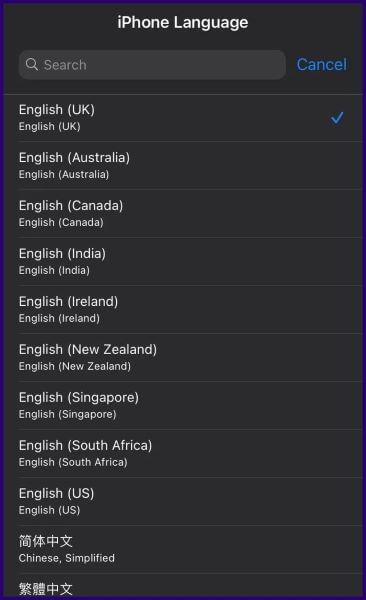
الخطوة 5: قم بالتمرير خلال خيارات اللغة المتاحة واختر لغتك المفضلة من خلال النقر عليها.
خطوة 6: يجب أن تتلقى رسالة تسألك عما إذا كنت ترغب في إجراء التغيير ، انقر فوق تغيير إلى.
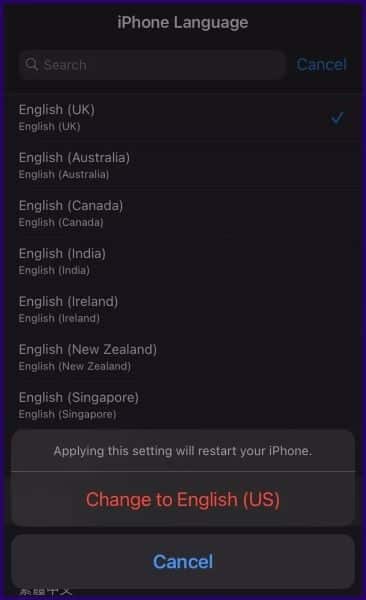
الخطوة 7: انتظر حتى يكمل هاتفك إعادة تشغيله.
الخطوة 8: قم بتشغيل خرائط Google وأدخل الموقع والوجهة.
ملاحظة: عندما تقوم بتغيير إعدادات اللغة على جهاز iPhone ، فإنها تؤثر على جهازك بالكامل. إذا كنت على ما يرام مع هذا ، فلا ينبغي أن يكون هناك مشكلة.
الاستفادة من خرائط Google بلا اتصال بالإنترنت
يمكن أن يكون تغيير صوت التنقل في خرائط Google على iPhone و Android مفيدًا إذا كنت تريد الاستمتاع أو تكافح لقياس لهجات الأصوات الافتراضية. هذا كل ما في الأمر لتغيير صوت التنقل على خرائط Google لأجهزة iPhone و Android. إذا كنت ترغب في توفير تكاليف البيانات عند استخدام التطبيق أو السفر إلى مكان بعيد مع وصول ضعيف للإنترنت ، فيمكنك تنزيل خرائط غير متصلة بالإنترنت من خرائط Google.