Getting rid of any file on Windows 10 is as easy as eating pie. However, the duration of the deletion process performed in File Explorer varies from item to item. Various factors that affect it are the size, the number of individual files to be deleted, the file type, etc. Therefore, deleting large folders containing thousands of individual files can take hours. In some cases, the estimated time displayed during deletion can be more than a day. Moreover, the traditional deletion method is rather inefficient, as you will need to empty the Recycle Bin to permanently remove these files from your computer. Therefore, in this article, we will discuss how to delete folders and subfolders in Windows PowerShell quickly.

How to Delete Folders and Subfolders in Windows PowerShell
The simplest ways to delete a folder are mentioned below:
- Select the item and press the key. From on the keyboard.
- Right-click the item and select delete From the context menu that appears.
However, the files you delete are not permanently deleted by the computer, as the files will still exist in recycle bin. Thus, to permanently remove files from your Windows PC,
- Either click on Shift + Delete Together to delete the item.
- Or right-click on the icon recycle bin On the desktop, click the option Empty the Recycle Bin.
Why delete large files in Windows 10?
Here are some reasons to delete large files in Windows 10:
- Your computer may be running low on disk space. low , so space needs to be cleared.
- Your files or folder may be duplicated by The error
- Your files can be deleted. Special Or sensitive So that no one else can access it.
- Your files may be damaged Or filled with malware due to a malware attack.
Problems deleting large files and folders
Sometimes, when you delete larger files or folders, you may encounter annoying issues like:
- Files cannot be deleted. – This happens when you try to delete the app's files and folders instead of uninstalling them.
- The deletion time is too long. Before the actual deletion process begins, File Explorer checks the contents of the folder and calculates the total number of files to provide the estimated access time. Aside from checking and calculating, Windows also analyzes the files to display updates to the file/folder being deleted at that moment. These additional processes significantly contribute to the overall deletion process time.
Fortunately, there are several ways to bypass these unnecessary steps and speed up the process of deleting large files on Windows 10. In this article, we'll walk you through different methods to do the same.
Method 1: Delete folders and subfolders in Windows PowerShell
Follow the steps below to delete large folders using PowerShell:
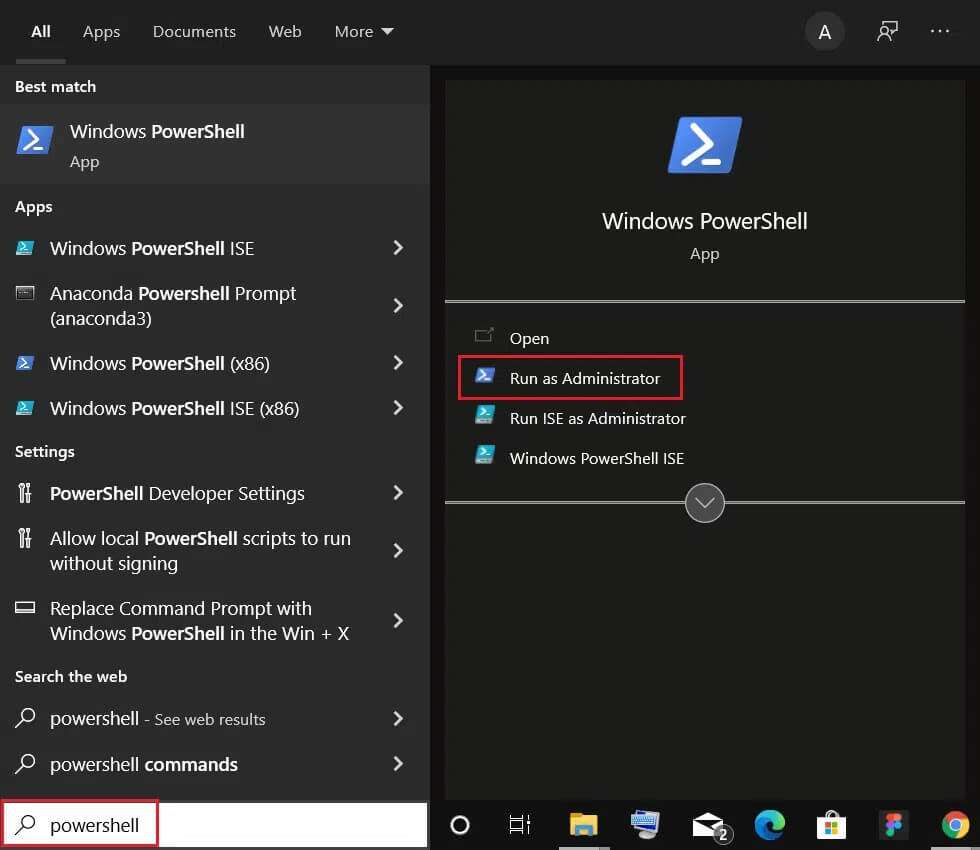
1. Click START YOUR Type PowerShell, and then click Run as administrator.
2. Type the following command and press the key: Enter.
Remove-Item -path C:\Users\ACER\Documents\large_folders -recurse
Note: Change the path in the above command to the path of the folder you want to delete.

Method 2: Delete folders and subfolders in the Command Prompt
According to official Microsoft documentation, deleting del command One or more files are deleted. rmdir command File directory. Both commands can also be run in the Windows Recovery Environment. Here's how to delete folders and subfolders at the Command Prompt:
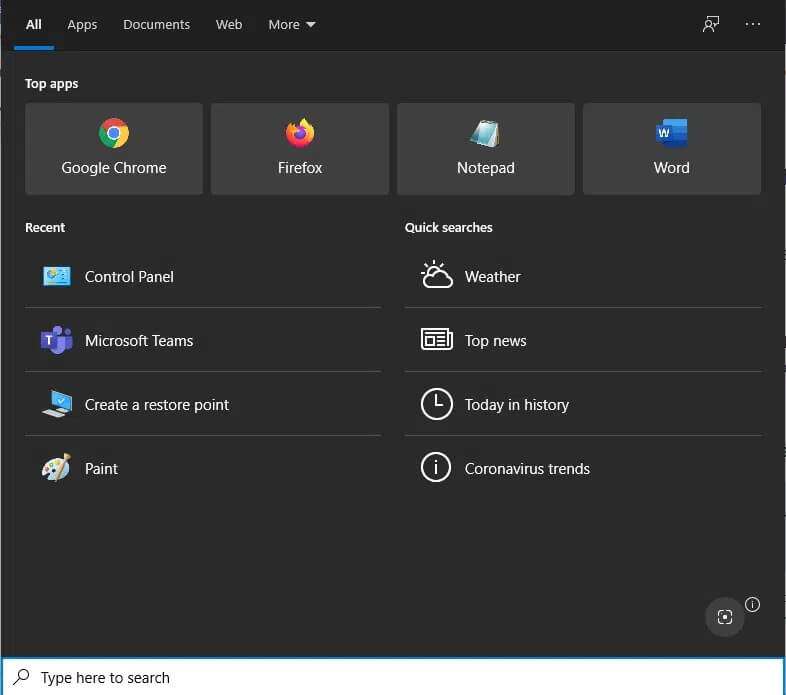
1. Press the keys Windows + Q To turn on the search bar.
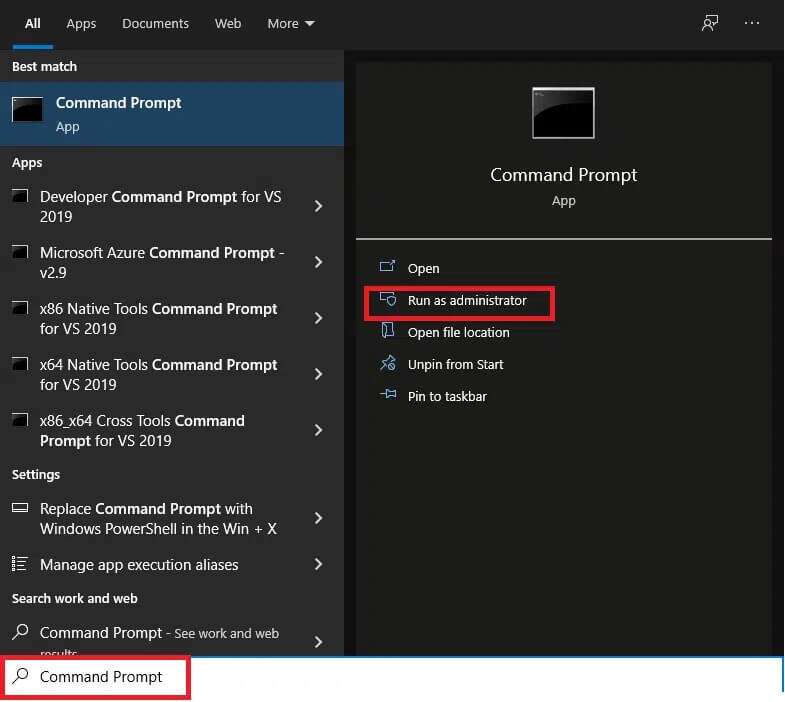
2. Type command prompt and click on the option “Run as administratorOn the left side.
3. Click "Yeah" In the pop-up windowUser Account Control", if asked.
4. Write cd and the path of the folder you want to delete and press the key Enter.
for example , cd C:\Users\ACER\Documents\Adobe As shown below.
Note: You can copy the folder path from File Explorer application so that there are no errors.

5. The command prompt will now reflect the folder path. Double-check it to ensure the correct path is entered to delete the files. Then type the following command and press the key. Enter to implement.
del /f/q/s *.* > no

6. Write CD. . Command to go back one step in the folder path and press the key Input.

7. Type the following command and press Enter To delete the selected folder.
rmdir /q/s FOLDER_NAME
not FOLDER_NAME With the name of the folder you want to delete.

This is how to delete large folders and subfolders in Command Prompt.
Method 3: Add a quick delete option in the context menu
Although we've learned how to delete folders and subfolders in Windows PowerShell or the Command Prompt, the procedure must be repeated for each individual large folder. To make this even easier, users can create a batch file for the command and then add it to the File Explorer context menu. This is the menu that appears after right-clicking on a file/folder. The Quick Delete option will then be available for each file and folder within Explorer for you to choose from. This is a lengthy procedure, so follow it carefully.
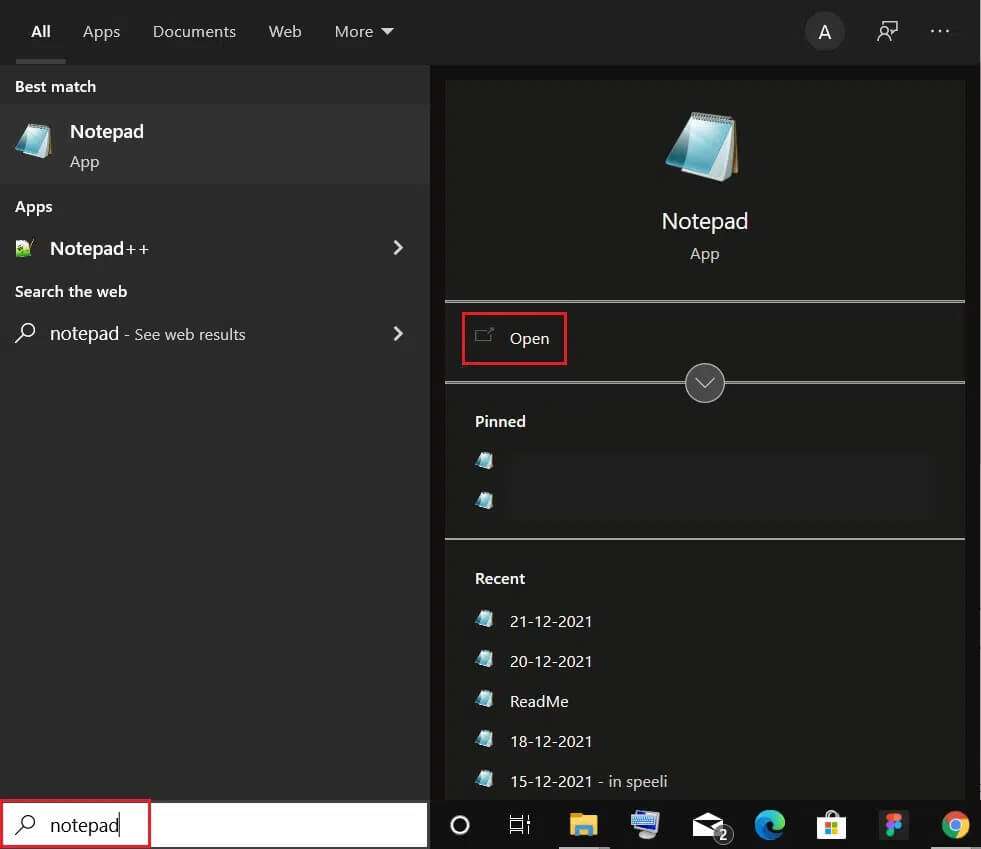
1. Press the keys Windows + Q Together and write notepad. Then click open As shown.
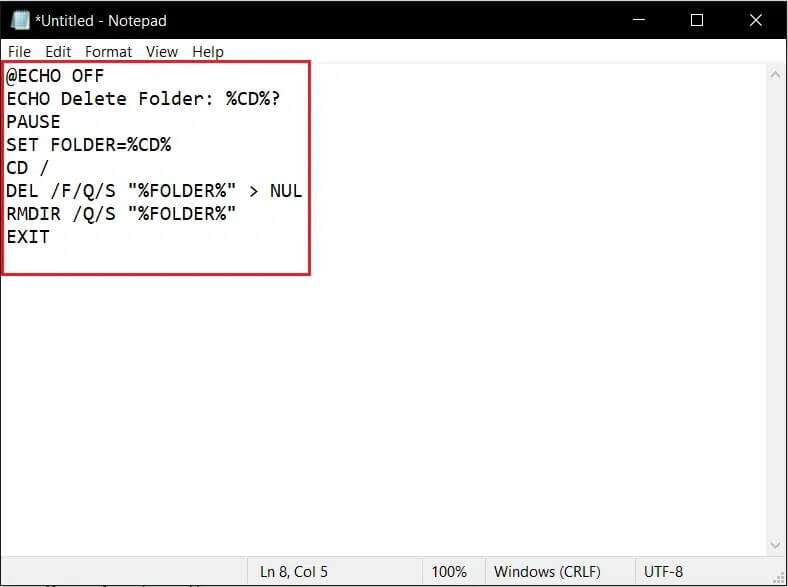
2. Copy and paste the selected lines into a document. Notepad Carefully, as shown:
@ ECHO OFF
ECHO Delete Folder: %CD%?
BREAK
SET FOLDER=%CD%
CD /
DEL /F/Q/S "%FOLDER%" > NUL
RMDIR /Q/S "%FOLDER%"
EXIT
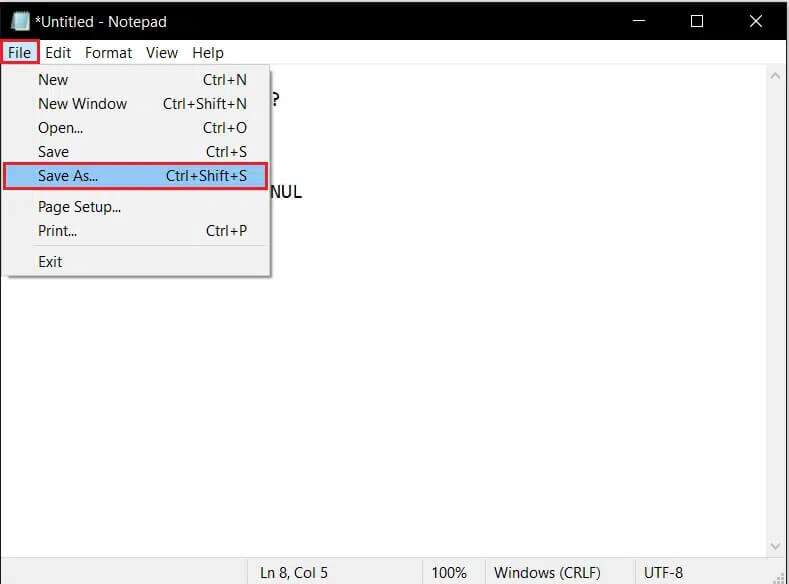
3. Click the option "a file" From the top left corner, choose “Save as... ” from the list.
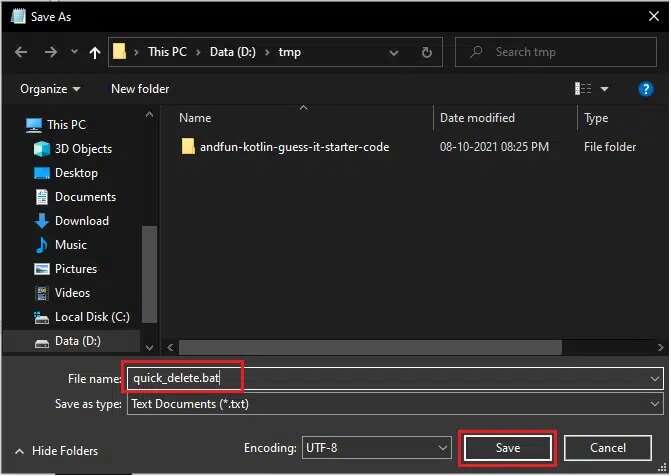
4. Write quick_delete.bat As file name: and click the button save.
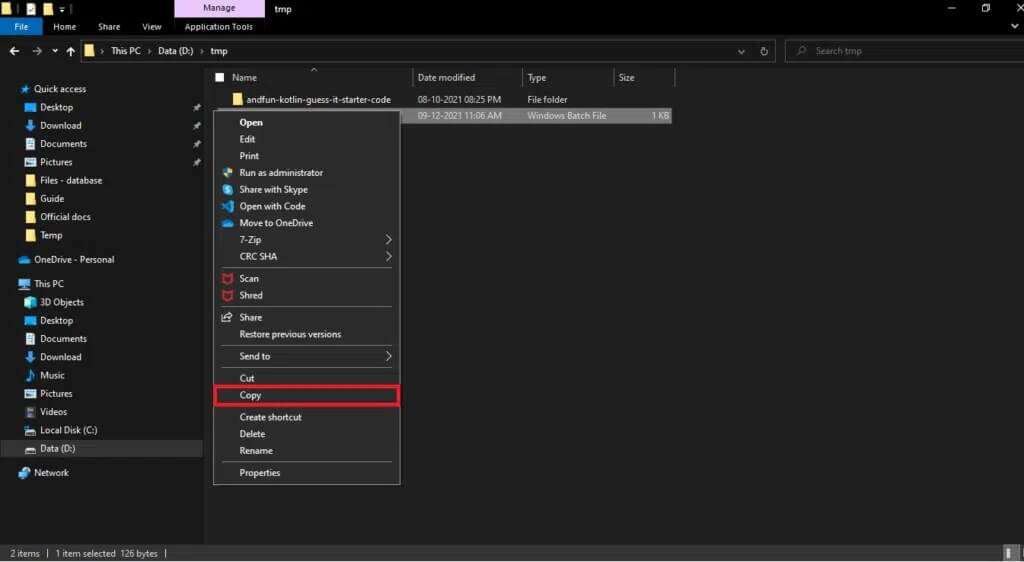
5. Navigate to the folder location. Right-click on quick_delete.bat file And choose Copy to appear highlighted.
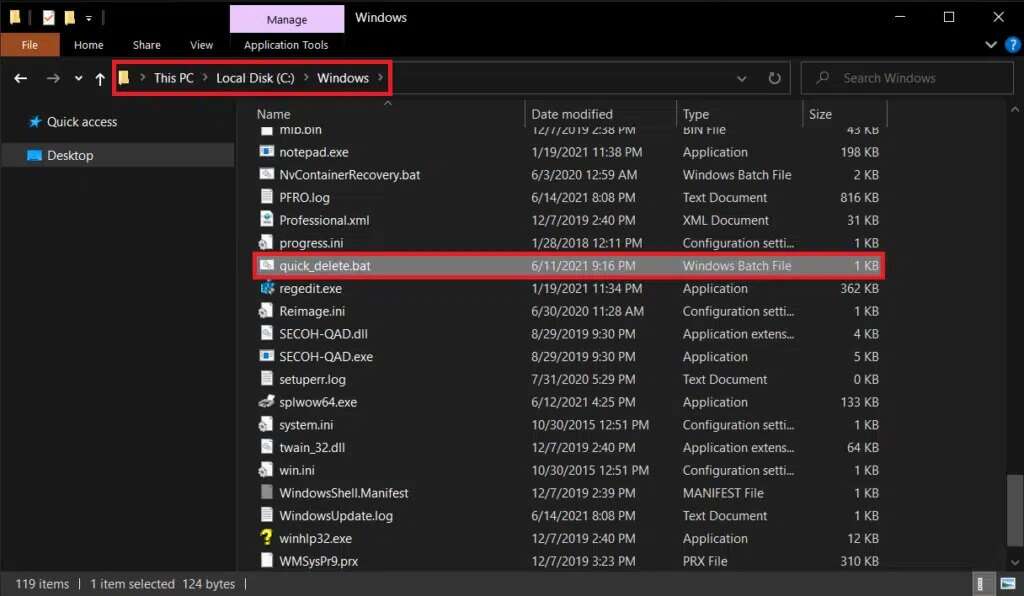
6. Go to C:\Windows In File Explorer. Press the keys Ctrl + V Paste the quick_delete.bat file here.
Note: To add the quick delete option, the quick_delete.bat file must be in a folder with its own PATH environment variable. The path variable for the Windows folder is%windir%.
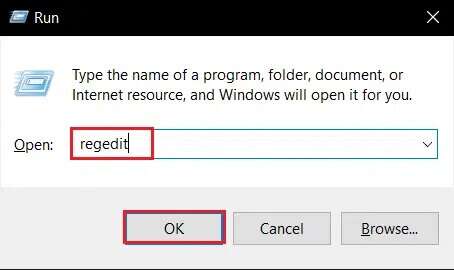
7. Press the keys Windows + R At the same time to start the dialog box.
8. Write regedit And press Enter to open the Registry Editor.
Note: If you're not logged in as an administrator, you'll receive a User Account Control pop-up asking for permission. Click "Yes" to grant it and continue with the steps below to delete folders and subfolders.
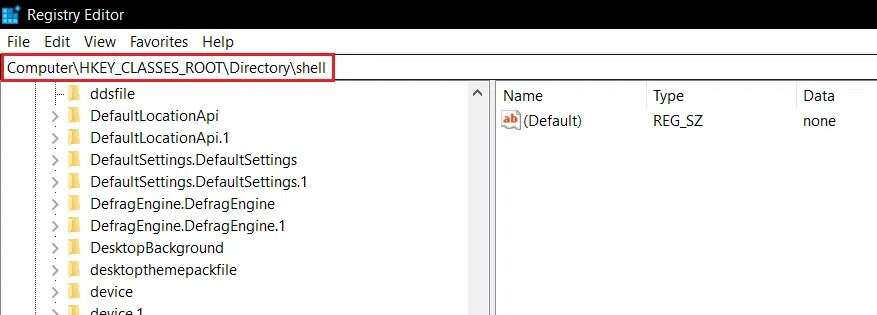
9. Go to HKEY_CLASSES_ROOT\Directory\shell As shown below.
10. Right-click on the folder. shell. Click New> A key in the context menu. Rename this new key with Quick Delete.
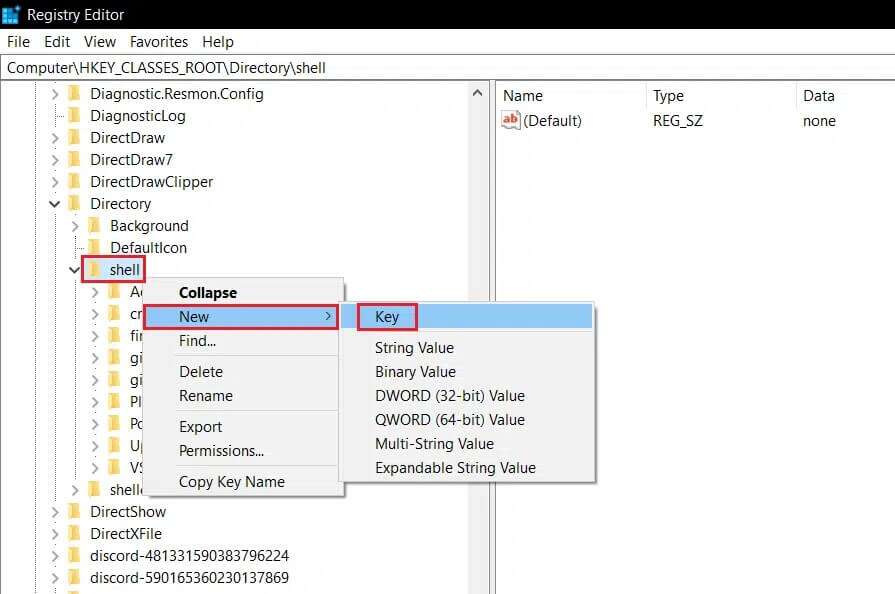
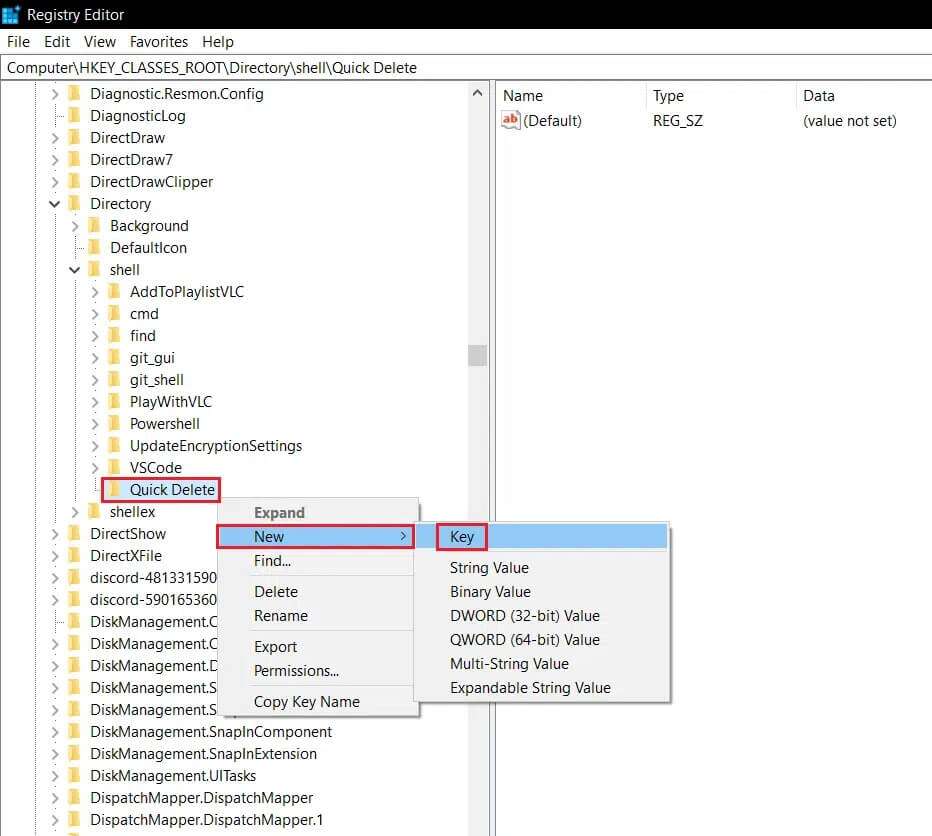
11. Right-click on the key. Quick delete , and go to New , and select a key from the list, as shown below.
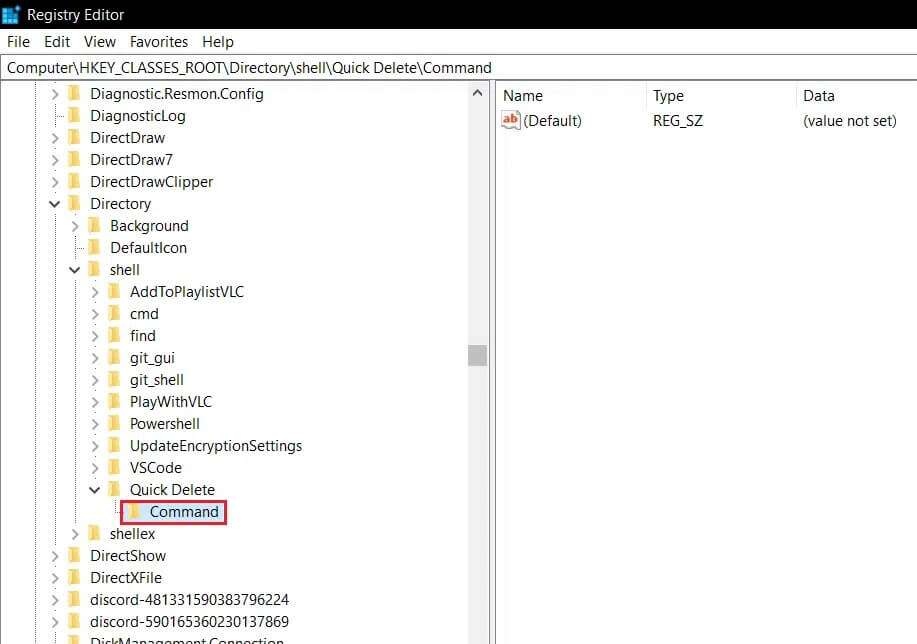
12. Rename the new key to command.
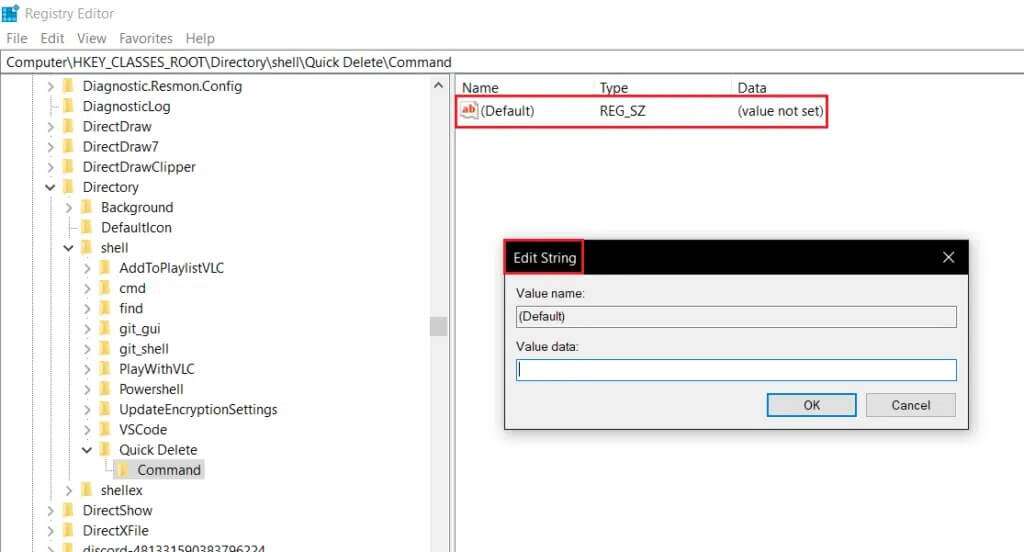
13. In the right pane, double-click the file. (default) To open the string editing window.
14. Write cmd /c “cd %1 && quick_delete.bat” Under Value data: and click OK
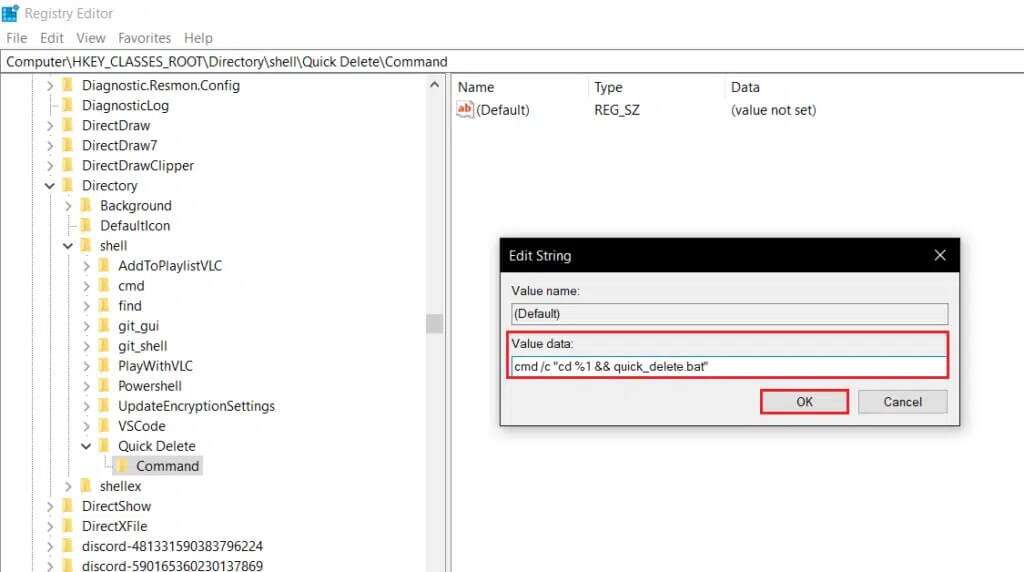
Option now added Quick delete To the explorer context menu.
15. Close the Registry Editor application and return to Vol which you wish to delete.
16. Right-click on the folder and choose QuickDelete From the context menu, as shown.
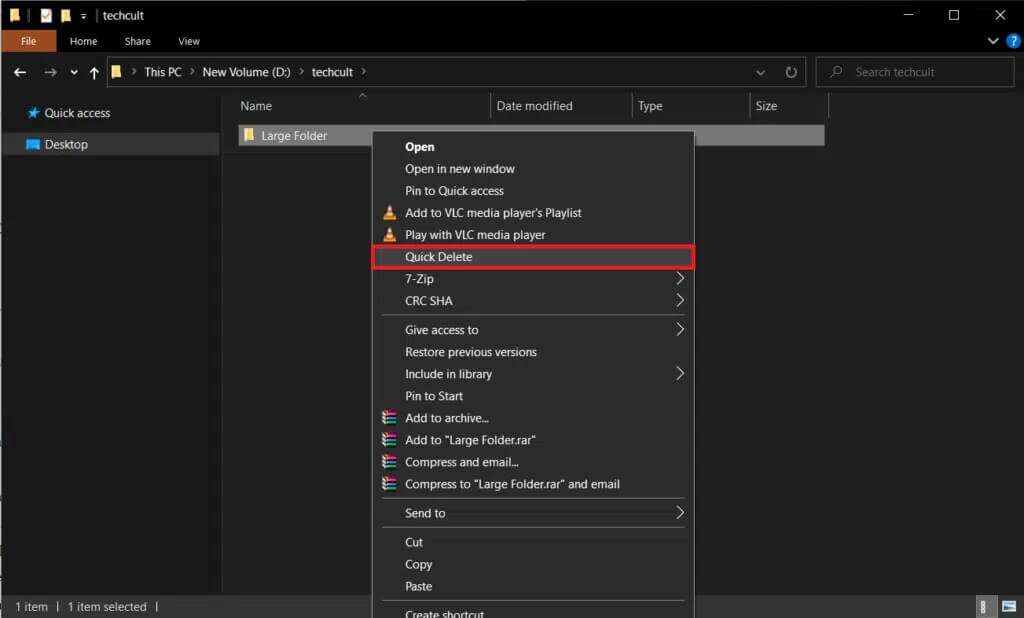
Once you select Quick Delete, a command prompt window will appear asking: Action confirmation.
17. Check the folder path and folder name once and press any key on the keyboard. To delete the folder quickly.
Note: However, if you have selected the wrong folder by mistake and want to terminate the process, press Ctrl + CThe command prompt will again ask for confirmation by displaying the message End batch task (Yes/No)? Press Y Then press Enter To cancel the quick delete process, as shown below.

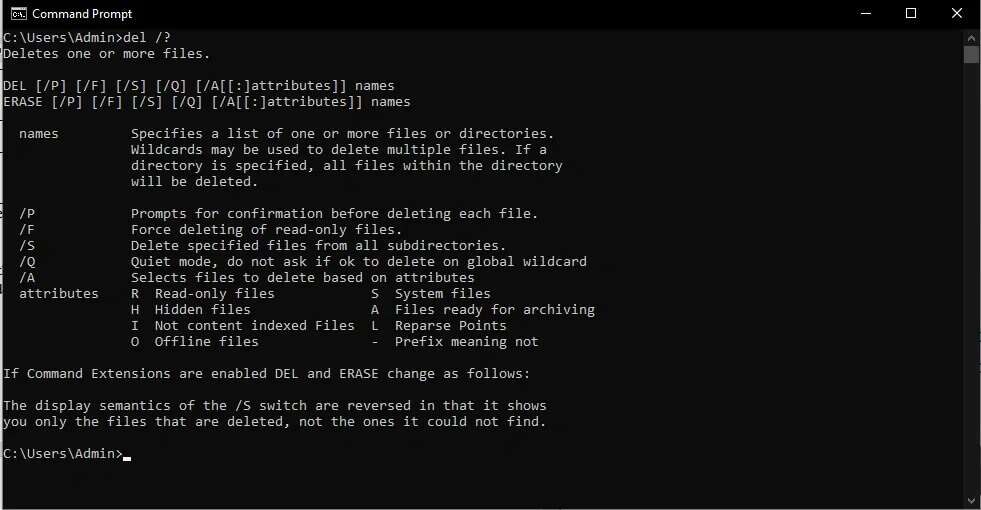
Pro Tip: Parameter Table and Their Uses
/f: Force delete read-only files
/q: To enable silent mode, you do not need to confirm each deletion operation.
/s: Executes the command on all files in the specified path folders.
*.* : Deletes all files in this folder.
nul: Speeds up the process by disabling the console output.
Implementation of del/? Order to know more about the same.
The methods mentioned above are the most effective ways to delete large folders in Windows 10. We hope this guide helped you learn how to delete folders and subfolders in PowerShell and Command Prompt. Also, if you have any questions/comments regarding this article, feel free to leave them in the comments section.
