Microsoft Excel is a very important tool for many people to create worksheets. You can add data for further review, calculations, and analysis. Besides adding data manually, Microsoft Excel allows you to import data directly from the web.

Importing data from the web into Microsoft Excel saves you from manually feeding or copying and pasting data. Once you connect Excel to a web data source, it imports the information you need and updates itself when changes occur. Here's everything you need to know about importing data directly from the web into Excel.
Important things to note when importing data from the web into Microsoft Excel
You need to meet two requirements to import data:
- Microsoft Excel version: Power Query supports data import. With Power Query, Excel users can connect to, transform, merge, and load data. However, Power Query is only available in Excel for Microsoft 365, Excel 2021, Excel 2019, Excel 2016, Excel 2013, and Excel 2010.
- Data format: When importing data from the web into Microsoft Excel, the data must be in table form or Embedded in an HTML tableIf the data isn't in a table, Power Query won't define it.
How to Import Web Data into Microsoft Excel
Using Power Query in Microsoft Excel, you can import data presented in tabular form on a website into a worksheet. Here's how it works.
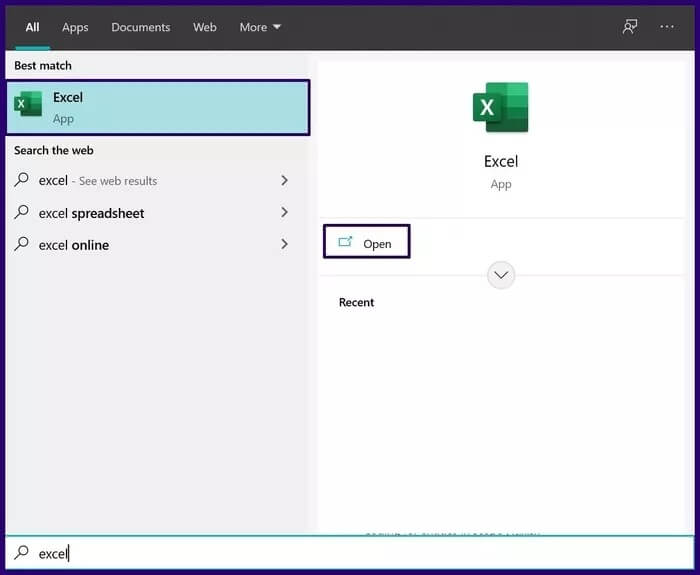
Step 1: Launch Microsoft Excel on your computer.
Step 2: In the ribbon interface at the top, click Data.

Step 3: In the group titled Get & Transform Data, select From Web.


Step 5: After pasting the link, click OK to load the web page in your browser.

Step 6: Microsoft Excel will ask you to confirm which data you want to upload from the website, click Connect to confirm.

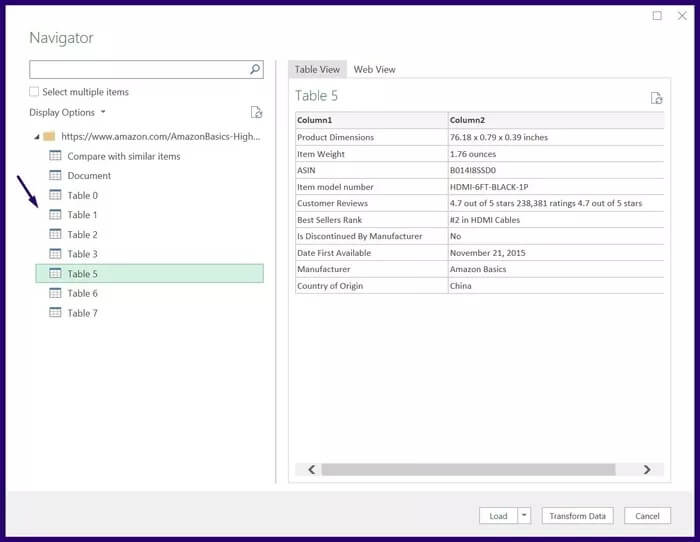
Step 7: Once Microsoft Excel finishes loading your data, you'll see the Navigator window. Select any of the tables listed in the Navigator to check if your data has been imported.
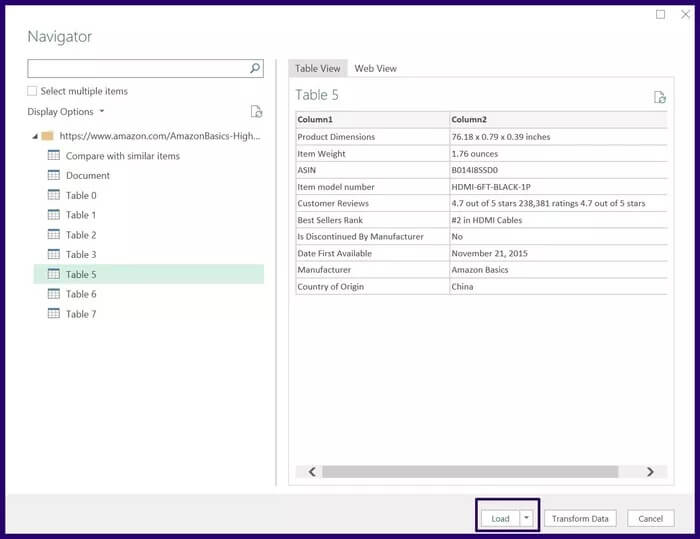
Step 8: Select Upload to show it in your worksheet if you're fine with how to import data from the web.
How to Refresh Web Data on Microsoft Excel
As mentioned above, when you import data, it's automatically updated. You can also set your preferences for how you want the update to occur. Here's what you need to do to update web data in Excel.
Step 1: Launch the worksheet connected to the web page.
Step 2: Press the table.

Step 3: From the ribbon, click Table Design.
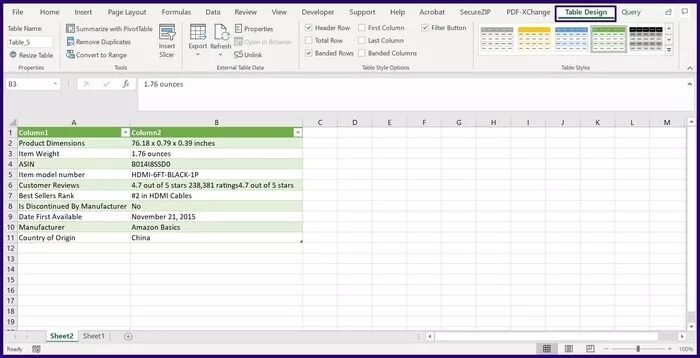
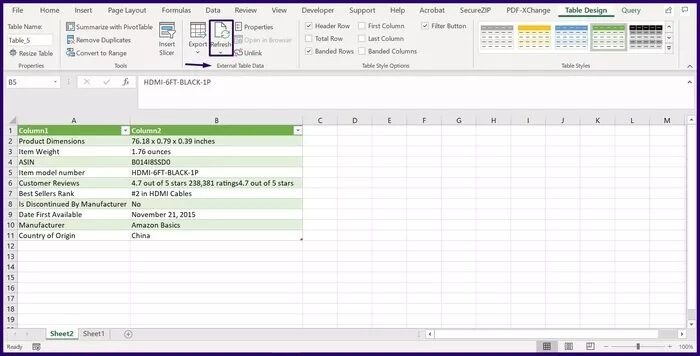
Step 5: From the Refresh drop-down menu, you have three options: Refresh, Refresh All, and Connection Properties. To set your preferences, click Connection Properties.
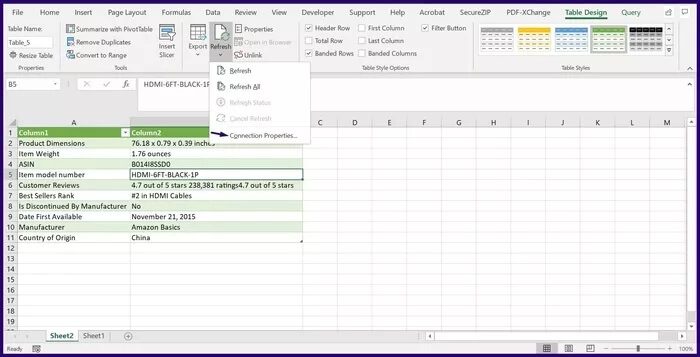
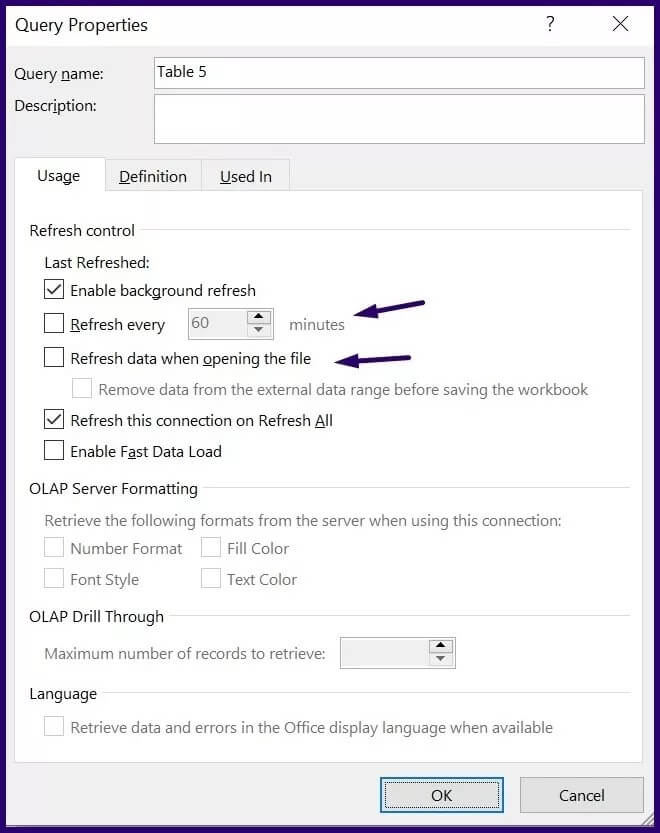
Step 6: In the dialog box called Query Properties, click the tab called Usage to set your update preferences, which include:
- Enable background refresh: This option is selected by default and ensures that your content is always updated.
- Update every: This option ensures that Excel only refreshes data during specific time intervals. When selecting this option, you must enter the number of minutes you want this to occur.
- Update data when opening the file: Data in an Excel file is updated only when it is run.
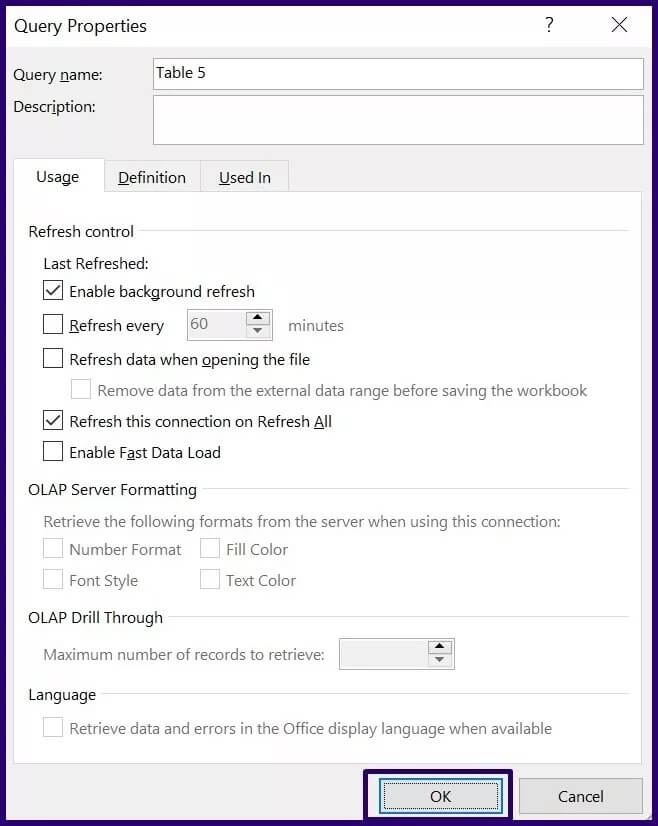
Step 7: Select OK to save your update preference.
Import Windows directory and file details into Excel
As long as your web data is in tabular form and you have the relevant version of Microsoft Excel, importing web data into your Microsoft Excel file should be easy. You can also import Windows directory or file details into an Excel file.


