One of the best ways you can improve your experience when using your Mac is to Customize your device with Screensaver. This will make your computer look more attractive and also allow you to show your personality. You can also add a custom screensaver to highlight your computer. Mac Or your MacBook.

Macs and MacBooks have plenty of options for setting and customizing their screen savers, and the process is fairly straightforward. However, adding a new one can be a bit tricky. This article will show you how to set, customize, and remove a Mac screen saver.
How to set a screensaver on a MAC
Adding a screensaver to your Mac will only take a few minutes at most, unless you spend more time choosing the right one for you. To add a new screensaver, follow the steps below.
Step 1: click logo Apple In the upper left corner of the toolbar Mac.
Step 2: Select the option named System Preferences , which is the second option from the top.

Step 3: go to the Desktop & Screen SaverThis icon appears below your name and password.

Step 4: Select the Screen Saver tab. On the left side, you'll see a list of possible screen saver options.


Step 5: Choose the screensaver you want to use.
If you are not sure which option you would like to choose, you can check the box labeled Use a random screensaverYou'll find this at the bottom of the options list in the right-hand menu.
How to customize your MAC screen
Once you've chosen your screensaver, there's a good chance you'll want to change it again in the future. When the time comes, it's a good idea to bookmark this article so you can access the steps more easily.
To customize your Mac screensaver, you'll need to follow the steps listed below this paragraph.
Step 1: Refer to the System Preferences and go to Desktop and screen saver once again.
Step 2: Choose from the list of options to change your screensaver.
You can also choose whether or not to display the screensaver when your computer displays it. To do this, select the Show with clock box.
Another way you can customize your Mac's screensaver is to specify how long you want it to appear. You can do this by selecting a specific time from the drop-down menu at the top of the window.
In addition to specifying the Apple screensaver options you'll see on your Mac, you can also add custom options. To do this, follow these steps.
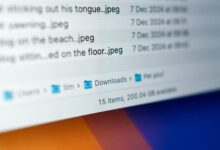
Step 1: Create a folder on your computer and add all the images you want to include in your screensaver.

Step 2: Once you have added all your images, return to your desktop and screensaver.
Step 3: In the screensaver window, find the drop-down menu titled “Source:.” It appears on the right side below the preview image.

Step 4: Click on this option. Once there, go to Choose Folder.

Step 5: Select the folder that contains your photos.
Once you add this, the changes should take effect immediately. If they don't, try restarting your Mac.
How to remove a screensaver on a Mac
Of course, having a Mac screensaver isn't something everyone wants. If you've decided not to use it, getting rid of it is as easy as adding a new one.
The steps below will guide you on how to delete the screensaver on your Mac.
Step 1: Refer to the Desktop and screen saver Click on the Screensavers window.
Step 2: Go to the option near the top of the screen where you can choose how long it should be before your computer displays the screensaver.
Step 3: Uncheck the box “Show screensaver after".

As with adding a new screensaver, these changes should take effect without delay after unchecking the box.
Customize your MAC screen with these tips
Macs are among the most popular computers. aesthetically pleasing Having your own screensaver will add even more aesthetic appeal. Setting up one of these options takes little time, and the steps are straightforward, meaning you can set your screensaver once and customize it as many times as you like.
If you later decide you no longer want a screensaver, the process is easier than setting one up. Thanks to this article, you now have the steps required for both.


