By default, Windows uses the DNS servers used by your Wi-Fi router or local network. However, if your DNS servers are slow and unreliable, you may want to switch to a better, faster DNS server on Windows 11. Fortunately, changing DNS servers on Windows is relatively quick and painless. In this post, we'll walk you through three different ways to change your DNS server on Windows 3. So, let's get started.

When should you change it?
Under ideal circumstances, you won't need to change your DNS server on Windows. However, if you experience unusually slow internet speeds and errors such as DNS server not responding So, it's a good idea to switch to public DNS servers on Windows 11.
Furthermore, using a default DNS server also threatens your privacy because your Internet Service Provider (ISP) may log your browsing history.

So, if you're looking for better internet speed or want to protect your privacy, changing your DNS servers is a good idea. Cloudflare, OpenDNS, and Google are some of the best options for switching to a free public DNS server.
- Cloudflare: 1.1.1.1 and 1.0.0.1
- Google: 8.8.8.8 and 8.8.4.4
- OpenDNS: 208.67.222.222 and 208.67.220.220
1. Change the DNS server using the Settings app.
Windows 11 gives you access to all the important settings through Settings app New and improved, unlike previous versions. Here's how to use it to change the DNS server on your computer.
Step 1: Click on Windows key + I On the keyboard to run Settings app.
Step 2: Go to Network and Internet tab On your left.
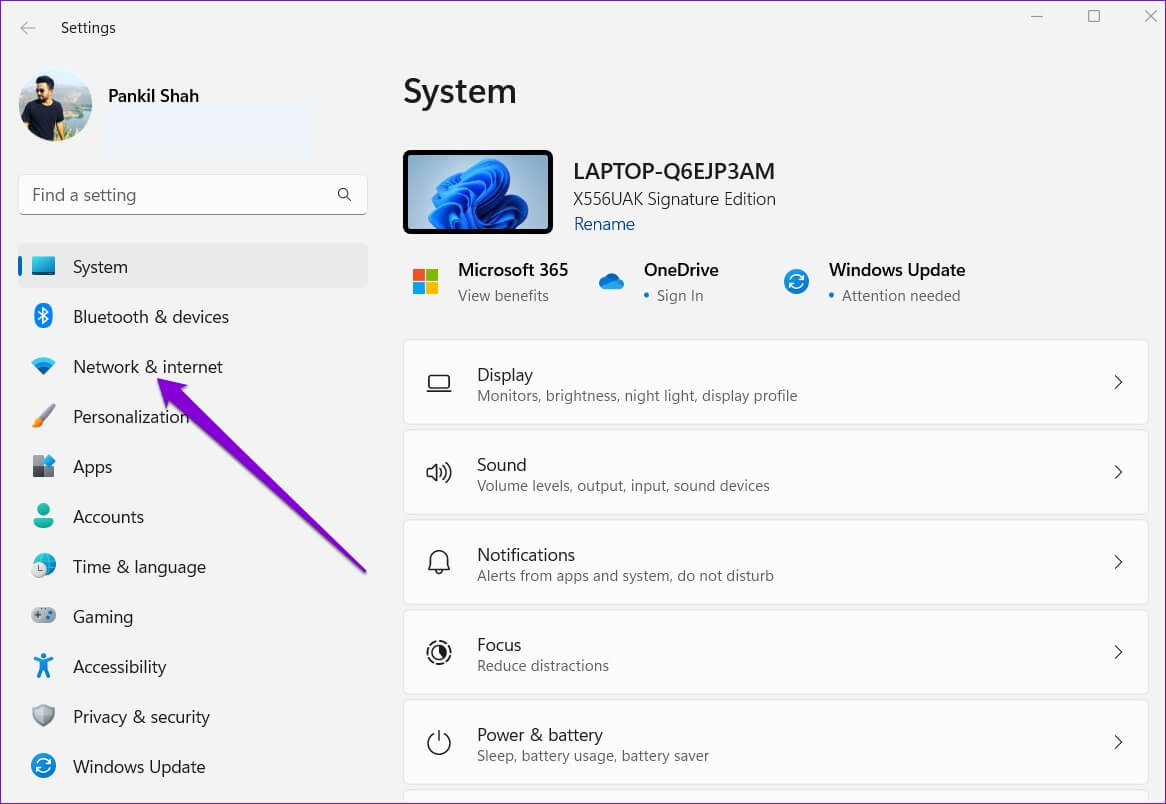
Step 3: Click Current Internet connection type Your Wi-Fi or Ethernet.
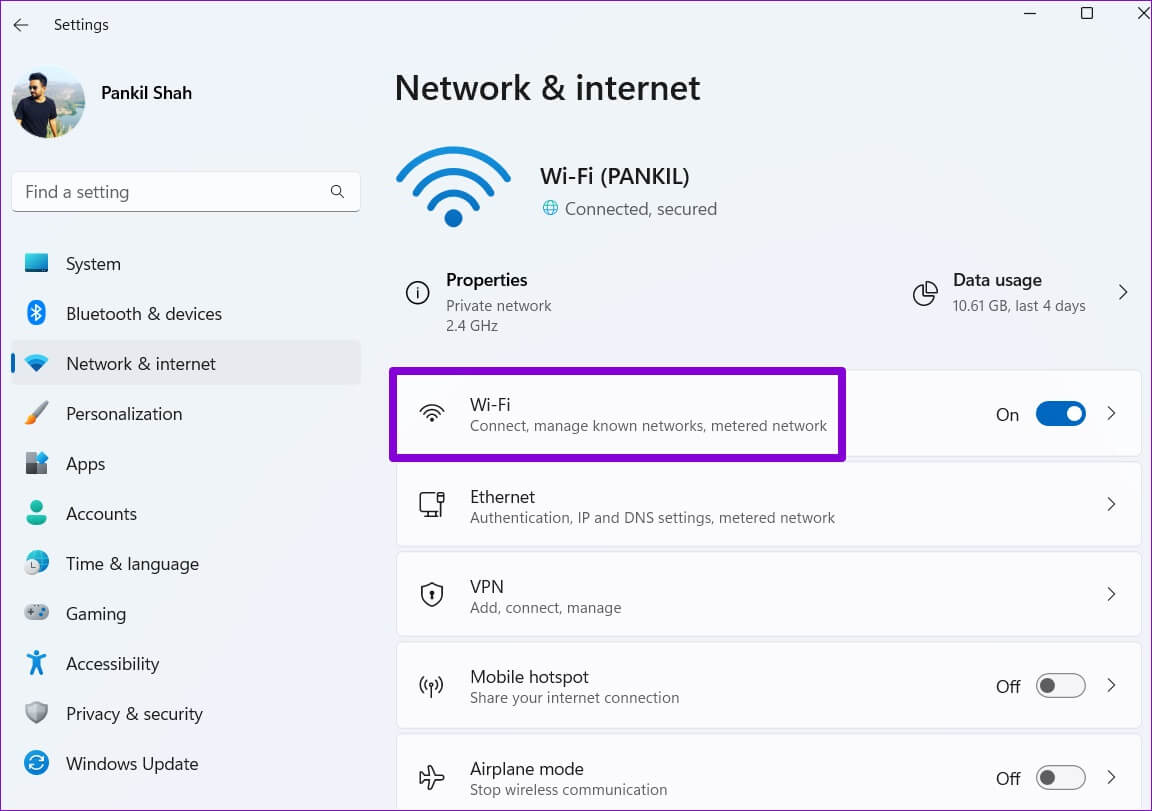
Step 4: go to the Hardware Features.
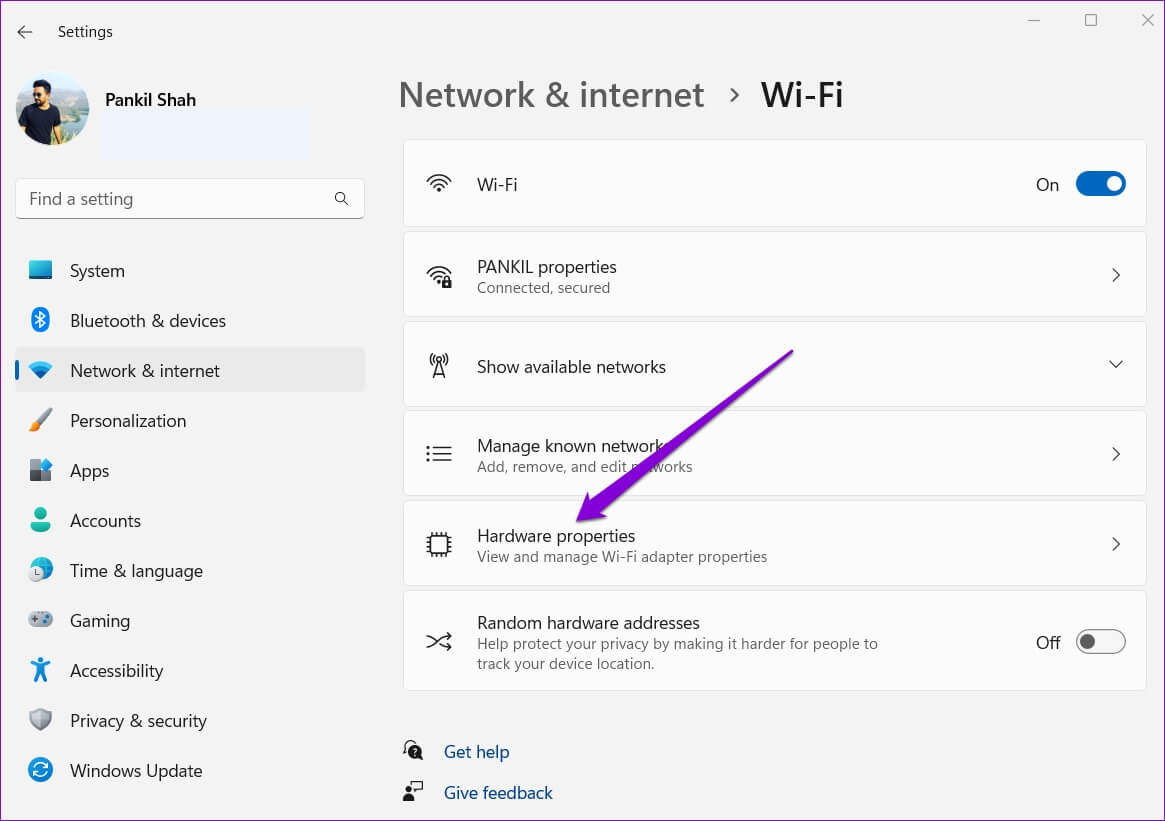
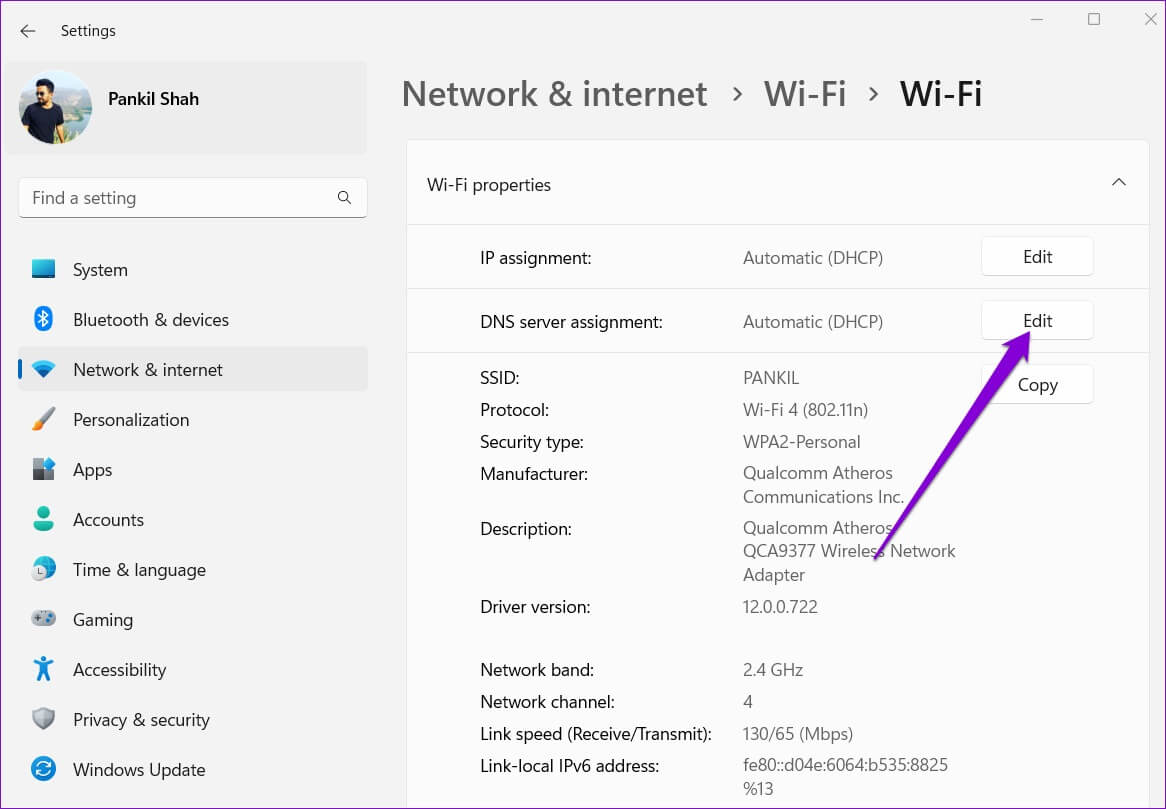
Step 5: Click Edit button Next to Set DNS Server.
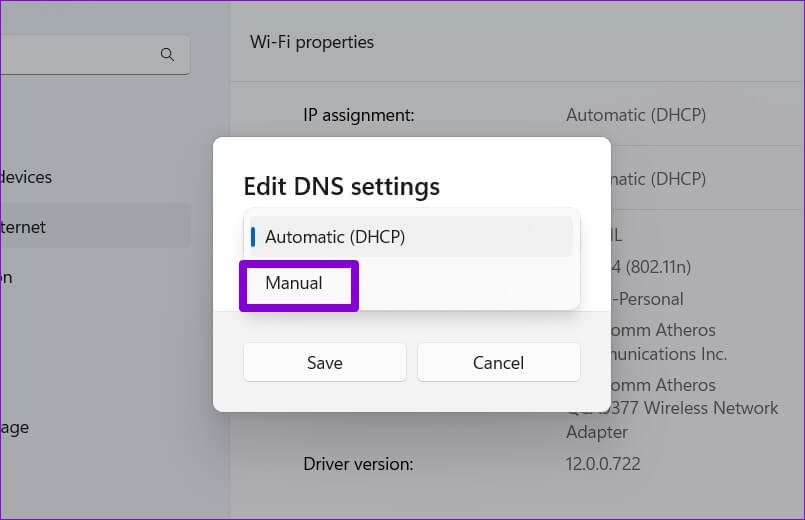
Step 6: in window Edit DNS settings Use the drop-down list to select Manual.
Step 7: turn on Setting up IPv4 or IPv6 , depending on the type of IP connection you want to modify.
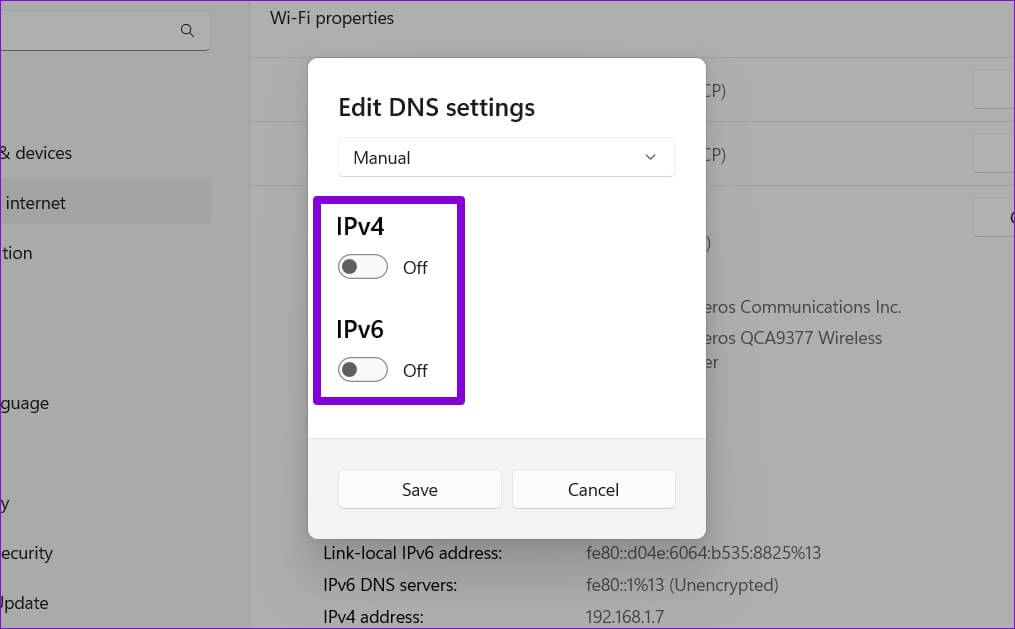
Step 8: We'll be using Google's public DNS servers. So you can enter 8.8.8.8 in the Preferred DNS field and 8.8.4.4 in the Alternate DNS field.
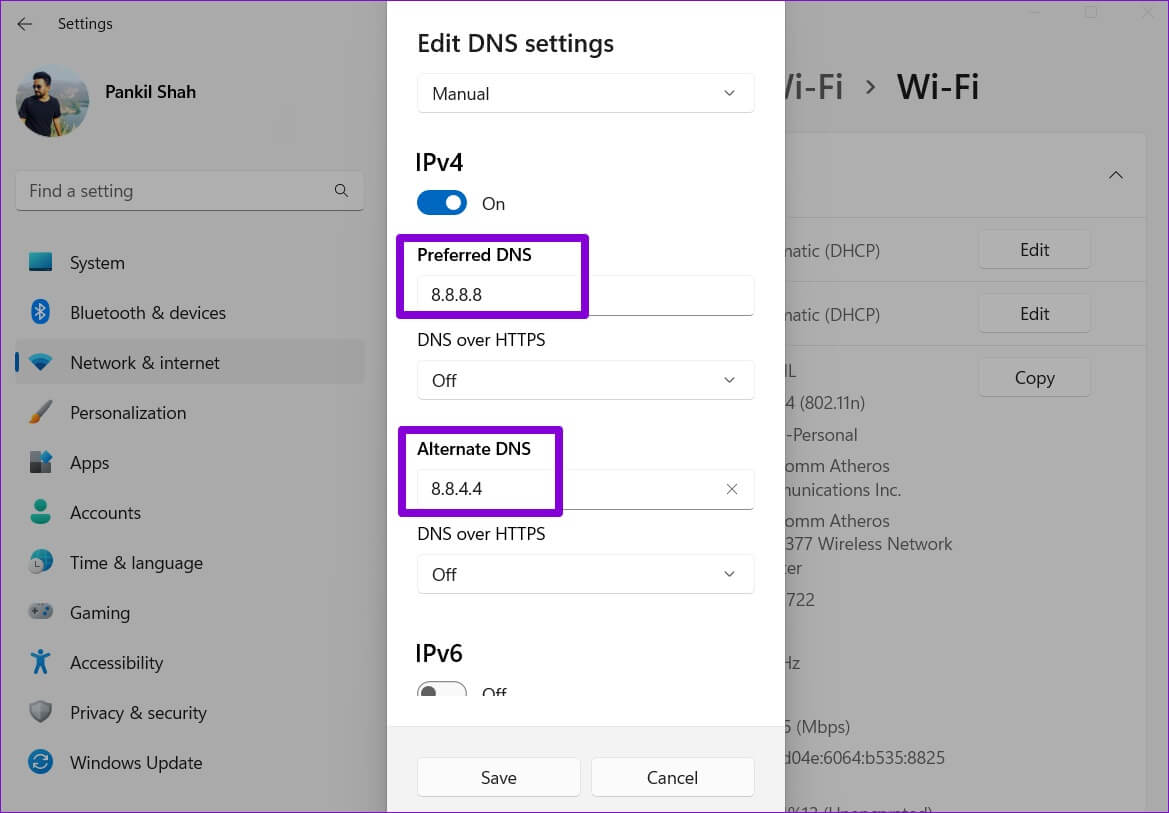
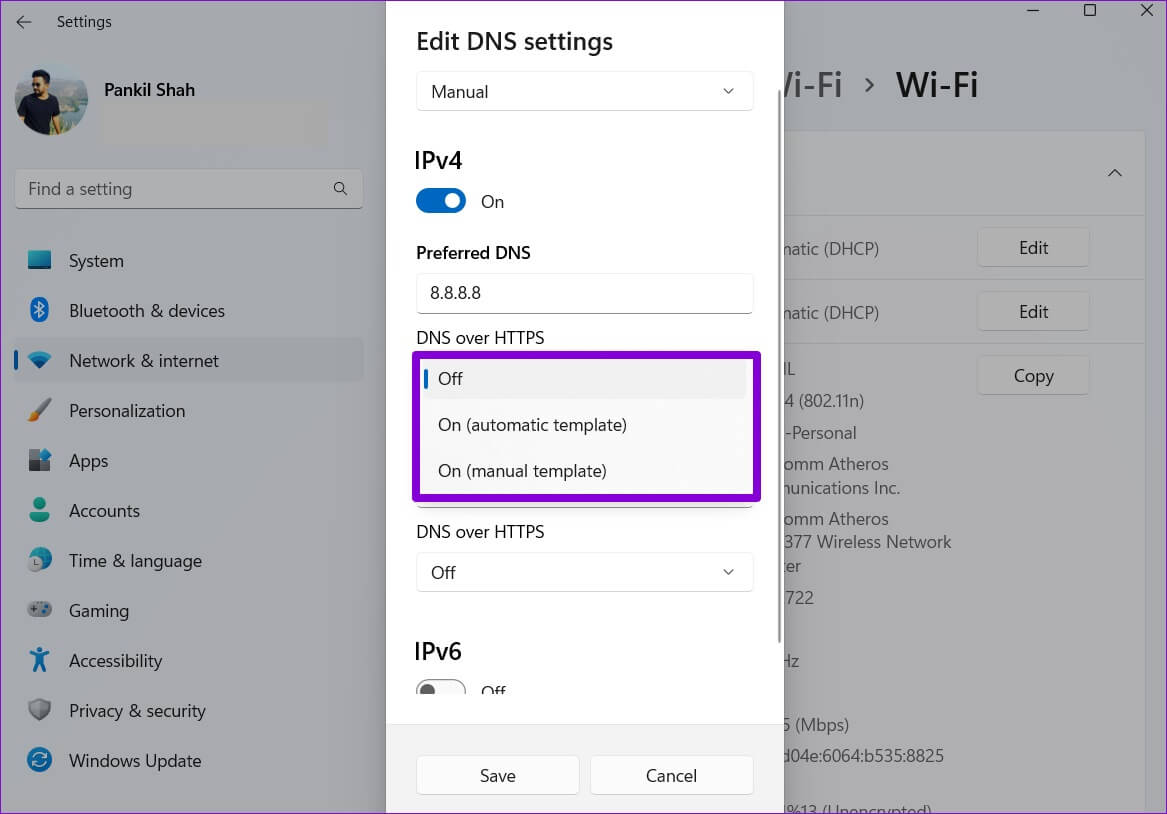
Alternatively, you can use the drop-down menu to enable DNS over HTTPS To improve privacy and security.
Step 9: Click on Save button to apply the changes.
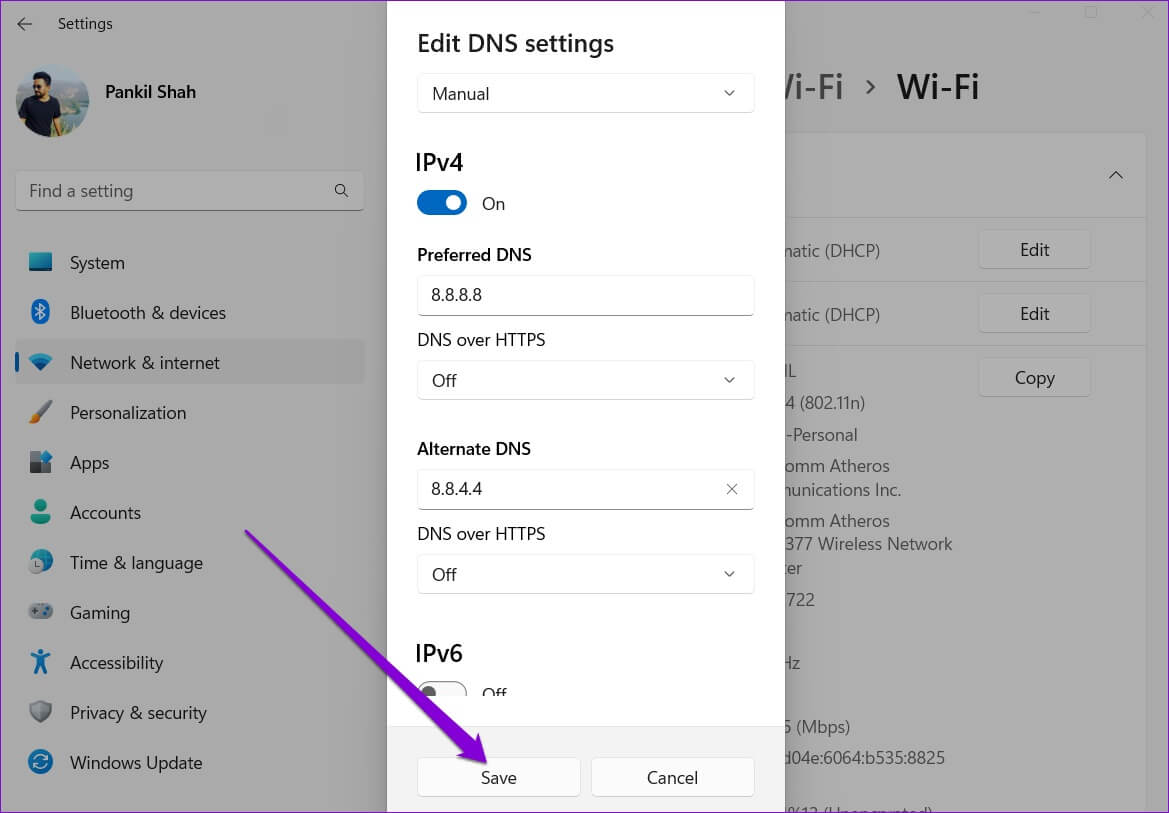
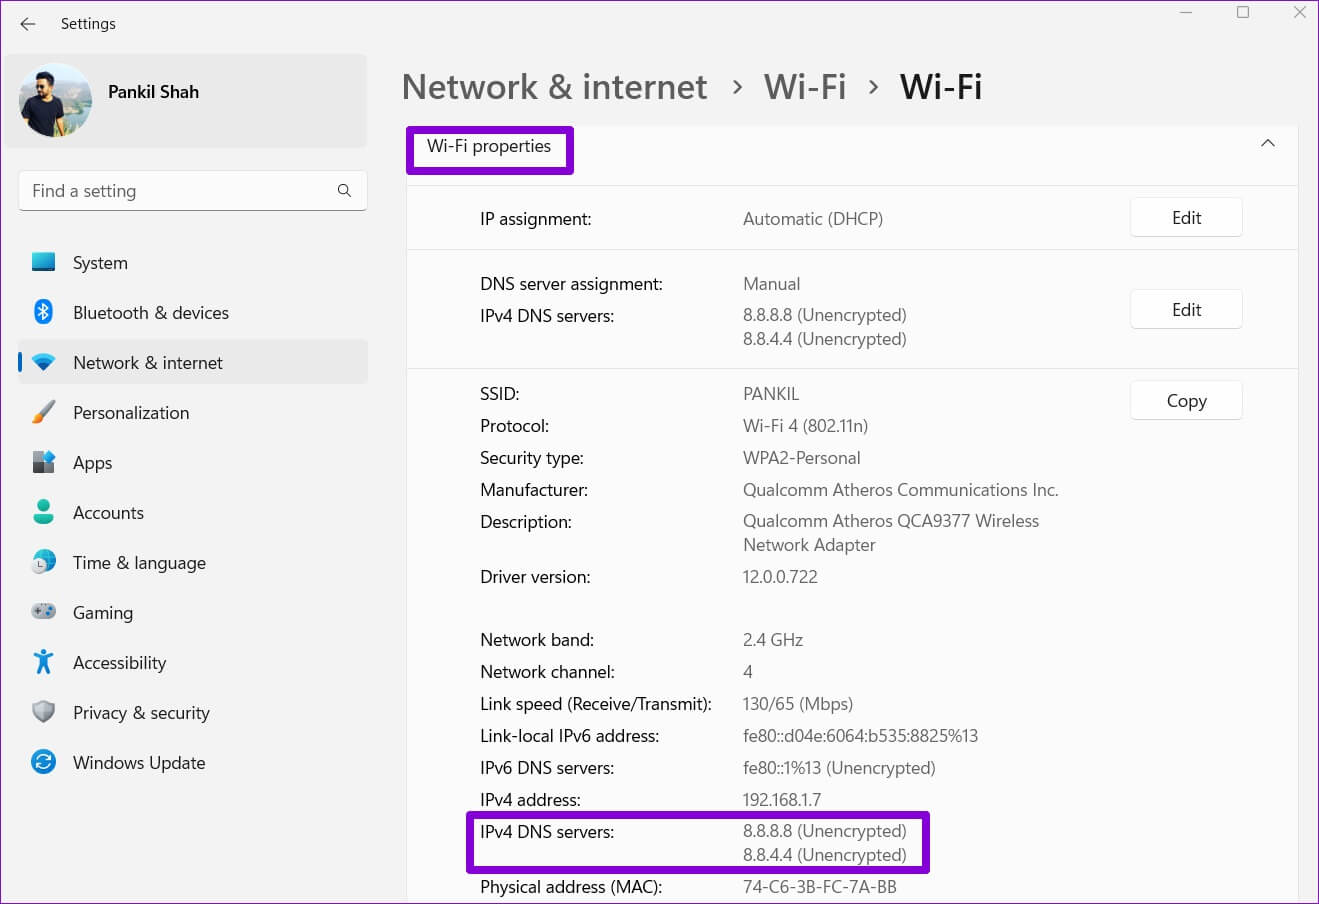
That's all. You'll find your selected DNS server in the Wi-Fi properties.
2. Change the DNS server using the control panel.
If you prefer the old-school method, you can also use the Control Panel to change the DNS servers on your computer. Here's how.
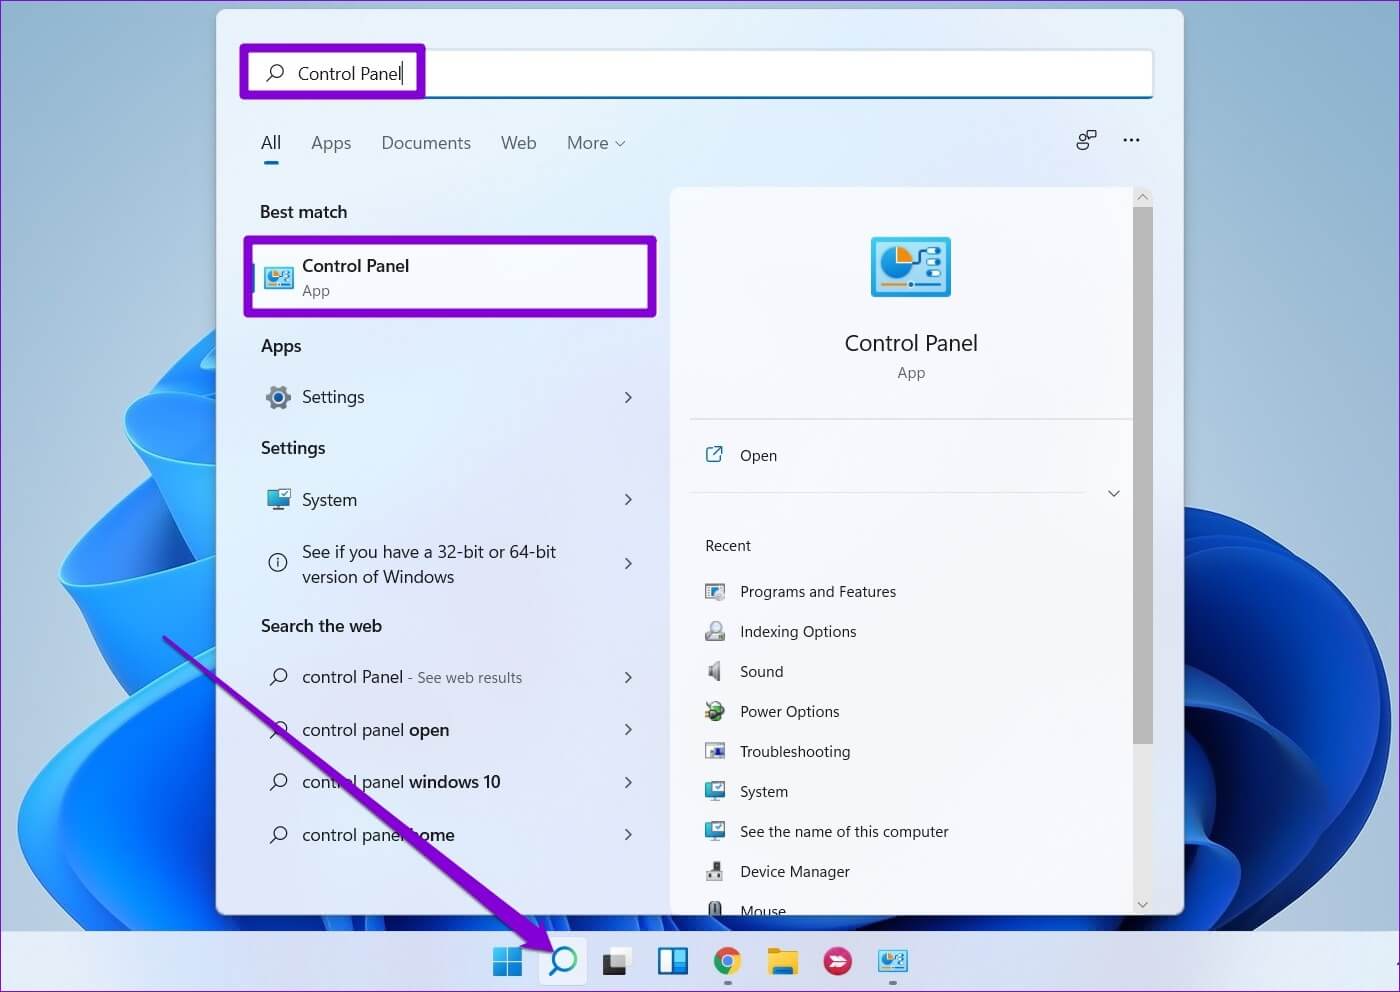
Step 1: Click search icon in Taskbar , And type Control Panel , and select the first result that appears.
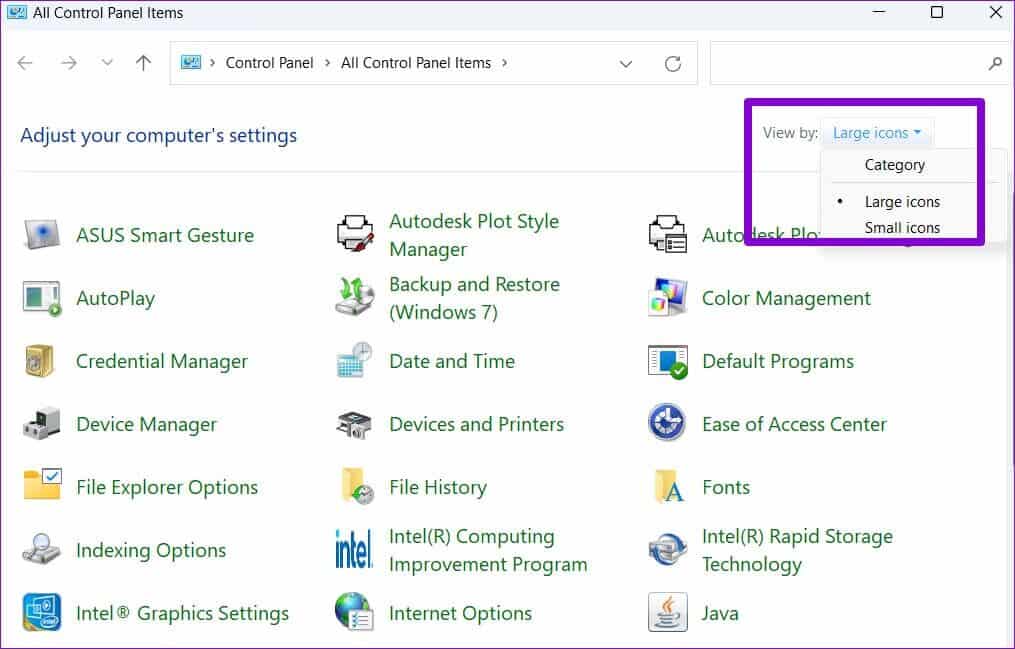
Step 2: Use the drop-down menu in the upper right corner to change Display type To Large or small symbols.
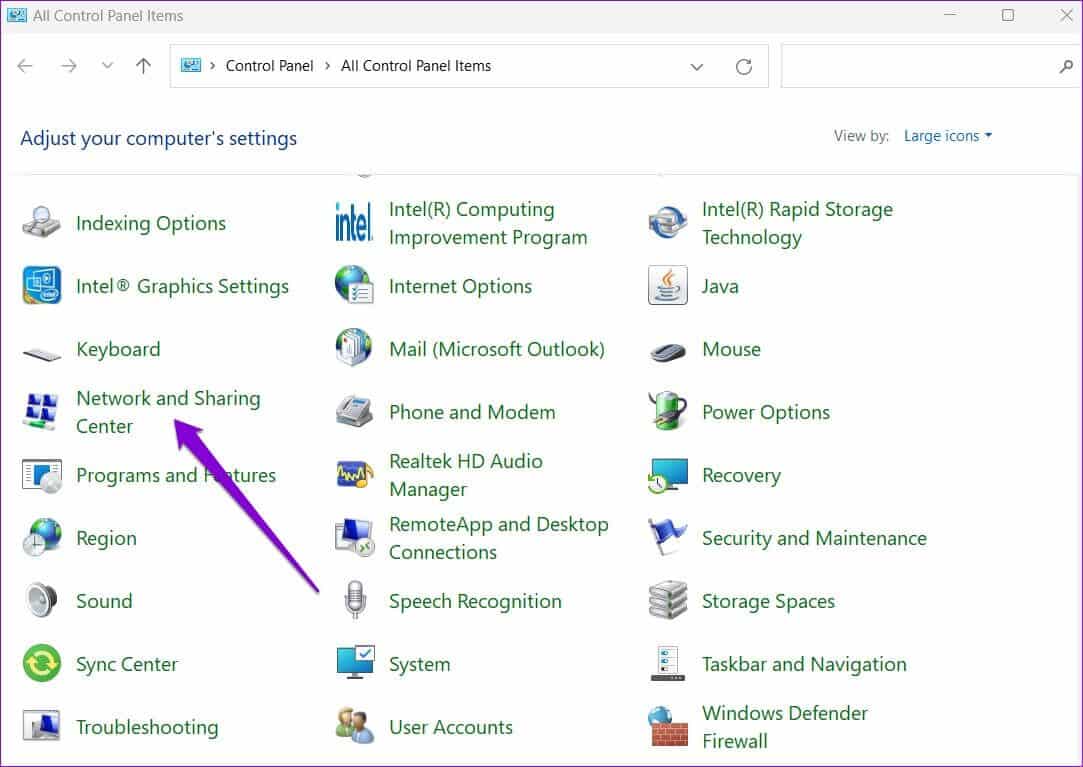
Step 3: go to the Network and Sharing Center.
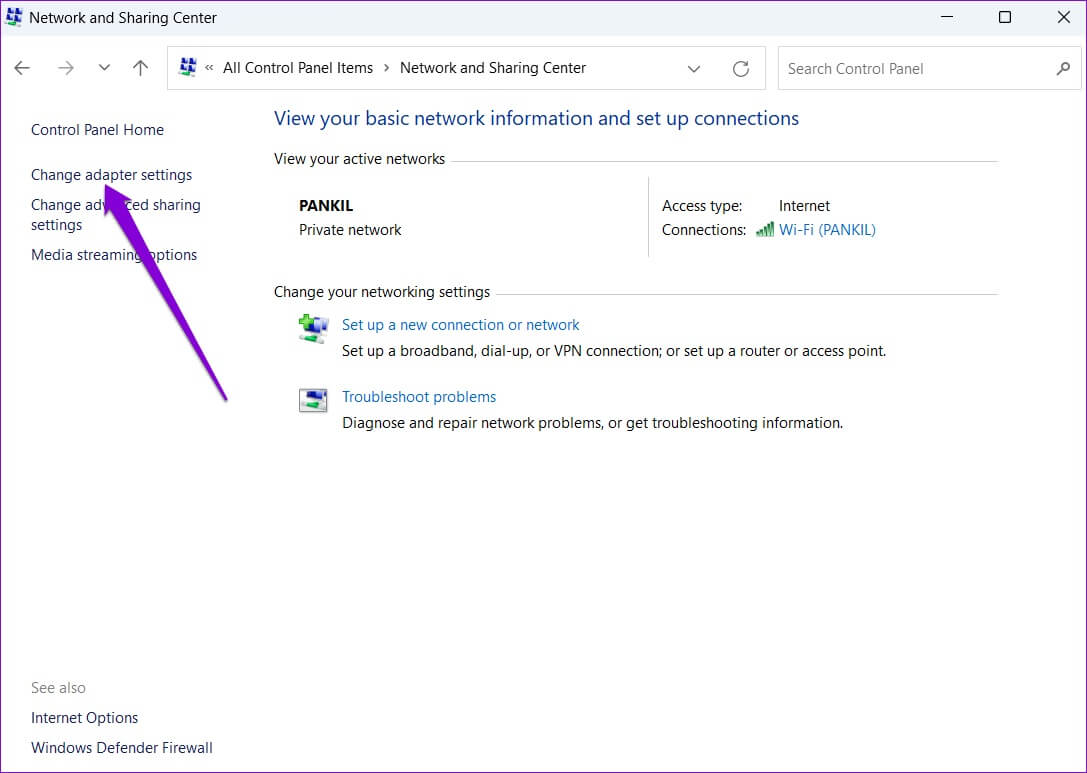
Step 4: Click Change adapter settings On your left.
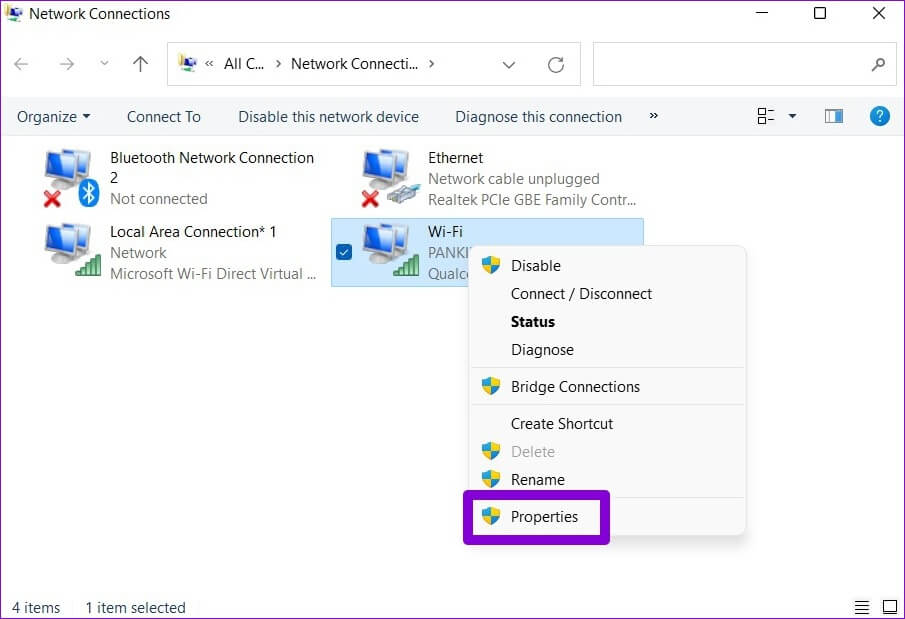
Step 5: Right click on your internet connection and select Properties.
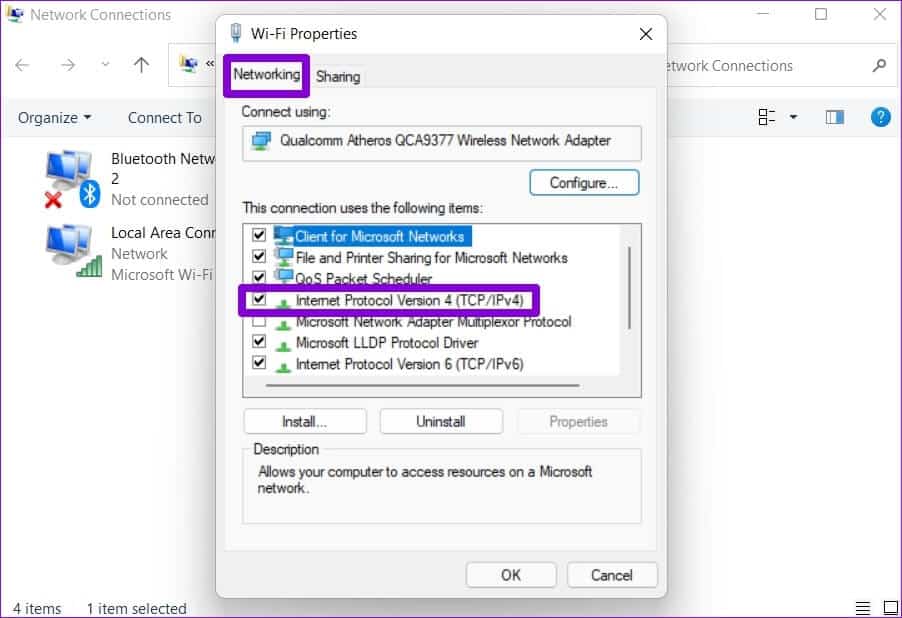
Step 6: within Networks , double-click Internet Protocol Version 4 (TCP/IPv4) to open its properties.
Step 7: Locate The “Use the following DNS server addresses” optionEnter. Primary and secondary DNS addresses In the Preferred DNS Server and Alternate DNS Server fields, respectively.
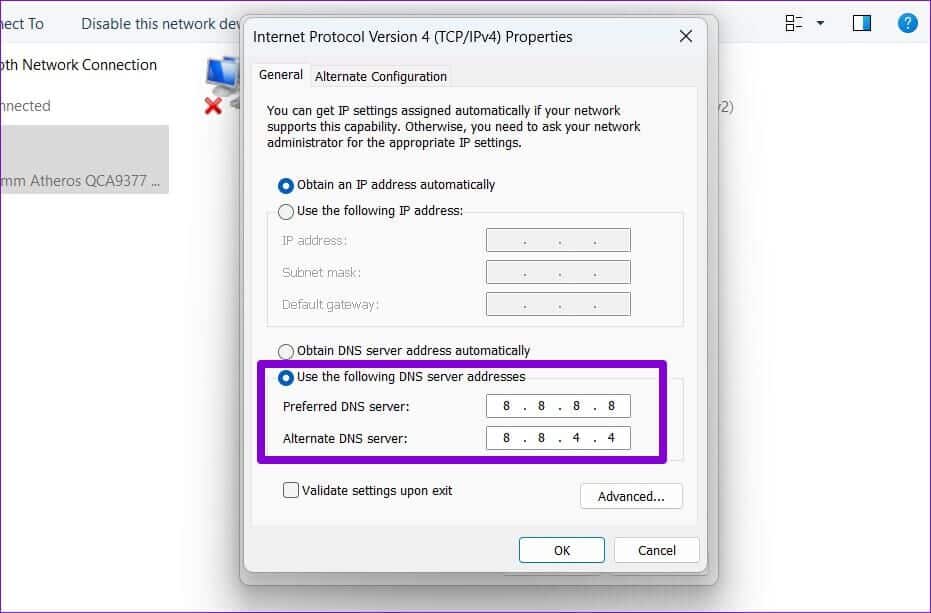
Step 8: check box “Verify settings upon exit” And click "OK".
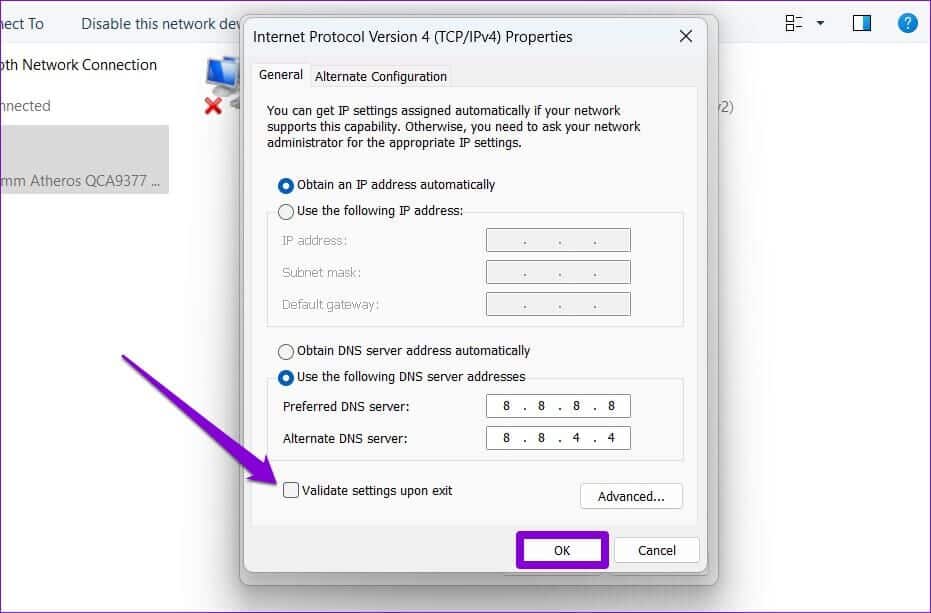
And you're good to go. Windows will start using your selected DNS settings immediately.
3. Change the DNS server using the command prompt.
If you are a power user and familiar with the tool Command Prompt on Windows You can run some commands to change the DNS server on your computer. Here's how.
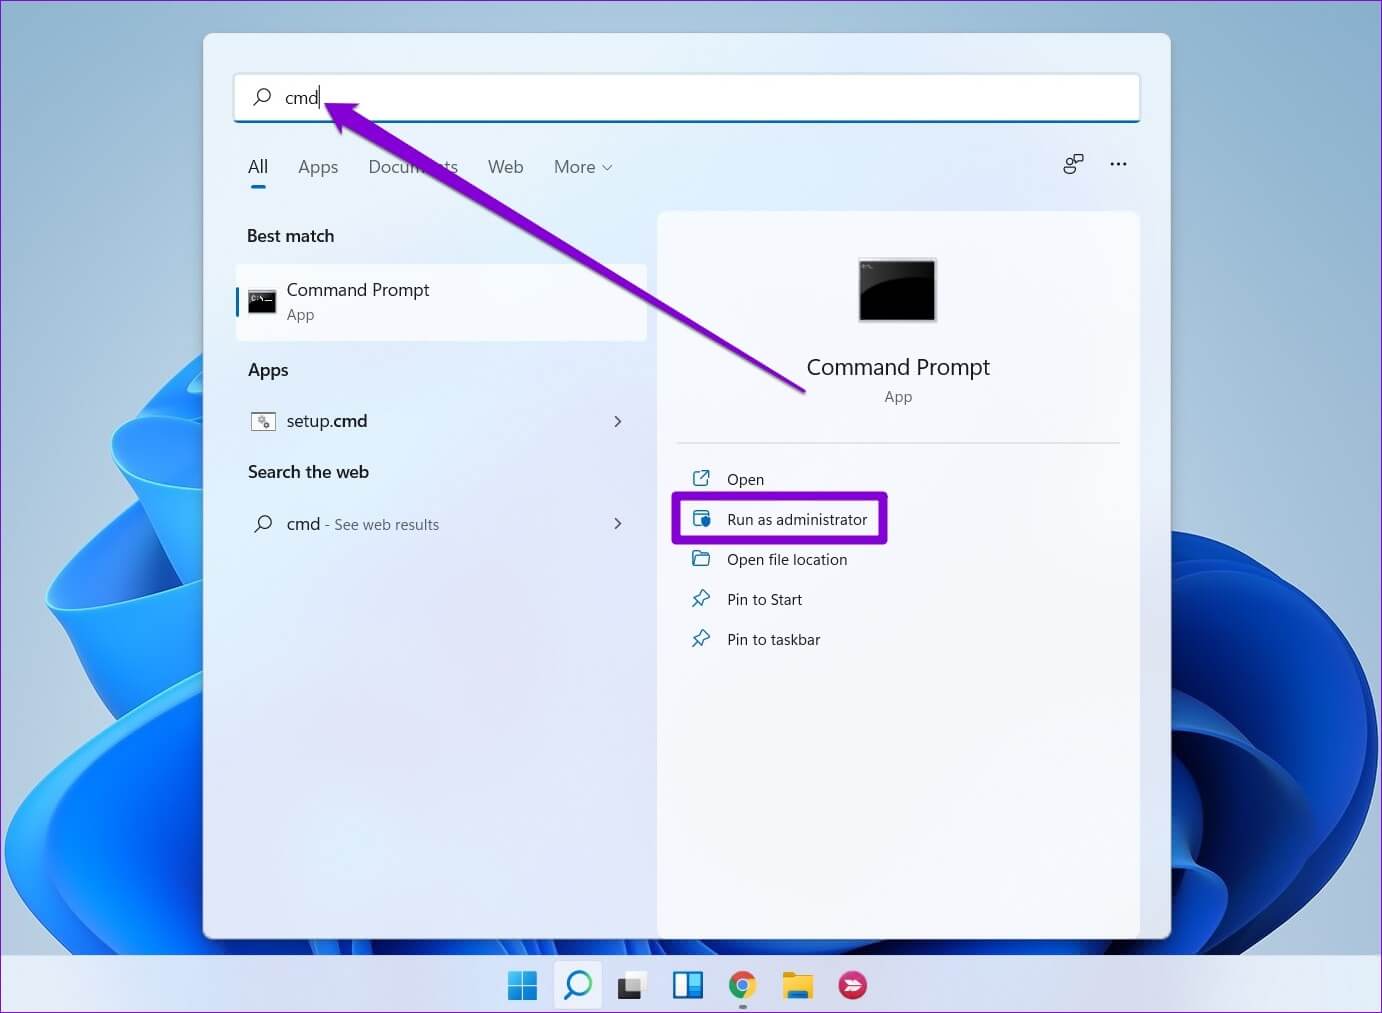
Step 1: Click on Windows key + S To open WindowsSearch. Type cmd And click Run as administrator.
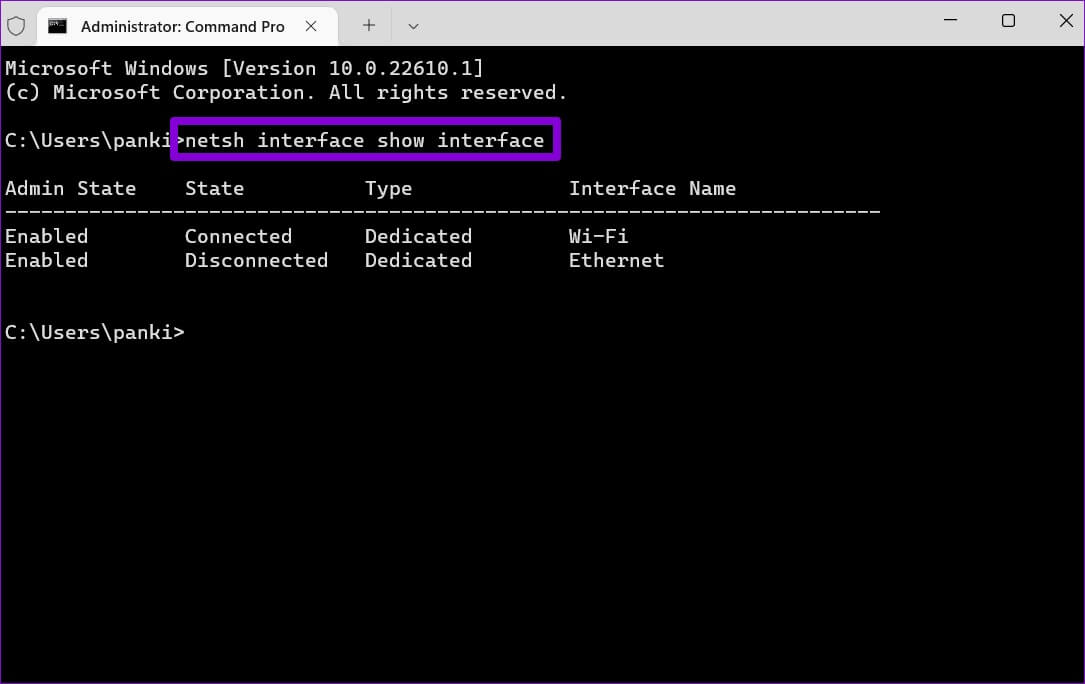
Step 2: in Control unit , type the following command and press Enter.
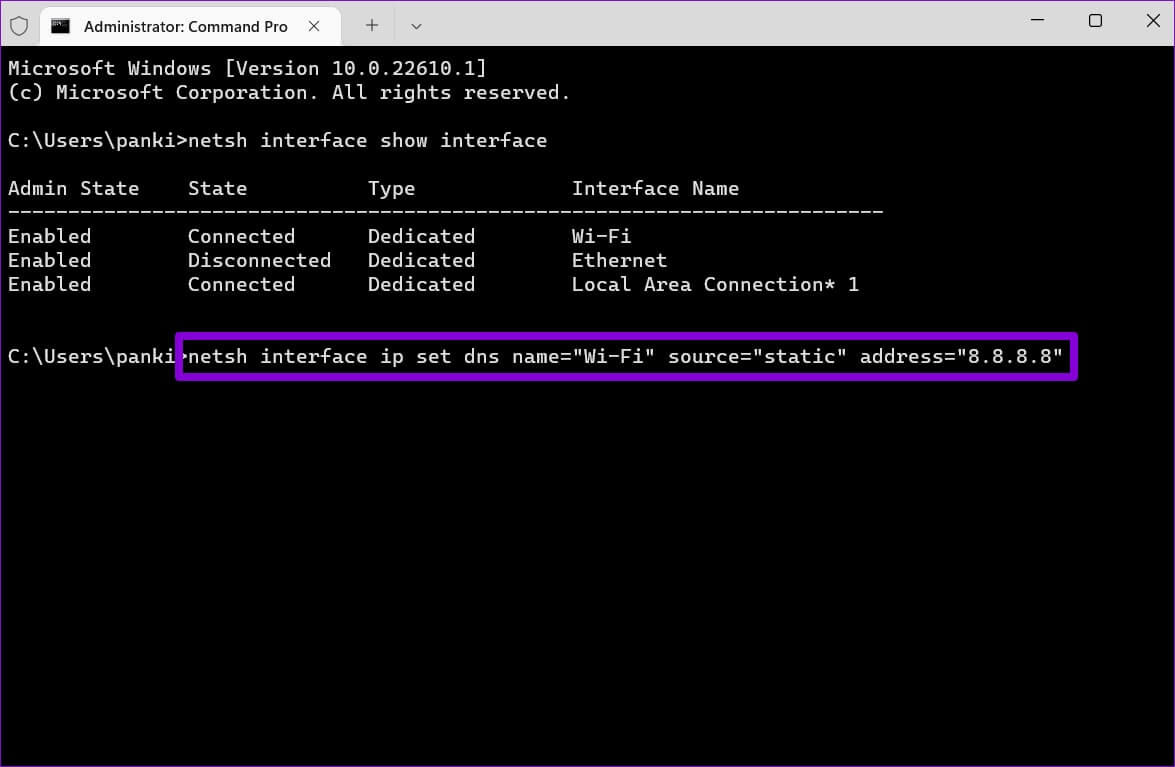
netsh interface show interface
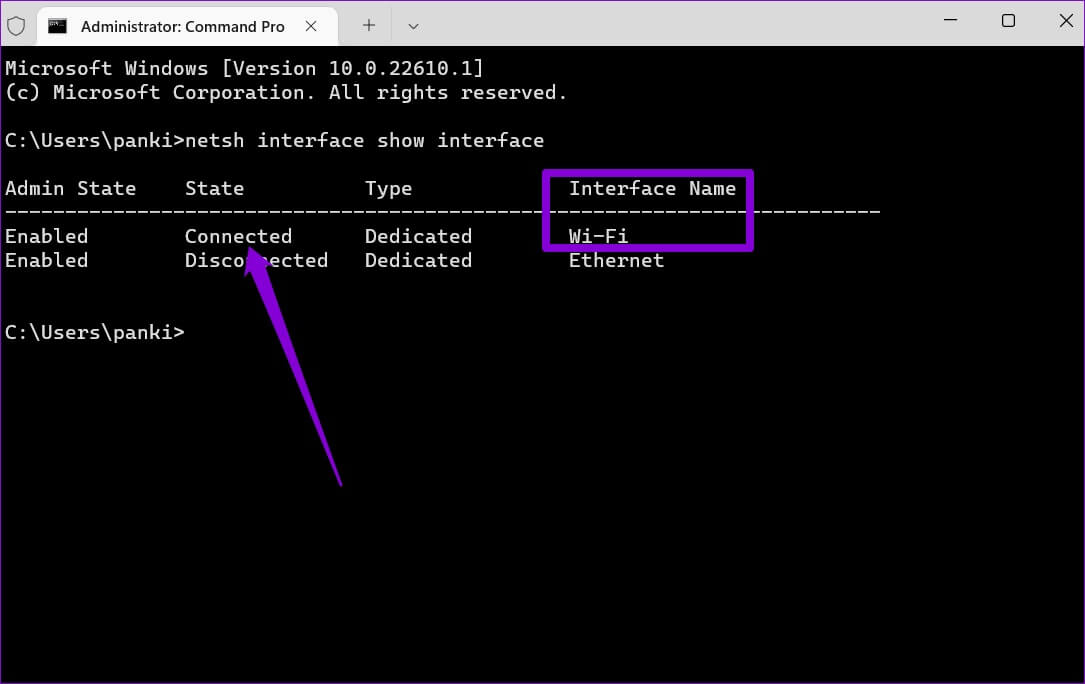
Step 3: Write down Network connection name Your current one.
Step 4: turn on Next command to prepare Primary DNS Server.
netsh interface ip set dns name="AdapterName" source="static" address="XXXX"
Replace AdapterName in the command above with the name of the network connection referenced in step 3. Replace XXXX with the actual address of the DNS server you want to use.
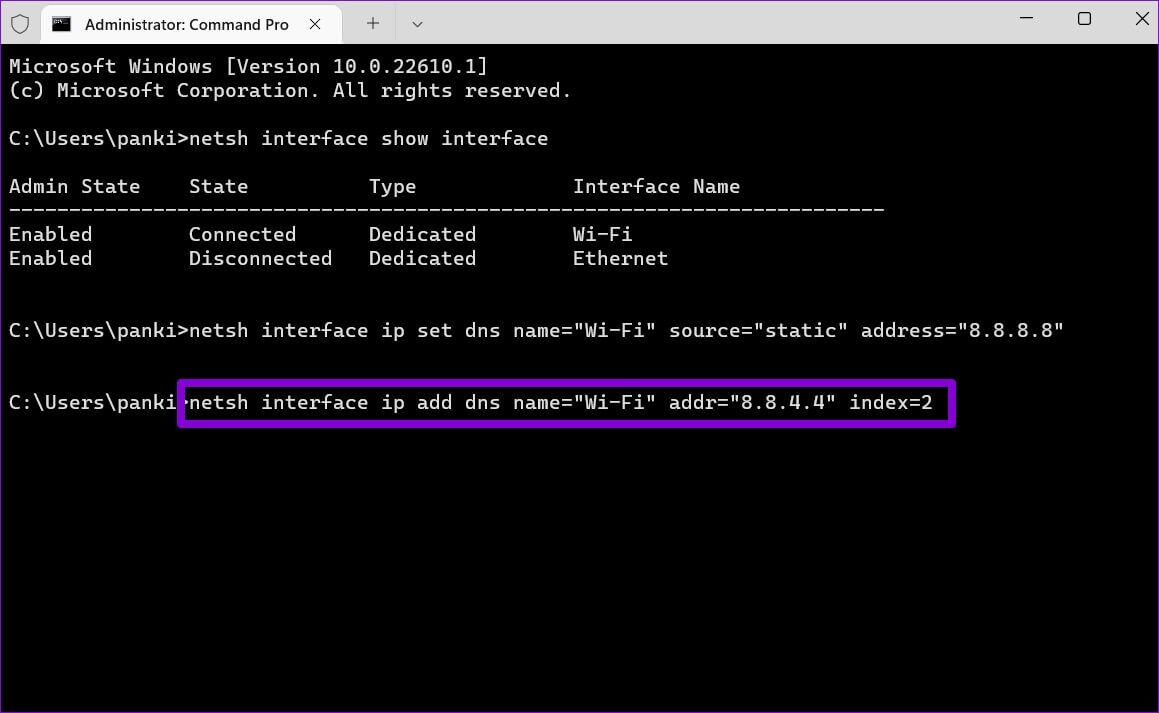
Step 5: Similarly, run the following command to set up an alternate DNS server.
netsh interface ip add dns name="ADAPTER-NAME" addr="XXXX" index=2
Again, replace AdapterName in the above command with the actual name of your network connection. Replace XXXX with the secondary address.
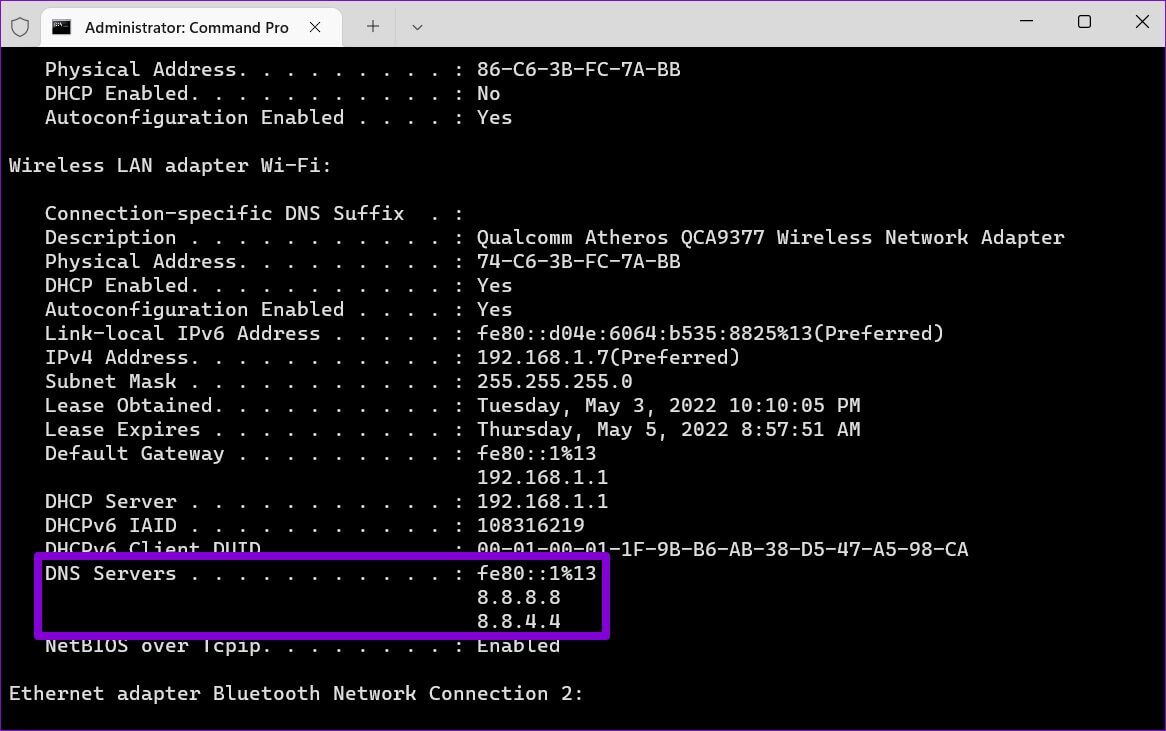
You can confirm the change to your DNS server by viewing your current network configuration. To do so, run the following command.
ipconfig / all
It's time to switch
Changing DNS servers is something you may need to do when you encounter Internet connection problems on your computer Yours. It's nice to see that Windows offers a few different ways to make this change.


