Most plastics are made from petroleum, but we can form similar plastics in just a few minutes using milk and other organic materials.
Making plastic from milk? It sounds like some kind of horror story, but it's actually a really cool scientific process. Create your own toys, jewelry, and more using ingredients you already have in your kitchen. It's so easy and so much more!

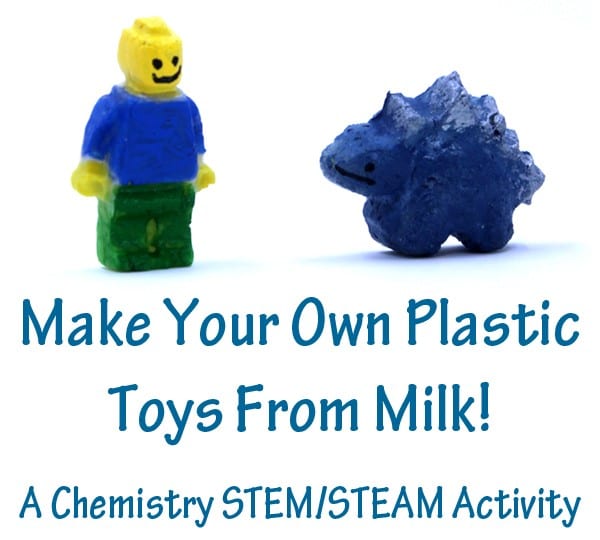
Turning milk into plastic toys!
This process, also known as casein plastic, has been in use for over 100 years and was the method used to make plastics before the introduction of synthetic plastics in 1945. Even royalty wore jewelry made from plastic milk many years ago. How cool is that?
With this simple process, you can create toys, beads, jewelry, decorative pieces, and more. This is a great, budget-friendly experiment, with amazing results that will pump up your students' excitement for science!
Supplies for making plastic from milk
- Stove or microwave to heat milk
- Milk (we used 2%, lower fat content is better)
- white vinegar or lemon juice
- Container
- Spoon
- Strainer (or you can create your own using a piece of cheese or similar)
- paper towel
- Molds (we love using Lego minifigures and dinosaur molds) or other shaping tools.
Time: 30 to 90 minutes for testing, then XNUMX days for drying. Add a little extra time for painting once dry!
How to turn milk into plastic
Measure 4 cup of milk (you can also use chocolate milk and the finish smells amazing!), this makes about 4 minutes or 4 dinosaurs. Heat on the stovetop in a bowl or in the microwave in a heatproof bowl. You want it to just start to steam. Remove from heat. Add XNUMX teaspoons of vinegar or lemon juice and stir gently.
The amount of vinegar is not exact. We used 4 tablespoons by accident and it was fine, it just made the vinegar smell stronger!
You'll notice it immediately starts to sag. You're making flakes and whey!
Stir gently for about a minute to fully react and form all the curds. Do not stir vigorously. Be gentle.
Drain the whey using a strainer or cheesecloth (or similar). Let it drain for a few minutes until most of the liquid has drained. Gently wipe the residue in the strainer if necessary.


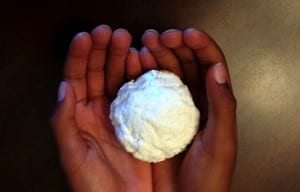
Now remove the curds and place them on several layers of paper towels. Carefully pat and squish to remove more liquid. You may need to replace the paper towels and repeat several times. The goal is to remove as much liquid as possible.
You'll notice it's kind of crumbly and spongy, but you can cook and shape it.
An optional additional step in this learning
Now you could put it in your molds at this point, but we've discovered that if you put the curds in a bowl or container and soak them in vinegar for an hour, you'll get a much smoother final product. Plus, they're whiter if you do this extra step. If you make too much vinegar, the longer the hour, the more likely it is to be. Repeat the process, blotting with a paper towel again. This time, you'll notice they're much smoother in texture and no longer crumbly.
How to Color Your Plastic Milk
While the vinegar is soaking, you can add some food coloring if you like. Just add a few drops to the vinegar while it's soaking and it will color the curd. Or make yours glow in the dark with our favorite trick!
Final steps to ending plastic milk
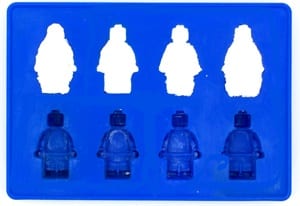
Now crush them into your molds. We used silicone molds to make Lego minifigs and dinosaurs.
You can also shape it by hand. Roll it to form beads, then use a skewer to poke a hole through it before setting it aside to dry. Or flatten it and use some cookie cutters.
The drying process takes time, about two days depending on natural humidity levels and how much moisture you removed with paper towels. However, you can remove the molds from the silicone molds after 24 hours, which will help speed up the drying time.
Once dry, clean up the edges a little if necessary, just like you would with any other casting. You can do this with just your fingers, a piece of sand paper, or other tools. The plastic will be hard now, so it may take a little extra work!
You can paint the finished products with either acrylic paints or markers. I used acrylic paints and a sharpie for the faces on mine. Spray them with a clear coat to give them a nice shine once finished.
Well! Who knew it was so easy, and so much fun, to make plastic from milk!
How does milk stay in plastic form?
Our oldest plastic toys are over 2 years old now and show no signs of wear and tear. We haven't done any testing yet to see if they degrade with moisture, heat, or sun, but it might be worth keeping in the books for future research. They're definitely very durable!
Summary
First Heat the milk in a pot and when it starts to boil, slowly add
Several spoons of vinegar and stir it.
Second We continue stirring until the mixture becomes elastic (here the acidic substances in the vinegar react with the organic substances in the milk)
Leave the mixture to cool, then wash it under tap water.