تحتاج التطبيقات والألعاب إلى .NET Framework لتعمل بشكل صحيح على نظام التشغيل Windows. إطار العمل عبارة عن مجموعة من مطوري الأكواد المعبأة مسبقًا التي يستخدمونها أثناء إنشاء التطبيقات. ربما واجهت أخطاء أثناء تثبيت وتشغيل التطبيقات التي تحتاج إلى إصدار محدد من .NET Framework. لكن التطبيقات تعمل بشكل جيد بعد تثبيت الإصدار المطلوب من مكتبات وقت التشغيل. إذا كنت تريد التحقق من إصدار .NET Framework على نظام التشغيل Windows، فيمكنك استخدام أي من الطرق الخمس التالية. هيا نبدأ.
1. استخدام مجلد التثبيت في مستكشف الملفات
إن أبسط طريقة للتحقق من إصدار .NET Framework المتوفر على جهاز الكمبيوتر الذي يعمل بنظام التشغيل Windows 10 أو Windows 11 هي استخدام File Explorer. كل ما عليك فعله هو زيارة مجلد التثبيت الموجود في محرك الأقراص C والتحقق من خصائصه. كرر الخطوات التالية للقيام بذلك:
الخطوة 1: اضغط على اختصار لوحة المفاتيح Windows + E لفتح تطبيق File Explorer.
الخطوة 2: انتقل إلى شريط العناوين في الأعلى، والصق المسار التالي، ثم اضغط على Enter:
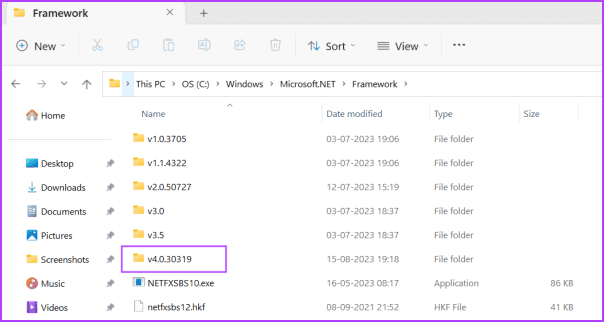
C:\Windows\Microsoft.NET\Framework
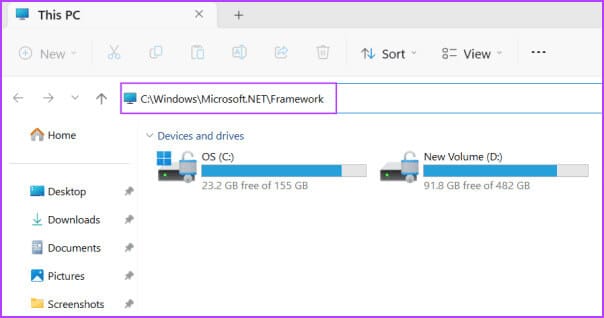
خطوة 3: هذا المجلد الذي يحتوي على جميع عمليات تثبيت .NET Framework على جهاز الكمبيوتر الخاص بك. سترى العديد من المجلدات التي تبدأ بالحرف الأول “v” متبوعًا باسم الإصدار. كما هو الحال على جهاز الكمبيوتر الخاص بنا، لدينا مجلدات من إصدارات .NET Framework من 1 إلى 4.0. انقر نقرًا مزدوجًا على أي من المجلدات لفتحه.
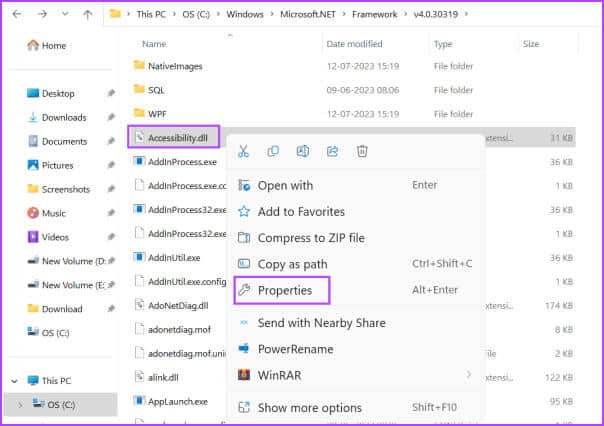
الخطوة 4: انقر بزر الماوس الأيمن على ملف DLL وحدد خيار الخصائص من قائمة السياق.

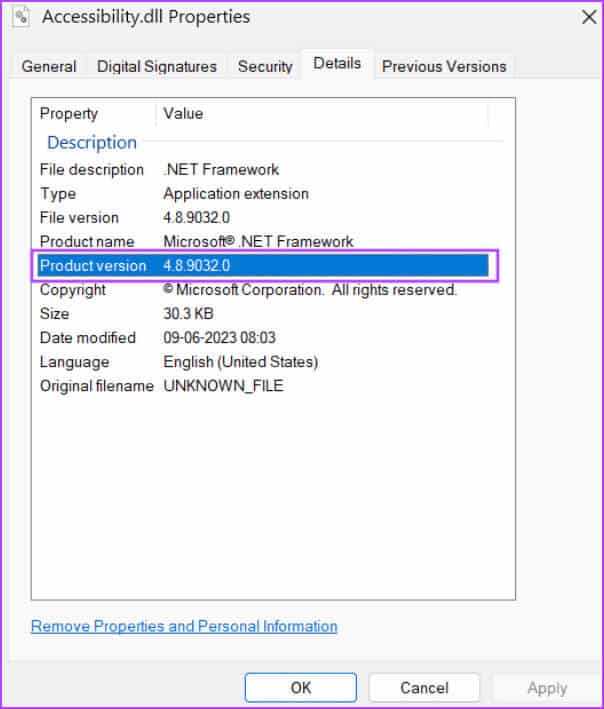
الخطوة 5: قم بالتبديل إلى علامة التبويب التفاصيل. ابحث عن خيار إصدار المنتج. وسيحتوي على رقم إصدار .NET Framework.
خطوة 6: أغلق نافذة الخصائص.
2. استخدام محرر التسجيل
إذا كنت تتساءل “ما هو إصدار .NET Framework الذي أملكه؟”، يمكنك ببساطة إلقاء نظرة خاطفة على محرر التسجيل لمعرفة المزيد عنه. إليك كيفية القيام بذلك:
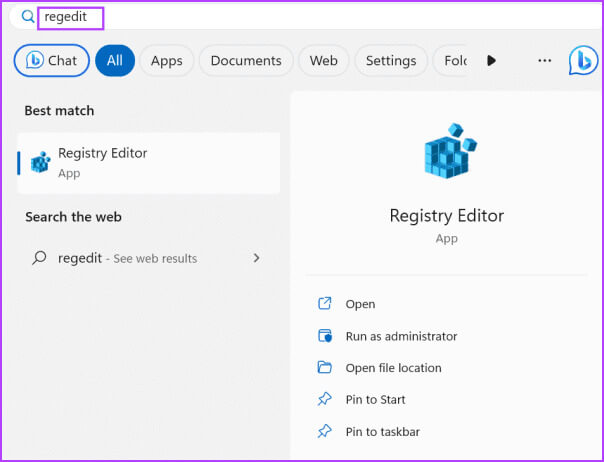
الخطوة 1: اضغط على مفتاح Windows لفتح قائمة ابدأ. اكتب regedit في مربع البحث واضغط على Enter.
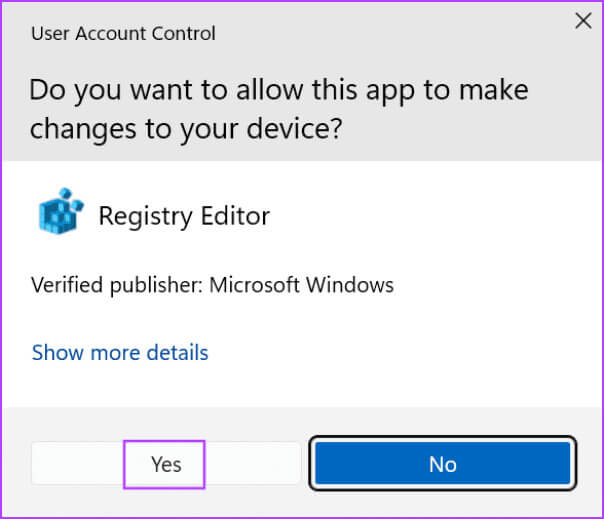
الخطوة 2: سيتم تشغيل نافذة التحكم في حساب المستخدم. انقر فوق الزر “نعم” لفتح محرر التسجيل.
خطوة 3: انتقل إلى شريط العناوين في الأعلى، والصق المسار التالي، ثم اضغط على Enter:
HKEY_LOCAL_MACHINE\SOFTWARE\Microsoft\NET Framework Setup\NDP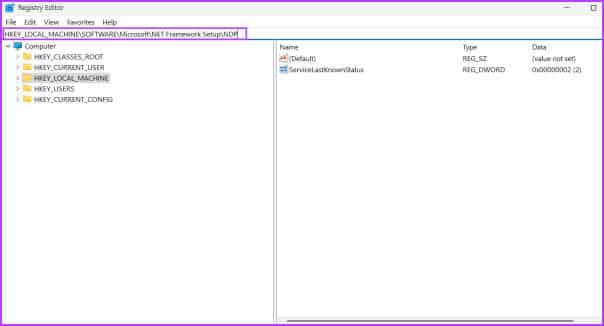
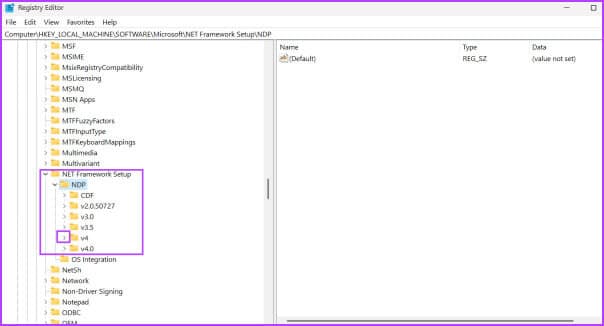
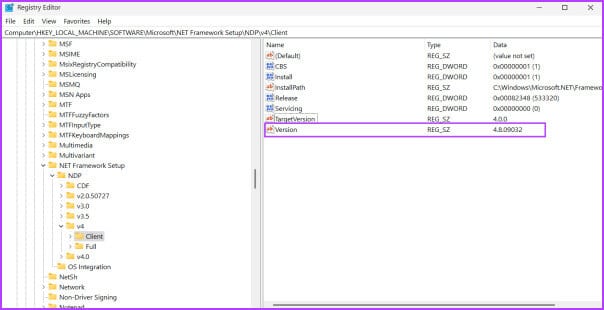
الخطوة 4: سترى مجموعة من المفاتيح الفرعية أسفل مفتاح NDP. انقر على أيقونة السهم لتوسيع مفتاح فرعي.
الخطوة 5: انقر على مفتاح العميل الفرعي.
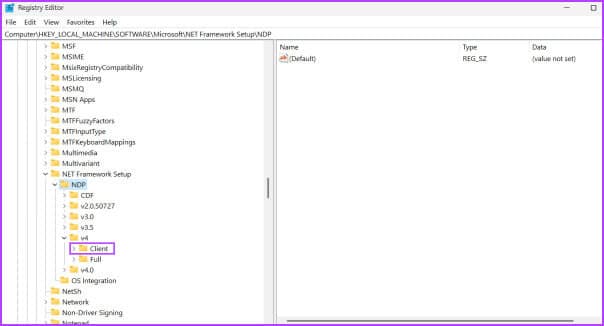
خطوة 6: انتقل إلى الجانب الأيمن وابحث عن قيمة الإصدار. سترى برنامج .NET Framework مدرجًا ضمن عمود البيانات. وبالمثل، يمكنك التحقق من إصدار كافة المفاتيح الفرعية المدرجة ضمن مفتاح NDP.
الخطوة 7: أغلق محرر التسجيل.
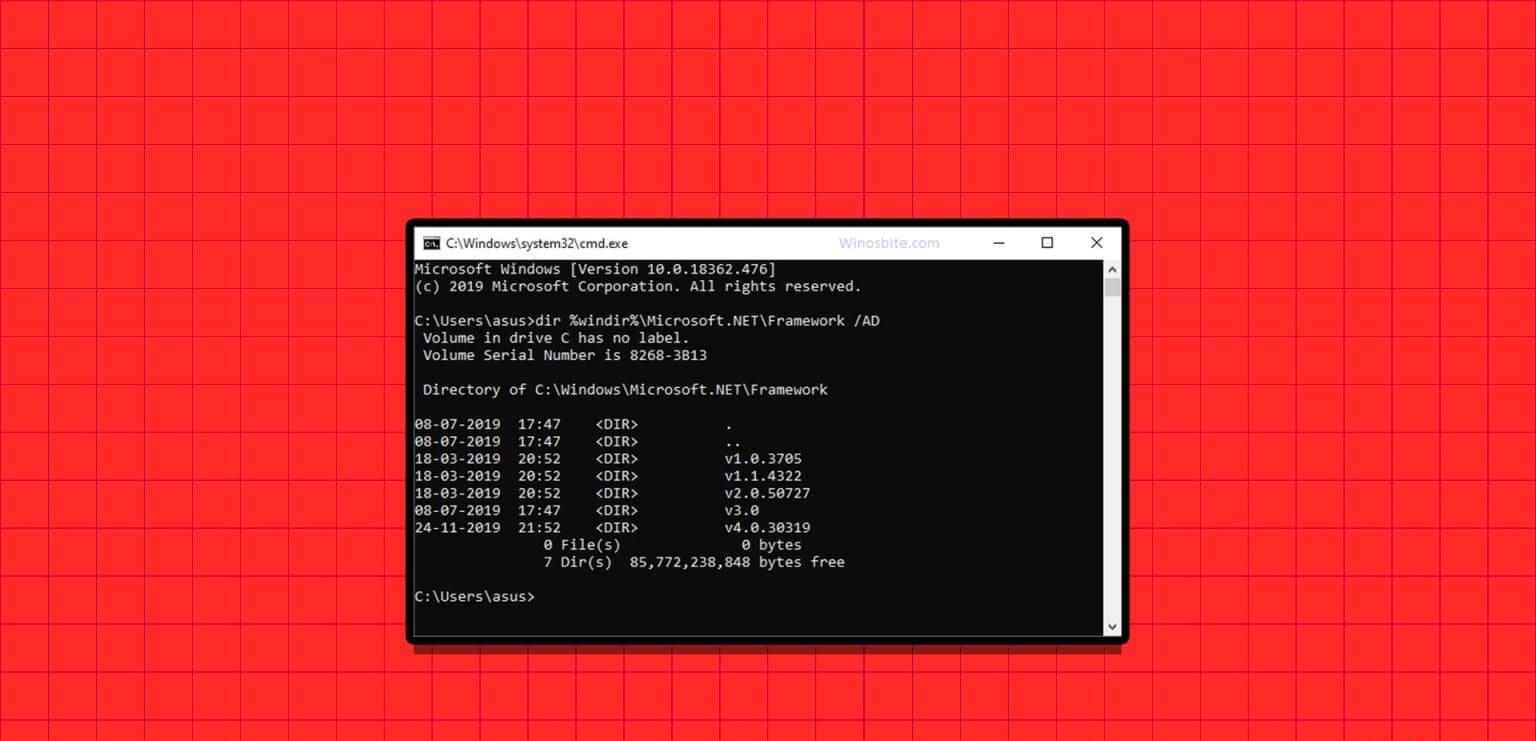
3. استخدام موجه الأوامر
إذا لم تتمكن من معرفة إصدار .NET المثبت على جهاز الكمبيوتر الذي يعمل بنظام Windows 10 أو 11، فيمكنك استخدام موجه الأوامر للحصول على صورة واضحة. يمكنك استخدام أمر يستعلم عن مفتاح NDP في سجل النظام ويعرض كافة تفاصيله. إليك الطريقة:
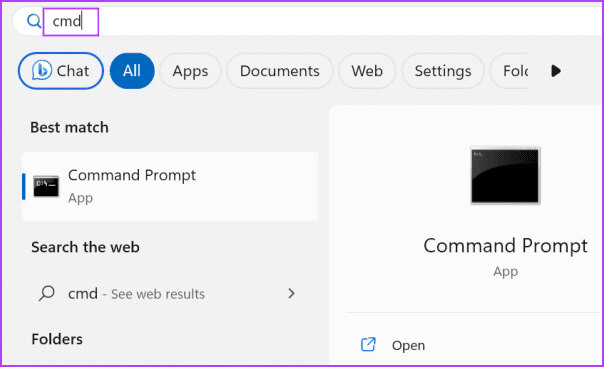
الخطوة 1: اضغط على مفتاح Windows لفتح قائمة ابدأ. اكتب cmd في مربع البحث واضغط على Enter لفتح موجه الأوامر في تطبيق Terminal.
الخطوة 2: اكتب الأمر التالي واضغط على Enter:
reg query "HKLM\SOFTWARE\Microsoft\Net Framework Setup\NDP"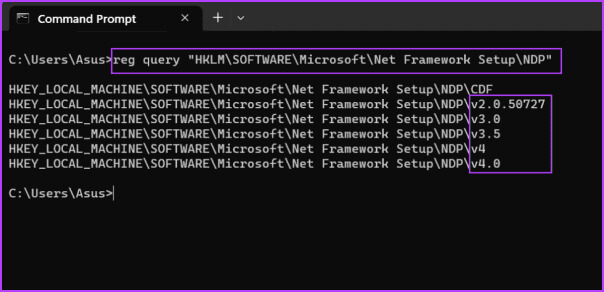
خطوة 3: سيقوم الأمر بإنشاء كافة أسماء المفاتيح الفرعية ضمن مفتاح NDP. يشير الحرف “v” هنا إلى الإصدار. لذا، v2.0 هو الإصدار الثاني، v3.0، هو الإصدار الثالث، وهكذا. ولكن إذا كنت تريد الحصول على تفاصيل الإصدار الكاملة لمفتاح فرعي محدد، فقم بتنفيذ الأمر التالي:
reg query "HKLM\SOFTWARE\Microsoft\Net Framework Setup\NDP\v4\Client" /v Version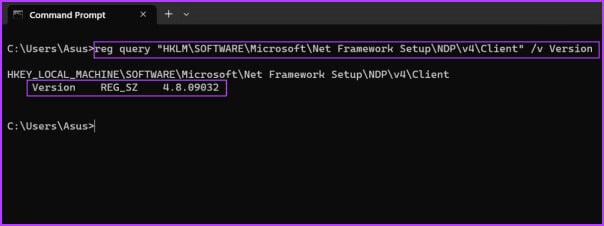
الخطوة 4: يمكنك استبدال الجزء v4 من الأمر بأي إصدار مفتاح فرعي آخر (v3.0 أو v2.0 أو آخر) والتحقق من إصداره الدقيق.
4. استخدام أمر GET-CHILD CMDLET الخاص بـ POWERSHELL
يمكن لعشاق الأجهزة الطرفية أيضًا استخدام Get-child cmdlet للبحث عن كافة إصدارات إصدار .NET Framework وعرضها على جهاز كمبيوتر يعمل بنظام Windows 11. إليك كيفية القيام بذلك:
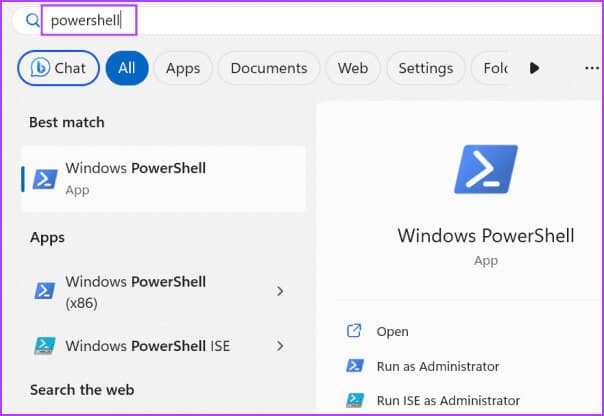
الخطوة 1: اضغط على مفتاح Windows لفتح قائمة ابدأ. اكتب powershell في مربع البحث واضغط على Enter لفتح PowerShell في تطبيق Terminal.
الخطوة 2: اكتب الأمر التالي واضغط على Enter:
Get-ChildItem 'HKLM:\SOFTWARE\Microsoft\NET Framework Setup\NDP' -Recurse | Get-ItemProperty -Name version -EA 0 | Where { $_.PSChildName -Match '^(?!S)\p{L}'} | Select PSChildName, version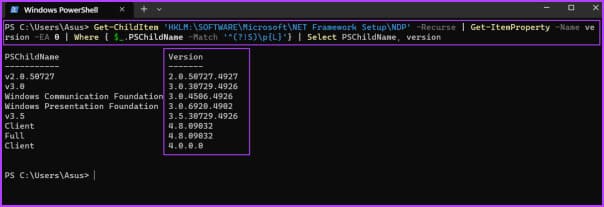
خطوة 3: سترى جميع إصدارات.NETFramework مثبتة على جهاز الكمبيوتر الخاص بك.
الخطوة 4: أغلق تطبيق Terminal.
5. استخدام أداة خارجية (ASOFT .NET VERSION DETECTOR)
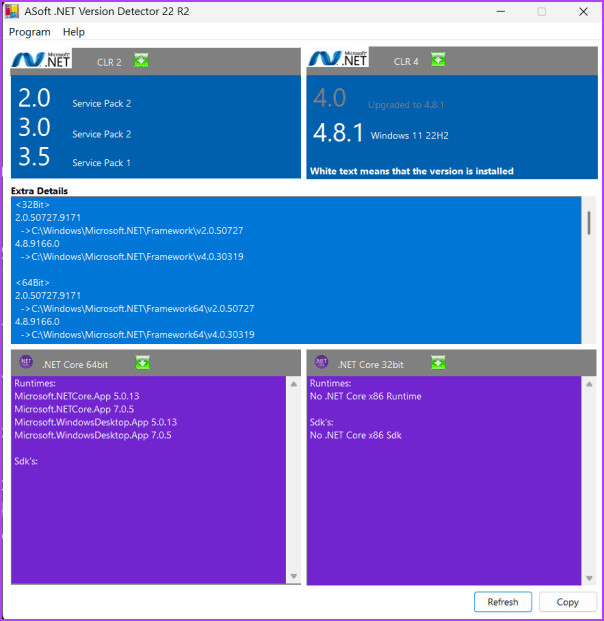
إذا وجدت أن أساليب موجه الأوامر أو مفتاح التسجيل مربكة للغاية، فيمكنك استخدام تطبيق تابع لجهة خارجية مثل ASoft .NET Version Detector. سيقوم باكتشاف وعرض جميع إصدارات .NET Framework على جهاز الكمبيوتر الخاص بك. إليك كيفية القيام بذلك:
الخطوة 1: تنزيل ASoft .NET Version Detector.
الخطوة 2: قم باستخراج ملف ZIP وتشغيل التطبيق على جهاز الكمبيوتر الخاص بك.
خطوة 3: سترى جميع إصدارات .NET Framework مثبتة على جهاز الكمبيوتر الخاص بك الذي يعمل بنظام Windows.
الأسئلة الشائعة
س1. ما هو إصدار .NET Framework الحالي؟
الجواب: أحدث إصدار من .NET Framework هو 4.8 وهو متوفر لنظامي التشغيل Windows 10 وWindows 11.
س2. كيف يمكنني تحديث إصدار .NET Framework الخاص بي؟
الجواب: تقوم Microsoft بشحن أحدث الإصدارات من إصدار .NET Framework مع تحديثات Windows. لذلك، تحقق من آخر تحديث متوفر لجهاز الكمبيوتر الذي يعمل بنظام Windows وقم بتنزيله. يمكنك أيضًا تنزيل أحدث إصدار يدويًا من موقع Microsoft الرسمي.
س3. كيفية تثبيت .NET Framework 2.0 و3.0 و3.5 في نظام التشغيل Windows 11؟
الجواب: افتح صفحة البرامج والميزات في لوحة التحكم. انقر فوق خيار “تشغيل ميزات Windows أو إيقاف تشغيلها”. انقر فوق خانة الاختيار .NET Framework 3.5 ثم انقر فوق الزر “موافق”. انتظر حتى يكتمل التثبيت ثم أعد تشغيل جهاز الكمبيوتر الخاص بك.
التحقق بسهولة من إصدار .NET FRAMEWORK
كانت هذه هي الطرق الخمس للتحقق من إصدار .NET Framework على جهاز الكمبيوتر الذي يعمل بنظام Windows 11. إذا كنت تفضل تطبيقًا يستند إلى واجهة المستخدم الرسومية، فيمكنك استخدام ASoft .NET Version Detector للعثور على إصدار .NET Framework، ونسخ النتائج وحفظها في ملف نصي.