Just as we talk to people to communicate, our computers talk to the things around them. Since they can't use words, each device is assigned a unique identifier to distinguish them on the network, called an IP address. But where can you find an IP address on Windows 11?

When looking up your Internet Protocol (IP) address on Windows 11, you'll encounter external and internal IP addresses. As the name suggests, the external, or WAN, IP address is the one used to communicate with and view the outside world.
On the other hand, the internal IP address, also known as the local IP address, is the address assigned to your local modem or router for internal communication. There are several ways to find both external and internal IP addresses in Windows 11. Let's explore each one.
How to find your computer's local IP address
Finding your computer's local IP address (also called its private IP address) can help if you're having problems sharing files or connecting to other devices on the same network. This is because your internal IP address helps you identify devices connected to the same network.
This address is visible only to you. So, let's take a look at all the ways you can find your local IP address in Windows 11.
1. Using the Settings menu
The easiest way to find your local IP address is to use the Settings menu. Simply open your Wi-Fi properties and locate your local IP or IPv4 address. Here's how.
Step 1: Right click on the icon Windows and click Settings.

Step 3: Click Wi-Fi access.


Step 4: Here, click on Wi-Fi features Your own.

Step 5: Scroll down and locate the address. IPv4 Your.

This is the local IP address of your computer.
2. How to find your computer's IP address using the Control Panel
You can also use the Network and Internet menu in the Control Panel to determine your local IP address. Follow the steps below to do so.
Step 1: Click Search And type Control PanelFrom the search results, open Control Panel.

Step 2: Here, click on “Network and the Internet”.

Step 3: Next, tap "Network and Sharing Center".

Step 4: Here, click on Wi-Fi access point Yours. This will open Wi-Fi status window.

Step 5: Click on the details.

Step 6: Verify The listed IPv4 address.

This is the local IP address of your Windows 11.
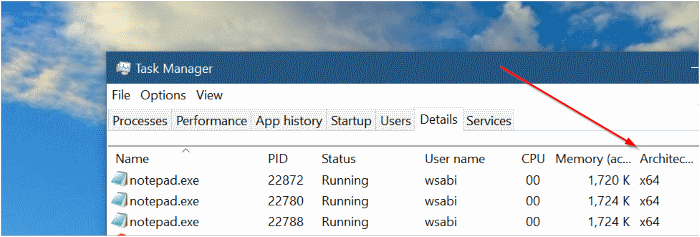
3. Use Task Manager
Aside from using Windows Task Manager to monitor performance, you can also use it to find your local IP address. Here's how.
Step 1: Right click on Windows icon and click Task Management.

Step 2: From options Menu , Click the performance.

Step 3: Locate IPv4 address.

4. Use of system information
System information contains comprehensive details about your device. So it's no surprise that it can also be used to find your local IP address. Follow the steps below to do so.
Step 1: Go to Search bar And type system information.Then open the application from research results.

Step 2: in Menu Options , Click the components.
Step 3: Once Expand menu options , Click Network > Select Adapter.
Step 4: Scroll down to Network adapter settings Check your IP address.
The first half of the address listed here is your IPv4 address, that is, your local IP address.

5. How to find an IP address using the command prompt
Using ipconfig, you can also use the Windows 11 command prompt to find your IP address. Here's how.
Note: You can also use the command below when using Windows PowerShell.
Step 1: Go to icon Windows , right-click, and click Terminal.

Step 2: Here, click the down arrow once it opens. Terminal app , and select Command Prompt.

Step 3: Type the command below and press Enter.
ipconfig
Step 4: Scroll down and locate IPv4 address.

This is your local IP address (internal IP).
How to find the external IP address on your device
Unlike your local IP address, your external IP address is the one visible to the outside world. This IP address is assigned to you by your internet provider and allows you to connect to the internet. This address can be used to help troubleshoot any external internet issues. Here's how to find it.
1. Use a web browser
The easiest way to find your external IP address on any device is by using your web browser's address bar. Here's how.
Step 1: Open a browser the web Your favourite.
For illustrative purposes, we will use Chrome.
Step 2: In the address bar, type ifconfig.me And press Enter.
Step 3: Under your contact section, check: IP address Your.

This is the external IP address of your device.
2. Use Command Prompt
In addition to using the Command Prompt to determine your local IP address, you can also use it to find your external IP address. To do so, run the command below.
Step 1: Right click on the icon Windows and select Terminal.

Step 2: Next, click the down arrow, and from the options, click Command Prompt.

Step 3: Here, type the command below and press Enter.
nslookup myip.opendns.com. resolve1.opendns.com
Step 4: Then, within “Unreliable answer” , check your IP address.

Now, you can use this external IP address to solve any network related issue.
Frequently Asked Questions About Finding Your IP Address in Windows 11
Q1. Is it possible to view the IP address on an Android device?
The answer: Yes, you can view the IP address on your Android device. Open Settings > Connections > Wi-Fi and click Wi-Fi settings Yours. Then scroll down and check your IP address.
Q2. Is it possible to hide my IP address in Windows 11?
The answer: To hide your IP address in Windows 11, you can: Connect to a VPN Or set up proxies while browsing the internet. This will hide your real IP address. You can also check out our other article if you're having trouble. Problem connecting Windows 11 to VPN.
Find your IP address
Finding your IP address on Windows 11 isn't actually a complicated process, and we hope this article was helpful. Check out our other article to learn more. Best ways to forget a network exists on Windows 11.