One of the frequently used applications forData entry tasks It is Microsoft Excel. Using Microsoft Excel, you can create a data model, document information in the model, and use other tools in Excel to analyze the information. However, the analysis performed in Microsoft Excel will only be as accurate as the data provided. One way to ensure the accuracy and relevance of data is to use data validation. Data validation in Microsoft Excel restricts the information that can be provided in a cell. It can also instruct the user on what to enter in a cell. Here's how to use data validation in Microsoft Excel.

How to Set Up a Data Validation Rule in Microsoft Excel
Using data validation, you can specify the type of information you want in a cell. For example, you can specify a cell to accept only a date, number, decimal point, etc. You can also create a drop-down list using data validation. Here's how:
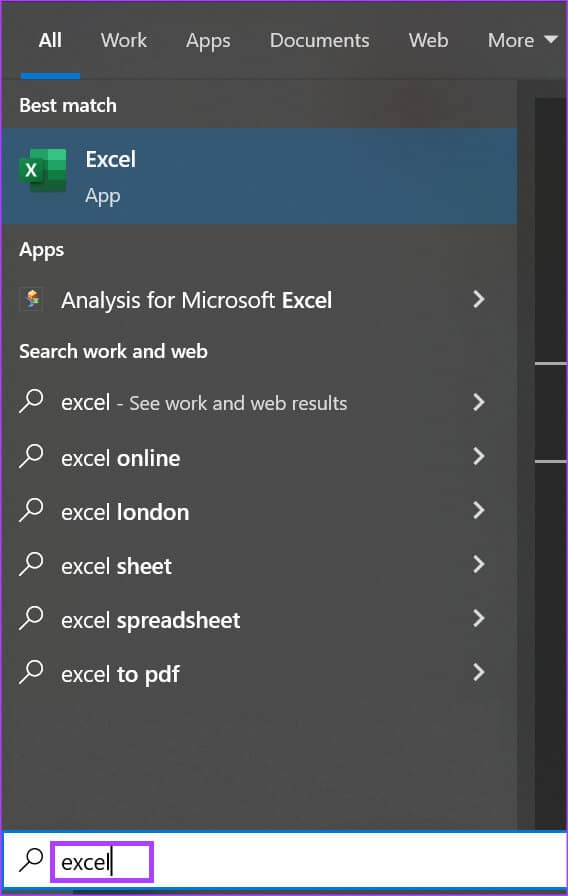
Step 1: Click the button "Start" located on the taskbar to open the menu "Start" And type excel To search for the application.
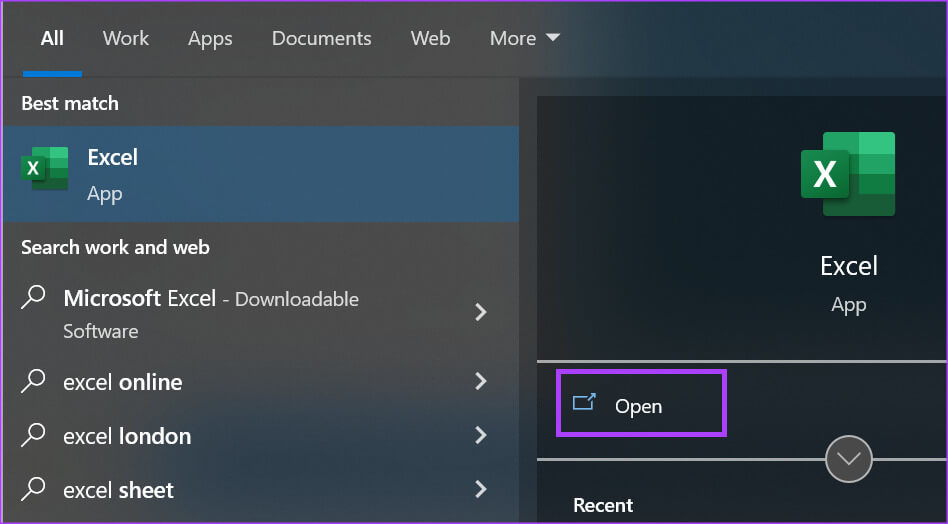
Step 2: From the results, click an app or workbook. Microsoft Excel to open it.
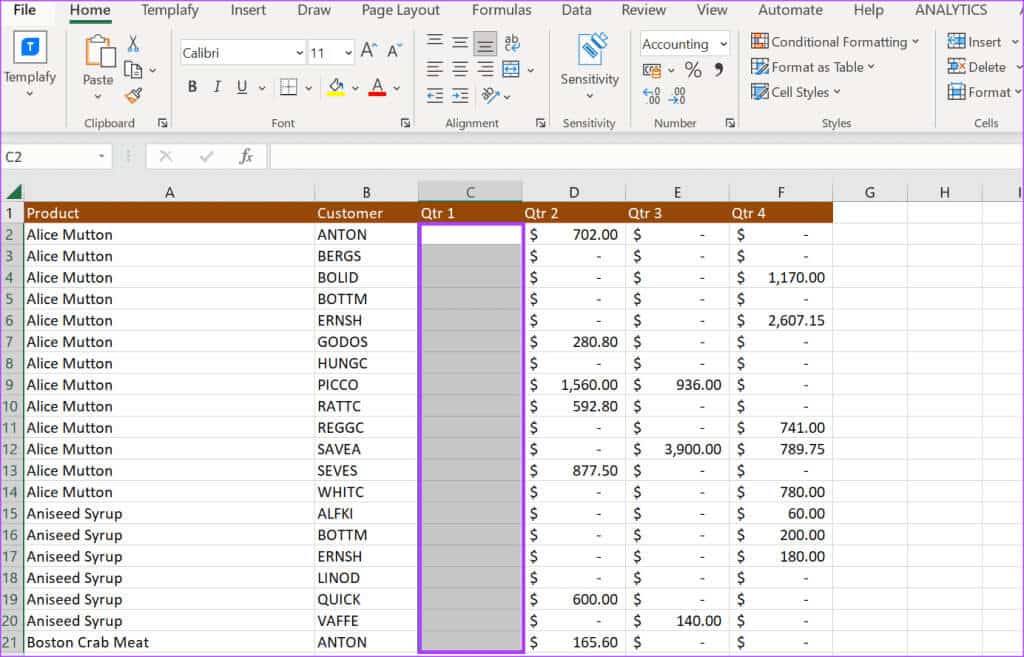
Step 3: in Excel workbook, Locate cell Or cells to which you wish to submit the data validation rule.
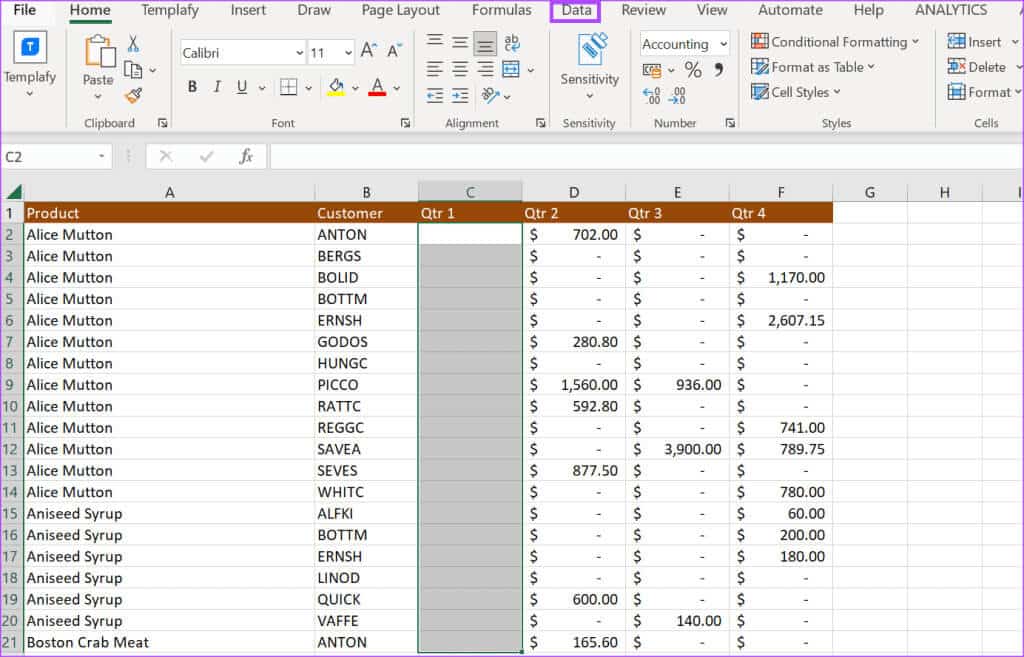
Step 4: On tape Excel, Click the tab data.
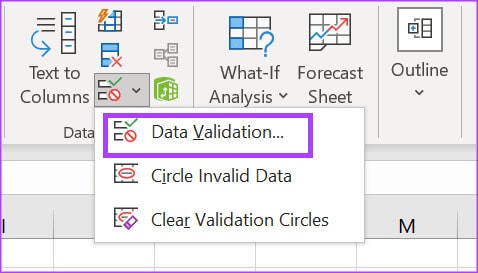
Step 7: In the Data Validation pop-up window, click the tab. Settings.
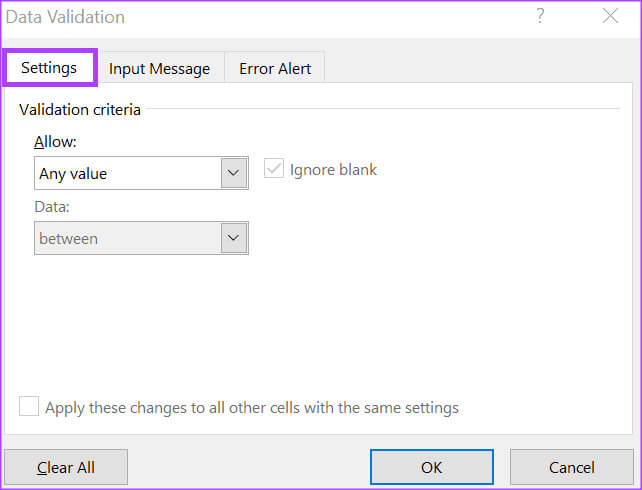
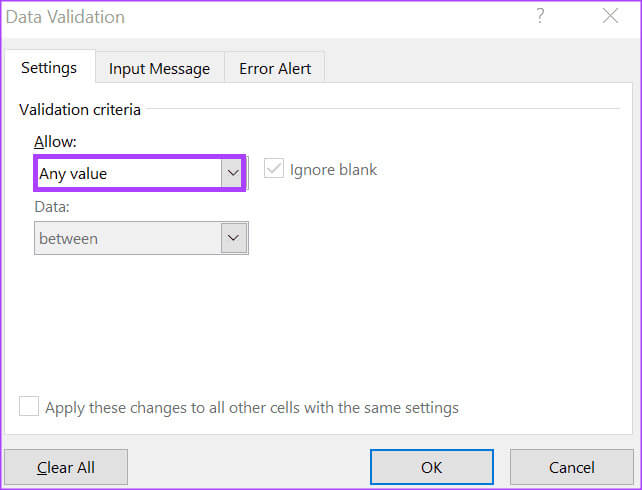
Step 8: tap on Drop-down menu Below the allow list.
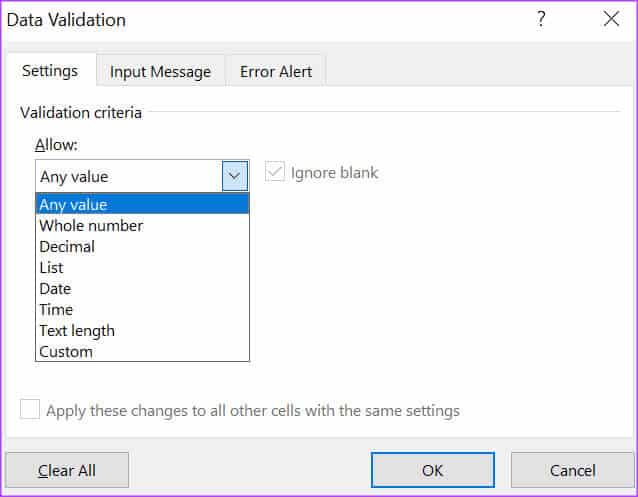
Step 9: Select any of the following from the drop-down list:
- Any value: Data validation criteria are not applied to cells.
- Integer: Allows an integer between the minimum and maximum values specified.
- decimal: Allows a decimal point to be placed between the minimum and maximum values.
- the list: Allows users to create a dropdown list for them to select values from.
- Date: Data within the specified minimum and maximum values is allowed.
- the time: Allows time within the specified minimum and maximum values.
- Text length: Text with a specified number of characters is allowed.
- Custom: Allows users to set a custom formula.
If you selected List and Custom, go to step 10 after entering the list source or formula in the provided grid. If you selected Integer, Decimal, Date, Time, and Text Length options, go to step 12.
Step 10: Click the drop-down menu below the data list and select any of the following conditions:
- between: The values allowed in the cell must be within the specified range.
- Not between: The values allowed in the cell must be outside the specified range,
- It equals: The value entered into the cell must be exactly as specified.
- Not equal to: The value entered in the cell must be different from the specified limit.
- Greater than: The value entered in the cell must be higher than the specified minimum.
- below: The value entered in the cell must be less than the specified maximum.
- greater than or equal to: The value entered in the cell must be greater than or equal to the specified minimum.
- Less than or equal to: The value entered in the cell must be less than or equal to the specified maximum.
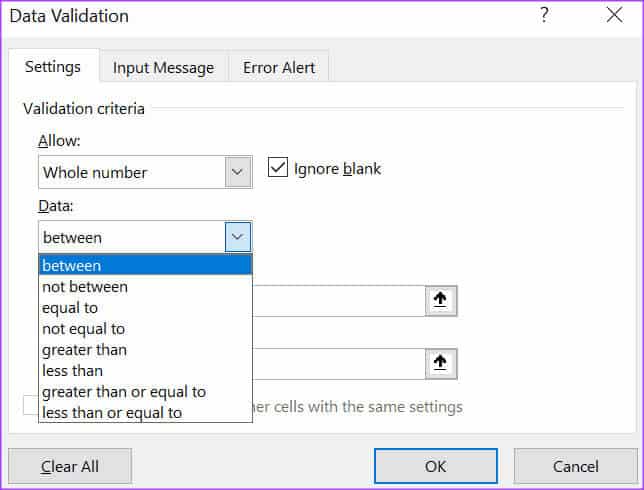
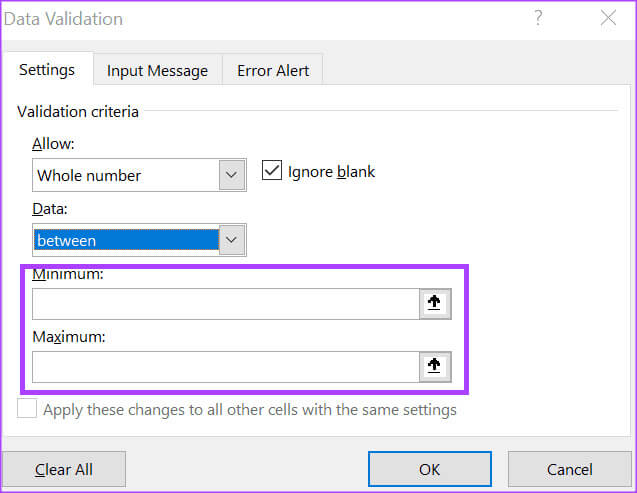
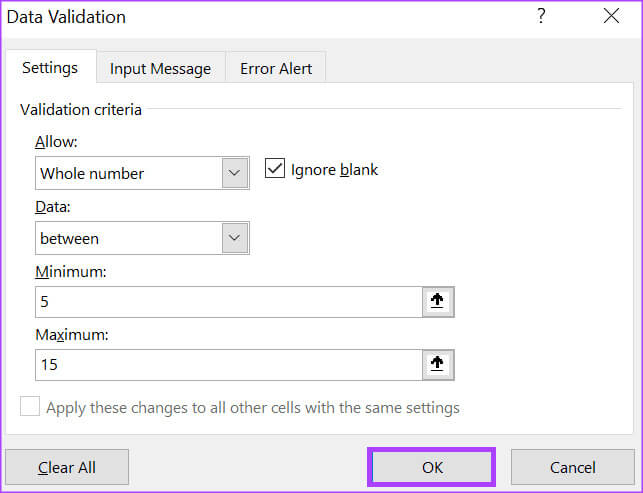
Step 11: In my field Minimum and/or Maximum, Enter Your data limits.
Step 12: Click OK to save the changes.
How to Add Input Messages to Validate Data in Microsoft Excel
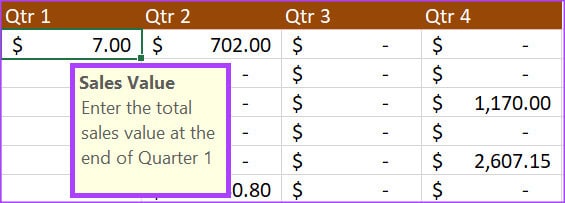
Now that you have data validation set up in your Excel program, the data submitted must meet your defined limits. However, you can set up a display message when others click on validation cells. This way, they know what type of data is being requested. Here's how to configure the input message.
Step 1: in a spreadsheet Excel, Locate cells where you want the input message to appear.


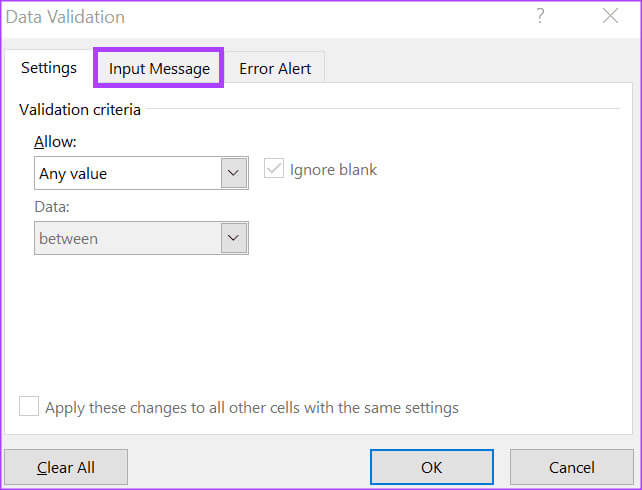
Step 5: In the Data Validation pop-up window, click the tab. Input message.
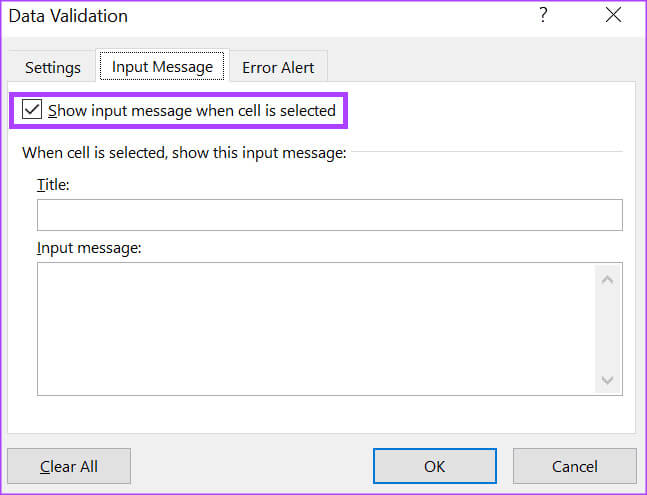
Step 6: Check the box next to Show input message when cell is selected.
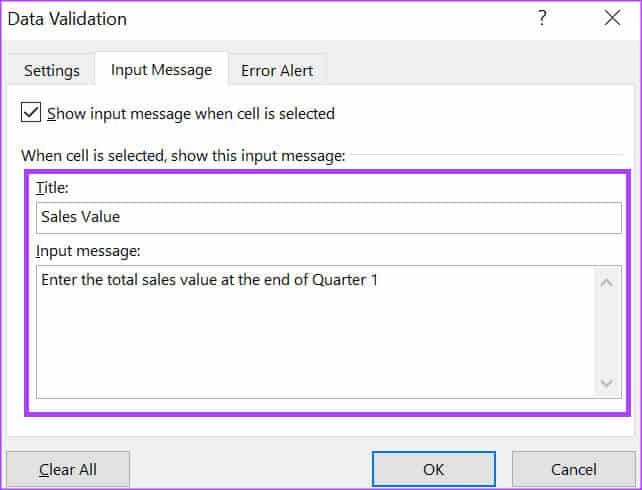
Step 7: In the Text and Input fields, enter your preferred text.
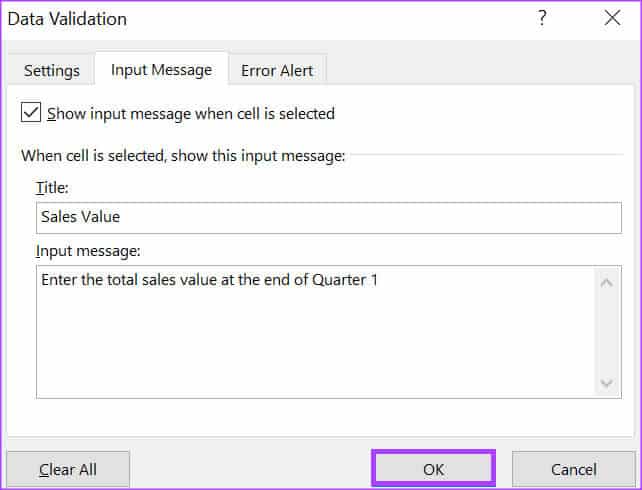
Step 8: Click "OK" to save the changes.
How to Add Error Messages to Validate Data in Microsoft Excel

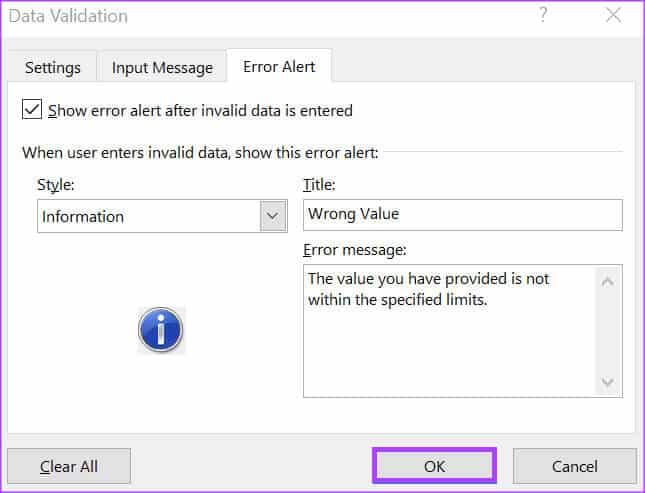
When users enter incorrect information in a data validation cell, you can configure the error message that appears. Here's how:
Step 1: In an Excel spreadsheet, select cells where you want the input message to appear.

Step 2: On the Excel ribbon, click the tab data.
Step 3: In the Data Tools group, click Drop-down menu Data validation.

Step 4: From the drop-down menu, click Data validation.

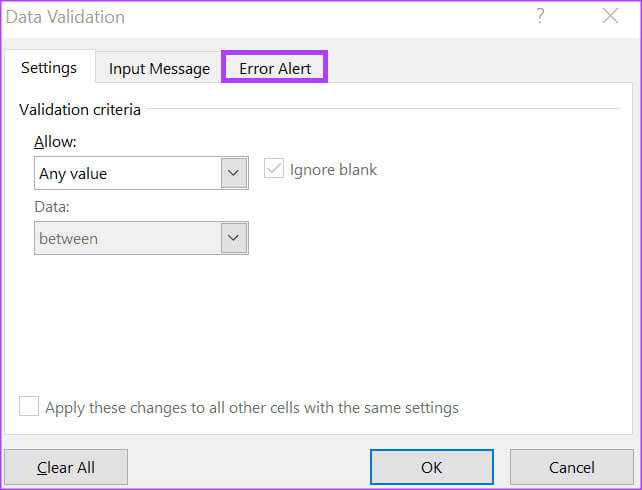
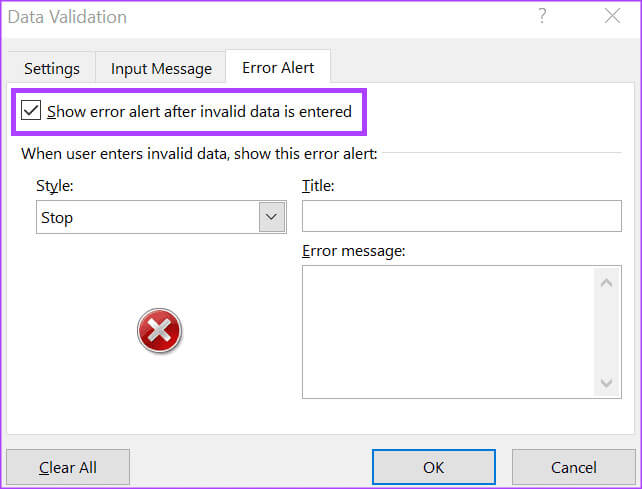
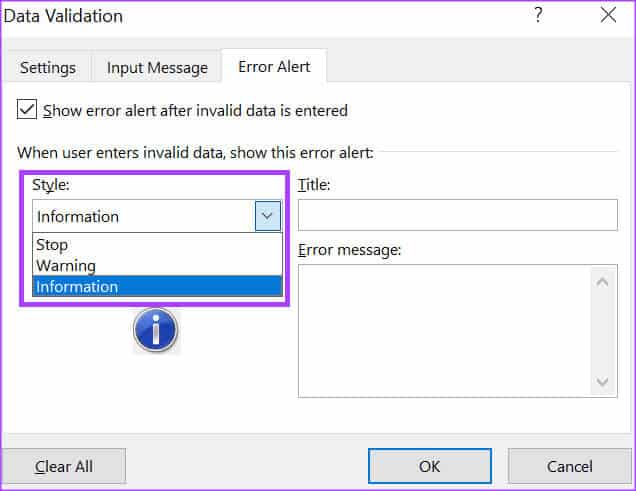
- Stop
- Warning
- Information
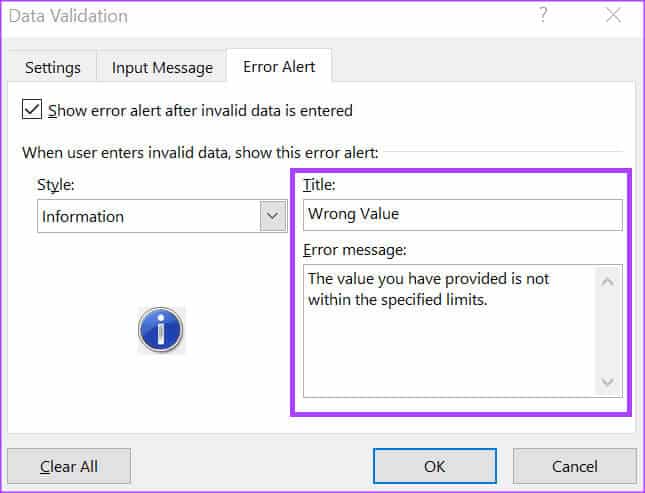
Step 9: Click "OK" to save the changes.
How to Remove Data Validation Rules in Microsoft Excel
Here's how to remove a data validation rule from a cell in Microsoft Excel:
Step 1: in Excel spreadsheet, Select the cells from which you want to remove data validation rules.


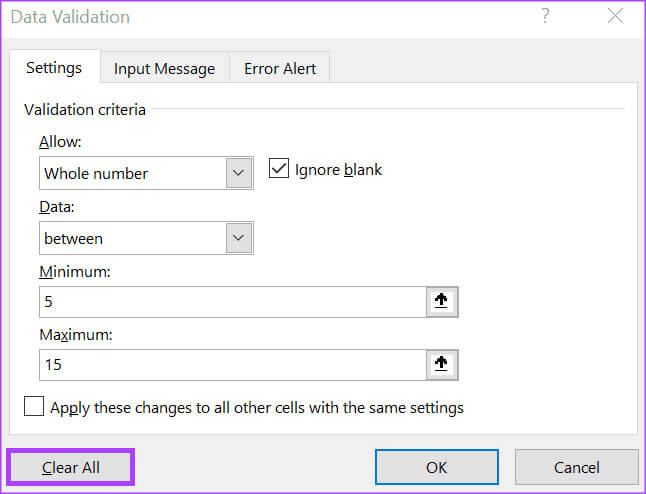
Step 5: In the Data Validation pop-up window, click the tab. Settings.

Step 6: Click the button “Clear all” located at the bottom of the pop-up window to clear all entries.
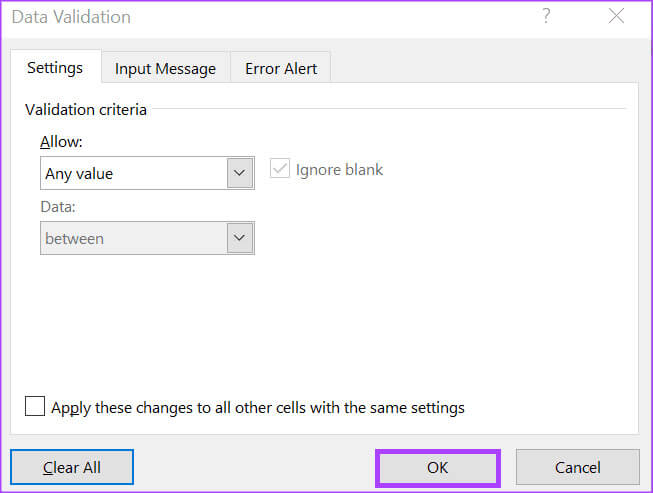
Step 7: Click "OK" to save the changes.
Using the version date in Microsoft Excel
Unlike Microsoft Word, Microsoft Excel's change tracking feature isn't as detailed. This makes it difficult to determine what changes have been made to Excel by reviewing the change history. However, you can use Version history for your Excel file To compare and identify differences between files.


