يحتوي Microsoft Excel على ميزة تسمح للمستخدمين بتعقب التغييرات التي تم إجراؤها على مصنف. ومع ذلك ، بمجرد قبول التغييرات في المصنف ، يتم فقدان المسار المتغير إلى الأبد. إذن ، ماذا يحدث عندما تحتاج إلى التراجع عن الإصدار السابق من المصنف أو الرجوع إليه؟ في هذه المقالة سنتعرف على كيفية استخدام مقارنة جداول بيانات Microsoft لتحليل إصدارات ملفات Excel.

أحد الخيارات التي يمكنك تجربتها هو مقارنة جداول بيانات Microsoft . التي تسهل على المستخدمين مقارنة نسختين من ملف Excel. تقوم الأداة بعد ذلك بتسليط الضوء على الاختلافات بين الملفين مما يسهل اكتشاف التغييرات.
متطلبات استخدام مقارنة جداول بيانات MICROSOFT
يمكنك الوصول إلى مقارنة جدول بيانات Microsoft في Microsoft 365 و Office Professional Plus 2013 و Office Professional Plus 2016 و Office Professional Plus 2019. يمكن الوصول إلى الأداة من مجموعة برامج Microsoft Office Tools.
لكي تعمل المقارنة ، من الضروري أن يكون لديك إصدارات مختلفة من جدول البيانات. تقوم الأداة بعد ذلك بتحليل الملفات وتمييز الاختلافات باستخدام معايير معينة. وإليك كيف يعمل:
كيفية تحليل نسختين من كتاب العمل باستخدام مقارنة جداول بيانات MICROSOFT
لتحليل إصدارات مختلفة من مصنف ، يجب عليك استيراد كلا المصنفين في أداة مقارنة جداول البيانات. إليك كيفية القيام بذلك:
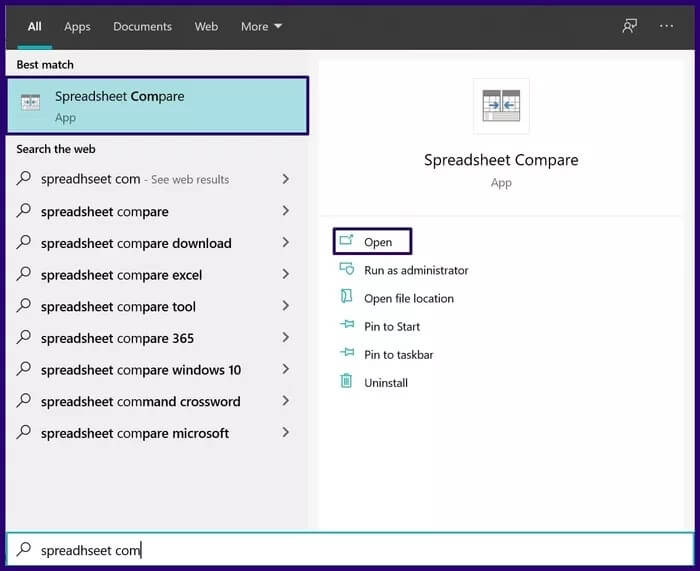
الخطوة 1: من قائمة ابدأ ، ابحث عن مقارنة جداول البيانات وقم بتشغيلها.
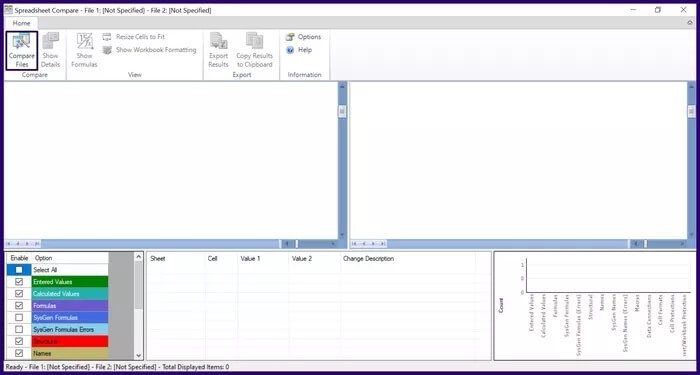
الخطوة 2: في علامة التبويب الصفحة الرئيسية ، في المجموعة مقارنة ، حدد مقارنة الملفات لبدء تشغيل مربع حوار.
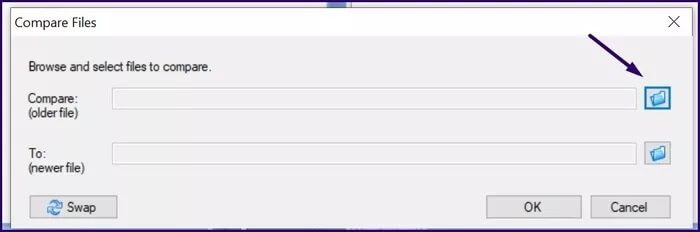
خطوة 3: ضمن مربع الحوار “مقارنة الملفات” ، حدد رمز الملف بجانب خيار المقارنة (ملف أقدم). حدد ملف Excel في File Explorer وانقر فوق فتح.

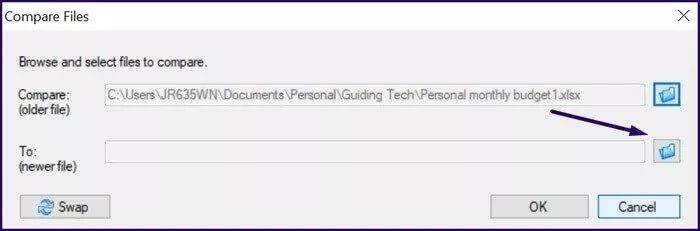
الخطوة 4: حدد رمز الملف بجانب الخيار إلى (ملف أحدث) في مربع الحوار مقارنة الملفات. حدد ملف Excel في File Explorer وانقر فوق فتح.
الخطوة 5: انقر فوق “موافق” لبدء عملية المقارنة.
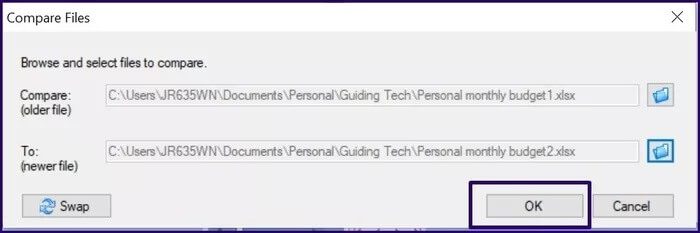
ملاحظة: إذا وجدت أن ترتيب مقارنة الملفات مختلط ، فيمكنك النقر فوق “تبديل” لتغيير موضع كل مصنف.
خطوة 6: يمكنك تبسيط ما تحلله أداة مقارنة جداول البيانات عن طريق تحديد مربعات الاختيار أو إلغاء تحديدها في الجزء السفلي الأيسر من الأداة. يتم شرح وظيفة بعض مربعات الاختيار أدناه:
- القيم المدخلة: يبرز التغيير في إدخال البيانات داخل المصنفات.
- القيم المحسوبة: يبرز الفرق في القيم المحسوبة داخل المصنفات.
- الصيغ: يسلط الضوء على تغيير في الصيغ داخل المصنفات.
- الأسماء: يبرز الاختلاف في أسماء الخلايا داخل المصنفات.
- وحدات الماكرو: يبرز الاختلاف في التعليمات البرمجية لـ VBA داخل المصنفات.
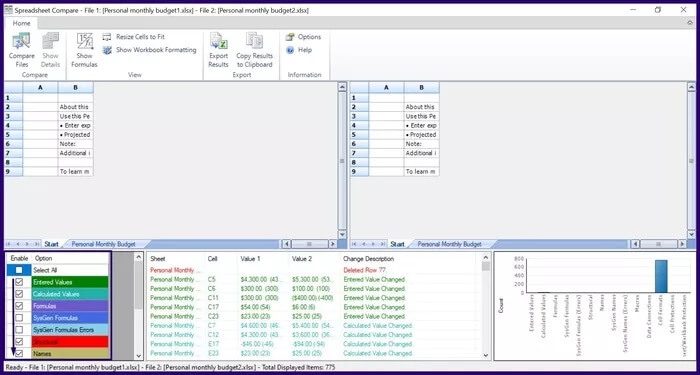
يرتب الرسم البياني في الزاوية اليمنى السفلية من الأداة الأنواع المختلفة للتغييرات في المصنف. يمكن استخدام هذا الرسم البياني لتحديد التغييرات الأكثر حدوثًا في المصنفات.
كيفية تصدير نتائج مقارنة من مقارنة جداول بيانات MICROSOFT
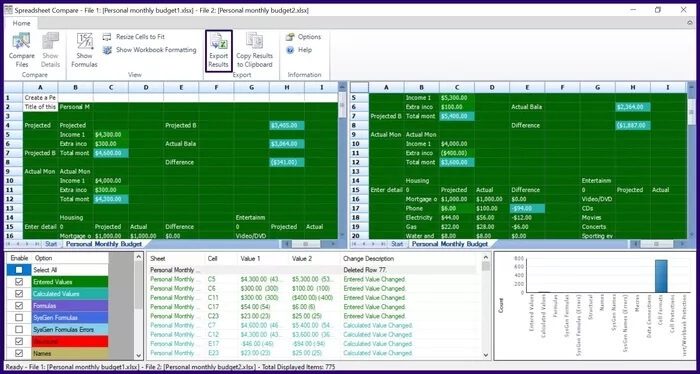
بعد النقر فوق “موافق” لمقارنة أوراق العمل لتحليل التغييرات التي تم إجراؤها على أوراق العمل الخاصة بك ، يتم تمييز التغييرات المحددة بنص مختلف وألوان تعبئة خلية مختلفة. يمكن استخدام نتائج المقارنة إما مباشرة على الأداة أو تصديرها إلى نظام أساسي آخر. إليك كيفية القيام بذلك:
تصدير نتائج المقارنة إلى Microsoft Excel
من خلال تصدير نتائج المقارنة إلى Microsoft Excel ، يمكنك إجراء مزيد من التحليل عليها. إليك كيفية تصديره:
الخطوة 1: على شريط أداة مقارنة جداول البيانات ، حدد نتائج التصدير ، الذي يقوم بتشغيل مستكشف الملفات.
الخطوة 2: حدد الموقع الذي تريد حفظ الملف فيه وأدخل اسمًا للملف.

يجب أن يكون تحليل المقارنة متاحًا الآن في موقعك المحفوظ.
نسخ نتائج المقارنة إلى الحافظة
إذا كنت ترغب في استخدام نتائج المقارنة على أي نظام أساسي آخر باستثناء Microsoft Excel ، فإن الخيار الأفضل هو النسخ إلى الحافظة. إليك كيفية القيام بذلك:
الخطوة 1: على شريط أداة مقارنة جداول البيانات ، حدد نسخ النتائج إلى الحافظة.

الخطوة 2: قم بتشغيل تطبيق للصق البيانات المنسوخة.
خطوة 3: حدد Ctrl + V على لوحة المفاتيح للصقها.
حدود مقارنة جداول البيانات
هكذا نكون قد تعرفنا على كيفية استخدام مقارنة جداول بيانات Microsoft لتحليل إصدارات ملفات Excel وكذا مقارنة إصداراتها. ومع ذلك ، تحتوي الأداة على قيود رئيسية تتمثل في عدم قبول أو رفض التغييرات التي تمت ملاحظتها في المصنفات المقارنة. لا تعرض الأداة سوى أوراق Excel جنبًا إلى جنب وتسلط الضوء على التغييرات لتسهيل التعرف عليها على المستخدمين.