These days, You can do a lot with your Mac.One unique way you can customize your device is to have it read documents or emails—along with other text—which is helpful if you have vision difficulties. Here's how to have your Mac read documents, emails, and web pages.

When you customize your Mac to read text on your screen, you can change the speed and volume. You can also enable your device to read content in other languages.
Keep reading to find out how you can make your Mac Reads documents and emails , along with the different ways you can modify this feature. These tips will work regardless of whether you have a MacBook Air, MacBook Pro, or iMac.
Read documents and email on your Mac
To have your Mac read documents and emails, you'll need to use the Spoken Content feature.
Getting started is straightforward; all you have to do is follow the steps below.
Step 1: Click the Apple logo in the top left.
![]()
Step 2: Select System Preferences.

Step 3: Go to Accessibility and click on your trackpad.
![]()
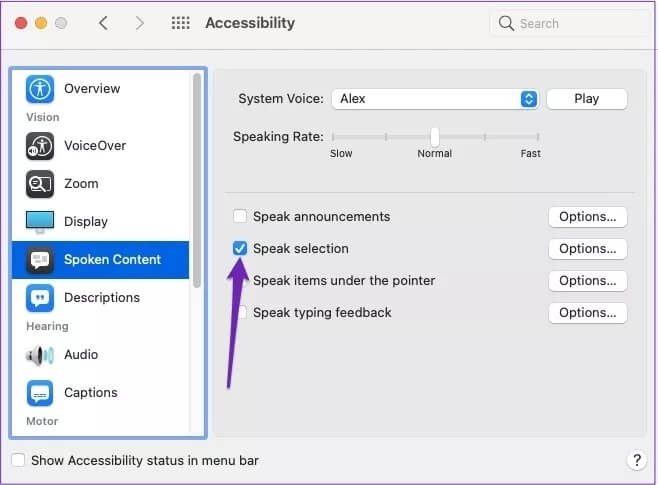
Step 4: Within the vision, look for spoken content.

In the Spoken Content tab, you'll see several options. If you want to have a specific paragraph of text read aloud, you can select Speak.

To make things easier, click the Options tab – next to Show Console – select Always.

To get your Mac to read documents and emails, you'll need to follow the steps below.
Step 1: Open the document or email you want your device to read.
Step 2: Highlight the text.
Step 3: Press the play button on the control bar.

sound customization
When you start using Spoken Content on your Mac, you'll have a default voice chat through everything. But if you find this person boring or difficult to understand, don't worry; you can customize this to make everything easier for you.
To customize the sound of spoken content on your Mac:
Step 1: Go to the Apple logo in the top left and select System Preferences.

Step 2: Select accessibility.
![]()
Step 3: Under Vision, select Spoken Content.

Step 5: Once you click on the box, a drop-down menu will appear. Select one of these sounds.

Step 6: Press Play to see if you like the new sound. If you don't, repeat the process.

Alternatively, you can find additional options by selecting "Customize" at the bottom of the screen. Once there, you can select and deselect any that don't capture your fancy.
Change speaking speed
In addition to changing the voices, you can change the speaking speed. One way to do this is to select the rabbit or turtle icons on the Spoken Content bar that you previously selected to enable.
Alternatively, you can adjust this from within your System Preferences.
Step 1: Go to the Apple logo in the top left and click on it.
![]()

Step 3: Open access.
![]()
Step 4: Find spoken content within the vision.

Step 5: Near the top of the screen, you'll see a bar labeled "Speaking Rate." Slide it left to slow down the voice and right to speed it up.

Change the language
Besides English, you can also change the Spoken Content settings on your Mac to enable different languages.
You can choose from several different languages, but not all of them will have the same number of voices to choose from as English. The process of doing so is not very difficult:
Step 1: Go to the Apple logo in the top left. When the drop-down menu appears, select System Preferences.
Step 2: Click on the accessibility icon.
![]()
Step 3: Under Vision, go to Spoken Content and expand the System Voice tab. Then tap Customize at the bottom.

Step 4: Select the voice of the person you want to add under your selected language, then select "OK."

Make your MAC talk
Customizing and having your Mac read documents, emails, and web pages can help if you see text you don't understand, and it can do the same if you're having difficulty reading the content. The tips we've outlined in this article will also work if you want your Mac to read articles you see online.
Try these tips and customize the settings as you see fit. You'll find it much easier to consume content from your Mac.