Imagine you are getting ready toYour virtual meeting Only to realize that the camera on your computer isn't working. Normally, Windows 11 can automatically detect and configure cameras. Sometimes, this can cause hiccups, whether you're using a laptop or a desktop. Here are the top 8 ways to fix a camera not working on Windows 11.

In most cases, the software is to blame rather than the hardware. But if the usual troubleshooting tricks like restarting the app or your PC don't help, this guide will walk you through a list of solutions to get your camera working again.
1. Run the camera troubleshooter.
Windows offers a set of troubleshooters to diagnose and fix any minor issues. Therefore, you can run Camera Troubleshooter on Windows 11Here's how.
Step 1: Click on Windows Key+S To open Windows Search , And type Troubleshoot settings , And press Enter.

Step 2: Go to Troubleshooters Other.


2. Check the connection
If you're using an external webcam, make sure it's connected properly. You can also try switching to a different USB port (if available) to ensure the issue isn't related to a faulty USB port.
If your PC or external webcam has a physical on/off switch for the camera, be sure to check that as well.


3. Check permissions
Next, you can try checking the app's permissions on Windows. Make sure the app you're trying to use is allowed to use the camera on your computer. Here's how.
Step 1: press the . key Windows + I To run the application Settings Go to the tab Privacy and security On your left.
Step 2: Scroll down to the . section App permissions and go to camera

Step 3: Make sure you've allowed Windows to access your camera. You can also check whether the application you're trying to use has access.

4. Disable antivirus
Some antivirus programs have a privacy setting that prevents applications on your computer from accessing your camera. You can try disabling your antivirus for a moment to see if that resolves your issue. If it does, you need to investigate your antivirus settings further and allow camera access from there.
5. Re-enable the camera
Many users have also reported resolving the camera error on Windows simply by disabling and re-enabling the camera driver. You can also try it. Here's how.
Step 1: Click icon Search of Taskbar , And type device Manager , And press Enter.

Step 2: Expand Cameras, right-click on your webcam and select the option Disabled the device.


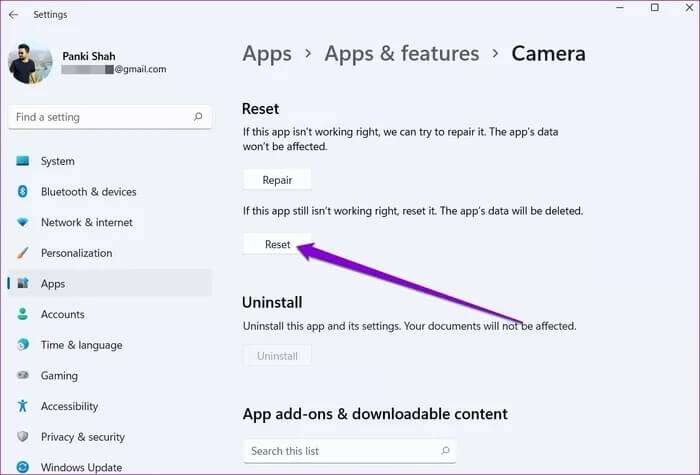
6. Reset the camera app
If you still can't access the camera, there may be a Camera app problem Same. So, you can try to reset it by following the steps below.
Step 1: press the . key Windows + I To run the application Settings. Use the right side to navigate to Applications section And click Apps and features.

Step 2: Locate the Camera app and tap the three-dot menu next to it to open it. Advanced Options.

Step 3: Scroll down to the . section Re settings and click the . button Reset.

7. Update or reinstall camera drivers
Since Windows uses drivers on your computer to detect and work with your camera, the problem can also occur if these drivers are outdated or incompatible. To resolve this, you can try: Driver Update To see if this helps you.
Step 1: Click icon Search of Taskbar , And type device Manager , And press Enter.
Step 2: Expand Cameras, right click on your webcam and select the option Update the driver.

If the problem persists, the cause may be: Driver corruptionYou can try uninstalling the drivers by following the steps above and restarting your computer to allow Windows to install them again.
8. Update Windows
Windows updates often include driver updates, bug fixes, and improvements. So, if nothing works, you can try installing any pending updates on your computer to fix the problem.
Smile, you're on camera!
There's nothing more frustrating than a broken camera on a Windows computer. Camera issues on Windows are nothing new. We hope the solutions above helped fix the camera not working on Windows 11 and put an end to the problem. Camera errors on Windows Forever. Let us know if we missed anything in the comments below.


