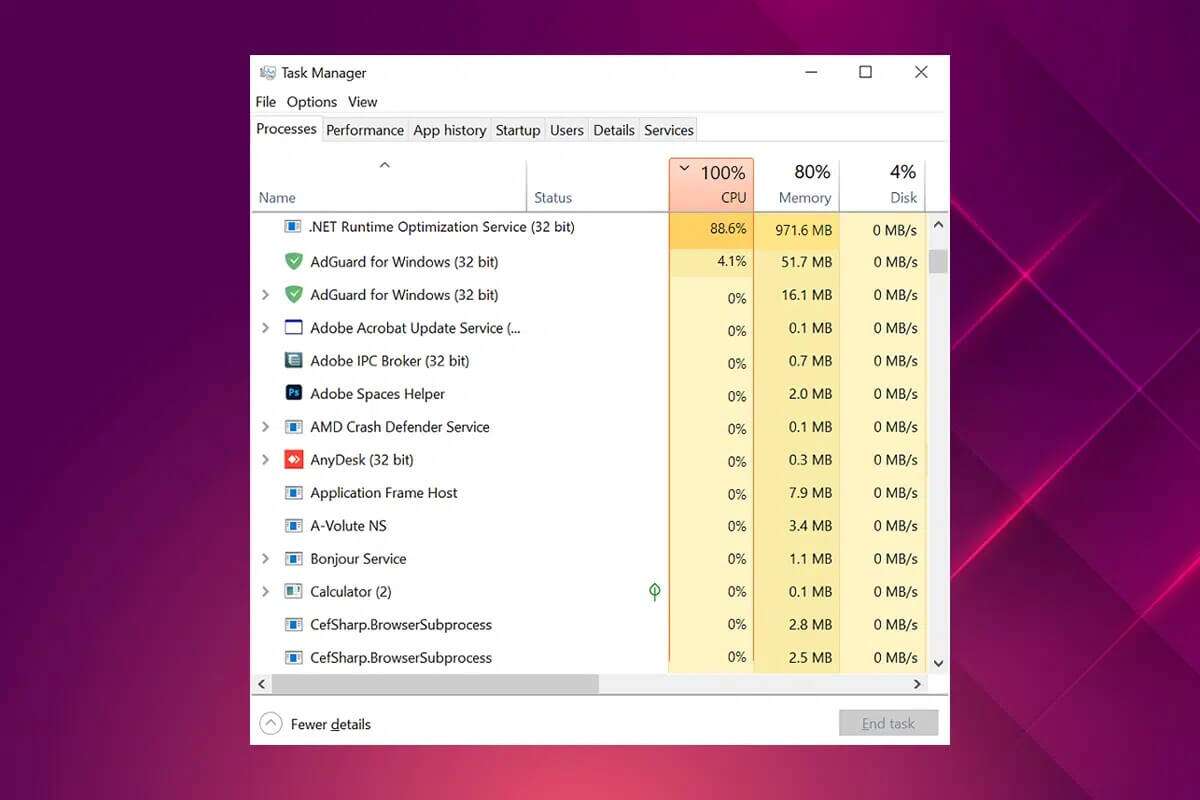
You may often encounter an application or system process running in the background that is consuming an abnormal amount of system resources. A process's high system resource usage can significantly slow down other system processes and can turn your computer into a sluggish mess. It may even cause it to crash completely. We've already covered a number of high CPU usage issues and processes on our website. In addition, today we'll discuss how to fix .NET Runtime Optimization Service's high CPU usage and how to bring it back to an acceptable level.
How to Fix .NET Runtime Optimization Service High CPU Usage on Windows 10
As you know, this .NET framework is used by Microsoft and other parties to develop and run Windows applications, among other things. The executable file for this service, called mscorsvw.exe, is an official Windows component and performs the task of optimizing the .NET framework before recompiling and compiling .NET libraries. This helps applications and programs run faster. The optimization service is designed to run in the background when your computer is idle for a brief period of 5-10 minutes.
Why does the .NET Runtime Optimization Service cause high CPU usage?
Sometimes the service may take longer than usual to recompile .NET libraries. This results in:
- Your computer service is running slower than usual.
- Malfunctions in your computer.
- The service is corrupt.
- Use of system resources by malware.
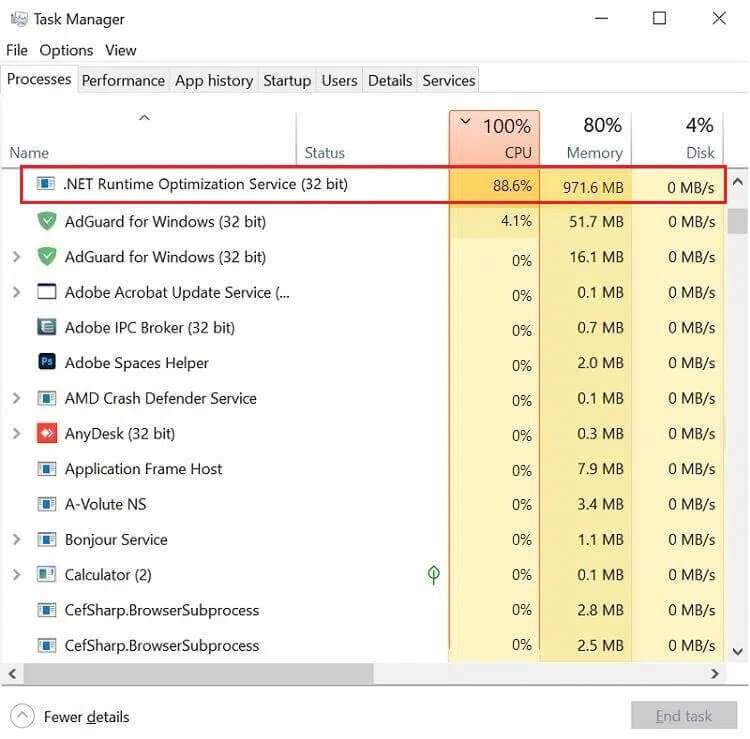
Given the impact this service has on individual application performance, it is not recommended to terminate it immediately at the first sign of damage. If the service seems to be taking a long time to terminate, you have the option of speeding things up by executing a few commands or a script. Other fixes include scanning your computer for malware and viruses, restarting the service, and performing a clean boot, as described in the next section.
Method 1: Perform a clean boot of your computer
It's very likely that the service is having difficulty recompiling libraries for a particular third-party application, and is therefore consuming more CPU power to complete the task. You can perform a clean boot, where only essential drivers and startup programs are loaded, to check if it is indeed a third-party program that is causing the .NET Runtime Optimization Service's high CPU usage issue. Here are the steps to perform a clean boot on Windows 10:
1. Press the keys Windows + R At the same time to start running Dialog box.
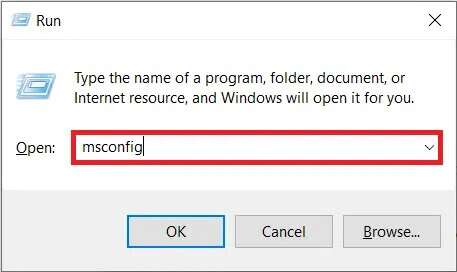
2. Write msconfig and press the key Enter To open System setup.
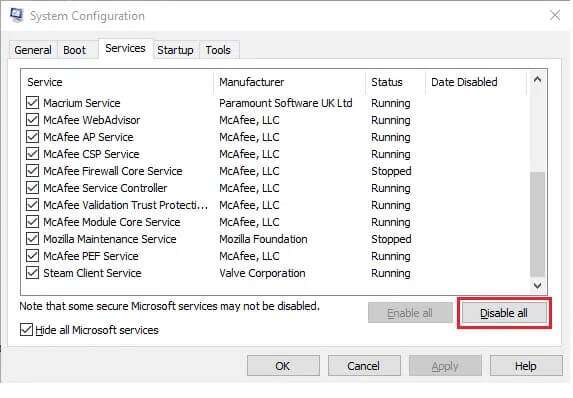
3. Go to the tab Services and check the box “Hide all Microsoft services”.
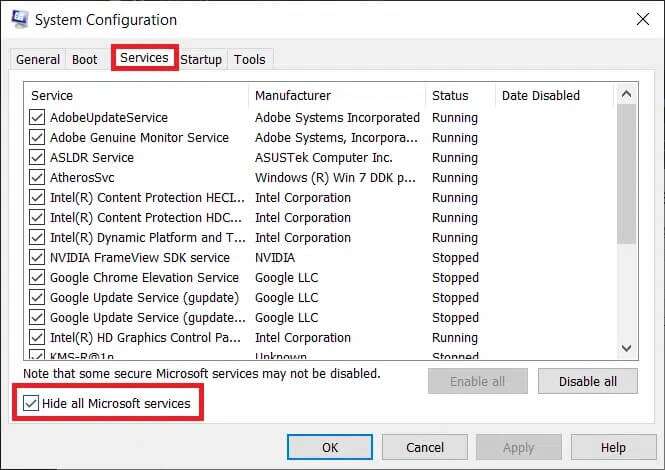
4. Then click the button Disable all , shown in the featured image. It will stop all third-party services and unnecessary services running in the background.
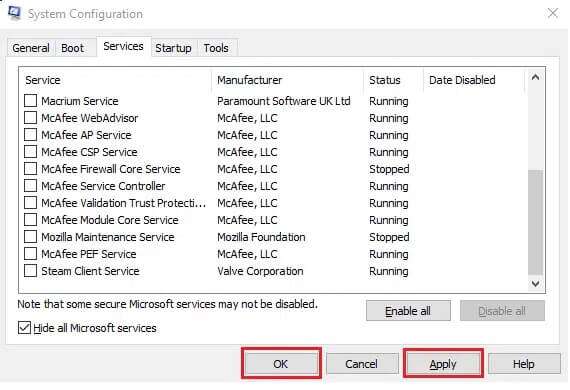
5. Save the changes by clicking the button. “Apply” > “OK”.
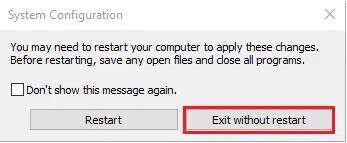
6. A pop-up window will appear asking if you want to restart or exit without restarting, as shown. Choose the option. Exit without reboot.
7. Again, launch the System Configuration window by repeating steps 1-2. Switch to the Startup tab.
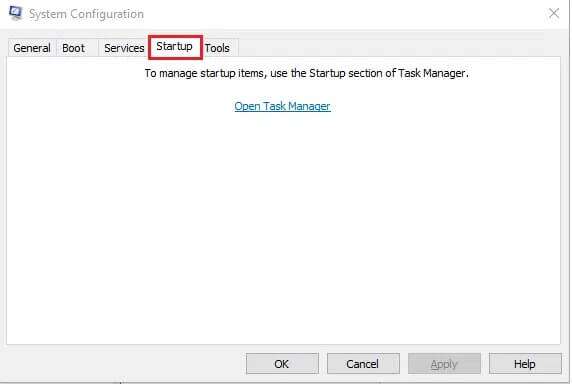
8. Click on the hyperlink. Open Task Manager , as shown.
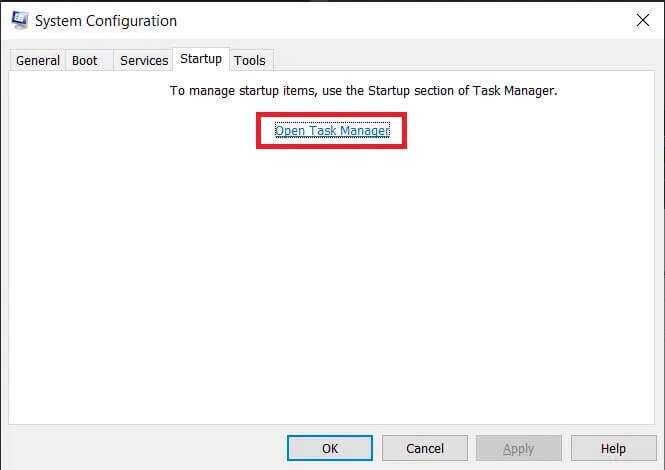
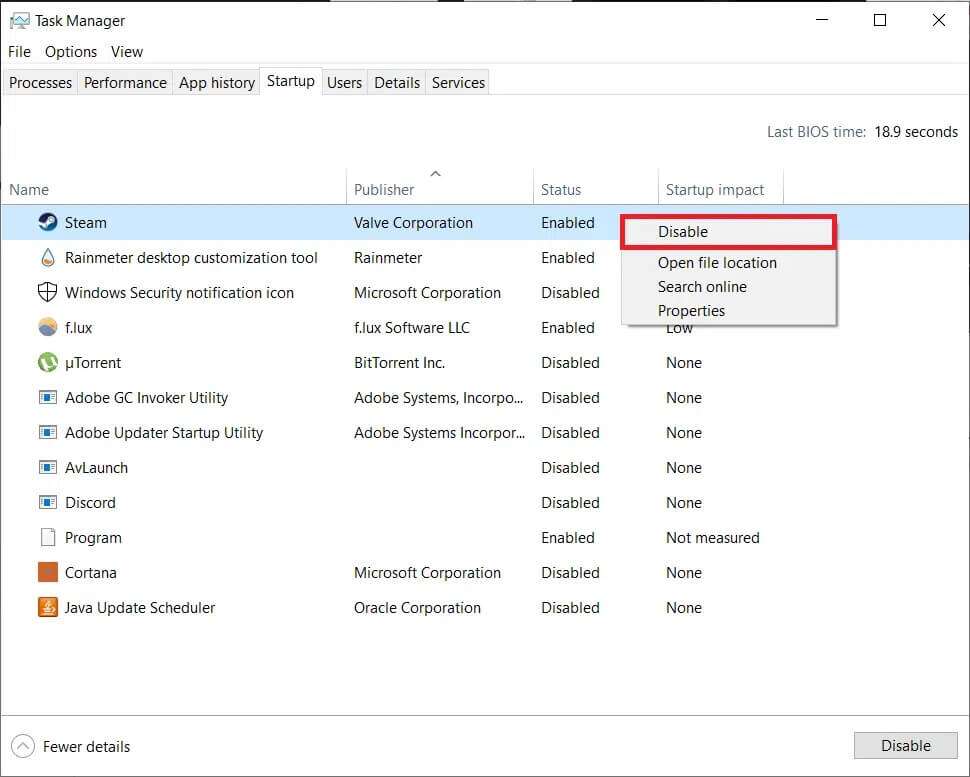
Note: Check the Startup Impact column for all listed applications/processes and disable those that have high impact on startup.
9. Right click on The application (Such as steam) and choose an option Disable As shown below.
10. Finally, close all active application windows and restart your computer. It will start in a clean boot state.
11. Now, check the .NET Runtime service's CPU usage in Task Manager. If it's normal, enable third-party programs one by one to identify the culprit and uninstall them to avoid such issues in the future.
Method 2: Enhance .NET Framework processes
Since killing this service isn't an option, you can instead give it a slight boost by allowing it to use additional CPU cores. By default, the service uses only one core.
- You can either execute some commands yourself
- Or simply download the official Microsoft script from GitHub And turn it on.
Option 1: Via Command Prompt
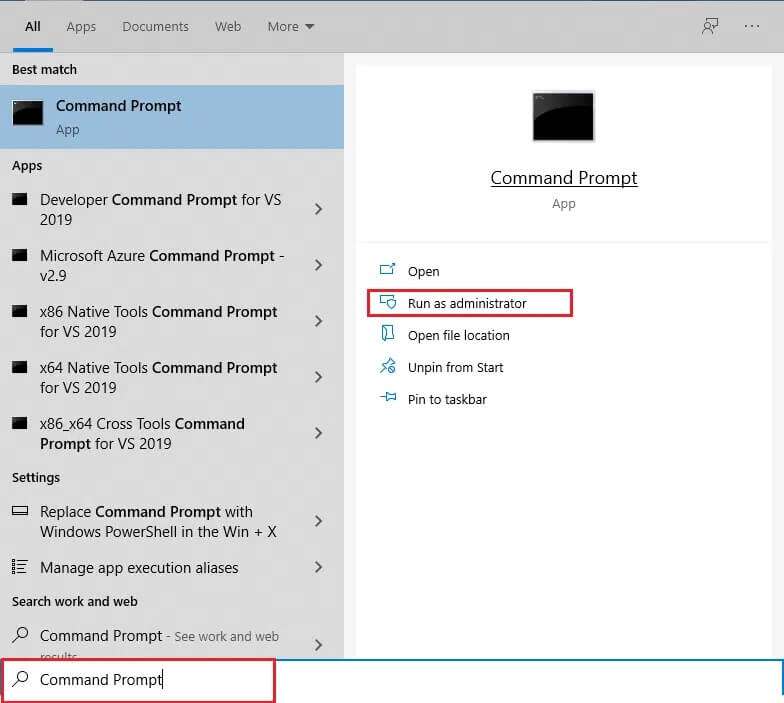
1. Click Start, and type Command Prompt And click Run as administrator , as shown.
2. Type the specified command and press the key. Enter to implement it.
Note: The commands to be executed vary depending on the system architecture.
- For 32-bit systems: cd c:\Windows\Microsoft.NET\Framework\v4.0.30319
- For 64-bit systems: cd c:\Windows\Microsoft.NET\Framework64\v4.0.30319

3. Next, perform executive items. ngen.exe , As shown below.

Pro Tip: Determine whether your Windows computer is 32-bit or 64-bit.
If you are not sure about your system architecture, simply follow the given steps:
1. Press the keys Windows + R Together to open Run dialog box.
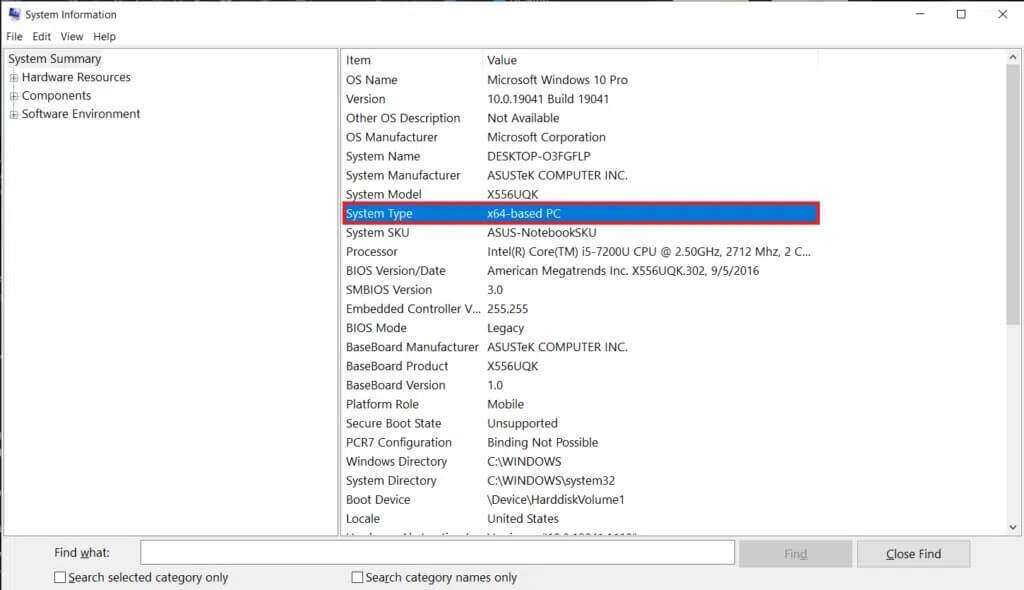
2. Write msinfo32 And click "OK" to open a window System information.
3. Here, check the System Type label to verify it.
Option 2: Via GitHub Script
1. Go to the page GitHub To get the script.
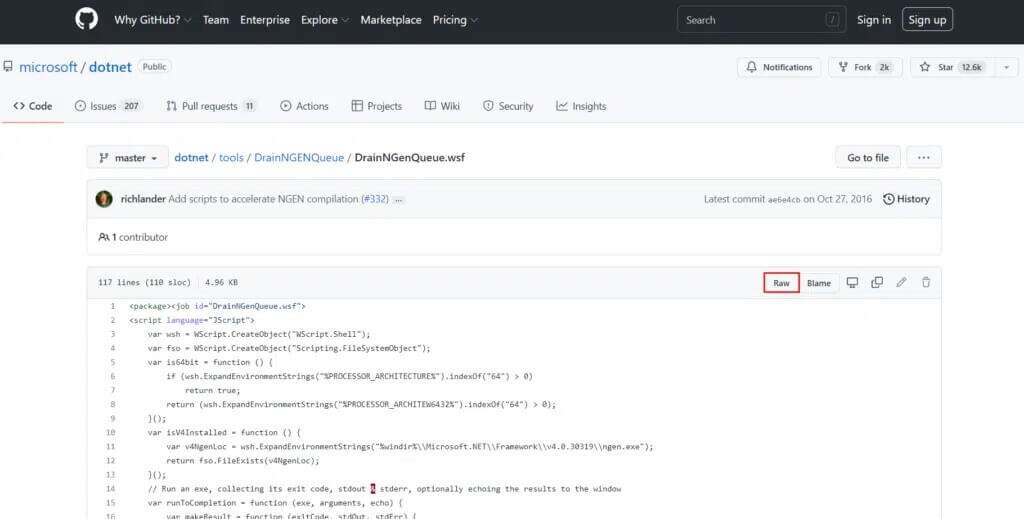
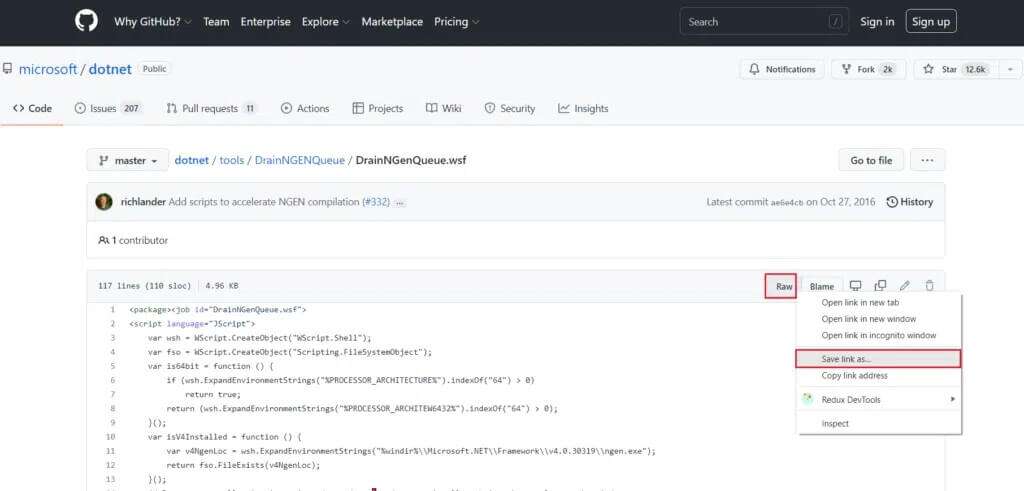
2. Right-click on the button. Raw and choose an option Save link as… As shown.
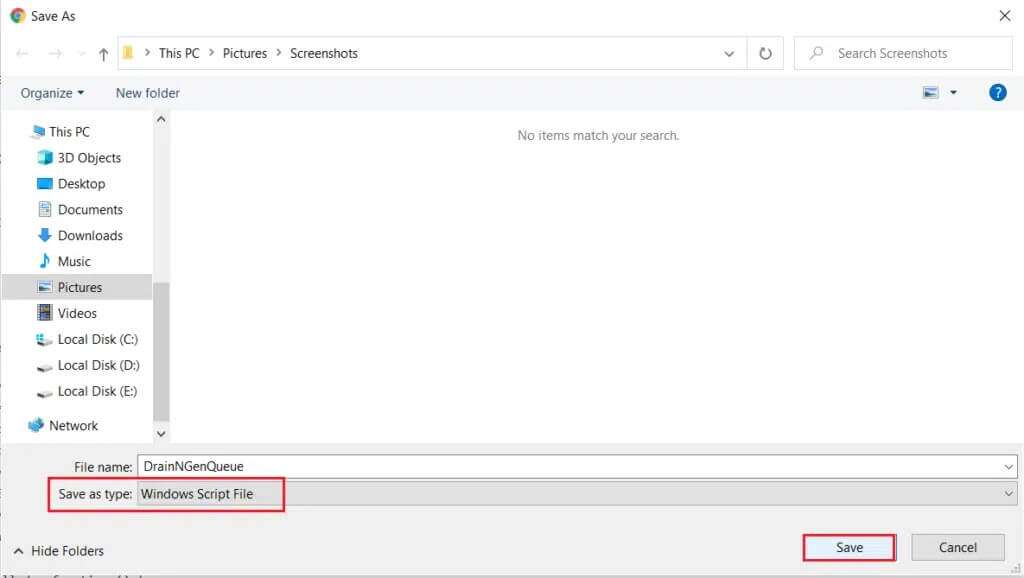
3. Change Save as type To Windows Script File And click Save.
4. Once downloaded, open the file using Windows Script Host.
Method 3: Restart the .NET Runtime Optimization Service
Services often crash and then exhibit strange behavior, such as using unnecessary amounts of system resources or remaining active for a long period of time. The faulty instance can be caused by bugs in the current version of the Windows operating system. Here's how to resolve high CPU usage for the .NET Runtime Optimization Service by restarting the service:
Note: This solution only works with systems that have a dedicated graphics card supported by NVIDIA.
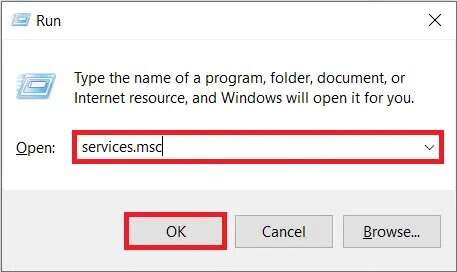
1. Press the keys Windows + R At the same time to start running Dialog box.
2. Write services.msc And click "OK" To open an application Services.
3. Scroll through the list and locate the service. NVIDIA Telemetry Container.
4. Right click on it and choose The properties From the context menu, as shown.
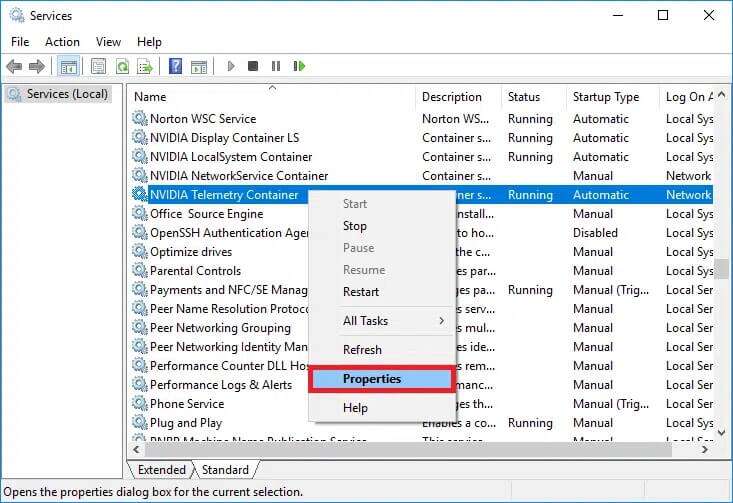
5. Click the button "turning off" First, wait until the service status reads Stopped, and then click the Start button to restart it again.
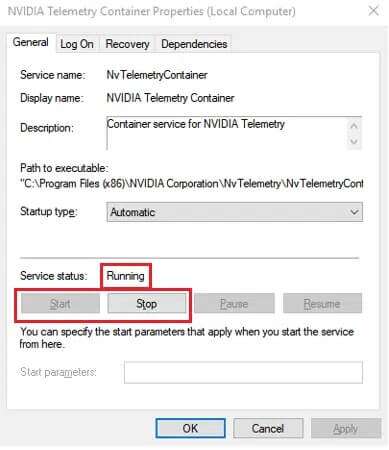
6. Make sure that Startup Type is set to Automatic.
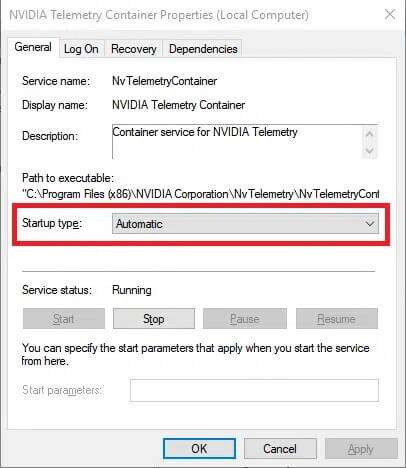
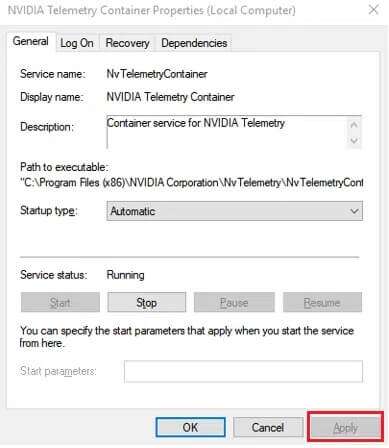
7. Once the service is restarted, click Apply > OK To save changes and close the Properties window.
8. Press the keys Ctrl + Shift + Esc Together to open Task Manager Check if the service is still using high CPU resources.
Method 4: Detect and remove malware
If the service's abnormal CPU usage persists, run a virus/malware scan to rule out the possibility of infection. Malicious applications can infiltrate your computer if you're not careful. These programs will disguise themselves as legitimate Windows components, causing a variety of issues such as high CPU usage. You can use the native Windows Defender to scan your computer or use any other specialized security software available. Follow these steps to fix the .NET Runtime Optimization Service's high CPU usage issue by removing malware from your computer:
1. Press the keys Windows + I At the same time to open Settings.
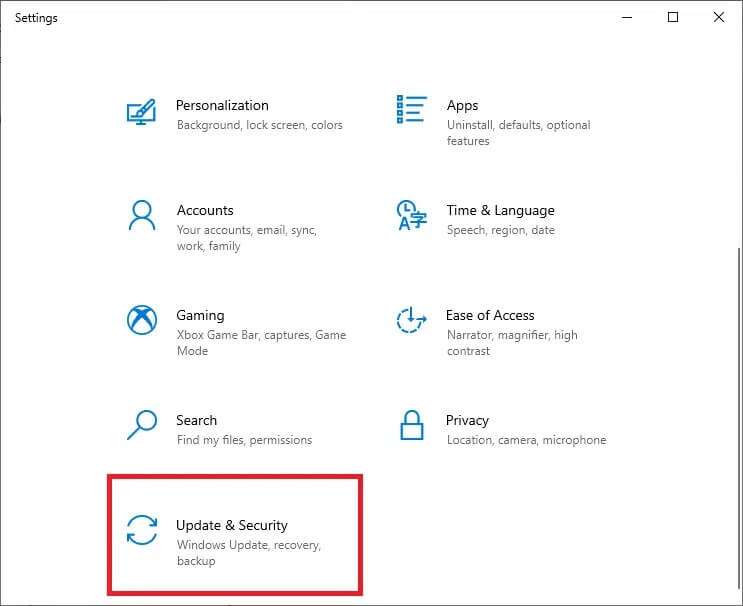
2. Here, click Update and security , as shown.
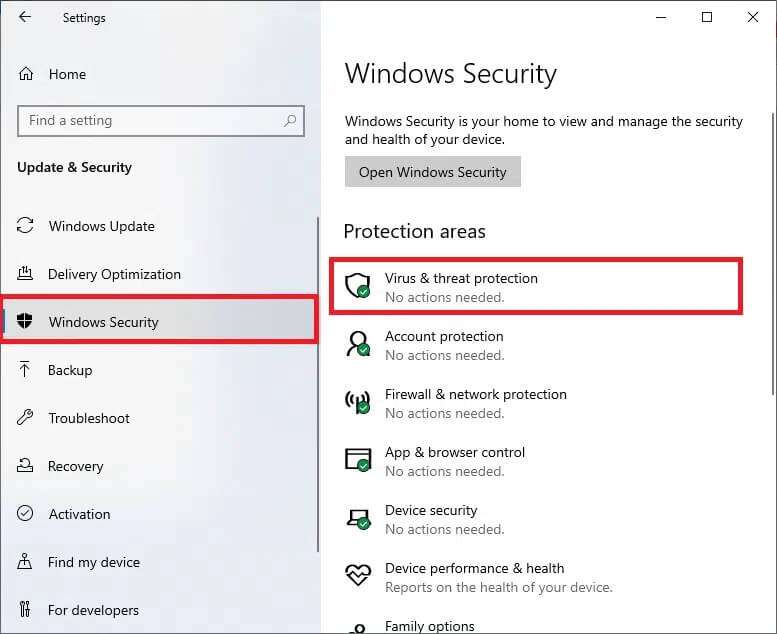
3. Go to menu Windows Security and click Virus & Threat Protection
4. Click Quick Check To scan your computer to see if there is any malware.
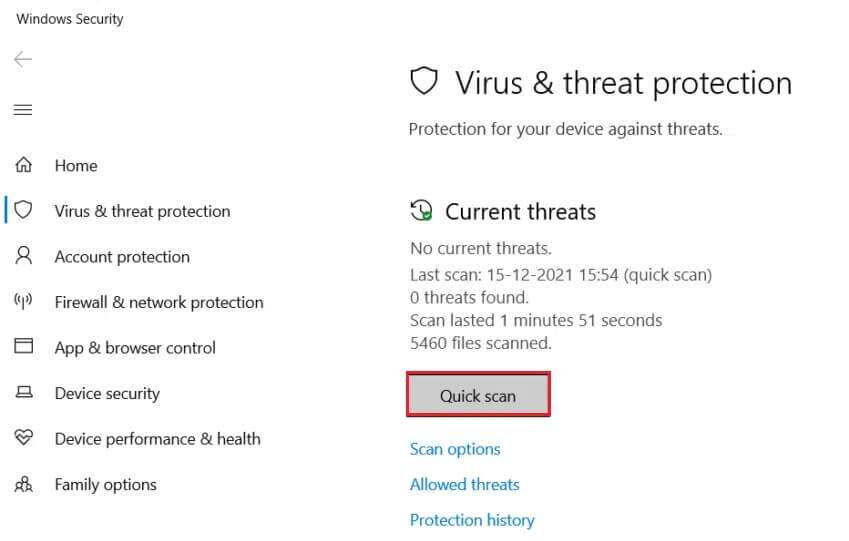
5. If any malware is found, click Start the process To remove or block it and restart your computer.

Hopefully, one of the solutions above has fixed the .NET Runtime Optimization Service's high CPU usage on your computer. If the same issue comes back later, check for a Windows update or reinstall the latest version. .NET frameworkAlso, if you have any queries/suggestions regarding this article, feel free to leave them in the comments section.


