Being one of the most popular apps among professionals for communication, it has become Microsoft Teams The new must-have app for all those working from home due to the COVID-19 pandemic. It makes it easier. Microsoft Teams There are many features that make it easy to use and time-saving. One such feature is that when the app is running in the background, it automatically changes to Away. However, a small window will appear in the lower-right corner when you receive a call or message. You can change your Teams status settings to avoid changing to Away. In this guide, we'll walk you through how to keep your status available in Microsoft Teams.

How to keep status always available in Microsoft Teams on Windows 10
The Microsoft Teams Automatically change status to Away when:
- The system is dormant.
- The system goes to sleep.
- Teams runs in the background for longer.
This automatic change can be useful if you don't want to keep changing your status all the time. However, it can also be problematic if your status changes to Away even when you're still working. Therefore, follow any of the methods below to change your Microsoft Teams inactivity timeout.
Method 1: Set status and reset duration
You can simply set a status message to be displayed to your team members to avoid being seen outside while Microsoft Teams is minimized and running in the background. To do this:
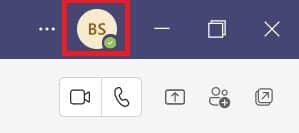
1. Click profile picture in the upper right corner of the screen.
2. Click current situation , as shown.
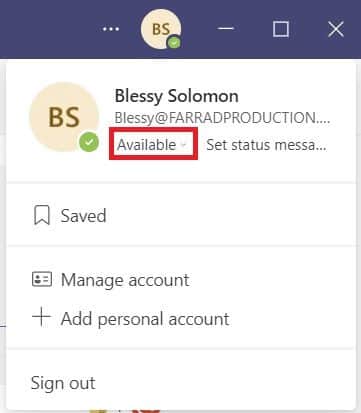
3. Click Duration.
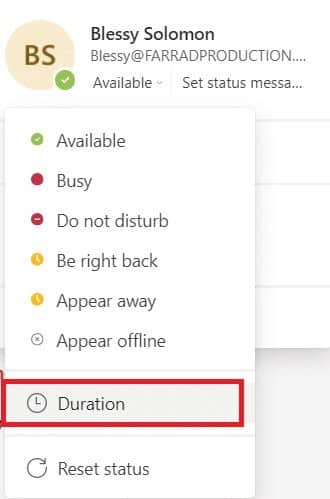
4. Specify the reset status and time in the Reset After column as needed.
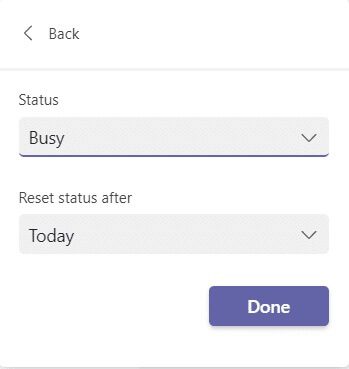
5. Finally, tap It was completed.
Method 2: Prevent your computer from going into sleep mode
The Away feature occurs automatically when your system goes into sleep mode. Follow the instructions provided to prevent your Windows 10 computer from going into sleep mode:
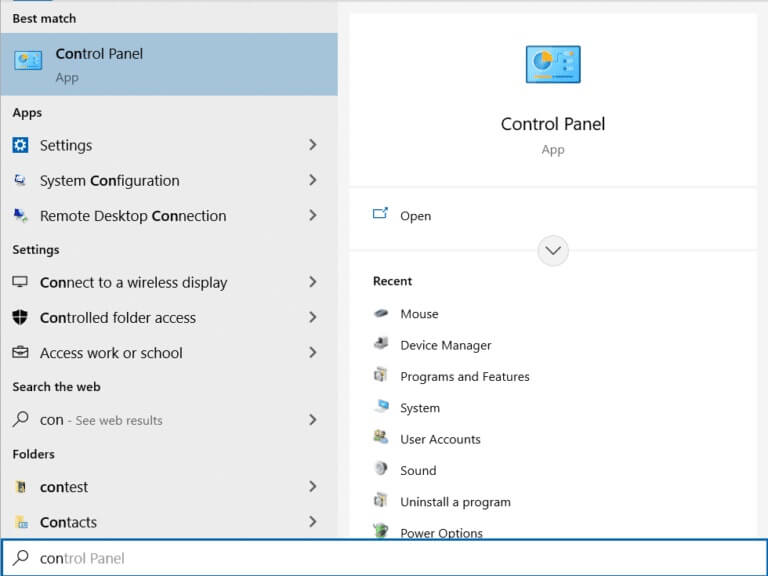
1. Press Windows key. Write Control Panel Click on it to open it.
2. Set the category in View by and select the option Hardware and sound , as shown.
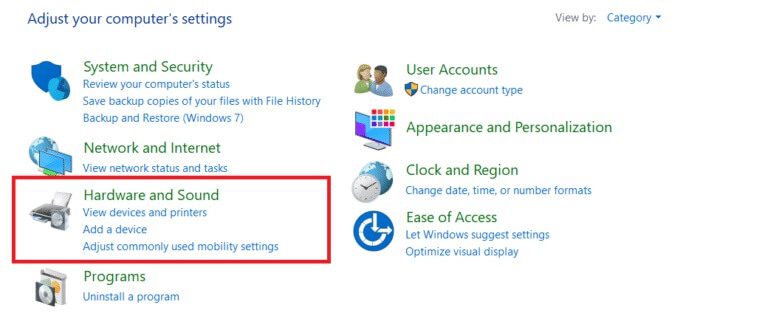
3. Click Power Options.
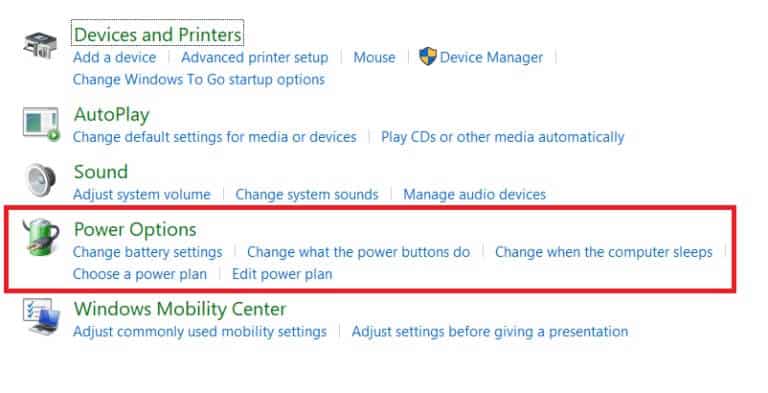
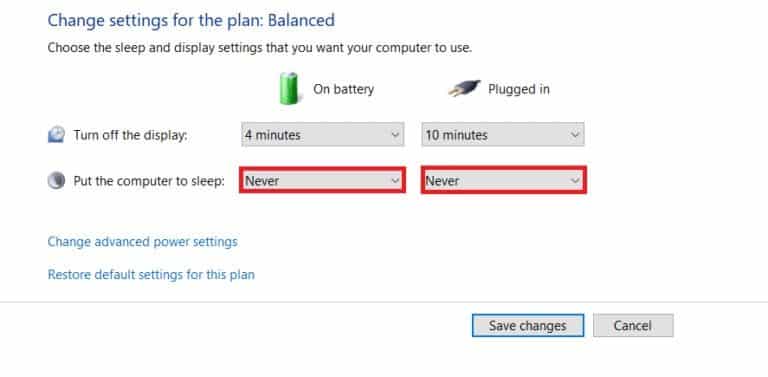
4. On the next screen, tap Change plan settings.

5. Change to “Never put your computer to sleep”
- On battery option.
- Connected option.
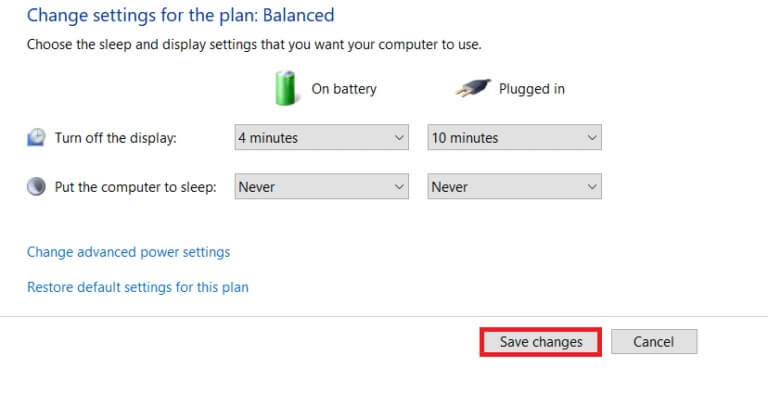
6. Finally, tap Save changes and exit.
Method 3: Prevent your computer from sitting idle
Microsoft Teams offers an automatic inactivity timeout feature to change when the system goes into idle state. You can prevent your system from going into idle state by following any of the methods below.
- Play a song or movie in the background with the volume muted.
- Use third-party tools like MouseJiggler or Caffeine to prevent your computer from going into idle state.
- Insert a paperclip next to the Enter key to hold down the Insert key.
Pro Tip: How to Set a Status Message in Microsoft Teams
You can also customize your Teams status settings. You can adjust the duration of your status. Follow these steps.
1. Get up Running Microsoft Teams on Desktop/Laptop.
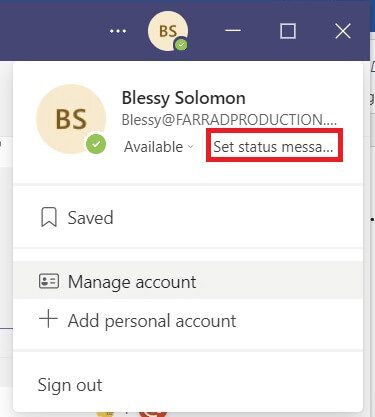
2. Click profile picture in the upper right corner of the screen.
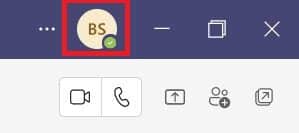
3. Click Set status message , As shown below.
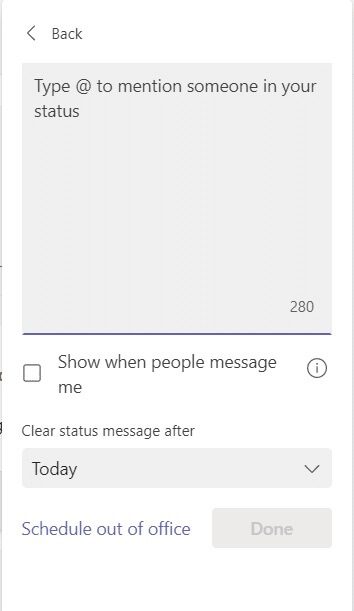
4. Type the message you want to display, up to 280 characters.
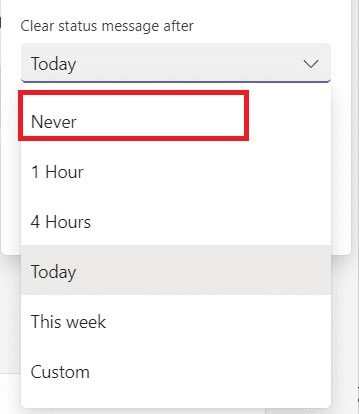
5. Select Start In the list Clear status After the drop-down menu.
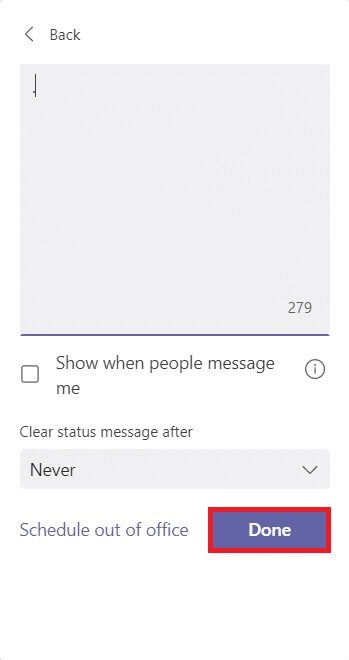
6. Finally, tap It was completed.
Frequently asked questions (FAQs)
Q1. What are the different statuses in Microsoft Teams?
answer. There are a total of six statuses available in the Teams app:
- Available,
- busy,
- Do not disturb,
- I'll be right back,
- Appearing outside, and
- Appear offline.
Q2. What are the best apps to prevent my system from lagging?
answer. Some third-party apps to keep your system awake are:
- Caffeine,
- MouseJiggler,
- Move Mouse,
- Coffee FF , and
- NoSleep
This concludes our guide on how to maintain your Microsoft Teams available status. We hope this is a useful reference for all students and staff to be considered active regardless of whether Microsoft Teams is running in the background or in the foreground. We welcome suggestions and feedback in the comments section below.


