With businesses and schools now holding meetings and classes online due to the COVID-19 pandemic, it has become Zoom Now a household name worldwide, Zoom has become a necessity for the majority of the world's population. But what do you do if you need to take a screenshot of an ongoing meeting? You can take a screenshot of a Zoom meeting quite easily without the need for any third-party tools. In this article, you will learn how to take a screenshot of a Zoom meeting. Also, we have answered your question: Does Zoom notify attendees of screenshots taken?

How to take a screenshot of a Zoom meeting
Starting with version 5.2.0 of Zoom For desktop, you can now take screenshots from Zoom using keyboard shortcuts. There are also three other ways to take screenshots of a Zoom meeting using built-in tools on Windows and macOS computers. So, you don't have to search for a good screenshot tool that might cost you money or put an explicit watermark on your screenshot.
Method 1: Use the Zoom Desktop app on Windows and macOS
You need to activate the keyboard shortcut from Zoom settings first.
Note: You can take screenshots even if a Zoom window is open in the background.
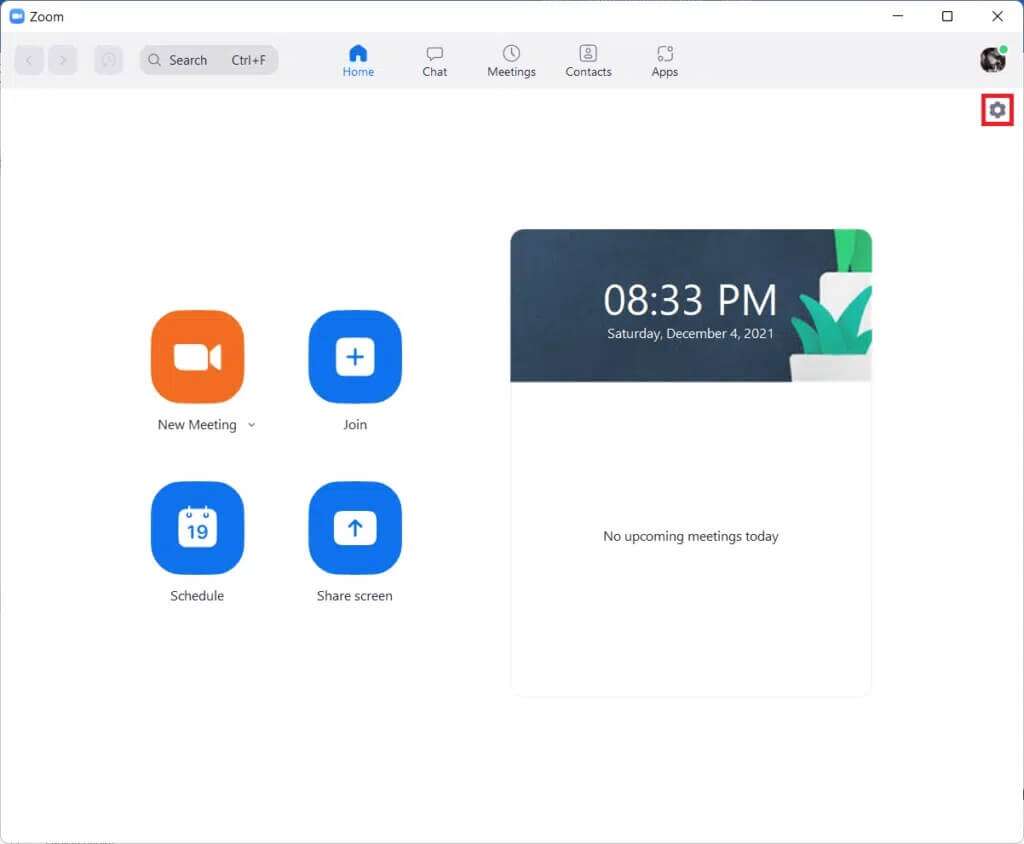
1. Open a client Zoom Desktop.
2. Click on the icon Settings On the home screen, as shown.
3. Then click Keyboard Shortcuts in the right pane.
4. Scroll down the list of keyboard shortcuts on the right pane and select Screenshot. Check the box marked “Enable global shortcut" As shown below.
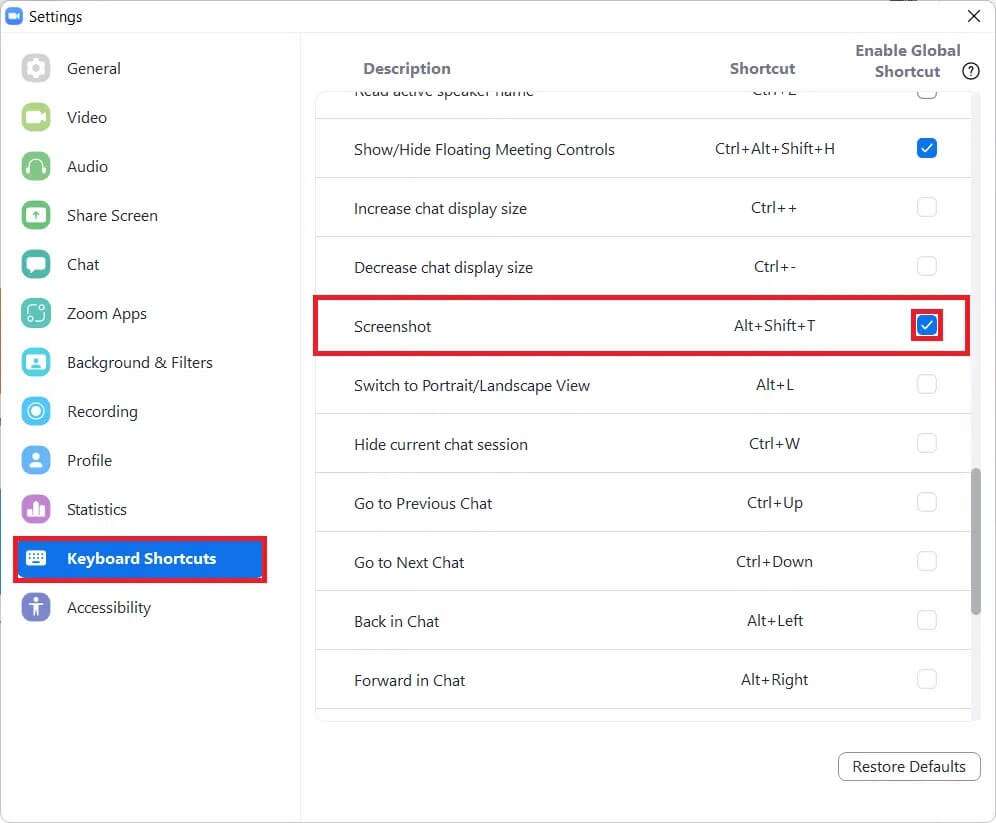
5. You can now press the keys. Alt+Shift+T Simultaneously take a screenshot of a Zoom meeting.
Note: macOS users can use the Command + T keyboard shortcut in the screenshot after enabling the shortcut.
Method 2: Using the PrtSrc key on a Windows computer
Prntscrn It's the first tool we think of for taking a screenshot of a Zoom meeting. Follow the steps below to take screenshots using the key. Print Screen:
Option 1: Set up a single display
1. Go to the screen Zoom meeting To take a screenshot.
2. Press the keys Windows + Print Screen (or just PrtSrc) to take a screenshot of that screen.
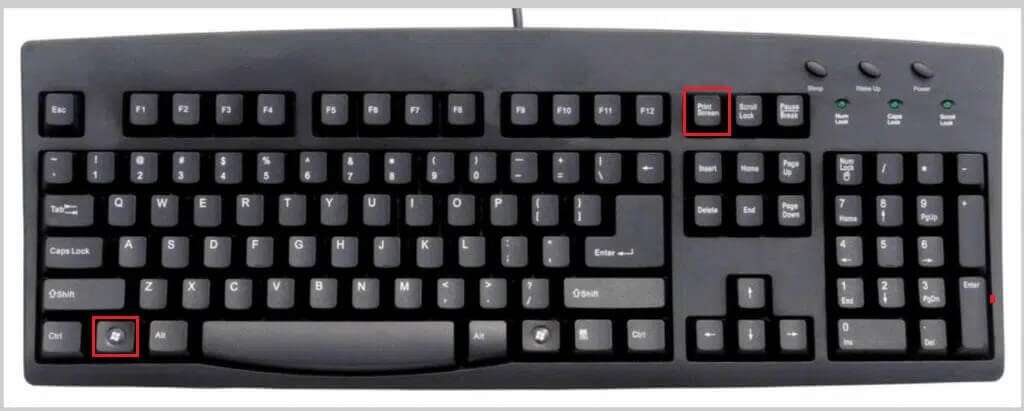
3. Now, go to Next site To view your screenshot:
C:\Users\<username>\Pictures\Screenshots
Option 2: Set up multi-display
1. Press Ctrl + Alt + PrtSrc At the same time.
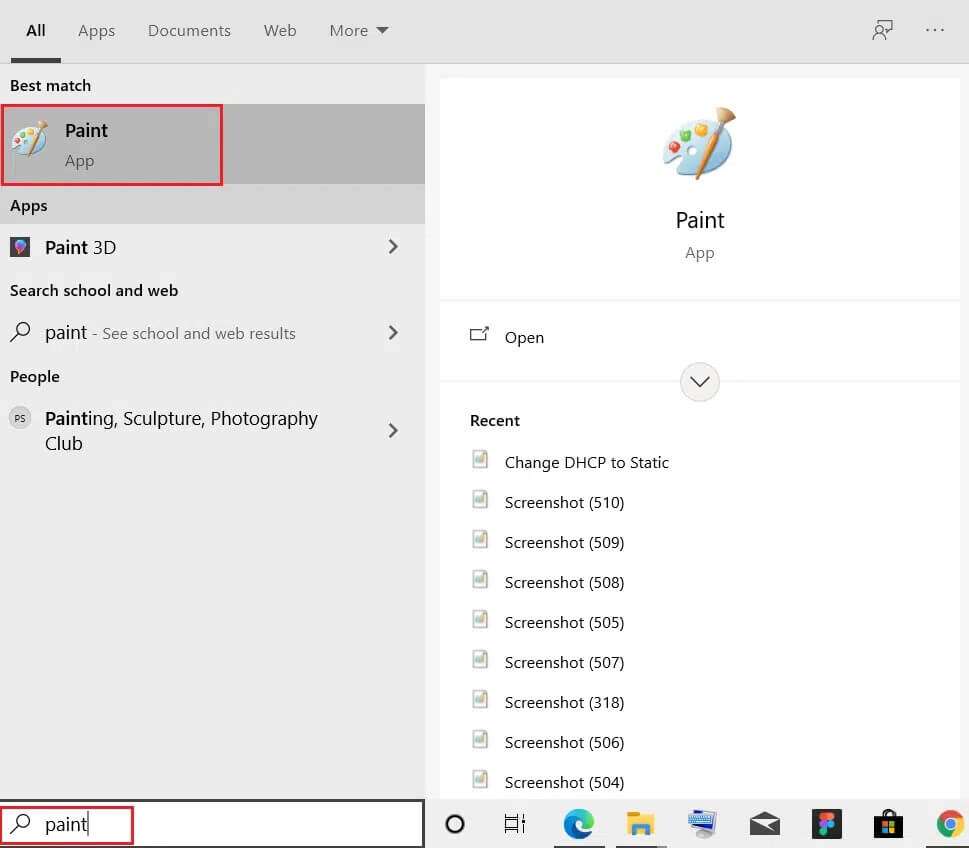
2. Then run the application. Painter From the search bar, as shown.
3. Press the keys Ctrl + V Together to paste the screenshot here.
4. Now, save the screenshot in the directory of your choice by pressing the keys. Ctrl + S.
Method 11: Use the Screen Snip Tool on Windows XNUMX
Windows has introduced the Screen Snip tool to take a screenshot of your screen on Windows 11 computers.
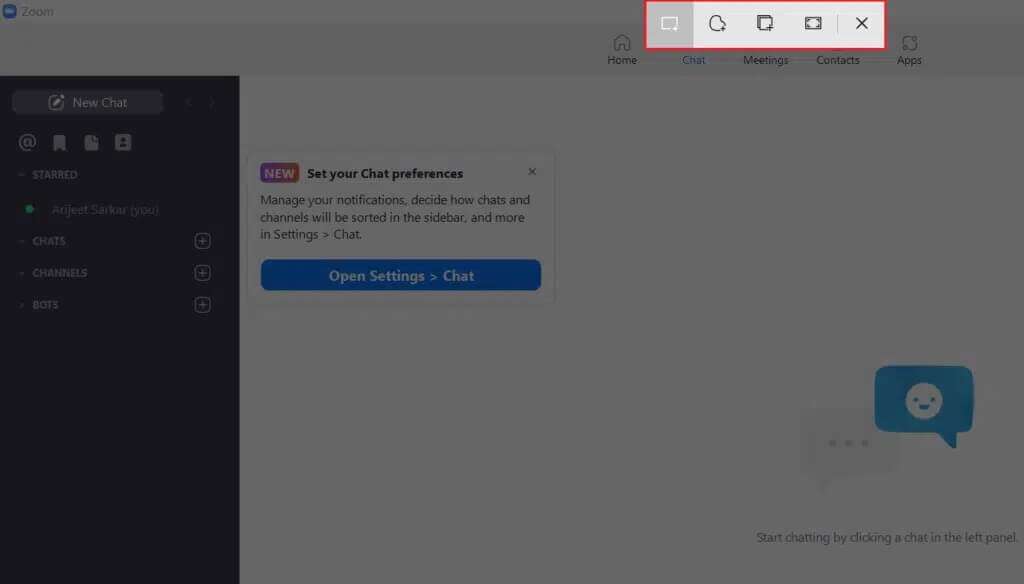
1. Press the keys Windows + Shift + S Together to open the cutting tool.
2. Here, four are available. خيارات To take screenshots, as shown below:
- rectangular clip
- free clipping
- clipping window
- Full screen snippet
Choose any of the above options to take a screenshot.
3. Click on the notification that says: Snip Saved in Holster Once the capture is successful.
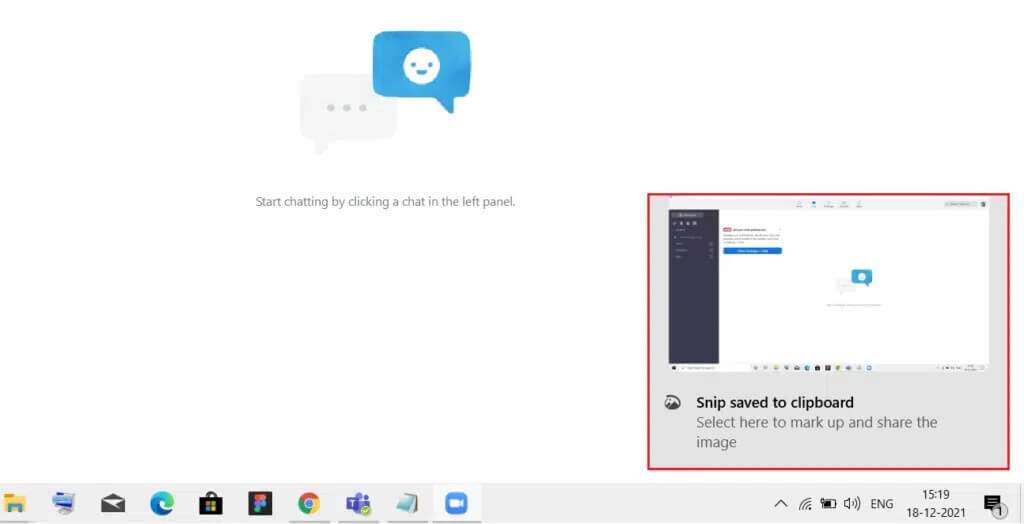
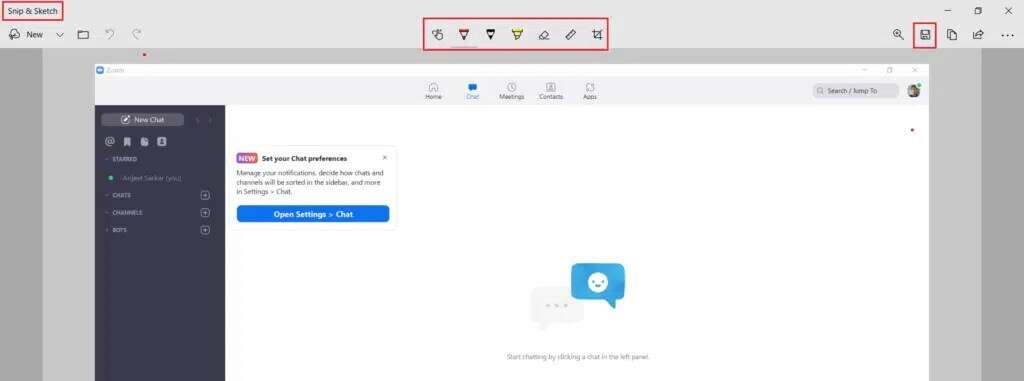
4. Now, a window will open. Snip & SketchHere, you can edit and save the screenshot, as needed.

How to Take Zoom Screenshots on macOS
Similar to Windows, macOS also offers a built-in screen capture tool to capture a screenshot of the entire screen, the active window, or a portion of the screen, depending on the user's needs. Follow these steps to take a screenshot of a Zoom meeting on Mac:
Option 1: Take a screenshot
1. Go to the screen the meeting In the Zoom desktop app.
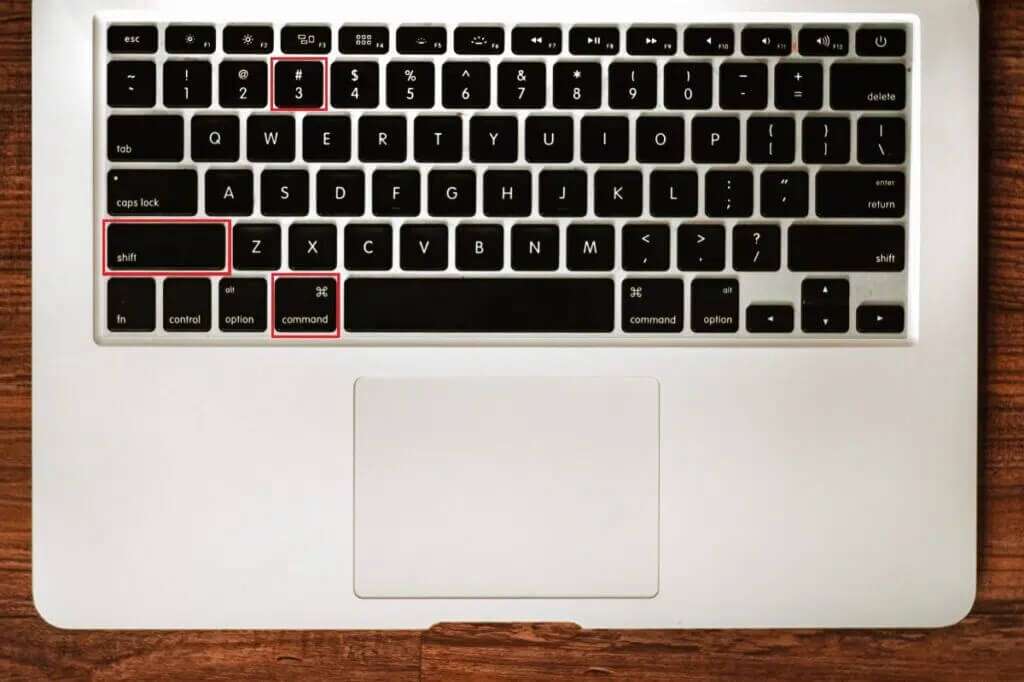
2. Press Command + Shift + 3 Press keys together to take a screenshot.
Option 2: Take a screenshot of the active window
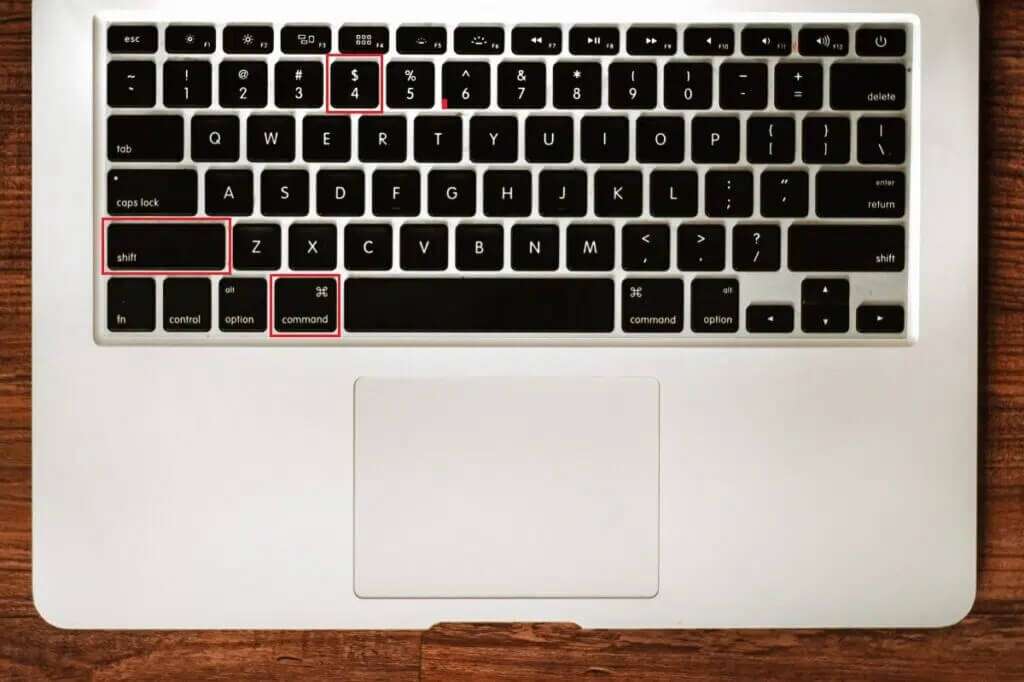
1. Press Command + Shift + 4 Keys together.
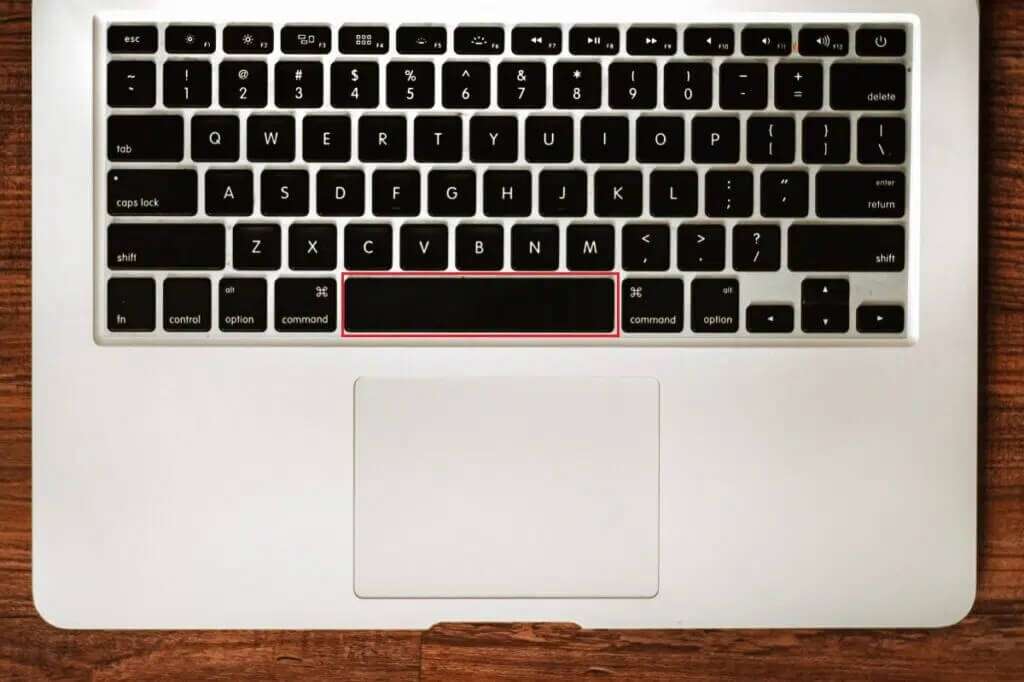
2. Then press the key distance When the pointer turns into a crosshair.
3. Finally, click on Window. Zoom meeting To take a screenshot.
Does Zoom notify attendees of screenshots being taken?
no , not Zoom notifies meeting attendees of the screenshot being captured. In case Record the meeting After that, all participants will see the notification about the same.
We hope that through this article you have learned how to take a screenshot of a meeting. Zoom On computers running Windows و macOS. We'd love to hear your feedback, so post your suggestions and questions in the comments box below. We publish new content every day, so bookmark us to stay up to date.


