Janna Theme License is not validated, go to the theme options page to validate the license, you need a single license for each domain name.
Top 7 Ways to Fix Screenshots Not Working on Mac
Taking and sharing screenshots is a vital part of many users' workflow. Similar Snip & Sketch on Windows macOS has a built-in screenshot tool. The problem occurs when your Mac fails to take a screenshot. Read on to fix screenshots not working on Mac. The default screenshot tool is good enough for most users out there. We will only recommend a third-party app (at the end of the post) when you want more features to simplify your routine. Without further ado, let's begin our troubleshooting journey.
1. Use relevant key combinations to take screenshots.
Because the screenshot feature is built into macOS, you don't need to worry about launching a separate app on your Mac. Simply master the following keyboard shortcuts and capture your Mac screen in no time.
Command + Shift + 3: Take a full screenshot. Be careful when using this command. You may capture confidential information in a screenshot.
Command + Shift + 4: Select an area and capture the screen. Most GT members rely on this shortcut to take screenshots.
Command + Shift + 4 + Space: Take a screenshot of the active window. Make sure to keep the cursor on the window to take a screenshot.
Make sure you press the relevant key combination at the same time to enable screenshot on your Mac.
2. Check screenshot shortcuts
Although macOS allows the startup screenshot feature, you can check it again from the System Preferences menu.
Step 1: tap on Apple icon The small one in the upper left corner.
Step 2: Locate System Preferences.
Step 3: go to the Keyboard menu.
Step 4: Scroll to Abbreviations.
Step 5: Locate Screenshots From the side menu, make sure to: Enable options related to.
When any other third-party application uses the same on-screen keyboard combinations, you'll continue to encounter issues with the macOS default shortcut keys. The system will disable them and assign the screenshot keys to other functions.
NVRAM stores basic settings for your Mac, such as display information, time zone, volume, and more. You can reset NVRAM and fix basic issues with your Mac.
Step 1: Click Apple icon in the menu bar and select Shut Down.
Step 2: Keep pressing power button Once heard startup sound , use Command + Option + P + R keys For 15-20 seconds.
Once you arrive at macOS Home Use the relevant keys and try to take a screenshot.
4. Clean MacBook keys
If you use a butterfly MacBook keyboard, some keys may become stuck over time. The keys become stuck and unresponsive to your inputs. This is largely due to dust that settles under the MacBook keys.
Use compressed air and blow it under unresponsive keys, including the Command, Shift, and Number rows. Try your luck with the recovery screenshots. If you're still having trouble registering keys, it's time to visit your nearest Apple Center for a keyboard replacement. The company does.Run a free replacement program for affected MacBooks.
5. Open a third-party screenshot app on startup
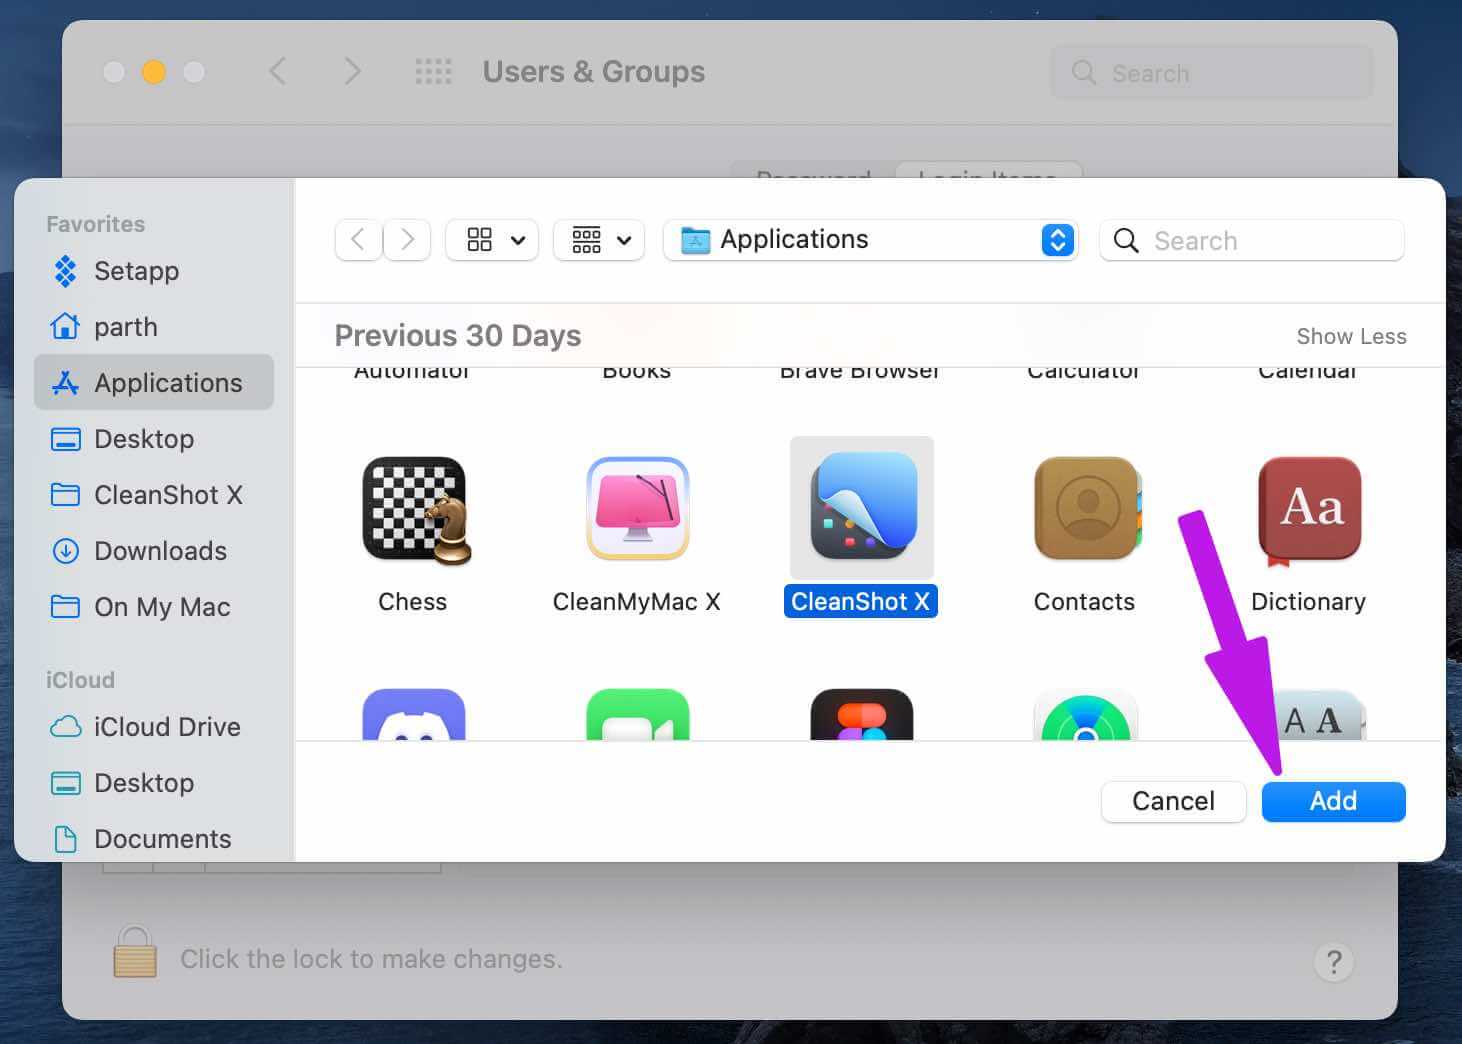
Many GT members are big fans of CleanShot X – Third-party screenshot tool For Mac. When using such software to take screenshots on a Mac, you need to open the application.
Once opened, you'll see the app icon appear in the menu bar at the top. To continue working without any problems, you can simply ask macOS to launch the app at startup.
Step 1: Click Apple icon In the menu bar and open System Preferences.
Step 4: tap on + Icon To open Application List.Select Screenshot app from the list.
From now on, macOS will only open the selected app on startup, and you won't have any issues taking screenshots.
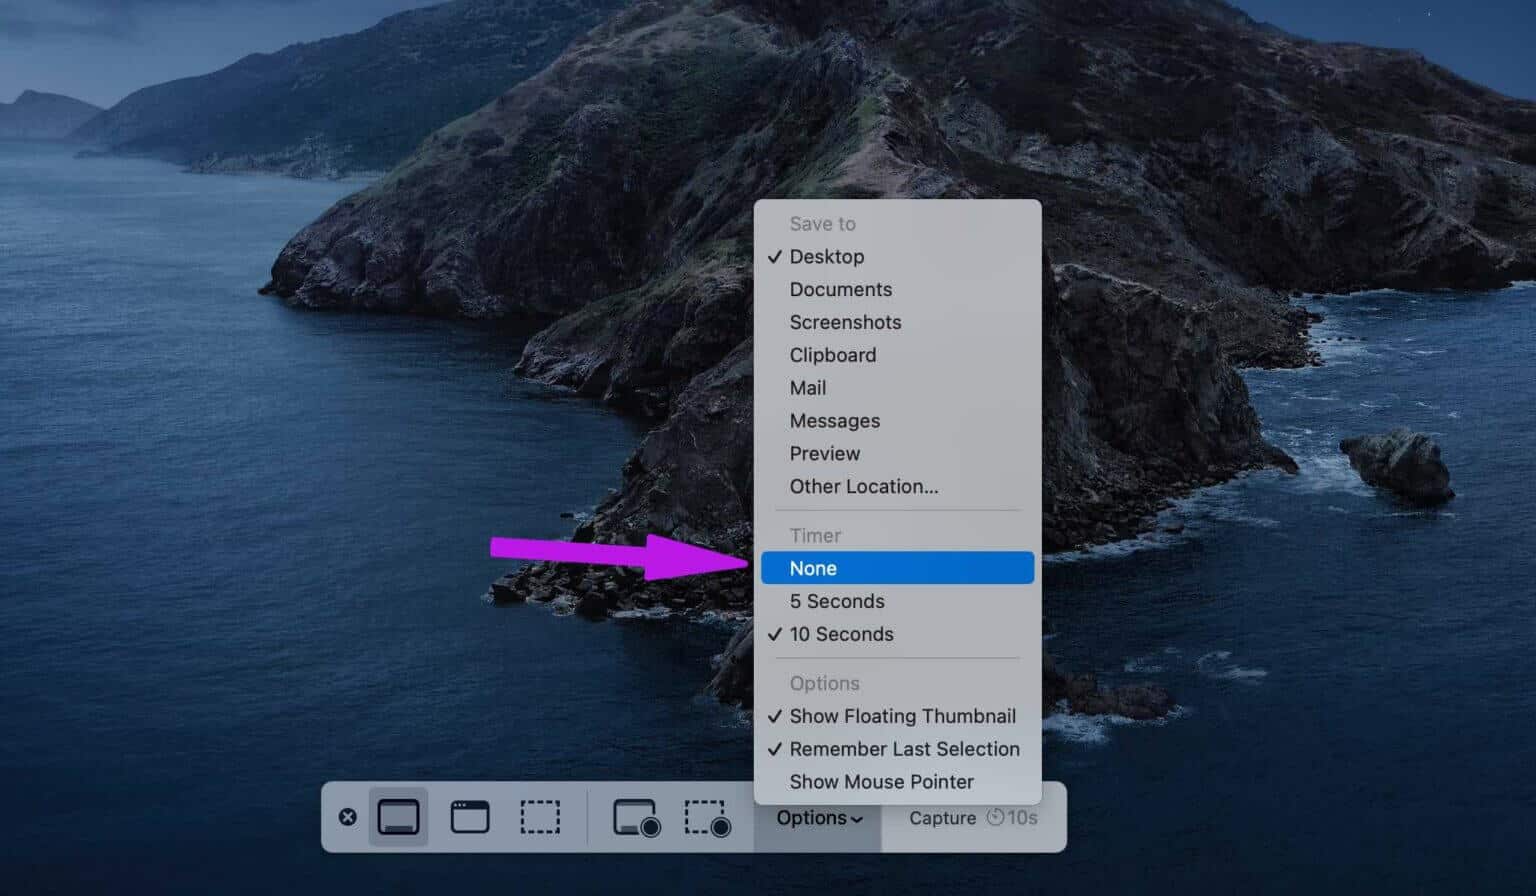
6. Disable the timer
macOS allows users to set a timer to capture screenshots after 3 or 10 seconds. If you experience a delay in capturing screenshots, this isn't a bug, but a feature. Here's how to disable the screen capture timer on your Mac.
Step 1: Click on Cmd + Shift + 5 keys and open Screenshot menu.
Step 2: Expand Options menu and select nothing of Timer.
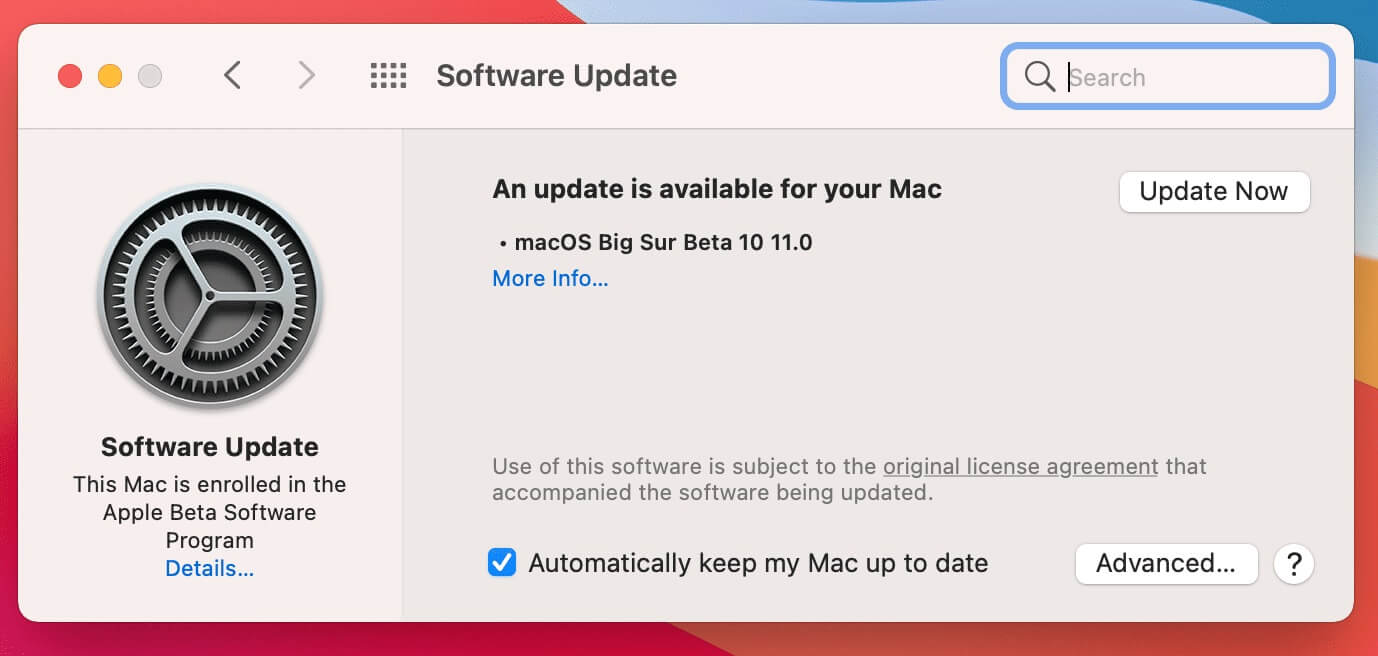
7. MACOS Update
Before you go ahead and update macOS on your primary device, hear us out. GT doesn't recommend installing the latest version of macOS on your primary device from day one. But if you do install one and encounter screenshots that don't work, you need to double-check the latest version.
If it's a widespread bug, others should have reported it to Apple. The company is quick to fix critical issues in the next update.
Open System Preferences(See point two) and go to Software update list. Download Latest version of macOS on Mac And start taking screenshots.
Get information on MAC
While you're busy taking screenshots on your Mac, you should also check the screenshot export folder. Launch Finder and navigate to the relevant folder to locate all your screenshots. You should also unmute your Mac to hear this screenshot sound. We hope you were able to fix the screenshots not working on your Mac using the steps above.